cropper手机使用实例
cropper手机使用实例
一、总结
一句话总结:
启示:还是要多个相关的实例交叉使用,相互印证,查漏补缺,可以更加高效和方便和节约时间
二、Cropper.js从前台到后台的完整实例应用
转自或参考:Cropper.js从前台到后台的完整实例应用
https://blog.csdn.net/chenlkissmm/article/details/80787871
先是html主体
<html lang="zh-CN">

<head>

<link href="../../assets/plugins/bootstrap/css/bootstrap.min.css" rel="stylesheet">

<link href="../../assets/plugins/sweetalert/sweetalert.css" rel="stylesheet">

<link href="../../assets/plugins/cropper/cropper.min.css" rel="stylesheet">

</head>

<body>

	<div id="main-wrapper">

		<div class="page-wrapper">

			<div class="container-fluid">

				<div class="card">

					<div class="row p-10">

						<div class="col-md-8 p-b-10">

							<div class="img-container">

								<img id="image" src="${sessionScope.headimageurl}" alt="Picture">

							</div>

						</div>

						<div class="col-md-4 docs-buttons">

							<div class="docs-preview clearfix">

								<div class="img-preview preview-lg"></div>

								<div class="img-preview preview-md"></div>

								<div class="img-preview preview-sm"></div>

								<div class="img-preview preview-xs"></div>

							</div>

							<div class="btn-group">

								<label class="btn btn-primary btn-upload" for="inputImage"> <input type="file"

									class="sr-only" id="inputImage" name="file"

									accept=".jpg,.jpeg,.png,.gif,.bmp,.tiff"> <span

										class="fa fa-upload"> 选择图片</span>

								</label>

							</div>

							<div class="btn-group btn-group-crop">

								<button type="button" class="btn btn-success"

									data-method="getCroppedCanvas"

									data-option="{ "width": 520, "height": 520 }">

									<span>

									</span> <span class="fa fa-search"> 预览头像</span>

								</button>

							</div>

							<div class="modal fade docs-cropped" id="getCroppedCanvasModal"

								aria-hidden="true" aria-labelledby="getCroppedCanvasTitle"

								role="dialog" tabindex="-1">

								<div class="modal-dialog">

									<div class="modal-content">

										<div class="modal-header">

											<h5 class="modal-title" id="getCroppedCanvasTitle">您的头像</h5>

											<button type="button" class="close" data-dismiss="modal"

												aria-label="Close">

												<span aria-hidden="true">×</span>

											</button>

										</div>

										<div class="modal-body"></div>

										<div class="modal-footer">

											<button type="button" class="btn btn-secondary"

												data-dismiss="modal">取消</button>

											<button type="button" class="btn btn-info" id="download"

												data-dismiss="modal" οnclick="submitForm()">保存头像</button>

										</div>

									</div>

								</div>

							</div>

						</div>

					</div>

				</div>

			</div>

		</div>

	</div>

	<script src="../../assets/plugins/jquery/jquery.min.js"></script>

	<script src="../../assets/plugins/bootstrap/js/popper.min.js"></script>

	<script src="../../assets/plugins/bootstrap/js/bootstrap.min.js"></script>

	<script src="../../assets/plugins/sweetalert/sweetalert.min.js"></script>

	<script	src="../../assets/plugins/sweetalert/jquery.sweet-alert.custom.js"></script>

	<script src="../../assets/plugins/cropper/cropper.js"></script>

	<script src="../../assets/plugins/cropper/main.js"></script>

	<script>

		function submitForm() {

			var cas = $('#image').cropper('getCroppedCanvas', {

				width : 520,

				height : 520

			});// 获取被裁剪后的canvas

			var base64 = cas.toDataURL('image/jpeg'); // 转换为base64

			var data = encodeURIComponent(base64);//作为URI编码

			$.ajax({

				url : ".uploadHeadImageServlet",

				type : 'POST',

				data : "file=" + data,

				async : true,

				success : function(data) {

					sweetAlert({

						title : "已保存 !",

						text : "Your headimage file has been updated.",

						type : "success"

					}, function() {

						window.location.href = "myprofile.jsp";

					});

				}

			});

		}

	</script>

</body>

</html>
ajax调用servlet
	protected void doPost(HttpServletRequest request, HttpServletResponse response) throws ServletException, IOException {

		//获取用户ID

		HttpSession session = request.getSession();

		String userid = (String) session.getAttribute("id");

		//收到AJAX的data

		String imagefile = request.getParameter("file");

		//执行图片上传方法,并获得头像图片地址

		String path = uploadbiz.UploadHeadImage(userid, imagefile);

		//更新session中的头像地址

		session.setAttribute("headimageurl", path);

	}
上传方法
package sin.service;
import java.io.FileOutputStream;
import sin.dao.UserInfoDao;
import sin.plugins.NewAFileName;
import sun.misc.BASE64Decoder;
@SuppressWarnings("restriction")
public class UploadHeadImageBiz {
@SuppressWarnings("unused")
public String UploadHeadImage(String userid, String imagefile) {
NewAFileName newname = new NewAFileName();
UserInfoDao userinfodao = new UserInfoDao();
String path = null;
BASE64Decoder decoder = new BASE64Decoder();
try {
//去掉头data:image/jpeg;base64,
String imagebasefile = imagefile.substring(23);
// Base64解码
byte[] bytes = decoder.decodeBuffer(imagebasefile);
for (int i = 0; i < bytes.length; ++i) {
if (bytes[i] < 0) {// 调整异常数据
bytes[i] += 256;
}
}
//生成JPEG图片输出流,名字,保存路径
String filename = userid + newname.getFileName();
path = "../../../../sin/upload/headimages/" + filename;
FileOutputStream out = new FileOutputStream(path);
//更新用户头像URL
Boolean result = userinfodao.updateUserHeadImageById(userid, path);
out.write(bytes);
out.flush();
out.close();
} catch (Exception e) {
}
return path;
}
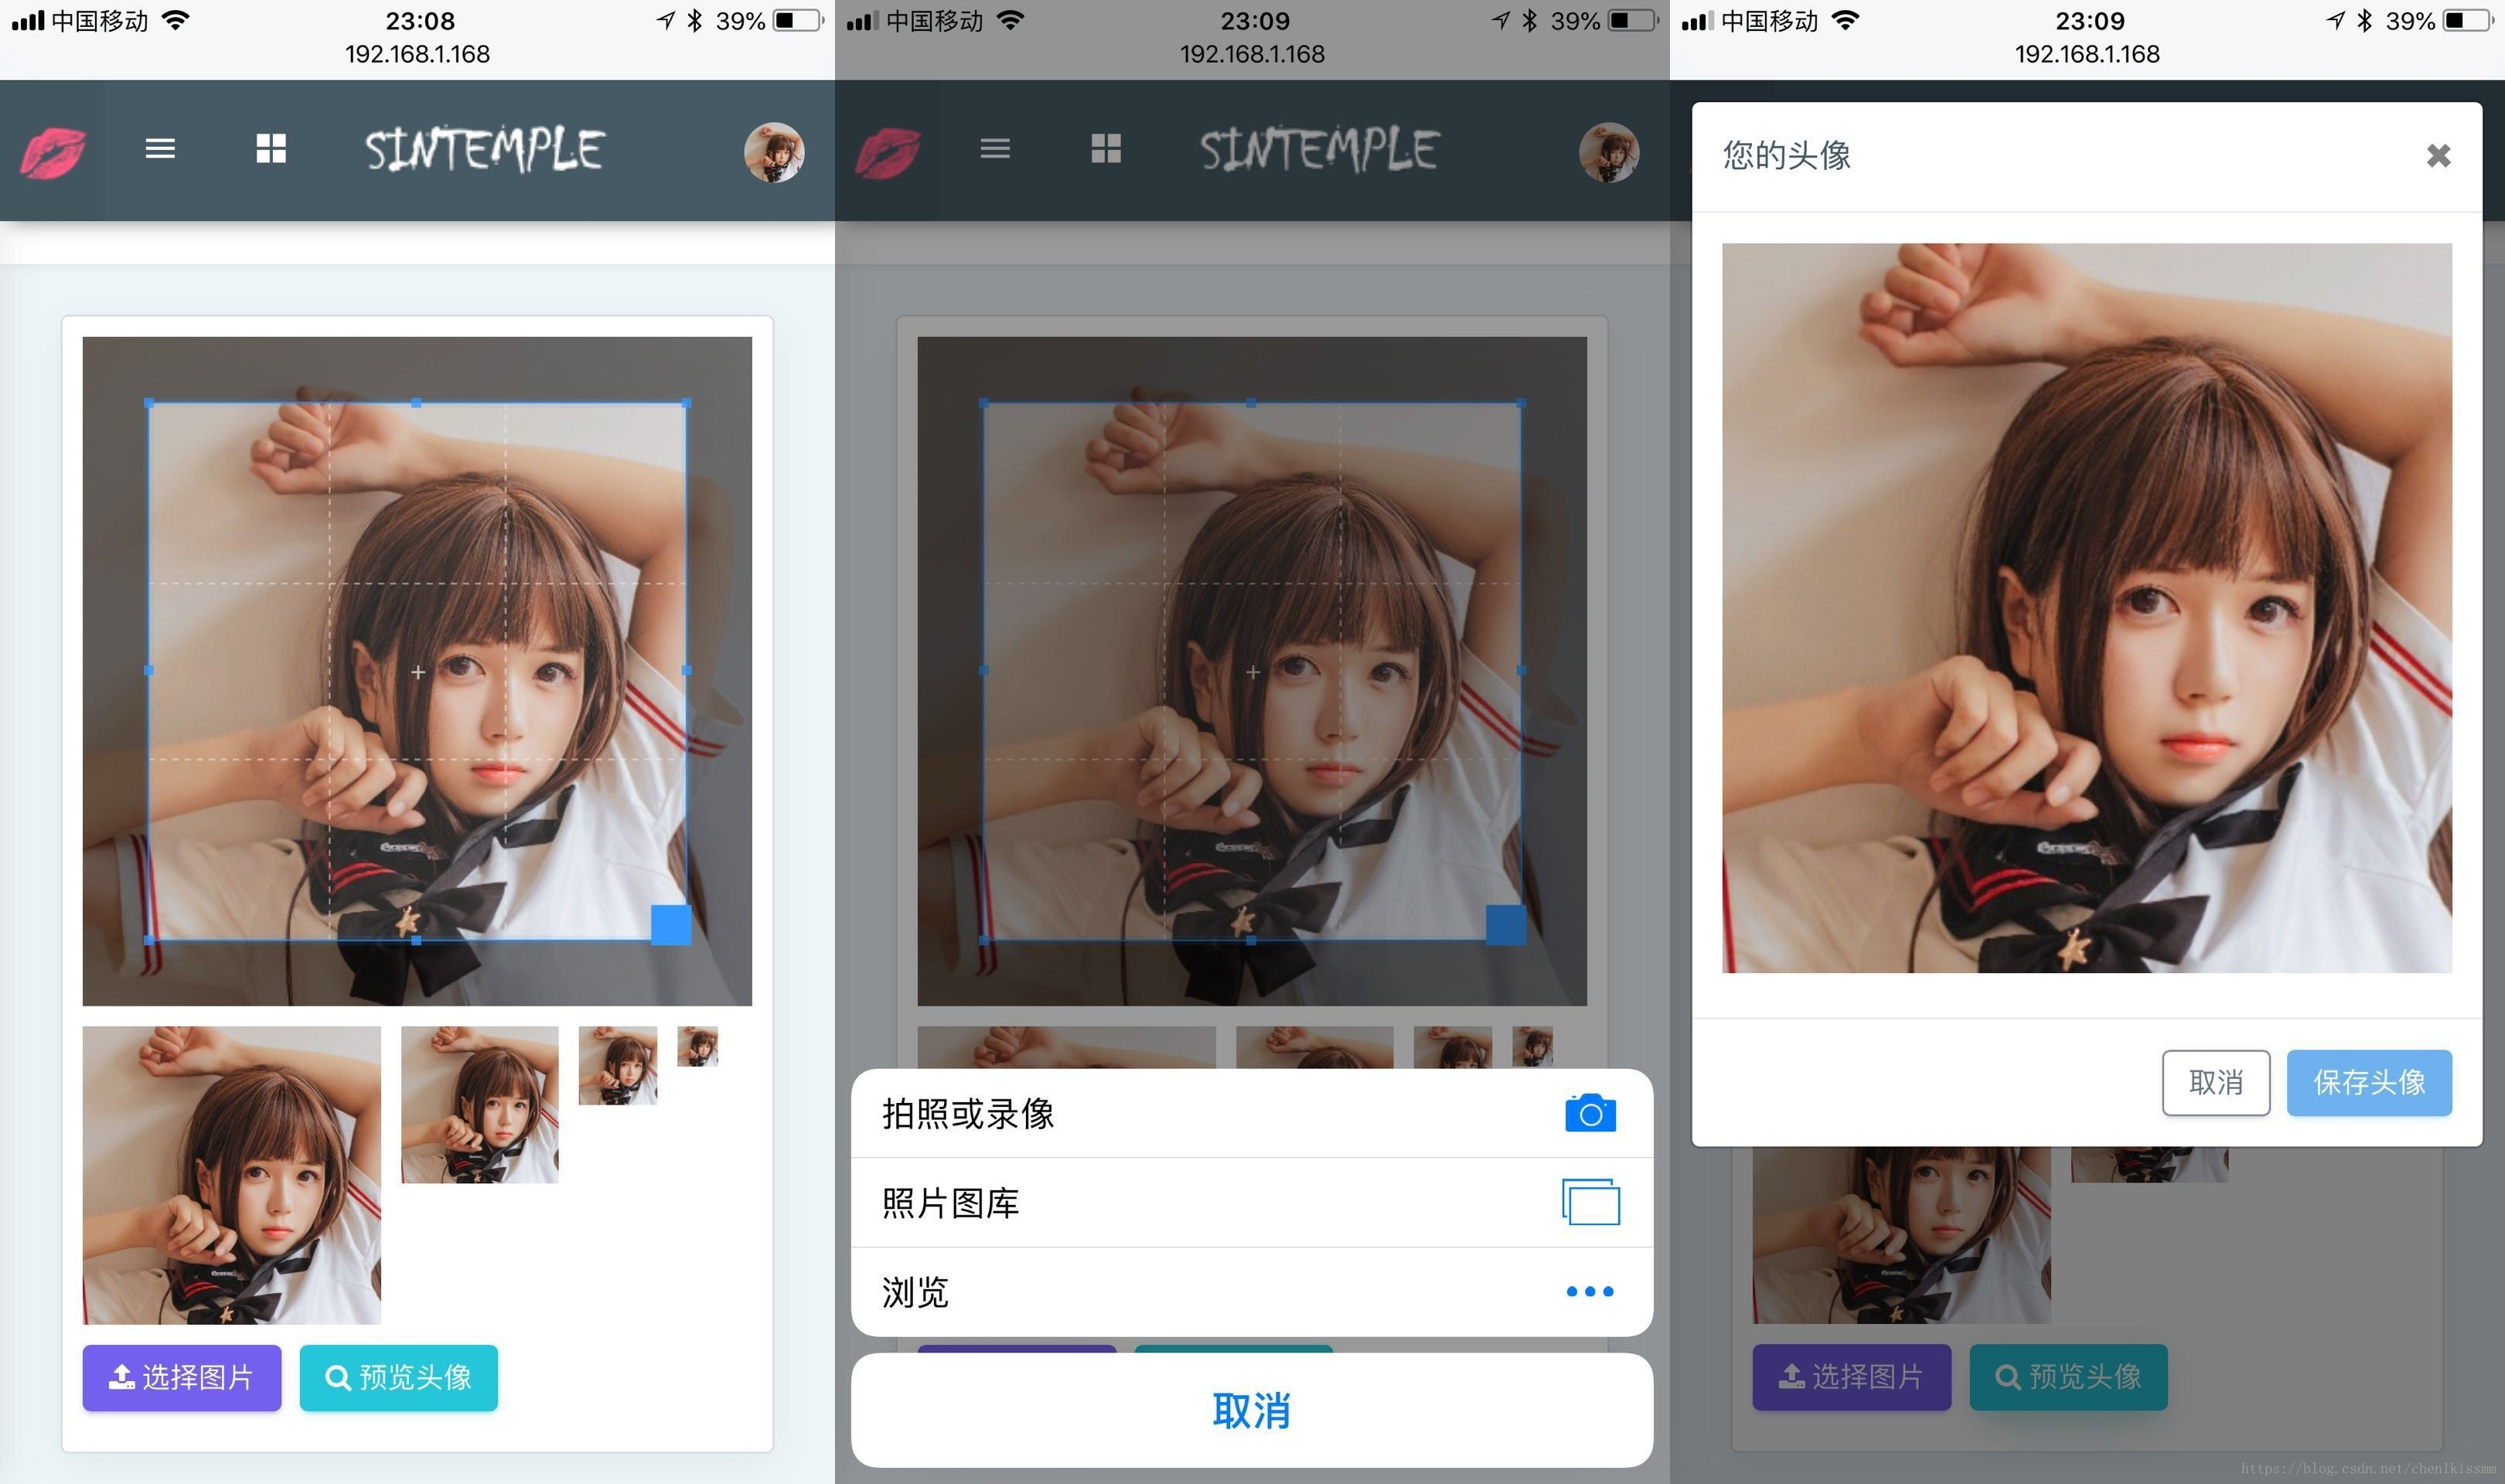
}附手机上使用的效果图
cropper手机使用实例的更多相关文章
- 一个完整的Appium手机自动化测试实例
实现过程: 1.使用环境 appium .安卓SDK .python 本文重点是自动化实例,环境搭建过程省略. 2.找到被测APP的包名和Activity Name 手机连接上电脑后,在DOS环境先使 ...
- AudioManager音频管理器控制手机音频实例
import android.media.AudioManager;import android.media.MediaPlayer;import android.os.Bundle;import a ...
- 润乾V5手机报表说明文档
1.手机报表实例页面简要说明 index.jsp 是报表资源列表页面: mbReport.jsp 是报表展现页面: mbParam.jsp是参数报表展现页面: echarts.jsp是带有echart ...
- javascript模式 (3)——工厂模式和装饰模式
上节我们讲解了单例模式,这节我们将继续讲解工厂模式和迭代器模式 工厂模式: 工厂模式的目的是为了方便的创建对象(可以在不知道构造的情况下),通过静态方法来实现,在java或c#等静态编译语言中需要通过 ...
- 【源代码】基于Android和蓝牙的单片机温度採集系统
如需转载请标明出处:http://blog.csdn.net/itas109 QQ技术交流群:129518033 STC89C52单片机通过HC-06蓝牙模块与Android手机通信实例- 基于And ...
- 关于JAVA中抽象类和接口的区别辨析
今天主要整理一下新学习的有关于Java中抽象类和接口的相关知识和个人理解. 1 抽象类 用来描述事物的一般状态和行为,然后在其子类中去实现这些状态和行为.也就是说,抽象类中的方法,需要在子类中进行重写 ...
- Spring:AOP面向切面编程
AOP主要实现的目的是针对业务处理过程中的切面进行提取,它所面对的是处理过程中的某个步骤或阶段,以获得逻辑过程中各部分之间低耦合性的隔离效果. AOP是软件开发思想阶段性的产物,我们比较熟悉面向过程O ...
- Material Design 常用控件
Material Design Material Design (原质化/材料化设计) 是在2014年Google I/O大会上推出的一套全新的界面设计语言. 意在解决Android平台界面风格不统一 ...
- 工厂模式&策略模式。
抽象.封装,具体事情做得越多,越容易犯错误.这每个做过具体工作的人都深有体会,相反,官做得越高,说出的话越抽象越笼统,犯错误可能性就越少.好象我们从编程序中也能悟出人生道理.(百度百科) 不断抽象封装 ...
随机推荐
- MongoDB 3.6.1集群部署
Mongodb安装 Linux版本:CentOS release 6.9 Mongodb版本:mongodb-linux-x86_64-3.6.1.tgz 示例是在一台主机上安装mongodb集群 端 ...
- Vue 文档Demo01
Vue 1. Vue 基础 1. 声明式渲染 1. v-bind <!DOCTYPE html> <html> <head> <meta charset=&q ...
- 交叉编译openssl1.1.1a
交叉编译openssl1.1.1a的时候遇到的问题,记录一下,方便下次查找 一.下载源码 1.打开openssl官网,下载openssl-1.1.1.tar.gz源码包. 2.执行下面的命令解压源 ...
- pandas数据处理
首先,数据加载 pandas提供了一些用于将表格型数据读取为DataFrame对象的函数,期中read_csv和read_table这两个使用最多. 1.删除重复元素 使用duplicated()函数 ...
- HTML&CSS基础-常用选择器
HTML&CSS基础-常用选择器 作者:尹正杰 版权声明:原创作品,谢绝转载!否则将追究法律责任. 一.html源代码 <!DOCTYPE html> <html> & ...
- git 常见的命令和错误
- 用chrome浏览器进行前端debug和停止debug
首先F12打开控制台: 选择"source","Ctrl+Shift+F"搜索需要debug的代码关键词(Ctrl+O根据文件名搜索): 打开需要debug的文 ...
- P1345 [USACO5.4]奶牛的电信[拆点+最小割]
题目描述 农夫约翰的奶牛们喜欢通过电邮保持联系,于是她们建立了一个奶牛电脑网络,以便互相交流.这些机器用如下的方式发送电邮:如果存在一个由c台电脑组成的序列a1,a2,...,a(c),且a1与a2相 ...
- tomcat访问manager
在配置好Tomcat7/8后,我们往往需要访问Tomcat7/8的Manager以及Host Manager.就需要在tomcat-users.xml中配置用户角色来实现.在地址栏输入:localho ...
- 前端学习笔记--js概述与基础语法、变量、数据类型、运算符与表达式
本篇记录js的概述与基础语法.变量.数据类型.运算符与表达式 1.概述与基础语法 2.变量 举例: 3.数据类型 4.运算符与表达式