Extjs 可重用组件开始写 2014 8 23日
今天开始自己去写组件。
这次写组件重点在于参考cfWeb来写出自己的组件。
首先先把结构做出来。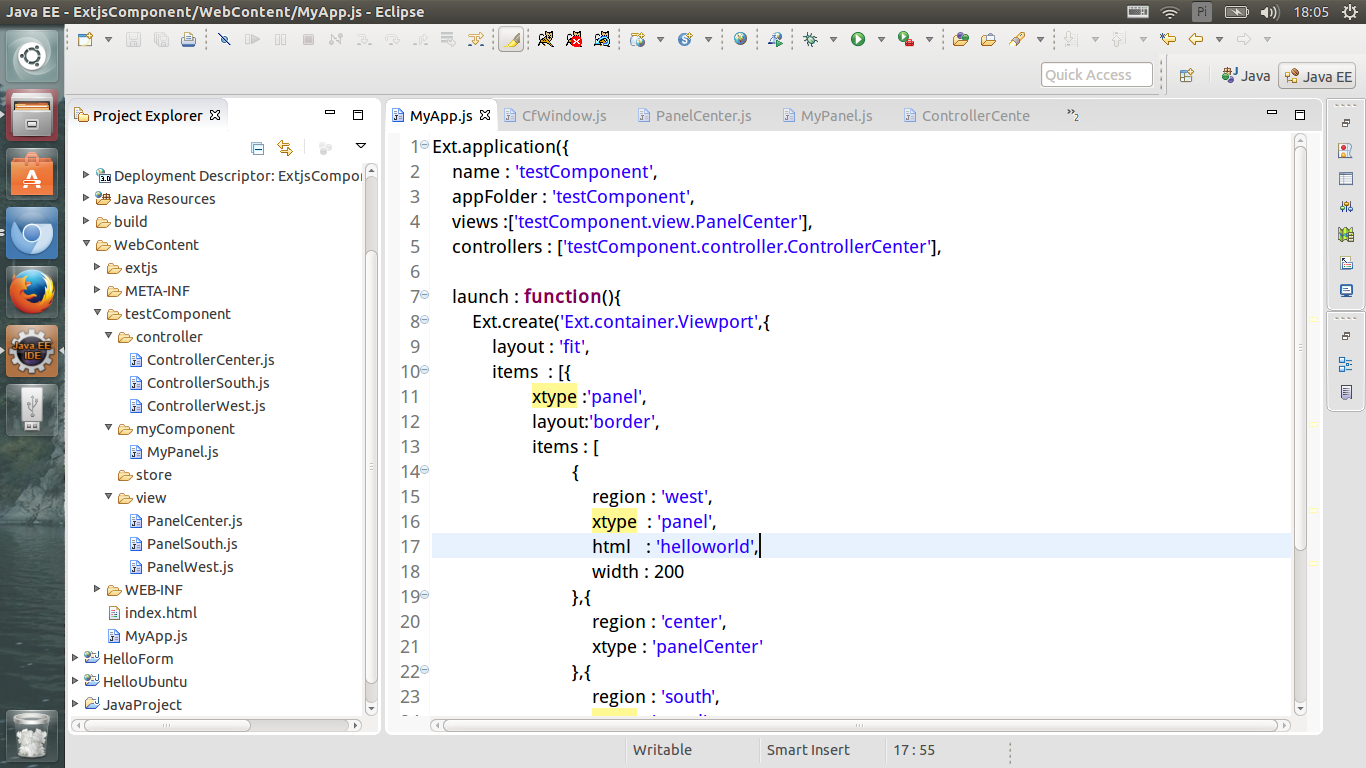

对于这次的自定义组件,现在所做的事情关键在于上面四个文件。于是将上面四个文件贴出来。
MyApp.js
Ext.application({

    name : 'testComponent',

    appFolder : 'testComponent',

    views :['testComponent.view.PanelCenter'],

    controllers : ['testComponent.controller.ControllerCenter'],

    launch : function(){

        Ext.create('Ext.container.Viewport',{

            layout : 'fit',

            items  : [{

                    xtype :'panel',

                    layout:'border',

                    items : [

                            {

                                region : 'west',

                                xtype  : 'panel',

                                html   : 'helloworld',

                                width : 200

                            },{

                                region : 'center',

                                xtype : 'panelCenter'

                            },{

                                region : 'south',

                                xtype : 'panel',

                                html : 'hellosouth',

                                height : 150

                            }

                ]

            }]

        });

    }

});
PanelCenter.js
Ext.define('testComponent.view.PanelCenter',{

    extend : 'Ext.panel.Panel',

    alias : 'widget.panelCenter',

    layout : 'fit',

    items :[{

        xtype : 'myPanel'

    }],

    initComponent : function(){

        this.callParent(arguments);

    }

});
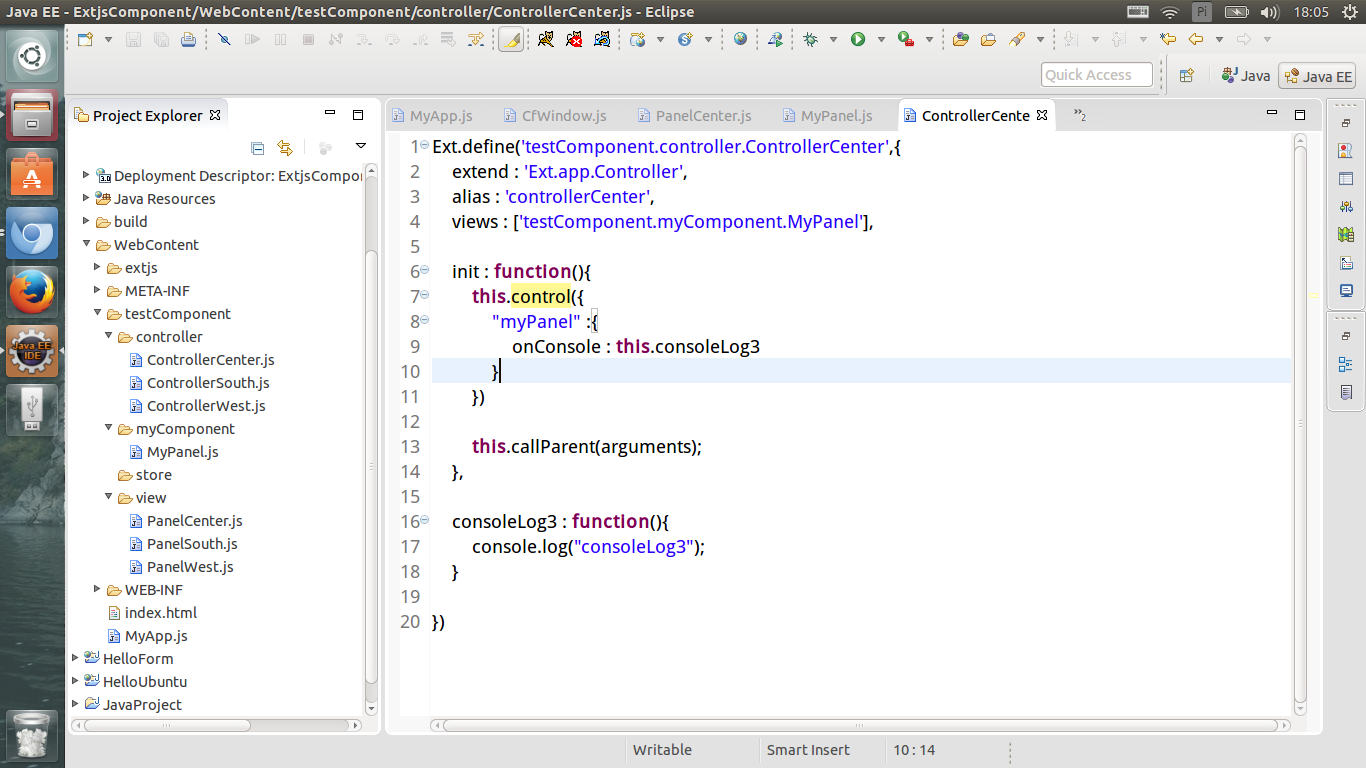
ControllerCenter.js
Ext.define('testComponent.controller.ControllerCenter',{

    extend : 'Ext.app.Controller',

    alias : 'controllerCenter',

    views : ['testComponent.myComponent.MyPanel'],

    init : function(){

        this.control({

            "myPanel" :{

                onConsole : this.consoleLog3

            }

        })

        this.callParent(arguments);

    },

    consoleLog3 : function(){

        console.log("consoleLog3");

    }

})
接下来主要内容
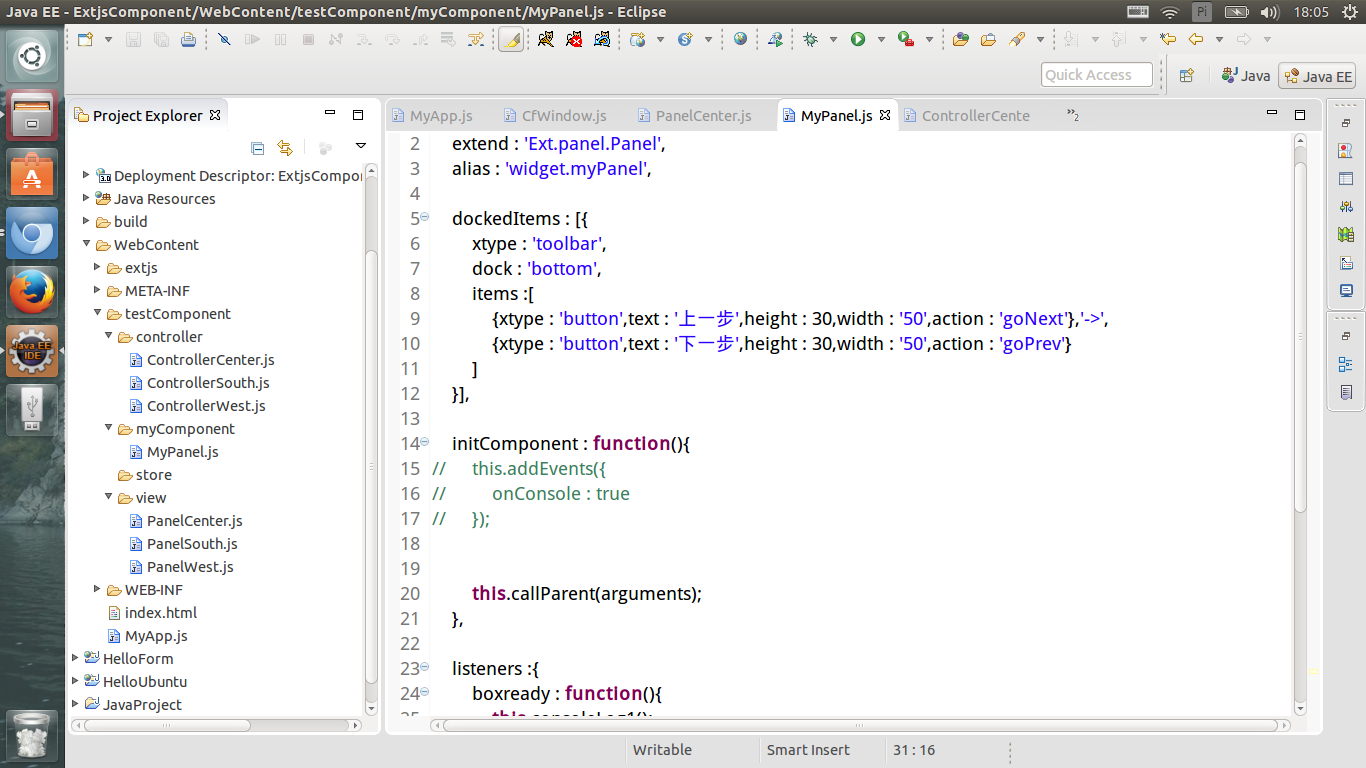
MyPanel.js
Ext.define('testComponent.myComponent.MyPanel',{

    extend : 'Ext.panel.Panel',

    alias : 'widget.myPanel',

    dockedItems : [{

        xtype : 'toolbar',

        dock : 'bottom',

        items :[

            {xtype : 'button',text : '上一步',height : 30,width : '50',action : 'goNext'},'->',

            {xtype : 'button',text : '下一步',height : 30,width : '50',action : 'goPrev'}

        ]

    }],

    initComponent : function(){

//        this.addEvents({//            onConsole : true//        });//是否注释掉这一行结果没有太大的变化

        this.callParent(arguments);

    },

    listeners :{

        boxready : function(){

            this.consoleLog1();

            this.consoleLog2();

        }

    },

    consoleLog1 : function(){

        console.log("consoleLog1");

    },

    consoleLog2 : function(){

        console.log("consoleLog22");

        this.fireEvent("onConsole",this);

    }

});
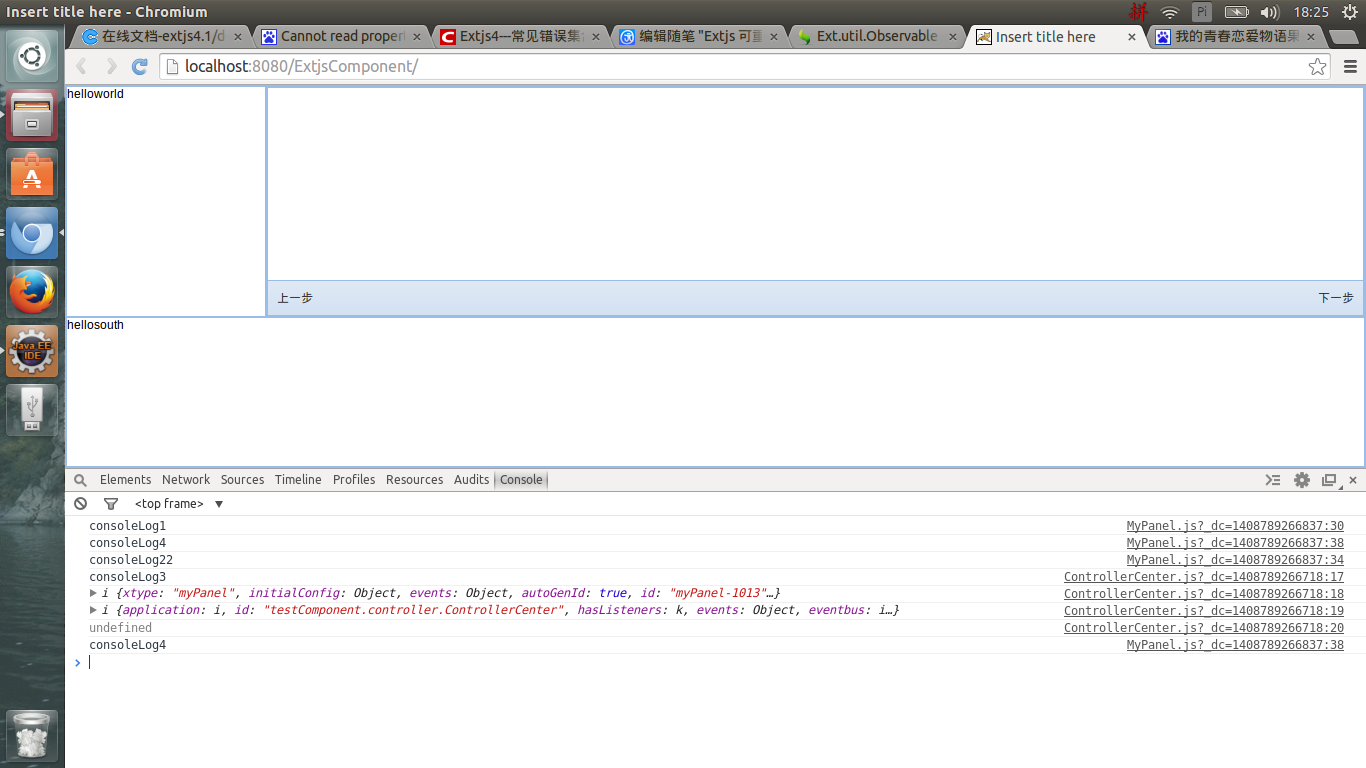
运行结果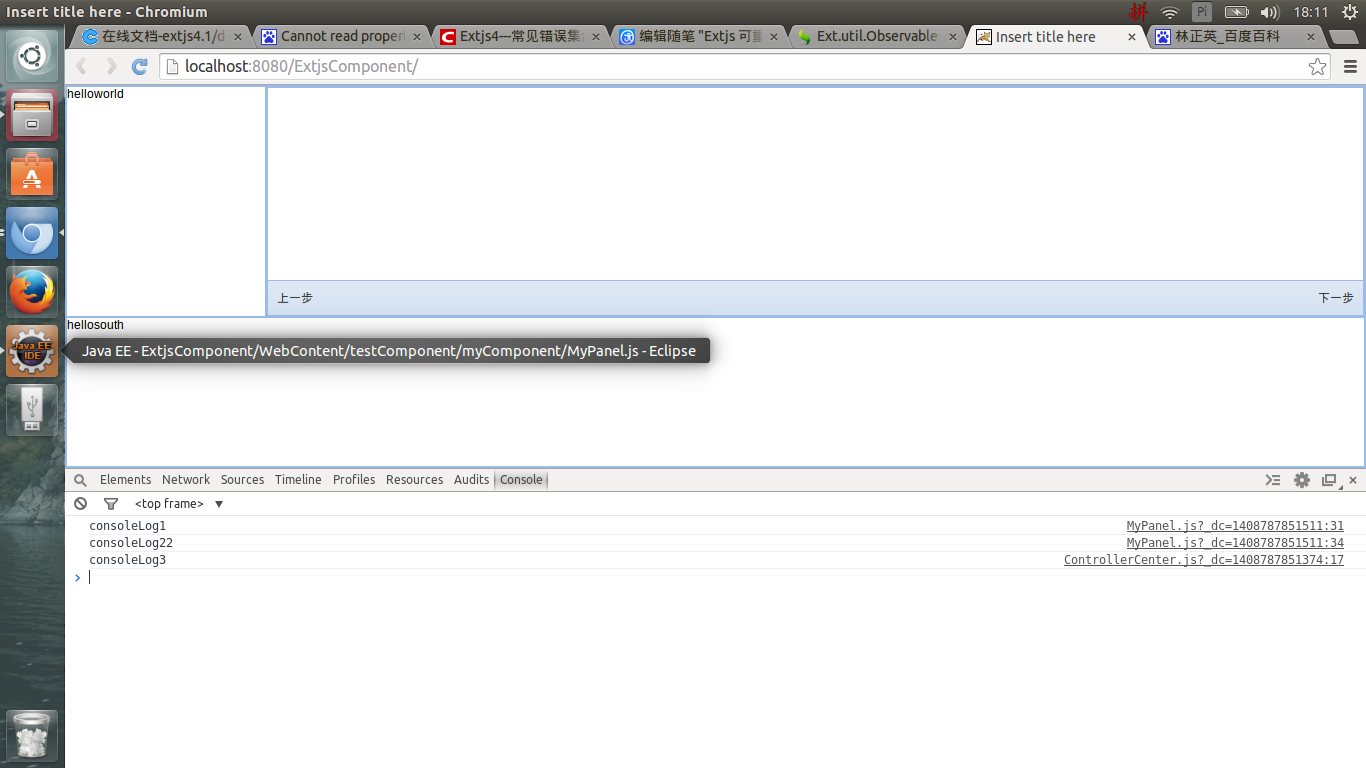
上面的MyPanel还是相当简单的,这里的重点是通过这个demo看MyPanel中的方法如何执行以及如何抛出事件。
现在将MyPanel、contorller稍微进行修改,则更能够明白MyPanel中的方法是怎么回事以及抛出事件时的参数是什么。
修改后的MyPanel.js
Ext.define('testComponent.myComponent.MyPanel',{

    extend : 'Ext.panel.Panel',

    alias : 'widget.myPanel',

    dockedItems : [{

        xtype : 'toolbar',

        dock : 'bottom',

        items :[

            {xtype : 'button',text : '上一步',height : 30,width : '50',action : 'goNext'},'->',

            {xtype : 'button',text : '下一步',height : 30,width : '50',action : 'goPrev'}

        ]

    }],

    initComponent : function(){

//        this.addEvents({

//            onConsole : true

//        });

        this.callParent(arguments);

    },

    listeners :{

        boxready : function(){

            this.consoleLog1();

            this.consoleLog2();

        }

    },

    consoleLog1 : function(){

        console.log("consoleLog1");

        this.consoleLog4();

    },

    consoleLog2 : function(){

        console.log("consoleLog22");

        this.fireEvent("onConsole",this);

    },

    consoleLog4: function(){

        console.log("consoleLog4");

    }

});
修改后的ControllerCenter.js
Ext.define('testComponent.controller.ControllerCenter',{

    extend : 'Ext.app.Controller',

    alias : 'controllerCenter',

    views : ['testComponent.myComponent.MyPanel'],

    init : function(){

        this.control({

            "myPanel" :{

                onConsole : this.consoleLog3

            }

        })

        this.callParent(arguments);

    },

    consoleLog3 : function(me,you){

        console.log("consoleLog3");

        console.log(me);

        console.log(this);

        console.log(you);

        me.consoleLog4();

    }

})
在chrome中的运行结果
自定义组件的一个相当重要的作用就是满足开发的过程中不同的需求。
作为一个前端,能够改变自定义组件的样式是一种相当必要的能力。必须要有有一定的CSS基础。
现在对MyPanel中的next进行监听,并处理监听事件。(这里就是on的用法,使用on后组件一直监听并触发方法,当然也可以在方法中抛出事件)
MyPanel.js
Ext.define('testComponent.myComponent.MyPanel',{

    extend : 'Ext.panel.Panel',

    alias : 'widget.myPanel',

    dockedItems : [{

        xtype : 'toolbar',

        dock : 'bottom',

        items :[

            {xtype : 'button',text : '上一步',height : 30,width : '50',action : 'goPrev'},'->',

            {xtype : 'button',text : '下一步',height : 30,width : '50',action : 'goNext'}

        ]

    }],

    initComponent : function(){

//        this.addEvents({

//            onConsole : true

//        });

        this.callParent(arguments);

    },

    listeners :{

        boxready : function(){

            this.consoleLog1();

            this.consoleLog2();

        }

    },

    consoleLog1 : function(){

        console.log("consoleLog1");

        var obj=this.down("button[action=goNext]");

        console.log(obj);

        obj.on("click",this.goNextClick,this);//设置监听事件

        this.consoleLog4();

    },

    consoleLog2 : function(){

        console.log("consoleLog22");

        this.fireEvent("onConsole",this);

    },

    consoleLog4: function(){

        console.log("consoleLog4");

    },

    goNextClick : function(){//处理监听事件的方法,并扔出事件

        console.log("You have  click the 下一步");

        console.log("goodbye");

        this.fireEvent("onGoNextClick",this);

    }

});
ControllerCenter.js
Ext.define('testComponent.controller.ControllerCenter',{

    extend : 'Ext.app.Controller',

    alias : 'controllerCenter',

    views : ['testComponent.myComponent.MyPanel'],

    init : function(){

        this.control({

            "myPanel" :{

                onConsole : this.consoleLog3,

                onGoNextClick : this.goNextClick //捕捉点击扔出的事件

            }

        })

        this.callParent(arguments);

    },

    consoleLog3 : function(me,you){

        console.log("consoleLog3");

        console.log(me);

        console.log(this);

        console.log(you);

        me.consoleLog4();

    },

    goNextClick : function(me,you){ //在controller中处理点击的方法

        console.log(me);

        console.log("你没有点击上一步");

    }

})
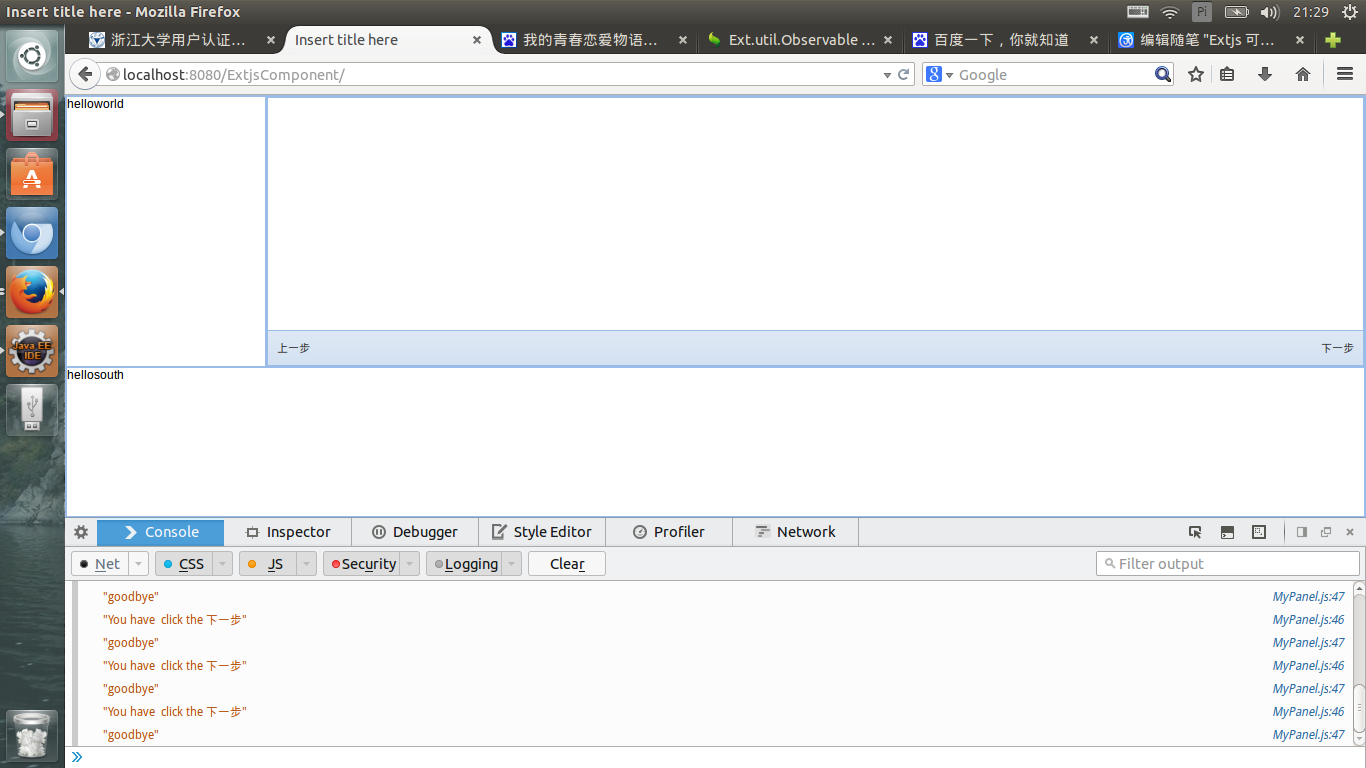
运行结果,点击了两次“下一次”按钮
Extjs 可重用组件开始写 2014 8 23日的更多相关文章
- Android 的Fragment组件(写完放假。。。)
今天写的有点晚,做个题目有点慢,然后搞其他事搞定就到了0点,总结下就差不多该睡了. 今天学长讲的是Fragment: 一个可以将activity拆分成几个完全独立封装的可重用的组件,每个组件有自己的生 ...
- extjs每一个组件要设置唯一的ID
extjs每一个组件要设置唯一的ID,否则会造成各种错误 EXTJS基本上是靠ID来识别组件的,假如你在panel1中有个ID:"keyword"的textfield,而panel ...
- 实用ExtJS教程100例-007:ExtJS中Window组件最小化
在上一节中我们演示了如何使用ExtJS的Window组件,这篇内容中我们来演示一下如何将窗口最小化. 要让ExtJS标题栏中显示最小化按钮并不麻烦,只需要设置 minimizable: true 即可 ...
- 【ExtJS】自定义组件datetimefield(二)
接上[ExtJS]自定义组件datetimefield(一) 第三步:添加按钮事件绑定,获取选定的时间 privates:{ finishRenderChildren: function () { v ...
- CSDN下载频道于2014年7月17日改版,23日-24日系统维护
尊敬的用户你们好: CSDN于2005年推出了下载服务,经过数年的发展,下载频道的用户已经为无数用户提供了帮助.分享500万的技术资源. 感谢用户们的资源共享精神,以及对CSDN下载频道的支持 下载频 ...
- ExtJS 4.2 组件介绍
目录 1. 介绍 1.1 说明 1.2 组件分类 1.3 组件名称 1.4 组件结构 2. 组件的创建方式 2.1 Ext.create()创建 2.2 xtype创建 1. 介绍 1.1 说明 Ex ...
- ExtJS 4.2 组件的查找方式
组件创建了,就有方法找到这些组件.在DOM.Jquery都有各自的方法查找元素/组件,ExtJS也有自己独特的方式查找组件.元素.本次从全局查找.容器内查找.form表单查找.通用组件等4个方面介绍组 ...
- BootStrap入门教程 (三) :可重用组件(按钮,导航,标签,徽章,排版,缩略图,提醒,进度条,杂项)
上讲回顾:Bootstrap的基础CSS(Base CSS)提供了优雅,一致的多种基础Html页面要素,包括排版,表格,表单,按钮等,能够满足前端工程师的基本要素需求. Bootstrap作为完整的前 ...
- ExtJS动态创建组件
J是代码动态创建dom: 或者 eval有后台组织代码,前台执 ======================= ExtJS组件的动态的创建: 程序中大多数时候需要在后台根据业务逻辑创建符合要求的组件, ...
随机推荐
- 移动端H5 判断IOS还是Android 平台
1.方法 (function($) { var UA = window.navigator.userAgent; if(/Android|HTC/i.test(UA) || !!(window.nav ...
- 运行于Windows内建账户下的服务访问映射网络驱动器的方法
Windows服务如果是运行在本地系统帐户下或本地服务帐户下,它只能访问这个账户自己创建的映射驱动器,UNC路径访问则不受次限制. LocalService Account (NT AUTHORITY ...
- jQuery,您可以实现元素的淡入淡出效果。
fadeIn() fadeOut() fadeToggle() fadeTo() jQuery fadeIn() 用于淡入已隐藏的元素 $("button").click(func ...
- Java中Scanner类的使用
一个可以解析基本类型和字符串的简单文本扫描器. 例如,以下代码使用户能够从 System.in 中读取一个数: public class ApiScanner { public static void ...
- Shoot the Bullet ZOJ - 3229有上下界网络流
Code: #include<cstdio> #include<algorithm> #include<vector> #include<queue> ...
- C++基础 (8) 第八天 数组指针 模板指针 C语言中的多态 模板函数
1昨日回顾 2 多态的练习-圆的图形 3多态的练习-程序员薪资 4员工管理案例-抽象类和技术员工的实现 employee.h: employee.cpp: technician.h: technici ...
- [luogu 2324][SCOI 2005] 骑士精神 (A*算法)
Description 在一个5×5的棋盘上有12个白色的骑士和12个黑色的骑士, 且有一个空位.在任何时候一个骑士都能按照骑士的走法(它可以走到和它横坐标相差为1,纵坐标相差为2或者横坐标相差为2, ...
- PHP开发实战权威指南-读书总结
从今年开始,断断续续学习PHP已经有4个月了.最初,认真学习PHP几天,就弄WordPress搭建了一个个人博客,这也符合技术人的实践理念. 最近,重温PHP开发实战权威指南,做点总结,整理下自己学习 ...
- centos查看防火墙端口
#centos7启动防火墙 systemctl start firewalld.service #centos7停止防火墙/关闭防火墙 systemctl stop firewalld.service ...
- Java基础学习总结(63)——Java集合总结
数据结构是以某种形式将数据组织在一起的集合,它不仅存储数据,还支持访问和处理数据的操作.Java提供了几个能有效地组织和操作数据的数据结构,这些数据结构通常称为Java集合框架.在平常的学习开发中,灵 ...