SpringBoot整合定时任务和异步任务处理 3节课
1、SpringBoot定时任务schedule讲解
定时任务应用场景:
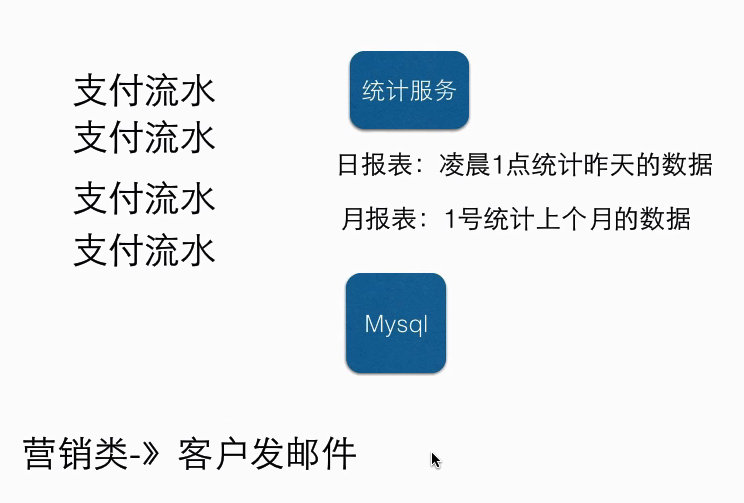
简介:讲解什么是定时任务和常见定时任务区别
1、常见定时任务 Java自带的java.util.Timer类
timer:配置比较麻烦,时间延后问题
timertask:不推荐
2、Quartz框架
配置更简单
xml或者注解
3、SpringBoot使用注解方式开启定时任务
1)启动类里面 @EnableScheduling开启定时任务,自动扫描
2)定时任务业务类 加注解 @Component被容器扫描
3)定时执行的方法加上注解 @Scheduled(fixedRate=2000) 定期执行一次 单位:ms
代码示例:
XdclassApplication.java启动类:
 package net.xdclass.base_project;

 import org.springframework.boot.SpringApplication;

 import org.springframework.boot.autoconfigure.SpringBootApplication;

 import org.springframework.scheduling.annotation.EnableScheduling;

 @SpringBootApplication //一个注解顶下面3个

 @EnableScheduling    //开启定时任务

 public class XdclassApplication {

     public static void main(String[] args) {

         SpringApplication.run(XdclassApplication.class, args);

     }

 }
TestTask.java:
package net.xdclass.base_project.task; import java.util.Date; import org.springframework.scheduling.annotation.Scheduled;
import org.springframework.stereotype.Component; @Component
public class TestTask { @Scheduled(fixedRate=2000) //两秒执行一次
public void sum(){
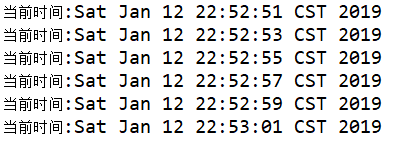
System.out.println("当前时间:"+new Date());
} }
控制台输出:
2、SpringBoot常用定时任务配置实战
简介:SpringBoot常用定时任务表达式配置和在线生成器
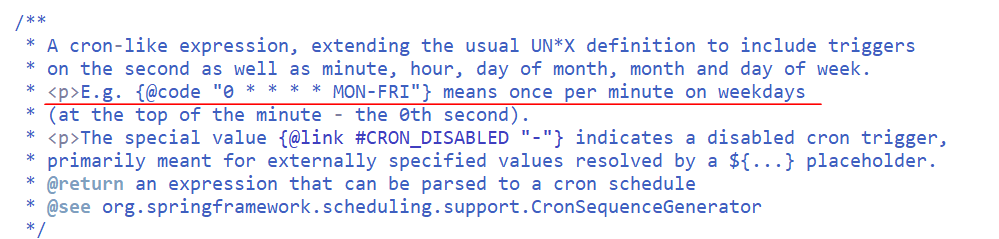
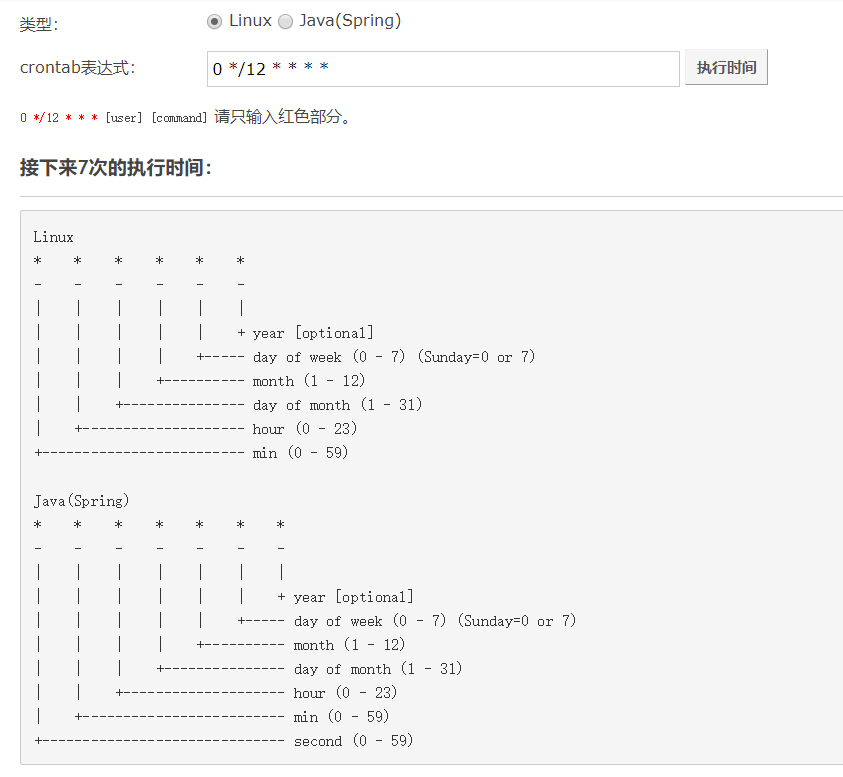
1、cron 定时任务表达式 @Scheduled(cron="*/1 * * * * *") 表示每秒
1)crontab 工具 https://tool.lu/crontab/
代码示例:(每2s执行一次)
 @Scheduled(cron="*/2 * * * * *")

 public void sum(){

     System.out.println("当前时间:"+new Date());

 }
2、fixedRate: 定时多久执行一次(上一次开始执行时间点后xx秒再次执行;)
3、fixedDelay: 上一次执行结束时间点后xx秒再次执行
4、fixedDelayString: 字符串形式,可以通过配置文件指定
3、SpringBoot2.x异步任务实战(核心知识)
简介:讲解什么是异步任务,和使用SpringBoot2.x开发异步任务实战
1、什么是异步任务和使用场景:适用于处理log、发送邮件、短信……等
下单接口->查库存 100
余额校验 150
风控用户100
....
2、启动类里面使用@EnableAsync注解开启功能,自动扫描
3、定义异步任务类并使用@Component标记组件被容器扫描,异步方法加上@Async
注意点:
1)要把异步任务封装到类里面,不能直接写到Controller
2)增加Future<String> 返回结果 AsyncResult<String>("task执行完成");
3)如果需要拿到结果 需要判断全部的 task.isDone()
4、通过注入方式,注入到controller里面,如果测试前后区别则改为同步则把Async注释掉
代码示例:
XdclassApplication.java:
 package net.xdclass.base_project;

 import org.springframework.boot.SpringApplication;

 import org.springframework.boot.autoconfigure.SpringBootApplication;

 import org.springframework.scheduling.annotation.EnableAsync;

 import org.springframework.scheduling.annotation.EnableScheduling;

 @SpringBootApplication //一个注解顶下面3个

 @EnableScheduling    //开启定时任务

 @EnableAsync //开启异步任务

 public class XdclassApplication {

     public static void main(String[] args) {

         SpringApplication.run(XdclassApplication.class, args);

     }

 }
AsyncTask.java:
 package net.xdclass.base_project.task;

 import java.util.concurrent.Future;

 import org.springframework.scheduling.annotation.Async;

 import org.springframework.scheduling.annotation.AsyncResult;

 import org.springframework.stereotype.Component;

 @Component

 @Async //异步方法,该方法注掉后为同步

 public class AsyncTask {

     public void task1() throws InterruptedException{

         long begin = System.currentTimeMillis();

         Thread.sleep(1000L);

         long end = System.currentTimeMillis();

         System.out.println("任务1耗时="+(end-begin));

     }

     public void task2() throws InterruptedException{

         long begin = System.currentTimeMillis();

         Thread.sleep(2000L);

         long end = System.currentTimeMillis();

         System.out.println("任务2耗时="+(end-begin));

     }

     public void task3() throws InterruptedException{

         long begin = System.currentTimeMillis();

         Thread.sleep(3000L);

         long end = System.currentTimeMillis();

         System.out.println("任务3耗时="+(end-begin));

     }

     //获取异步结果

     public Future<String> task4() throws InterruptedException{

         long begin = System.currentTimeMillis();

         Thread.sleep(2000L);

         long end = System.currentTimeMillis();

         System.out.println("任务4耗时="+(end-begin));

         return new AsyncResult<String>("任务4");

     }

     public Future<String> task5() throws InterruptedException{

         long begin = System.currentTimeMillis();

         Thread.sleep(3000L);

         long end = System.currentTimeMillis();

         System.out.println("任务5耗时="+(end-begin));

         return new AsyncResult<String>("任务5");

     }

     public Future<String> task6() throws InterruptedException{

         long begin = System.currentTimeMillis();

         Thread.sleep(1000L);

         long end = System.currentTimeMillis();

         System.out.println("任务6耗时="+(end-begin));

         return new AsyncResult<String>("任务6");

     }

 }
UserController.java测试:
 package net.xdclass.base_project.controller;

 import net.xdclass.base_project.domain.JsonData;

 import net.xdclass.base_project.task.AsyncTask;

 import java.util.concurrent.Future;

 import org.springframework.beans.factory.annotation.Autowired;

 import org.springframework.web.bind.annotation.GetMapping;

 import org.springframework.web.bind.annotation.RequestMapping;

 import org.springframework.web.bind.annotation.RestController;

 @RestController

 @RequestMapping("/api/v1")

 public class UserController {

     @Autowired

     private AsyncTask task;

     @GetMapping("async_task")

     public JsonData exeTask() throws InterruptedException{

         long begin = System.currentTimeMillis();

 //        task.task1();

 //        task.task2();

 //        task.task3();

         Future<String> task4 = task.task4();

         Future<String> task5 = task.task5();

         Future<String> task6 = task.task6();

         //需要返回结果可以使用该方法

         for(;;){

             if(task4.isDone() && task5.isDone() && task6.isDone()){

                 break;

             }

         }

         long end = System.currentTimeMillis();

         long total = end - begin;

         System.out.println("执行总耗时=" + total);

         return JsonData.buildSuccess(total);

     }

 }
同步/异步执行时间对比:
同步:

异步:

由此可见,同步与异步,它们的执行效率是不同的,应根据需求进行选择使用。
SpringBoot整合定时任务和异步任务处理 3节课的更多相关文章
- SpringBoot整合定时任务和异步任务处理
SpringBoot定时任务schedule讲解 简介:讲解什么是定时任务和常见定时任务区别 1.常见定时任务 Java自带的java.util.Timer类 timer:配置比较麻烦,时间延后问题, ...
- 小D课堂 - 零基础入门SpringBoot2.X到实战_第10节 SpringBoot整合定时任务和异步任务处理_41、SpringBoot定时任务schedule讲解
笔记 1.SpringBoot定时任务schedule讲解 简介:讲解什么是定时任务和常见定时任务区别 1.常见定时任务 Java自带的java.util.Timer类 ...
- 【SpringBoot】SpringBoot2.x整合定时任务和异步任务处理
SpringBoot2.x整合定时任务和异步任务处理 一.项目环境 springboot2.x本身已经集成了定时任务模块和异步任务,可以直接使用 二.springboot常用定时任务配置 1.在启动类 ...
- SpringBoot2.x整合定时任务和异步任务处理
SpringBoot2.x整合定时任务和异步任务处理 一.项目环境 springboot2.x本身已经集成了定时任务模块和异步任务,可以直接使用 二.springboot常用定时任务配置 1.在启动类 ...
- 【SpringBoot】整合定时任务和异步任务
========================10.SpringBoot整合定时任务和异步任务处理 =============================== 1.SpringBoot定时任务s ...
- SpringBoot整合定时任务----Scheduled注解实现(一个注解全解决)
一.使用场景 定时任务在开发中还是比较常见的,比如:定时发送邮件,定时发送信息,定时更新资源,定时更新数据等等... 二.准备工作 在Spring Boot程序中不需要引入其他Maven依赖 (因为s ...
- SpringBoot整合全局异常处理&SpringBoot整合定时任务Task&SpringBoot整合异步任务
============整合全局异常=========== 1.整合web访问的全局异常 如果不做全局异常处理直接访问如果报错,页面会报错500错误,对于界面的显示非常不友好,因此需要做处理. 全局异 ...
- 数据库操作之整合Mybaties和事务讲解 5节课
1.SpringBoot2.x持久化数据方式介绍 简介:介绍近几年常用的访问数据库的方式和优缺点 1.原始java访问数据库 开发流程麻烦 ...
- SpringBoot整合定时任务异步任务
1.定时任务 1.开启定时任务 @SpringBootApplication //开启定时任务 @EnableScheduling public class SpringBootDemoApplica ...
随机推荐
- MT【3】只有零向量旋转不变
解答: 评:利用了零向量方向不唯一的性质.
- 自学Linux Shell4.2-监测磁盘空间mount umount df du
点击返回 自学Linux命令行与Shell脚本之路 4.2-监测磁盘空间mount umount df du 1. 挂载存储媒体mount 移除存储媒体umount ls命令用于显示文件目录列表, ...
- sklearn 的train_test_split
train_test_split函数用于将矩阵随机划分为训练子集和测试子集,并返回划分好的训练集测试集样本和训练集测试集标签. 格式: from sklearn.model_selection imp ...
- hdu 2845 Beans(最大不连续子序列和)
Problem Description Bean-eating is an interesting game, everyone owns an M*N matrix, which is filled ...
- Java -- JDBC 学习--处理Blob
Oracle LOB LOB,即Large Objects(大对象),是用来存储大量的二进制和文本数据的一种数据类型(一个LOB字段可存储可多达4GB的数据).LOB 分为两种类型:内部LOB和外部L ...
- A1082. Read Number in Chinese
Given an integer with no more than 9 digits, you are supposed to read it in the traditional Chinese ...
- ST表与树状数组
ST表 st表可以解决区间最值的问题.可以做到O(nlogn)预处理 ,O(1)查询,但是不支持修改. st表的大概思路就是用st[i][j]来表示从i开始的2的j次方个树中的最值,查询时就从左端点 ...
- strace命令,read,write
strace + 运行的程序,可以查看程序运行的过程中调用的系统函数 read.write函数常常被称为Unbuffered I/O.指的是无用户及缓冲区.但不保证不使用内核缓冲区.
- 跟我一起学习vue2(使用命令行搭建单页应用)[二]
第一步:运行git命令,全局安装 vue-cli $ cnpm install --global vue-cli 第二步: 创建一个基于 webpack 模板的新项目 $ vue init webpa ...
- laravel 模型事件 updated 触发条件
1. 只有 $sku->{attribute} != $sku->getOriginal({attribute}) 不一致的时候才会触发 getDirty() 不为空的时候才触发, 而且不 ...