spring boot入门例子
最近学习spring boot,总结一下入门的的基础知识
1新建maven项目,修改pom.xml
<project xmlns="http://maven.apache.org/POM/4.0.0" xmlns:xsi="http://www.w3.org/2001/XMLSchema-instance"

  xsi:schemaLocation="http://maven.apache.org/POM/4.0.0 http://maven.apache.org/maven-v4_0_0.xsd">

  <modelVersion>4.0.0</modelVersion>

  <groupId>cn.sam</groupId>

  <artifactId>springboot3</artifactId>

  <packaging>war</packaging>

  <version>0.0.1-SNAPSHOT</version>

  <name>springboot3 Maven Webapp</name>

  <url>http://maven.apache.org</url>

      <properties>

        <project.build.sourceEncoding>UTF-8</project.build.sourceEncoding>

        <!-- 这里一定要配置上java的版本,如果是1.7版本的可不用配置 -->

        <java.version>1.8</java.version>

    </properties>

<parent>

    <groupId>org.springframework.boot</groupId>

    <artifactId>spring-boot-starter-parent</artifactId>

    <version>1.4.1.RELEASE</version>

    <relativePath/>

  </parent>

  <dependencies>

    <dependency>

      <groupId>org.springframework.boot</groupId>

      <artifactId>spring-boot-starter-web</artifactId>

    </dependency>

  </dependencies>

  <build>

    <plugins>

      <plugin>

        <groupId>org.springframework.boot</groupId>

        <artifactId>spring-boot-maven-plugin</artifactId>

      </plugin>

    </plugins>

  </build>

</project>
2新建main类如下,运行main方法,然后在浏览器输入http://127.0.0.1:8080/hello
import org.springframework.boot.SpringApplication;

import org.springframework.boot.autoconfigure.EnableAutoConfiguration;

import org.springframework.web.bind.annotation.RequestMapping;

import org.springframework.web.bind.annotation.RestController;

@RestController

@EnableAutoConfiguration

public class Application {

	public static void main(String[] args) {

		SpringApplication.run(Application.class, args);

	}

	@RequestMapping("/hello")

	public String hello(){

		return "Hello World!";

	}

}
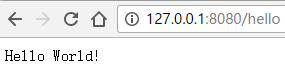
这样一个简单的入门例子就完成了,是不是非常的简单呢。
下面记录一下spring boot的一些简单配置
1在我们开发过程中,我们需要经常修改,为了避免重复启动项目,我们可以启用热部署。
Spring-Loaded项目提供了强大的热部署功能,添加/删除/修改 方法/字段/接口/枚举 等代码的时候都可以热部署,速度很快,很方便。想在Spring Boot中使用该功能非常简单,就是在spring-boot-maven-plugin插件下面添加依赖:
<dependencies>

    <dependency>

        <groupId>org.springframework</groupId>

        <artifactId>springloaded</artifactId>

        <version>1.2.5.RELEASE</version>

    </dependency>

</dependencies>
添加以后,用cmd进入项目目录,通过mvn spring-boot:run启动就支持热部署了(这里是用mvn命令去启动项目,并不是运行main方法)。
2修改服务器端口
一main方法类实现EmbeddedServletContainerCustomizer接口
import org.springframework.boot.SpringApplication;

import org.springframework.boot.autoconfigure.EnableAutoConfiguration;

import org.springframework.boot.context.embedded.ConfigurableEmbeddedServletContainer;

import org.springframework.boot.context.embedded.EmbeddedServletContainerCustomizer;

import org.springframework.web.bind.annotation.RequestMapping;

import org.springframework.web.bind.annotation.RestController;

@RestController

@EnableAutoConfiguration

public class Application1 implements EmbeddedServletContainerCustomizer {

	@Override

	public void customize(ConfigurableEmbeddedServletContainer container) {

		container.setPort(8899);

	}

	public static void main(String[] args) {

		SpringApplication.run(Application1.class, args);

	}

	@RequestMapping("/hello")

	public String port(){

		return "port 8899";

	}

}

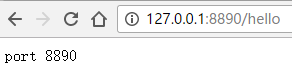
二主类添加一个factory方法
import java.util.concurrent.TimeUnit;

import org.springframework.boot.SpringApplication;

import org.springframework.boot.autoconfigure.EnableAutoConfiguration;

import org.springframework.boot.context.embedded.EmbeddedServletContainerFactory;

import org.springframework.boot.context.embedded.tomcat.TomcatEmbeddedServletContainerFactory;

import org.springframework.context.annotation.Bean;

import org.springframework.web.bind.annotation.RequestMapping;

import org.springframework.web.bind.annotation.RestController;

@RestController

@EnableAutoConfiguration

public class Application2 {

	public static void main(String[] args) {

		SpringApplication.run(Application2.class, args);

	}

	@RequestMapping("/hello")

	public String hello(){

		return "port 8890";

	}

	@Bean

    public EmbeddedServletContainerFactory servletFactory(){

        TomcatEmbeddedServletContainerFactory tomcatFactory = new TomcatEmbeddedServletContainerFactory();

        tomcatFactory.setPort(8890);

        tomcatFactory.setSessionTimeout(10,TimeUnit.SECONDS);

        return tomcatFactory;

    }

}
Hello World例子只是一个controller,可以在主类增加扫描,实现多个controller
1新建User实体类
public class User {

	private Integer id;

	private String name;

	public Integer getId() {

		return id;

	}

	public void setId(Integer id) {

		this.id = id;

	}

	public String getName() {

		return name;

	}

	public void setName(String name) {

		this.name = name;

	}

}
2新建UserController
import org.springframework.web.bind.annotation.PathVariable;

import org.springframework.web.bind.annotation.RequestMapping;

import org.springframework.web.bind.annotation.RestController;

import springboot3.domain.User;

@RequestMapping("/user")

@RestController

public class UserController {

	@RequestMapping("/{id}")

	public User getUserById(@PathVariable String id){

		User u = new User();

		u.setId(new Integer(id));

		u.setName("name="+id);

		return u;

	}

}
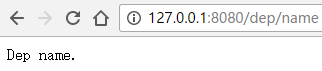
3新建DepartmentController
import org.springframework.web.bind.annotation.RequestMapping;

import org.springframework.web.bind.annotation.RestController;

@RequestMapping("/dep")

@RestController

public class DepartmentController {

	@RequestMapping("name")

	public String getDepName(){

		return "Dep name.";

	}

}
4新建主类
import org.springframework.boot.SpringApplication;

import org.springframework.boot.autoconfigure.EnableAutoConfiguration;

import org.springframework.context.annotation.ComponentScan;

@EnableAutoConfiguration

@ComponentScan(value = {"springboot3.controller"})

public class Application4 {

	public static void main(String[] args) {

		SpringApplication.run(Application4.class, args);

	}

}
运行主方法,在浏览器输入http://127.0.0.1:8080/user/1
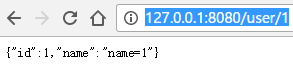
在浏览器输入http://127.0.0.1:8080/user/1
上面例子中,user用到url中的变量,可以直接获取
@RequestMapping("/users/{username}")

public String userProfile(@PathVariable("username") String username) {

    return String.format("user %s", username);

}

@RequestMapping("/posts/{id}")

public String post(@PathVariable("id") int id) {

    return String.format("post %d", id);

}
支持http方法
@RequestMapping(value = "/login", method = RequestMethod.GET)

public String loginGet() {

    return "Login Page";

}

@RequestMapping(value = "/login", method = RequestMethod.POST)

public String loginPost() {

    return "Login Post Request";

}
上面的例子,为了方便演示,都是采用restcontroller,spring boot也可以用模板
我们使用Thymeleaf模板引擎进行模板渲染,需要引入依赖:
<dependency>

  <groupId>org.springframework.boot</groupId>

  <artifactId>spring-boot-starter-thymeleaf</artifactId>

</dependency>
controller类
@Controller

public class HtmlController {

	@RequestMapping("/html/{name}")

	public String html(@PathVariable("name") String name, Model model){

		model.addAttribute("name","Hello Html "+name);

		return "html";

	}

}
接下来需要在默认的模板文件夹src/main/resources/templates/目录下添加一个模板文件hello.html
<html xmlns:th="http://www.thymeleaf.org">

<head>

    <title>Getting Started: Serving Web Content</title>

    <meta http-equiv="Content-Type" content="text/html; charset=UTF-8" />

</head>

<body>

    <p th:text="'Hello, ' + ${name} + '!'" />

</body>

</html>
访问http://127.0.0.1:8080/html/sam
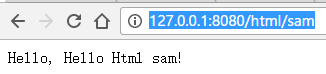
浏览器页面使用HTML作为描述语言,那么必然也脱离不了CSS以及JavaScript。为了能够浏览器能够正确加载类似/css/style.css, /js/main.js等资源,默认情况下我们只需要在src/main/resources/static目录下添加css/style.css和js/main.js文件后,Spring MVC能够自动将他们发布,通过访问/css/style.css, /js/main.js也就可以正确加载这些资源。
spring boot入门例子的更多相关文章
- 161103、Spring Boot 入门
Spring Boot 入门 spring Boot是Spring社区较新的一个项目.该项目的目的是帮助开发者更容易的创建基于Spring的应用程序和服务,让更多人的人更快的对Spring进行入门体验 ...
- Spring Boot入门(四):开发Web Api接口常用注解总结
本系列博客记录自己学习Spring Boot的历程,如帮助到你,不胜荣幸,如有错误,欢迎指正! 在程序员的日常工作中,Web开发应该是占比很重的一部分,至少我工作以来,开发的系统基本都是Web端访问的 ...
- Spring boot 入门(四):集成 Shiro 实现登陆认证和权限管理
本文是接着上篇博客写的:Spring boot 入门(三):SpringBoot 集成结合 AdminLTE(Freemarker),利用 generate 自动生成代码,利用 DataTable 和 ...
- Springboot 系列(一)Spring Boot 入门篇
注意:本 Spring Boot 系列文章基于 Spring Boot 版本 v2.1.1.RELEASE 进行学习分析,版本不同可能会有细微差别. 前言 由于 J2EE 的开发变得笨重,繁多的配置, ...
- spring boot 系列之一:spring boot 入门
最近在学习spring boot,感觉确实很好用,开发环境搭建和部署确实省去了很多不必须要的重复劳动. 接下来就让我们一起来复习下. 一.什么是spring boot ? spring boot是干嘛 ...
- spring boot入门教程——Spring Boot快速入门指南
Spring Boot已成为当今最流行的微服务开发框架,本文是如何使用Spring Boot快速开始Web微服务开发的指南,我们将使创建一个可运行的包含内嵌Web容器(默认使用的是Tomcat)的可运 ...
- Spring Boot入门系列(十七)整合Mybatis,创建自定义mapper 实现多表关联查询!
之前讲了Springboot整合Mybatis,介绍了如何自动生成pojo实体类.mapper类和对应的mapper.xml 文件,并实现最基本的增删改查功能.mybatis 插件自动生成的mappe ...
- spring boot 入门操作(二)
spring boot入门操作 使用FastJson解析json数据 pom dependencies里添加fastjson依赖 <dependency> <groupId>c ...
- spring boot 入门操作(三)
spring boot入门操作 devtools热部署 pom dependencies里添加依赖 <dependency> <groupId>org.springframew ...
随机推荐
- c# 读取嵌入式文件
using System;using System.Collections.Generic;using System.IO;using System.Linq;using System.Reflect ...
- 【BZOJ-1455】罗马游戏 可并堆 (左偏树)
1455: 罗马游戏 Time Limit: 5 Sec Memory Limit: 64 MBSubmit: 1355 Solved: 561[Submit][Status][Discuss] ...
- javascript要不要用来处理业务逻辑
这个问题,我现在才明白该怎样描述这个已经困惑了我很久的问题,在公司做的项目中,js对于数据验证起到了很大的作用,但是这使得整个项目的业务逻辑变得零散,甚至混乱 现在公司里的项目就是这样的.现在再想想, ...
- 【bzoj1178】 Apio2009—CONVENTION会议中心
http://www.lydsy.com/JudgeOnline/problem.php?id=1178 (题目链接) 题意 给出n个区间,问在区间两两不相交的情况下最多能选出多少区间,并输出字典序最 ...
- HDU1269 迷宫城堡
本文版权归ljh2000和博客园共有,欢迎转载,但须保留此声明,并给出原文链接,谢谢合作. 本文作者:ljh2000作者博客:http://www.cnblogs.com/ljh2000-jump/转 ...
- Servlet与JSP版本历史以及Tomcat支持的版本
查询这个的关键字:Java EE的版本历史. JavaServer Pages (JSP) Java Servlet 参考: https://en.wikipedia.org/wiki/Java_EE ...
- SQL Server发布订阅功能研究
前提: 发布订阅只能是同一个内网的机器上才能使用,其实这个可以用配置管理器的别名功能设置之后就可以了,外网的也能通过这样的方式来搞. 配置过程参考老D的文章:http://www.cnblogs.co ...
- 解决Gmail/GCalendar图标丢失问题
由于 ssl.gstatic.com被墙的原因,GFW里面访问gmail/gcalendar的时候好多图标出不来,用起来很窝火,已经有一阵子了.曾经搜 过不少解决方案,但是总是时好时坏.今天总算试验出 ...
- UVa 7146 Defeat the Enemy(贪心)
题目链接: 传送门 Defeat the Enemy Time Limit: 3000MS Memory Limit: 32768 KB Description Long long ago t ...
- ubuntu nginx 安装以及配置文件详解
1.到nginx官网下载源码包.最好下载稳定版本,nginx官网http://www.nginx.org/ 2.安装nginx依赖包运行命令: sudo apt-get install libssl- ...