
安装Gitlab到CentOS(YUM)
GitLab是Git的基于WEB的图形化管理平台,提供Git的用户、权限等高级管理功能。
运行环境
系统版本:CentOS Linux release 7.3.1611 (Core)
软件版本:Gitlab-ce-11.10.1
硬件要求:最低2核4GB,建议4核8GB
安装过程
1、安装依赖
[root@localhost ~]# yum -y install curl policycoreutils-python openssh-server
2、配置系统环境
[root@localhost ~]# systemctl enable sshd                                                 => 设置SSH远程服务开机自启

[root@localhost ~]# systemctl start sshd                                                  => 启动SSH远程服务

[root@localhost ~]# systemctl stop firewalld                                              => 停止Firewalld防火墙服务

[root@localhost ~]# systemctl disable firewalld                                           => 禁用Firwalld防火墙服务开机自启

[root@localhost ~]# sed -i 's/SELINUX=enforcing/SELINUX=disabled/' /etc/sysconfig/selinux => 关闭SeLinux(重启主机生效)

[root@localhost ~]# setenforce 0                                                          => 关闭SeLinux(当前生效)
3、添加YUM-Gitlab源
我们使用清华大学提供的YUM源,以提高下载速度。
[root@localhost ~]# vim /etc/yum.repos.d/gitlab-ce.repo

[gitlab-ce]

name=Gitlab CE Repository

baseurl=https://mirrors.tuna.tsinghua.edu.cn/gitlab-ce/yum/el$releasever/

gpgcheck=0

enabled=1

[root@localhost ~]# yum makecache
4、安装Gitlab
我们选择安装最新版本的Gitlab。
[root@localhost ~]# yum install -y gitlab-ce

可以访问"https://mirrors.tuna.tsinghua.edu.cn/gitlab-ce/yum/el7/"查看Gitlab-ce的版本。

安装历史版本请使用下面命令:

[root@localhost ~]# yum install -y gitlab-ce-{VERSION}
5、配置Gitlab
建议使用HTTPS。
[root@localhost ~]# vim /etc/gitlab/gitlab.rb

### 基础配置 ###

external_url 'https://gitlab.xxx.cn'

#用户访问所使用的URL,域名或者IP地址

gitlab_rails['time_zone'] = 'Asia/Shanghai'

#时区

### SSH配置 ###

gitlab_rails['gitlab_shell_ssh_port'] = 10222

#使用SSH协议拉取代码所使用的连接端口。

### 邮箱配置 ###

gitlab_rails['smtp_enable'] = true

#启用SMTP邮箱功能,绑定一个第三方邮箱,用于邮件发送

gitlab_rails['smtp_address'] = "smtp.exmail.qq.com"

#设置SMTP服务器地址

gitlab_rails['smtp_port'] = 465

#设置SMTP服务器端口

gitlab_rails['smtp_user_name'] = "xxx@xxx.cn"

#设置邮箱账号

gitlab_rails['smtp_password'] = "xxx"

#设置邮箱密码

gitlab_rails['smtp_authentication'] = "login"

#设置邮箱账号密码身份验证方式,"login"表示采用账号密码的方式登陆

gitlab_rails['smtp_enable_starttls_auto'] = true

gitlab_rails['smtp_tls'] = true

#设置开启SMTP邮件使用TLS传输加密协议传输邮件,以保证邮件安全传输

gitlab_rails['gitlab_email_from'] = 'xxx@xxx.cn'

#设置Gitlab来源邮箱地址,设置登陆所使用的邮箱地址

### WEB配置 ###

nginx['enable'] = true

#启用Nginx服务

nginx['client_max_body_size'] = '250m'

#设置客户端最大文件上传大小

nginx['redirect_http_to_https'] = true

#设置开启自动将HTTP跳转到HTTPS

nginx['ssl_certificate'] = "/etc/gitlab/ssl/gitlab.xxx.cn.pem"

#设置HTTPS所使用的证书

nginx['ssl_certificate_key'] = "/etc/gitlab/ssl/gitlab.xxx.cn.key"

#设置HTTPS所使用的证书密码

nginx['ssl_protocols'] = "TLSv1.1 TLSv1.2"

#设置HTTPS所使用的TLS协议版本

nginx['ssl_session_cache'] = "builtin:1000  shared:SSL:10m"

#设置开启SSL会话缓存功能

nginx['ssl_session_timeout'] = "5m"

#设置SSL会话超时时间

nginx['listen_addresses'] = ['*', '[::]']

#设置Nginx监听地址,"*"表示监听主机上所有网卡的地址

nginx['gzip_enabled'] = true

#设置开启Nginx的传输压缩功能,以节约传输带宽,提高传输效率
6、上传SSL证书到指定目录
[root@localhost ~]# ll /etc/gitlab/ssl/

total 28

drwxr-xr-x 2 root root 4096 Apr 25 11:48 ./

drwxrwxr-x 4 root root 4096 Apr 25 12:50 ../

-rw-r--r-- 1 root root 1675 Apr 25 11:45 gitlab.xxx.cn.key

-rw-r--r-- 1 root root 3671 Apr 25 11:45 gitlab.xxx.cn.pem
7、刷新配置
当配置文件发生变化时,或者是第一次启动时,我们需要刷新配置。

[root@localhost ~]# systemctl restart gitlab-runsvdir

[root@localhost ~]# gitlab-ctl reconfigure
8、启动服务
[root@localhost ~]# gitlab-ctl restart

[root@localhost ~]# gitlab-ctl status

run: alertmanager: (pid 13541) 2171s; run: log: (pid 13221) 2192s

run: gitaly: (pid 13557) 2170s; run: log: (pid 12463) 2266s

run: gitlab-monitor: (pid 13580) 2169s; run: log: (pid 13103) 2208s

run: gitlab-workhorse: (pid 13602) 2169s; run: log: (pid 12887) 2226s

run: logrotate: (pid 13617) 2168s; run: log: (pid 12959) 2218s

run: nginx: (pid 13628) 2168s; run: log: (pid 12927) 2222s

run: node-exporter: (pid 13714) 2168s; run: log: (pid 13002) 2214s

run: postgres-exporter: (pid 13720) 2167s; run: log: (pid 13270) 2188s

run: postgresql: (pid 13740) 2167s; run: log: (pid 12669) 2258s

run: prometheus: (pid 13748) 2166s; run: log: (pid 13181) 2198s

run: redis: (pid 13761) 2166s; run: log: (pid 11907) 2293s

run: redis-exporter: (pid 13800) 2165s; run: log: (pid 13143) 2202s

run: sidekiq: (pid 13821) 2163s; run: log: (pid 12872) 2227s

run: unicorn: (pid 13833) 2162s; run: log: (pid 12832) 2233s
9、测试邮件发送
我们在启动完成后测试一下邮件发送功能是否正常工作。
[root@localhost ~]# gitlab-rails console

irb(main):001:0> Notify.test_email('邮箱地址', '标题', '内容').deliver_now

irb(main):002:0> exit
10、第一次访问登陆
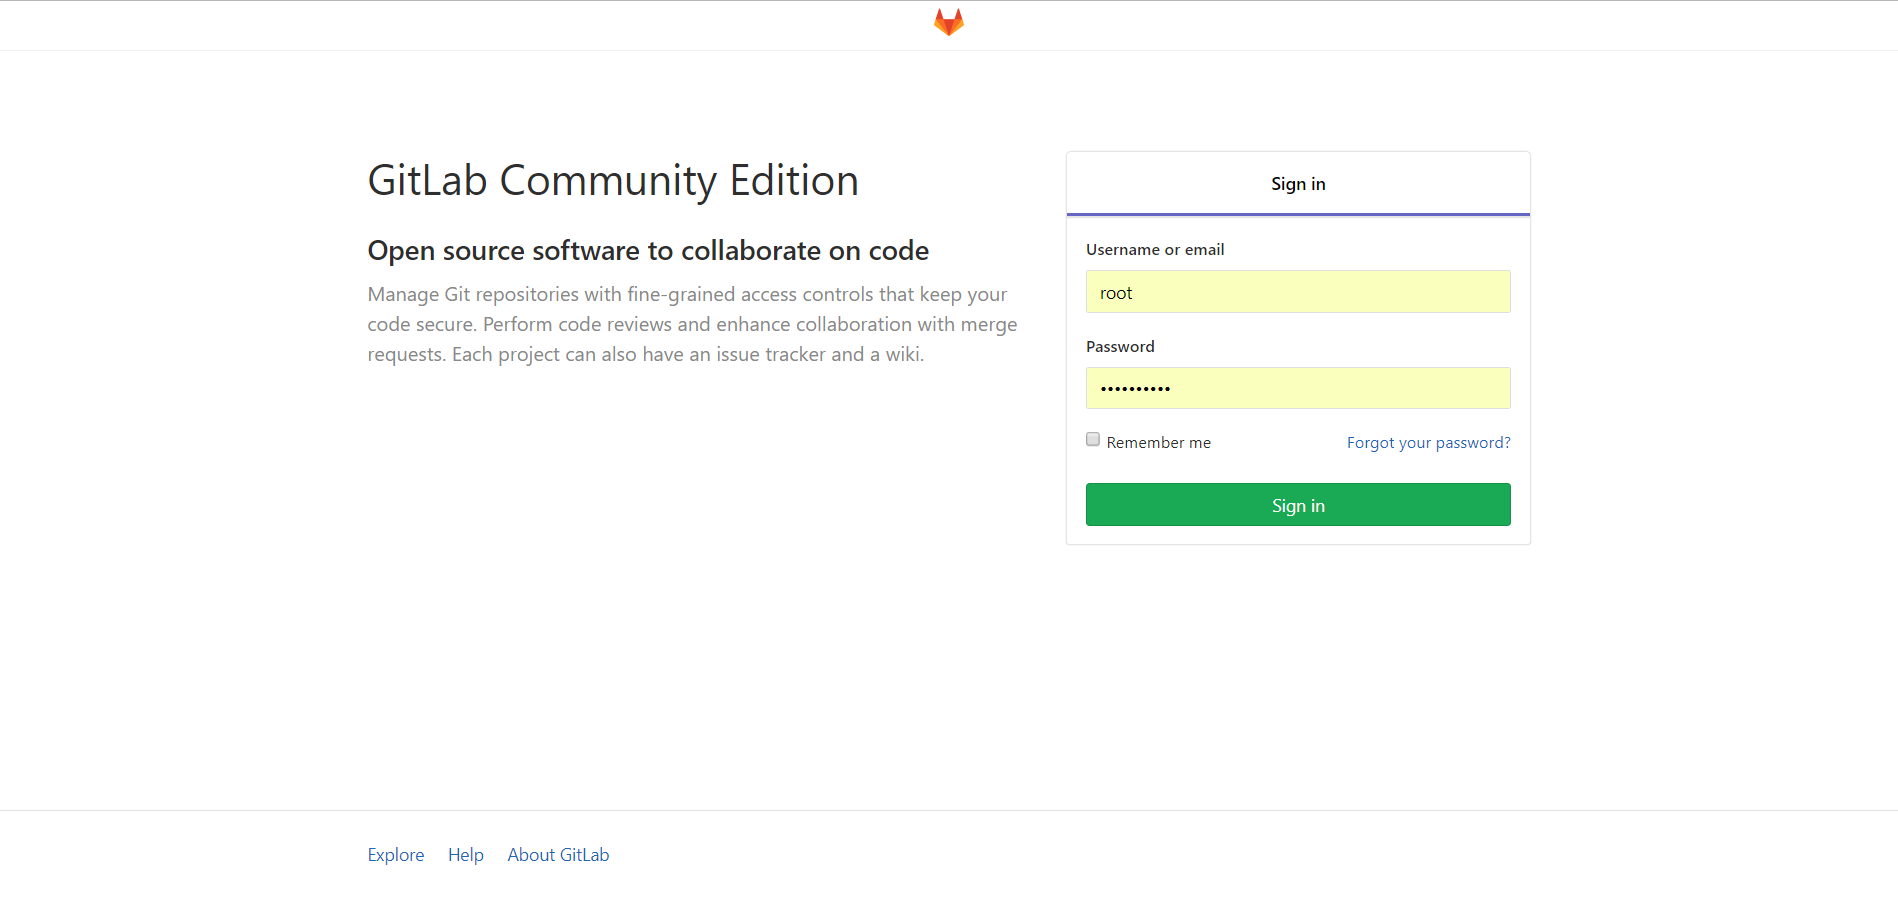
第一次需要输入新的超级管理员(root)密码。
修改成功后,我们使用超级管理员用户“root”账号登录Gitlab管理平台。


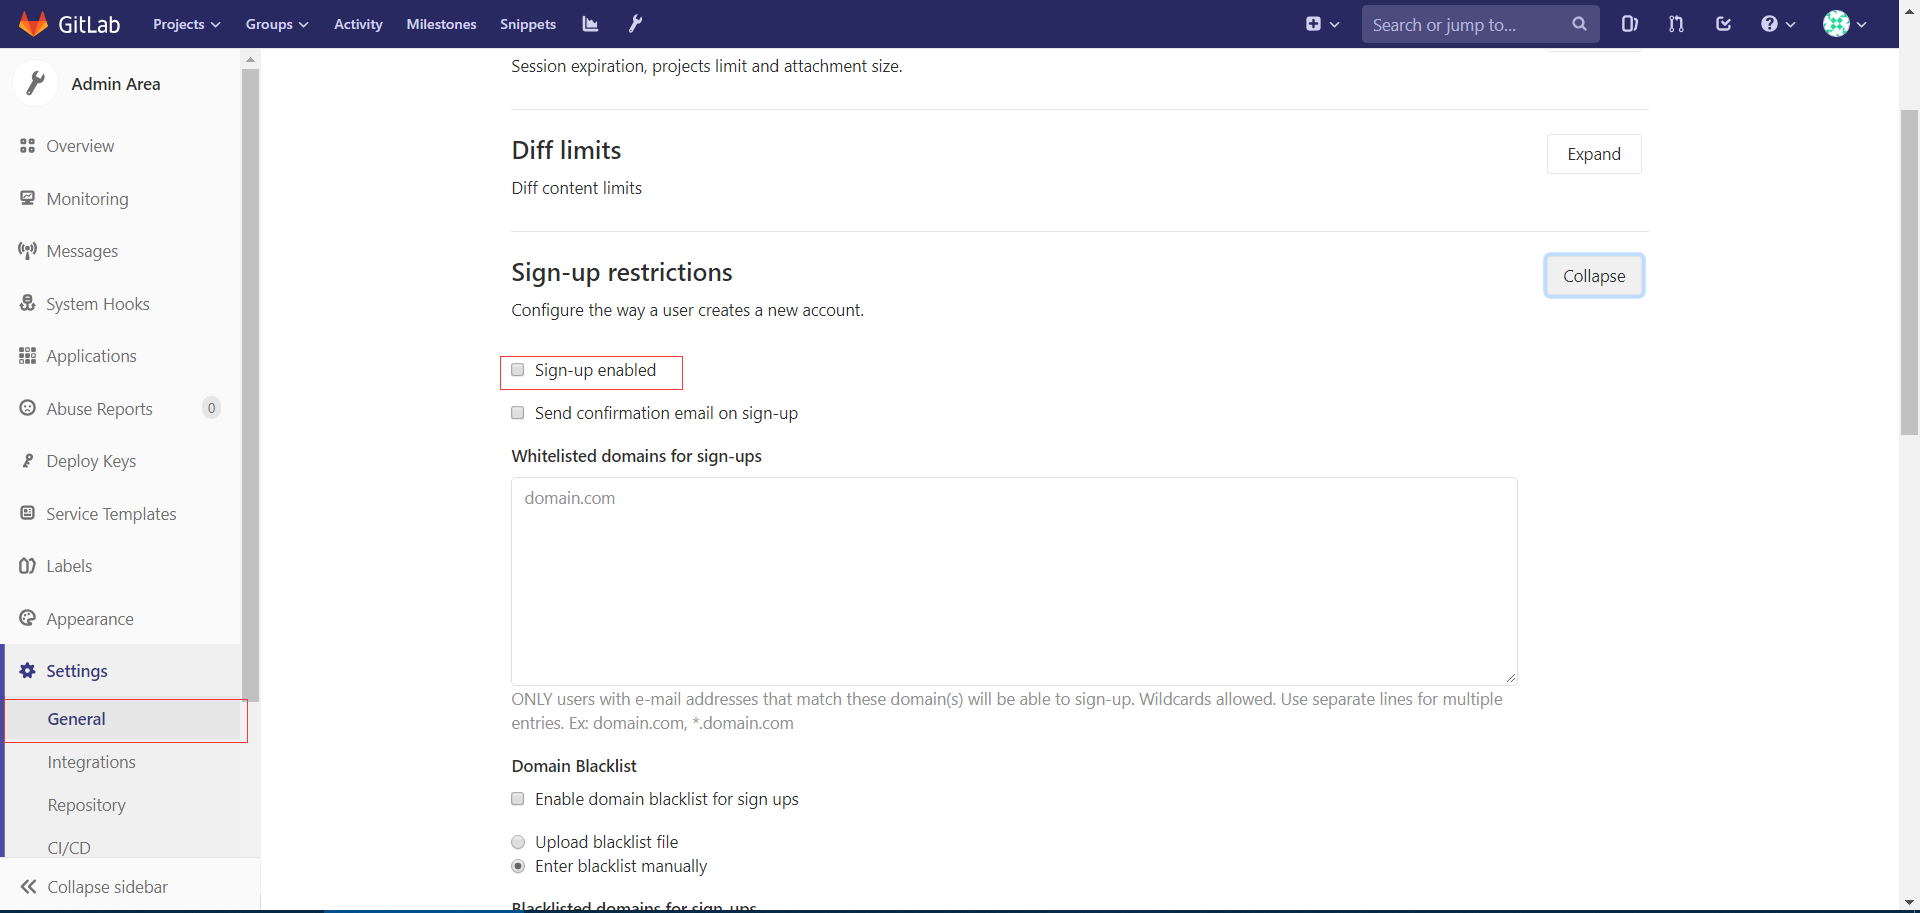
11、关闭用户注册功能
为了避免用户随便注册账号,我们将注册功能关闭。
11、设置语言为"简体中文"
保存后重启登陆即可。

安装Gitlab到CentOS(YUM)的更多相关文章
- Ejabberd2:安装和操作指南(centos yum 安装ejabberd)
(1)首先安装EPEL Repository ## RHEL/CentOS 6 32-Bit ## # wget http://download.fedoraproject.org/pub/ ...
- centos6/7安装gitlab
CentOS/RHEL 6/7安装gitlab新建 /etc/yum.repos.d/gitlab-ce.repo,内容为你的CentOS/RHEL版本:centos6 [gitlab-ce] nam ...
- CentOS7下安装Gitlab社区版【安装步骤、IP改域名、修改端口】
这两天一直在给公司的服务器配置Gitlab(10.5.4).过程很是痛苦,所以把过程记录一下. 1.安装CentOS7 从官网上下载了最新版CentOS-7-x86_64-DVD-1708.iso.用 ...
- centos7安装gitlab并汉化
一.基础环境准备 1.安装依赖包 [root@gitlab-server ~]#yum install curl policycoreutils openssh-server openssh-clie ...
- CentOS安装gitlab,gerrit,jenkins并配置ci流程
CentOS安装gitlab,gerrit,jenkins并配置ci流程 By Wenbin juandx@163.com 2016/4/9 这是我参考了网上很多的文档,配置了这三个软件在一个机器上, ...
- CentOS安装gitLab服务器
首先利用gitlab-install-el6.sh安装,比较简单: (出处:http://www.linuxidc.com/Linux/2013-06/85754.htm) 1:如果有条件,提供一台全 ...
- centos 6.5安装GitLab全过程和问题记录
GitLab,是一个使用 Ruby on Rails 开发的开源应用程序,与Github类似,能够浏览源代码,管理缺陷和注释,非常适合在团队内部使用. 官方只提供了Debian/Ubuntu系统下的安 ...
- centos 7.4 安装gitlab
centos 7.4 安装gitlab #curl -s https://packages.gitlab.com/install/repositories/gitlab/gitlab-ce/scrip ...
- CentOS 7 安装GitLab
CentOS 安装GitLab CentOS 安装GitLab GitLab是一个利用Ruby on Rails开发的开源应用程序,实现一个自托管的Git项目仓库,可通过Web界面进行访问公开的或者私 ...
随机推荐
- 03讲基础篇:经常说的CPU上下文切换是什么意思(上)
小结 总结一下,不管是哪种场景导致的上下文切换,你都应该知道: CPU 上下文切换,是保证 Linux 系统正常工作的核心功能之一,一般情况下不需要我们特别关注. 但过多的上下文切换,会把CPU时间消 ...
- nginx的四个主要组成部分
1.nginx二进制可执行文件 · 由各模块源码编译出的一个文件 2.nginx.conf配置文件 · 控制nginx的行为 3.access.log访问日志 . 记录每一条http请求信息 4.er ...
- windows下编译LUA-cjson
下载地址:http://www.kyne.com.au/~mark/software/lua-cjson.php 编译环境:win7 + MINGW 修改下载得到的lua-cjson-2.1.0.zi ...
- js小练习---实现红绿灯
<!DOCTYPE html> <html lang="en"> <head> <meta charset="UTF-8&quo ...
- HEXO常用命令总结
博客搬家:hexo常用命令总结 常见命令 hexo new "postName" #新建文章 hexo new page "pageName" #新建页面(新建 ...
- [Python]逻辑运算符 and or
复习老男孩全栈二期视频的时候 圆号老师测试的用例两个集合and 和or操作的时候的问题 >>> a = set("what") >>> b = ...
- PHP 中 new static 和 new self 的区别
今天老大在公司 问了一下 new static 和 new self 的区别 公司十个程序 竟然没有一个回答上来 后面画面自补 ... 本屌丝回家后 就百度了解了下 这二者区别 : ...
- javascript 浅复制 和 深复制
如何区分深拷贝与浅拷贝,简单点来说,就是假设 B复制了A,当修改A时,看B是否会发生变化,如果B也跟着变了,说明这是浅拷贝, 如果B没变,那就是深拷贝 实现思路 1 json 深度拷贝 2 遍历递归 ...
- Pyinstaller 打包程序为可执行文件exe
Pyiinstaller打包 pyinstaller是python的一个第三方模块,使用它可以将pythnon程序打包为可执行文件,实现打包后的程序在没有python环境的机器上也可以运行.pyins ...
- MongoDB 复本集搭建
复制集的特点 数据一致性 主是唯一的,但不是固定的 没有MySQL那样的双主结构 大多数原则,集群存活节点小于等于二分之一时集群不可写,只可读. 是否能选举出新的主节点,是由当前复制集成员存活量 ...