(六)OpenStack---M版---双节点搭建---Neutron安装和配置
↓↓↓↓↓↓↓↓视频已上线B站↓↓↓↓↓↓↓↓
》》》》》》传送门
1.创建网络服务数据库
2.获得 admin 凭证来获取只有管理员能执行的命令的访问权限
3.创建服务证书,neutron用户
4.创建网络服务API端点:
5.Controller节点安装并配置网络服务组件
6.网络服务初始化
7.同步数据库
8.Controller节点重启计算API服务
9.启动网络服务并设置开机启动
10.Compute节点安装并配置neutron服务
11.compute节点重启服务并设置开机自启
12.验证(Controller节点)
1.创建网络服务数据库
#mysql -uroot -p000000

>create database neutron;

> grant all privileges on neutron.* to 'neutron'@'localhost' identified by '000000';

> grant all privileges on neutron.* to 'neutron'@'%' identified by '000000';

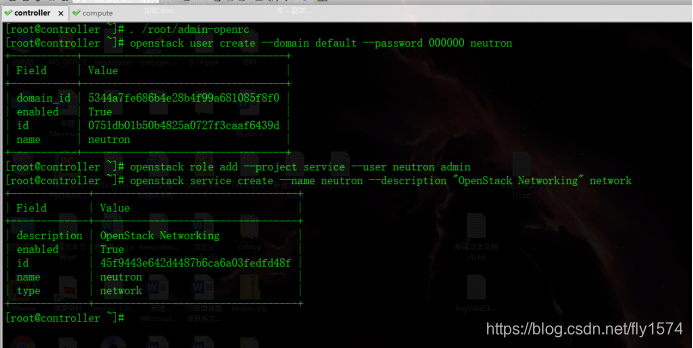
2.获得 admin 凭证来获取只有管理员能执行的命令的访问权限
#. /root/admin-openrc
3.创建服务证书,neutron用户
#openstack user create --domain default --password 000000 neutron

#openstack role add --project service --user neutron admin

#openstack service create --name neutron --description "OpenStack Networking" network
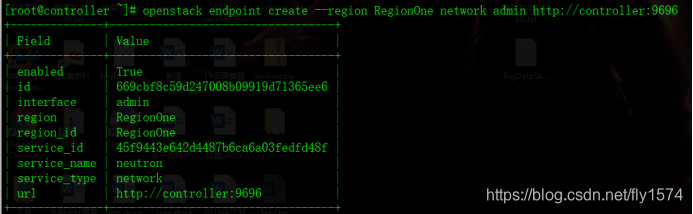
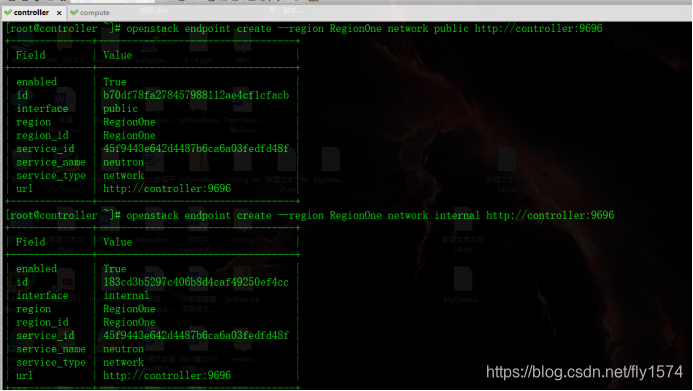
4.创建网络服务API端点:
#openstack endpoint create --region RegionOne network public http://controller:9696

#openstack endpoint create --region RegionOne network internal http://controller:9696

#openstack endpoint create --region RegionOne network admin http://controller:9696
5.Controller节点安装并配置网络服务组件
#yum -y install openstack-neutron openstack-neutron-ml2 openstack-neutron-linuxbridge ebtables
1.编辑配置文件 /etc/neutron/neutron.conf
#vi /etc/neutron/neutron.conf
在 [database] 部分,配置数据库访问:
connection = mysql+pymysql://neutron:000000@controller/neutron
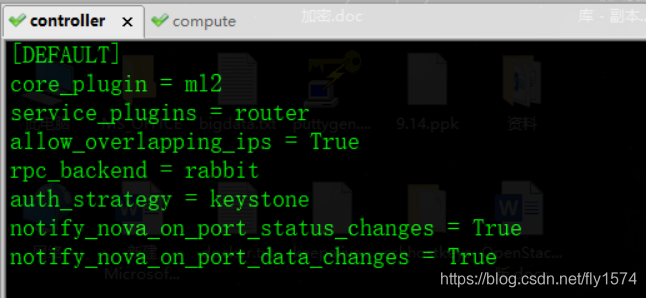
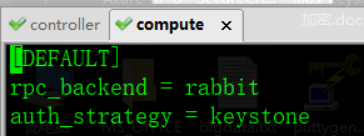
在``[DEFAULT]``部分,添加如下内容
core_plugin = ml2
service_plugins = router
allow_overlapping_ips = True
rpc_backend = rabbit
auth_strategy = keystone
notify_nova_on_port_status_changes = True
notify_nova_on_port_data_changes = True
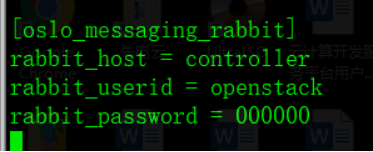
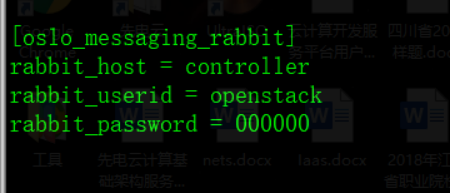
在[oslo_messaging_rabbit]部分,配置 “RabbitMQ” 消息队列的连接:
rabbit_host = controller
rabbit_userid = openstack
rabbit_password = 000000
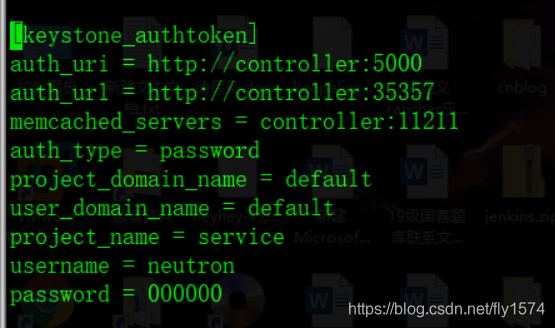
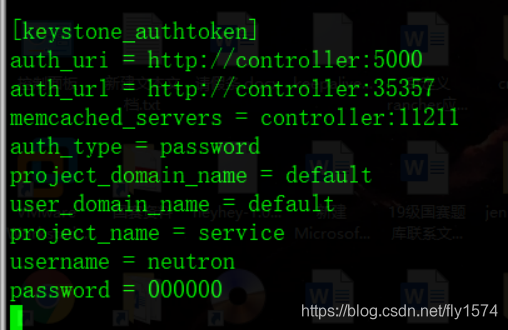
在[keystone_authtoken]部分,配置认证服务访问
auth_uri = http://controller:5000
auth_url = http://controller:35357
memcached_servers = controller:11211
auth_type = password
project_domain_name = default
user_domain_name = default
project_name = service
username = neutron
password = 000000
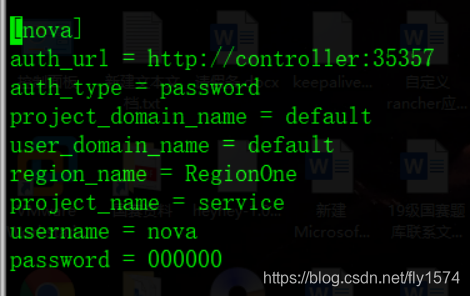
在[nova]部分,配置网络服务来通知计算节点的网络拓扑变化:
auth_url = http://controller:35357
auth_type = password
project_domain_name = default
user_domain_name = default
region_name = RegionOne
project_name = service
username = nova
password = 000000
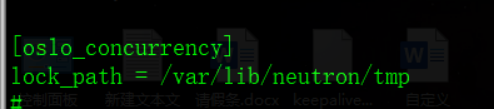
在 [oslo_concurrency] 部分,配置锁路径:
lock_path = /var/lib/neutron/tmp

2.编辑/etc/neutron/plugins/ml2/ml2_conf.ini文件,配置启用flat,VLAN,GRE,LOCAL以及VXLAN网络:
#vi /etc/neutron/plugins/ml2/ml2_conf.ini
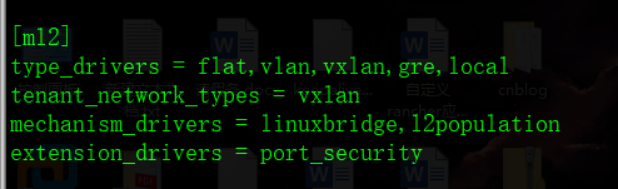
在[ml2]下添加
type_drivers = flat,vlan,vxlan,gre,local
tenant_network_types = vxlan
mechanism_drivers = linuxbridge,l2population
extension_drivers = port_security
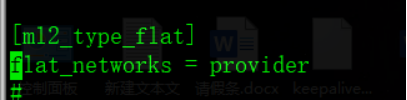
在 [ml2_type_flat] 部分,配置公共虚拟网络为flat网络
flat_networks = provider
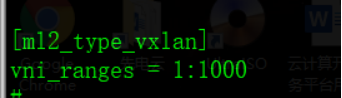
在 [ml2_type_vxlan] 部分,为私有网络配置VXLAN网络识别的网络范围:
vni_ranges = 1:1000
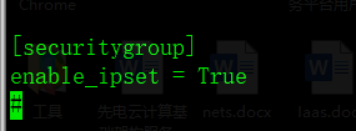
在 [securitygroup] 部分,启用 ipset 增加安全组规则的高效性:
enable_ipset = True
3.配置linuxbridge代理,编辑文件/etc/neutron/plugins/ml2/linuxbridge_agent.ini
#vi /etc/neutron/plugins/ml2/linuxbridge_agent.ini
在 [linux_bridge] 部分,将公共虚拟网络和公共物理网络接口对应起来:
physical_interface_mappings = provider:eth1
#注意,此处的eth1为基础环境配置中的200的网段 也就是 192.168.200.0/24
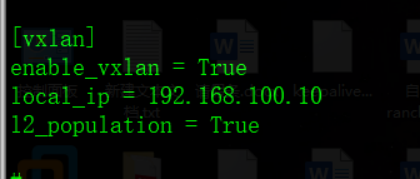
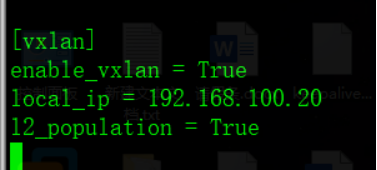
在 [vxlan] 部分,启用VXLAN覆盖网络,配置覆盖网络的物理网络接口的IP地址,启用layer-2 population:
enable_vxlan = True
local_ip = 192.168.100.10 #这里的IP地址是controller的管理网络
l2_population = True
在 [securitygroup] 部分,启用安全组并配置 Linuxbridge iptables firewall driver:
enable_security_group = True
firewall_driver = neutron.agent.linux.iptables_firewall.IptablesFirewallDriver


4.配置layer-3代理,编辑文件/etc/neutron/l3_agent.ini
#vi /etc/neutron/l3_agent.ini

在[DEFAULT]下添加

interface_driver = neutron.agent.linux.interface.BridgeInterfaceDriver

external_network_bridge =

5.配置DHCP代理编辑/etc/neutron/dhcp_agent.ini文件
#vi /etc/neutron/dhcp_agent.ini

在[DEFAULT]下添加

interface_driver = neutron.agent.linux.interface.BridgeInterfaceDriver

dhcp_driver = neutron.agent.linux.dhcp.Dnsmasq

enable_isolated_metadata = True

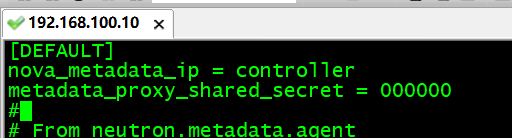
6.编辑/etc/neutron/metadata_agent.ini文件
#vi /etc/neutron/metadata_agent.ini

在``[DEFAULT]`` 部分,配置元数据主机以及共享密码:

nova_metadata_ip = controller

metadata_proxy_shared_secret = 000000
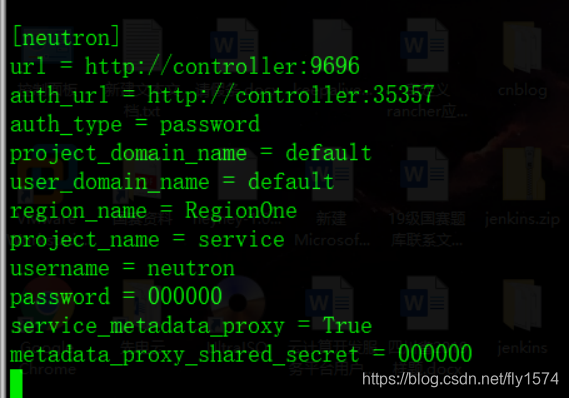
7.编辑/etc/nova/nova.conf文件
#vi /etc/nova/nova.conf
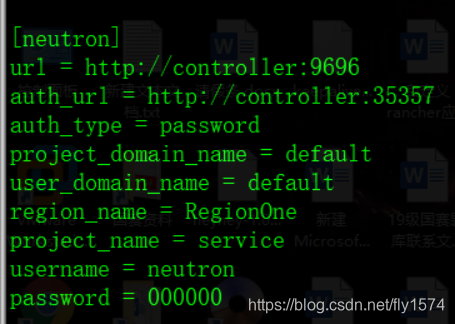
在``[neutron]``部分,配置访问参数,启用元数据代理并设置密码:
url = http://controller:9696
auth_url = http://controller:35357
auth_type = password
project_domain_name = default
user_domain_name = default
region_name = RegionOne
project_name = service
username = neutron
password = 000000
service_metadata_proxy = True
metadata_proxy_shared_secret = 000000
6.网络服务初始化
# ln -s /etc/neutron/plugins/ml2/ml2_conf.ini /etc/neutron/plugin.ini

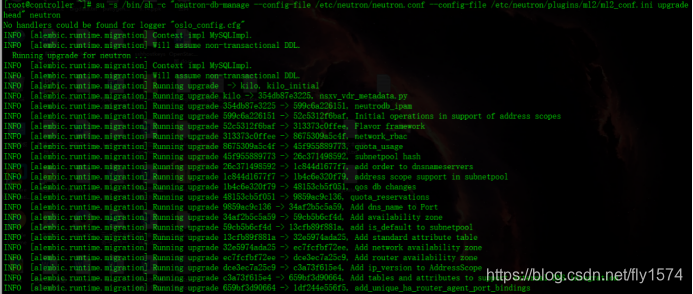
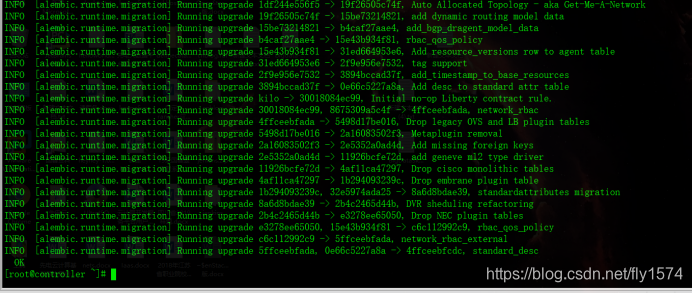
7.同步数据库
# su -s /bin/sh -c "neutron-db-manage --config-file /etc/neutron/neutron.conf --config-file /etc/neutron/plugins/ml2/ml2_conf.ini upgrade head" neutron
8.Controller节点重启计算API服务
# systemctl restart openstack-nova-api.service
9.启动网络服务并设置开机启动
systemctl start neutron-server.service neutron-linuxbridge-agent.service neutron-dhcp-agent.service neutron-metadata-agent.service neutron-l3-agent.service
systemctl enable neutron-server.service neutron-linuxbridge-agent.service neutron-dhcp-agent.service neutron-metadata-agent.service neutron-l3-agent.service
10.Compute节点安装并配置neutron服务
# yum -y install openstack-neutron-linuxbridge ebtables ipset
1.编辑/etc/neutron/neutron.conf 文件
#vi /etc/neutron/neutron.conf

在 “[DEFAULT]” 下添加

rpc_backend = rabbit

auth_strategy = keystone

在[oslo_messaging_rabbit]下添加

rabbit_host = controller

rabbit_userid = openstack

rabbit_password = 000000

在[keystone_authtoken]下添加

auth_uri = http://controller:5000

auth_url = http://controller:35357

memcached_servers = controller:11211

auth_type = password

project_domain_name = default

user_domain_name = default

project_name = service

username = neutron

password = 000000

在 [oslo_concurrency] 部分,配置锁路径:

lock_path = /var/lib/neutron/tmp

2.编辑/etc/neutron/plugins/ml2/linuxbridge_agent.ini文件
#vi /etc/neutron/plugins/ml2/linuxbridge_agent.ini

在 [linux_bridge] 部分,将公共虚拟网络和公共物理网络接口对应起来

physical_interface_mappings = provider:eth1

在 [vxlan] 部分,启用VXLAN覆盖网络,配置覆盖网络的物理网络接口的IP地址,启用layer-2 population:

enable_vxlan = True

local_ip = 192.168.100.20

l2_population = True

在  [securitygroup] 部分,启用安全组并配置 Linuxbridge iptables firewall driver:

enable_security_group = True

firewall_driver = neutron.agent.linux.iptables_firewall.IptablesFirewallDriver


3.编辑/etc/nova/nova.conf文件并完成下面的操作
#vi /etc/nova/nova.conf

在[neutron]部分添加

url = http://controller:9696

auth_url = http://controller:35357

auth_type = password

project_domain_name = default

user_domain_name = default

region_name = RegionOne

project_name = service

username = neutron

password = 000000
11.compute节点重启服务并设置开机自启
# systemctl restart openstack-nova-compute.service neutron-linuxbridge-agent.service

# systemctl enable neutron-linuxbridge-agent.service
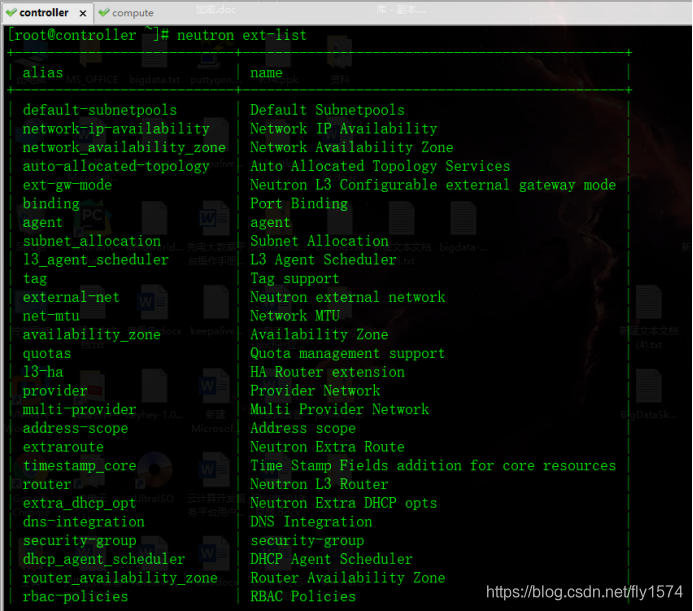
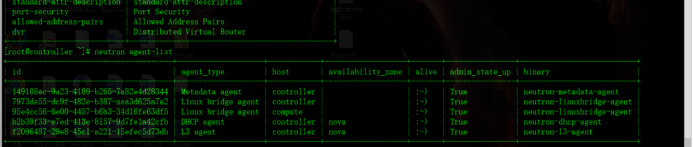
12.验证(Controller节点)
#. /root/admin-openrc

#neutron ext-list

#neutron agent-list
(六)OpenStack---M版---双节点搭建---Neutron安装和配置的更多相关文章
- (八)OpenStack---M版---双节点搭建---Cinder安装和配置
↓↓↓↓↓↓↓↓视频已上线B站↓↓↓↓↓↓↓↓ >>>>>>传送门 1.创建数据库并授权 2.获得admin凭证执行管理员命令并创建服务证书 3.创建块存储设备AP ...
- (二)OpenStack---M版---双节点搭建---数据库安装和配置
↓↓↓↓↓↓↓↓视频已上线B站↓↓↓↓↓↓↓↓ >>>>>>传送门 本章节只在Controller节点执行 1.安装Mariadb数据库来存储信息 2.NoSQL数 ...
- (十)OpenStack---M版---双节点搭建---Heat安装和配置
↓↓↓↓↓↓↓↓视频已上线B站↓↓↓↓↓↓↓↓ >>>>>>传送门 本章节仅在Controller节点执行 1.Controller节点执行安装和配置 2.验证操作 ...
- (三)OpenStack---M版---双节点搭建---Keystone安装和配置
↓↓↓↓↓↓↓↓视频已上线B站↓↓↓↓↓↓↓↓ >>>>>>传送门 1.创建keystone数据库 2.创建随机密码作为管理员令牌 3.安装openstack-ke ...
- (五)OpenStack---M版---双节点搭建---Nova安装和配置
↓↓↓↓↓↓↓↓视频已上线B站↓↓↓↓↓↓↓↓ >>>>>>传送门 1.创建nova 和 nova_api数据库 2.获得 admin 凭证来获取只有管理员能执行的 ...
- (四)OpenStack---M版---双节点搭建---Glance安装和配置
↓↓↓↓↓↓↓↓视频已上线B站↓↓↓↓↓↓↓↓ >>>>>>传送门 1.创建glance数据库 2.获得 admin 凭证来获取只有管理员能执行的命令的访问权限 3 ...
- (七)OpenStack---M版---双节点搭建---Dashboard安装和配置
↓↓↓↓↓↓↓↓视频已上线B站↓↓↓↓↓↓↓↓ >>>>>>传送门 1.安装并配置 2.重启apache和memcached服务 3.验证 4.在Web界面创建网络 ...
- (九)OpenStack---M版---双节点搭建---Swift(单节点)安装和配置
↓↓↓↓↓↓↓↓视频已上线B站↓↓↓↓↓↓↓↓ >>>>>>传送门 本次搭建仅采用Compute单节点做swift组件 1.Controller安装并配置控制节点 ...
- (一)OpenStack---M版---双节点搭建---基础环境配置
↓↓↓↓↓↓↓↓视频已上线B站↓↓↓↓↓↓↓↓ >>>>>>传送门 配置如下 本次搭建采用2台4核4G的虚拟机,也可以用2台2核4G 主机名 配置 网络 Contr ...
随机推荐
- Java多线程编程(二)对象及变量的并发访问
一.synchronized同步方法 1.方法内的变量为线程安全 “非线程安全”问题存在于“实例变量”中,如果是方法内部的私有变量,则不存在“非线程安全”问题,所得结果也就是“线程安全”的了. 示例: ...
- 数据结构(四十)平衡二叉树(AVL树)
一.平衡二叉树的定义 平衡二叉树(Self-Balancing Binary Search Tree或Height-Balanced Binary Search Tree),是一种二叉排序树,其中每一 ...
- 在vue中使用Ueditor
今天研究的主角是:UEditor UEditor是由百度WEB前端研发部开发的所见即所得的开源富文本编辑器,具有轻量.可定制.用户体验优秀等特点. 版本有很多 我用的是:[1.4.3.3 PHP 版本 ...
- Xbim.GLTF源码解析(一):简介
原创作者:flowell,转载请标明出处:https://www.cnblogs.com/flowell/p/10838972.html 简介 Xbim.GLTF是将IFC文件转换成GLTF文件的一个 ...
- 腾讯云上面部署PHP运行环境
现在云服务器已经很普及了,其价格.安全优势等成为不少开发者的首选.本人由于兴趣爱好,从朋友那边借了一个过来玩了两天,下面就分享整个部署流程吧. 1. 先到腾讯云官网购买服务器,这边就不演示.很简单,跟 ...
- TCP连接的关闭
原文地址:http://lib.csdn.net/article/computernetworks/17264 TCP连接的关闭有两个方法close和shutdown,这篇文章将尽量精简的说明它们 ...
- (Java) AES-128 数据加密
package com.vcgeek.hephaestus.utils; import javax.crypto.Cipher; import javax.crypto.spec.SecretKeyS ...
- LVS DR模式实践
client:192.168.4.10/24 proxy:192.168.4.5/24 VIP: 192.168.4.15/24 web1:192.168.4.100/24 VIP:192.168 ...
- 使用ASP.NET Core 3.x 构建 RESTful API - 2. 什么是RESTful API
1. 使用ASP.NET Core 3.x 构建 RESTful API - 1.准备工作 什么是REST REST一词最早是在2000年,由Roy Fielding在他的博士论文<Archit ...
- 史上最全 Java 中各种锁的介绍
更多精彩原创内容请关注:JavaInterview,欢迎 star,支持鼓励以下作者,万分感谢. 锁的分类介绍 乐观锁与悲观锁 锁的一种宏观分类是乐观锁与悲观锁.乐观锁与悲观锁并不是特定的指哪个锁(J ...