
Steps to Install Hadoop on CentOS/RHEL 6---reference
http://tecadmin.net/steps-to-install-hadoop-on-centosrhel-6/#
The Apache Hadoop software library is a framework that allows for the distributed processing of large data sets across clusters of computers using simple programming models. Read More
This article will help you for step by step install and configure single node hadoop cluster.
Step 1. Install Java
Before installing hadoop make sure you have java installed on your system. If you do not have java installed use following article to install Java.
Steps to install JAVA on CentOS and RHEL 5/6
Step 2. Create User Account
Create a system user account to use for hadoop installation.
# useradd hadoop

# passwd hadoop
Changing password for user hadoop.

New password:

Retype new password:

passwd: all authentication tokens updated successfully.
Step 3. Configuring Key Based Login
Its required to setup hadoop user to ssh itself without password. Using following method it will enable key based login for hadoop user.
# su - hadoop

$ ssh-keygen -t rsa

$ cat ~/.ssh/id_rsa.pub >> ~/.ssh/authorized_keys

$ chmod 0600 ~/.ssh/authorized_keys

$ exit
Step 4. Download and Extract Hadoop Source
Downlaod hadoop latest availabe version from its official site, and follow below steps.
# mkdir /opt/hadoop

# cd /opt/hadoop/

# wget http://apache.mesi.com.ar/hadoop/common/hadoop-1.2.1/hadoop-1.2.1.tar.gz

# tar -xzf hadoop-1.2.1.tar.gz

# mv hadoop-1.2.1 hadoop

# chown -R hadoop /opt/hadoop

# cd /opt/hadoop/hadoop/
Step 5: Configure Hadoop
First edit hadoop configuration files and make following changes.
5.1 Edit core-site.xml
# vim conf/core-site.xml
#Add the following inside the configuration tag

<property>

    <name>fs.default.name</name>

    <value>hdfs://localhost:9000/</value>

</property>

<property>

    <name>dfs.permissions</name>

    <value>false</value>

</property>
5.2 Edit hdfs-site.xml
# vim conf/hdfs-site.xml
# Add the following inside the configuration tag

<property>

	<name>dfs.data.dir</name>

	<value>/opt/hadoop/hadoop/dfs/name/data</value>

	<final>true</final>

</property>

<property>

	<name>dfs.name.dir</name>

	<value>/opt/hadoop/hadoop/dfs/name</value>

	<final>true</final>

</property>

<property>

	<name>dfs.replication</name>

	<value>2</value>

</property>
5.3 Edit mapred-site.xml
# vim conf/mapred-site.xml
# Add the following inside the configuration tag

<property>

        <name>mapred.job.tracker</name>

	<value>localhost:9001</value>

</property>
5.4 Edit hadoop-env.sh
# vim conf/hadoop-env.sh
export JAVA_HOME=/opt/jdk1.7.0_17

export HADOOP_OPTS=-Djava.net.preferIPv4Stack=true
Set JAVA_HOME path as per your system configuration for java.
Next to format Name Node
# su - hadoop

$ cd /opt/hadoop/hadoop

$ bin/hadoop namenode -format
13/06/02 22:53:48 INFO namenode.NameNode: STARTUP_MSG:

/************************************************************

STARTUP_MSG: Starting NameNode

STARTUP_MSG:   host = srv1.tecadmin.net/192.168.1.90

STARTUP_MSG:   args = [-format]

STARTUP_MSG:   version = 1.2.1

STARTUP_MSG:   build = https://svn.apache.org/repos/asf/hadoop/common/branches/branch-1.2 -r 1479473; compiled by 'hortonfo' on Mon May  6 06:59:37 UTC 2013

STARTUP_MSG:   java = 1.7.0_17

************************************************************/

13/06/02 22:53:48 INFO util.GSet: Computing capacity for map BlocksMap

13/06/02 22:53:48 INFO util.GSet: VM type       = 32-bit

13/06/02 22:53:48 INFO util.GSet: 2.0% max memory = 1013645312

13/06/02 22:53:48 INFO util.GSet: capacity      = 2^22 = 4194304 entries

13/06/02 22:53:48 INFO util.GSet: recommended=4194304, actual=4194304

13/06/02 22:53:49 INFO namenode.FSNamesystem: fsOwner=hadoop

13/06/02 22:53:49 INFO namenode.FSNamesystem: supergroup=supergroup

13/06/02 22:53:49 INFO namenode.FSNamesystem: isPermissionEnabled=true

13/06/02 22:53:49 INFO namenode.FSNamesystem: dfs.block.invalidate.limit=100

13/06/02 22:53:49 INFO namenode.FSNamesystem: isAccessTokenEnabled=false accessKeyUpdateInterval=0 min(s), accessTokenLifetime=0 min(s)

13/06/02 22:53:49 INFO namenode.FSEditLog: dfs.namenode.edits.toleration.length = 0

13/06/02 22:53:49 INFO namenode.NameNode: Caching file names occuring more than 10 times

13/06/02 22:53:49 INFO common.Storage: Image file of size 112 saved in 0 seconds.

13/06/02 22:53:49 INFO namenode.FSEditLog: closing edit log: position=4, editlog=/opt/hadoop/hadoop/dfs/name/current/edits

13/06/02 22:53:49 INFO namenode.FSEditLog: close success: truncate to 4, editlog=/opt/hadoop/hadoop/dfs/name/current/edits

13/06/02 22:53:49 INFO common.Storage: Storage directory /opt/hadoop/hadoop/dfs/name has been successfully formatted.

13/06/02 22:53:49 INFO namenode.NameNode: SHUTDOWN_MSG:

/************************************************************

SHUTDOWN_MSG: Shutting down NameNode at srv1.tecadmin.net/192.168.1.90

************************************************************/
Step 6: Start Hadoop Services
Use the following command to start all hadoop services.
$ bin/start-all.sh
[sample output]
starting namenode, logging to /opt/hadoop/hadoop/libexec/../logs/hadoop-hadoop-namenode-ns1.tecadmin.net.out

localhost: starting datanode, logging to /opt/hadoop/hadoop/libexec/../logs/hadoop-hadoop-datanode-ns1.tecadmin.net.out

localhost: starting secondarynamenode, logging to /opt/hadoop/hadoop/libexec/../logs/hadoop-hadoop-secondarynamenode-ns1  .tecadmin.net.out

starting jobtracker, logging to /opt/hadoop/hadoop/libexec/../logs/hadoop-hadoop-jobtracker-ns1.tecadmin.net.out

localhost: starting tasktracker, logging to /opt/hadoop/hadoop/libexec/../logs/hadoop-hadoop-tasktracker-ns1.tecadmin.ne  t.out
Step 7: Test and Access Hadoop Services
Use ‘jps‘ command to check if all services are started well.
$ jps

or

$ $JAVA_HOME/bin/jps
26049 SecondaryNameNode

25929 DataNode

26399 Jps

26129 JobTracker

26249 TaskTracker

25807 NameNode
Web Access URLs for Services
  http://srv1.tecadmin.net:50030/   for the Jobtracker

  http://srv1.tecadmin.net:50070/   for the Namenode

  http://srv1.tecadmin.net:50060/   for the Tasktracker
Hadoop JobTracker: 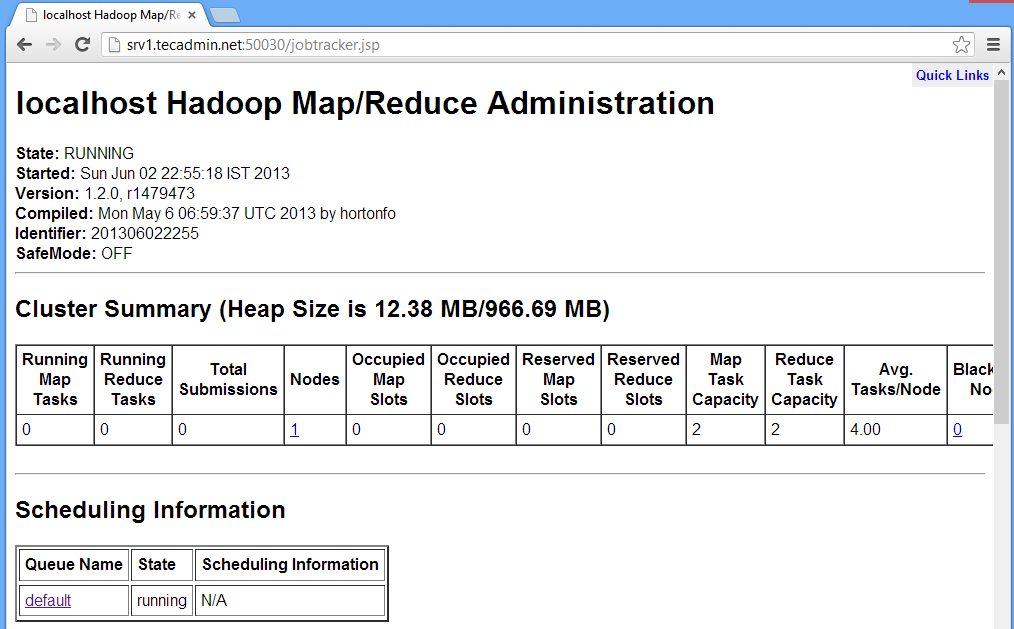
Hadoop Namenode: 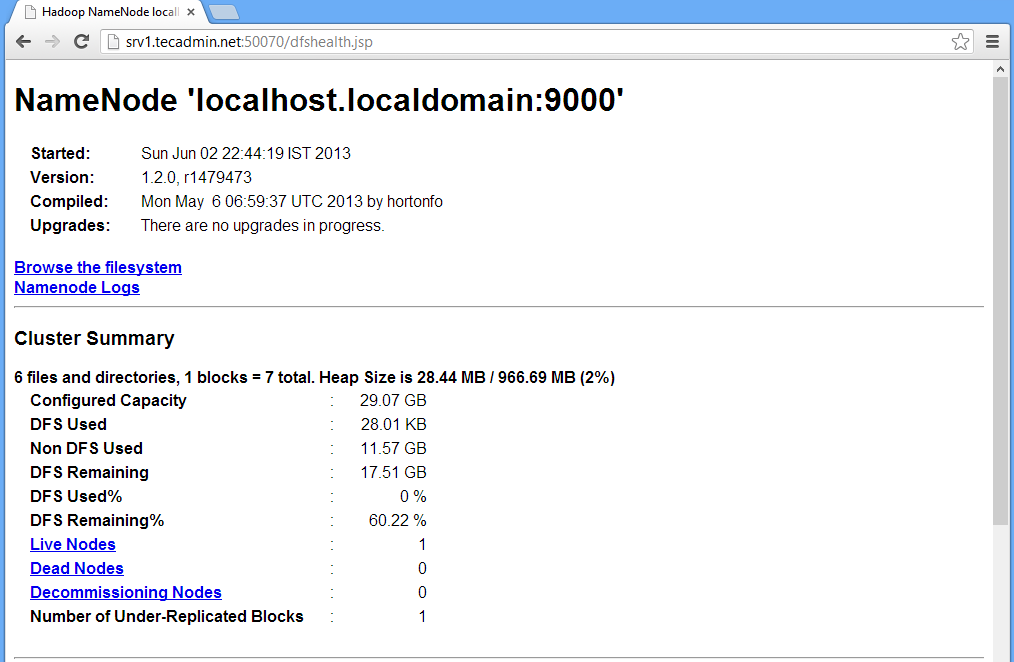
Hadoop TaskTracker: 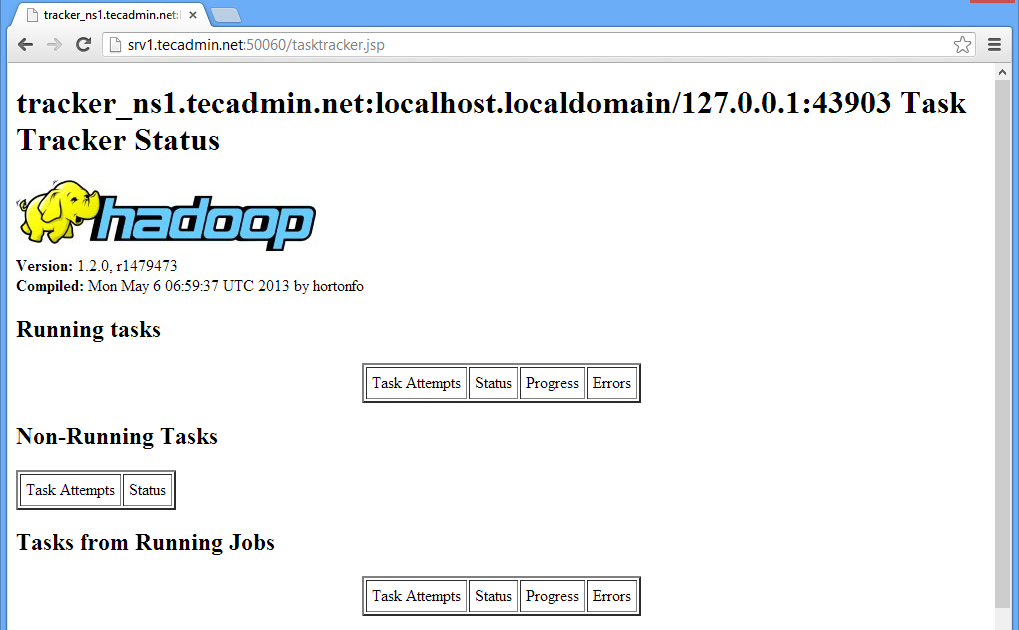
Step 8: Stop Hadoop Services
If you do no need anymore hadoop. Stop all hadoop services using following command.
# bin/stop-all.sh
Steps to Install Hadoop on CentOS/RHEL 6---reference的更多相关文章
- How to Install Ruby on CentOS/RHEL 7/6
How to Install Ruby on CentOS/RHEL 7/6 . Ruby is a dynamic, object-oriented programming language foc ...
- Install LAMP Server (Apache, MariaDB, PHP) On CentOS/RHEL/Scientific Linux 7
Install LAMP Server (Apache, MariaDB, PHP) On CentOS/RHEL/Scientific Linux 7 By SK - August 12, 201 ...
- How to Install Tomcat 8.0.27 on CentOS/RHEL and Ubuntu【转】
https://tecadmin.net/install-tomcat-8-on-centos-rhel-and-ubuntu/ Apache Tomcat is an opensource web ...
- Install Google Chrome on Fedora 28/27, CentOS/RHEL 7.5 (在 fedora 28 等 上 安装 chrome)
今天在使用 fedora 安装 chrome 的时候遇到了问题,今天进行将安装过程进行记录下来.需要安装第三方软件仓库. 我们需要进行安装 fedora-workstation-repositorie ...
- [转载]How to Install Google Chrome 39 in CentOS/RHEL 6 and Fedora 19/18
FROM: http://tecadmin.net/install-google-chrome-in-centos-rhel-and-fedora/ Google Chrome is a freewa ...
- [转载]Install Opera 12.16 Web Browser in CentOS/RHEL and Fedora
FROM: http://tecadmin.net/install-opera-web-browser-in-centos-rhel-fedora/ Opera is an modern web br ...
- 转: How to Install MongoDB 3.2 on CentOS/RHEL & Fedora (简单易懂)
from: http://tecadmin.net/install-mongodb-on-centos-rhel-and-fedora/ MongoDB (named from “huMONGOus ...
- How To Install Java on CentOS and Fedora
PostedDecember 4, 2014 453.8kviews JAVA CENTOS FEDORA Introduction This tutorial will show you how ...
- 在CentOS/RHEL/Scientific Linux 6下安装 LAMP
LAMP 是服务器系统中开源软件的一个完美组合.它是 Linux .Apache HTTP 服务器.MySQL 数据库.PHP(或者 Perl.Python)的第一个字母的缩写代码.对于很多系统管理员 ...
随机推荐
- XE8 hash
c++builder xe8 hash calc md5.sha256.sha384.sha512 file and string sha256.sha384.sha512 must call l ...
- Spark生态系统BDAS
目前,Spark已经发展成为包含众多子项目的大数据计算平台. 伯克利将Spark的整个生态系统称为伯克利数据分析栈(BDAS). 其核心框架是Spark,同时BDAS涵盖支持结构化数据SQL查询与分析 ...
- HD1049Climbing Worm
Problem Description An inch worm is at the bottom of a well n inches deep. It has enough energy to c ...
- StringBuffer与StringBuilder的异同
一. 相同之处 1.均是可变字符序列,可以随机的改变字符串,如追加操作或插入操作 2. 均使用了内部缓冲区,并且当内部缓冲区溢出后均会自动增大 二. 不同之处 1. Stri ...
- EasyMock使用手记
from:http://www.blogjava.net/supercrsky/articles/162766.html Mock 对象能够模拟领域对象的部分行为,并且能够检验运行结果是否和预期的一致 ...
- jquery自定义方法
总结: * jQuery中添加自定义或函数方法1,如 $.fn.extend({'aa':function(){}}) 或 jQuery.fn.aa=function(){}, 这种调用时就得这样,$ ...
- 上门洗车App 竟然是块大肥肉!
http://www.leiphone.com/k-xiche-app-idea.html 打车App.租车App.防违规App我们见得多,但洗车App你一定没听过,之前在一次创业路演上碰到一个做上门 ...
- Response.Redirect 打开新窗体的两种方法
普通情况下,Response.Redirect 方法是在server端进行转向,因此,除非使用 Response.Write("<script>window.location=' ...
- Swift学习笔记十四
Deinitialization 当类的实例对象即将要被释放时,会立即调用deinitializer,通过deinit关键字来定义deinitializer,和initializer一样,它也只存在于 ...
- C++在堆上申请和释放内存 - new & delete
// 动态申请内存, 指向一个未初始化的整型 int *pi = new int; // pi指向一个整型值,初始化为0 int *pi = new int(); // value of i is 1 ...