springboot-vue-JWT使用
springboot-vue-JWT使用
后端引入依赖:
     <dependency>

            <groupId>io.jsonwebtoken</groupId>

            <artifactId>jjwt</artifactId>

            <version>0.7.0</version>

        </dependency>
JWT工具类:

package com.tangzhe.util;

import java.security.interfaces.RSAPrivateKey;

import java.security.interfaces.RSAPublicKey;

import java.util.Date;

import io.jsonwebtoken.Claims;

import io.jsonwebtoken.ExpiredJwtException;

import io.jsonwebtoken.Jwts;

import io.jsonwebtoken.SignatureAlgorithm;

import io.jsonwebtoken.SignatureException;

/**

 * API调用认证工具类,采用RSA加密

 */

public class JWTUtils {

    private static RSAPrivateKey priKey;

    private static RSAPublicKey pubKey;

    private static class SingletonHolder {

        private static final JWTUtils INSTANCE = new JWTUtils();

    }

    public synchronized static JWTUtils getInstance(String modulus, String privateExponent, String publicExponent) {

        if (priKey == null && pubKey == null) {

            priKey = RSAUtils.getPrivateKey(modulus, privateExponent);

            pubKey = RSAUtils.getPublicKey(modulus, publicExponent);

        }

        return SingletonHolder.INSTANCE;

    }

    public synchronized static void reload(String modulus, String privateExponent, String publicExponent) {

        priKey = RSAUtils.getPrivateKey(modulus, privateExponent);

        pubKey = RSAUtils.getPublicKey(modulus, publicExponent);

    }

    public synchronized static JWTUtils getInstance() {

        if (priKey == null && pubKey == null) {

            priKey = RSAUtils.getPrivateKey(RSAUtils.modulus, RSAUtils.private_exponent);

            pubKey = RSAUtils.getPublicKey(RSAUtils.modulus, RSAUtils.public_exponent);

        }

        return SingletonHolder.INSTANCE;

    }

    /**

     * 获取Token

     * @param uid 用户ID

     * @param exp 失效时间,单位分钟

     * @return

     */

    public static String getToken(String uid, int exp) {

        long endTime = System.currentTimeMillis() + 1000 * exp;

        return Jwts.builder().setSubject(uid).setExpiration(new Date(endTime))

                .signWith(SignatureAlgorithm.RS512, priKey).compact();

    }

    /**

     * 获取Token

     * @param uid 用户ID

     * @return

     */

    public String getToken(String uid) {

        long endTime = System.currentTimeMillis() + 1000 * 60 * 1440;

        return Jwts.builder().setSubject(uid).setExpiration(new Date(endTime))

                .signWith(SignatureAlgorithm.RS512, priKey).compact();

    }

    /**

     * 检查Token是否合法

     * @param token

     * @return JWTResult

     */

    public JWTResult checkToken(String token) {

        try {

            Claims claims = Jwts.parser().setSigningKey(pubKey).parseClaimsJws(token).getBody();

            String sub = claims.get("sub", String.class);

            return new JWTResult(true, sub, "合法请求", ResponseCode.SUCCESS_CODE.getCode());

        } catch (ExpiredJwtException e) {

            // 在解析JWT字符串时,如果‘过期时间字段’已经早于当前时间,将会抛出ExpiredJwtException异常,说明本次请求已经失效

            return new JWTResult(false, null, "token已过期", ResponseCode.TOKEN_TIMEOUT_CODE.getCode());

        } catch (SignatureException e) {

            // 在解析JWT字符串时,如果密钥不正确,将会解析失败,抛出SignatureException异常,说明该JWT字符串是伪造的

            return new JWTResult(false, null, "非法请求", ResponseCode.NO_AUTH_CODE.getCode());

        } catch (Exception e) {

            return new JWTResult(false, null, "非法请求", ResponseCode.NO_AUTH_CODE.getCode());

        }

    }

    public static class JWTResult {

        private boolean status;

        private String uid;

        private String msg;

        private int code;

        public JWTResult() {

            super();

        }

        public JWTResult(boolean status, String uid, String msg, int code) {

            super();

            this.status = status;

            this.uid = uid;

            this.msg = msg;

            this.code = code;

        }

        public int getCode() {

            return code;

        }

        public void setCode(int code) {

            this.code = code;

        }

        public String getMsg() {

            return msg;

        }

        public void setMsg(String msg) {

            this.msg = msg;

        }

        public boolean isStatus() {

            return status;

        }

        public void setStatus(boolean status) {

            this.status = status;

        }

        public String getUid() {

            return uid;

        }

        public void setUid(String uid) {

            this.uid = uid;

        }

    }

}
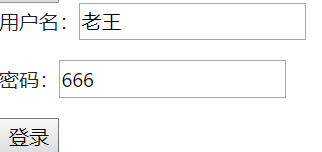
前端页面文件:
     <!-- 登录 -->

        <div>

            <p>用户名:<input v-model="username" /></p>

            <p>密码:<input v-model="password" /></p>

            <button @click="login">登录</button>

        </div>
...
login: function() {
    axios.post('http://localhost:8889/user/login', {
        username: this.username,
        password: this.password,
    })
        .then(function (response) {
            if (response.data.status) {
                alert(response.data.token);
            } else {
                alert("登录失败");
            }
        })
        .catch(function (error) {
            console.log(error);
        });
}
后端controller:
@PostMapping("/login")

    public Object login(@RequestBody LoginInfo loginInfo) {

        Map<String, Object> result = new HashMap<>();

        String token = userService.login(loginInfo);

        if (token == null) {

            result.put("status", false);

        } else {

            result.put("status", true);

            result.put("token", token);

        }

        return result;

    }
后端service:
public String login(LoginInfo loginInfo) {

        User user = userRepository.findByUsernameAndPassword(loginInfo.getUsername(), loginInfo.getPassword());

        if (user == null) {

            return null;

        }

        String token = JWTUtils.getInstance().getToken(user.getId() + "");

        return token;

    }
测试登录:
登录成功返回token

token本地存储:
存储在前端
               login: function() {

                    axios.post('http://localhost:8889/user/login', {

                        username: this.username,

                        password: this.password,

                    })

                        .then(function (response) {

                            if (response.data.status) {

                                alert(response.data.token);

                                // token本地存储

                                localStorage.setItem("token", response.data.token);

                            } else {

                                alert("登录失败");

                            }

                        })

                        .catch(function (error) {

                            console.log(error);

                        });

                }
// 从html本地存储中拿出token,设置到全局请求头中
axios.defaults.headers.common['Authorization'] = localStorage.getItem("token");
这样每次发送请求就能带上token的请求头了

后端解析请求头获取token,并借助jwt工具类解密出当前登录用户id:
public class LoginInfoUtils {

    /**

     * 获取当前登录用户id

     */

    public static String getLoginUserId(HttpServletRequest request) {

        String authorization = request.getHeader("Authorization");

        if (StringUtils.isNotBlank(authorization)) {

            JWTUtils.JWTResult result = JWTUtils.getInstance().checkToken(authorization);

            if (result.isStatus()) {

                return result.getUid();

            }

        }

        return null;

    }

}
后端控制台输出当前登录用户ID:
@GetMapping("/list")

    public List<User> list(HttpServletRequest request) {

        // 获取当前登录用户id

        System.out.println("当前用户ID: " + LoginInfoUtils.getLoginUserId(request));

        return userService.findAll();

    }
若还没登录则输出:当前用户ID: null
用户登录则输出:当前用户ID: 6
这样,前端发送请求时,请求头中带有后端登录接口返回的token值,
后端可以从请求头中获取token并通过JWT解密获得当前登录用户id,就可以在后端获取当前登录用户了。
springboot-vue-JWT使用的更多相关文章
- SpringBoot + Vue + ElementUI 实现后台管理系统模板 -- 后端篇(五): 数据表设计、使用 jwt、redis、sms 工具类完善注册登录逻辑
(1) 相关博文地址: SpringBoot + Vue + ElementUI 实现后台管理系统模板 -- 前端篇(一):搭建基本环境:https://www.cnblogs.com/l-y-h/p ...
- SpringBoot+Vue豆宝社区前后端分离项目手把手实战系列教程01---搭建前端工程
豆宝社区项目实战教程简介 本项目实战教程配有免费视频教程,配套代码完全开源.手把手从零开始搭建一个目前应用最广泛的Springboot+Vue前后端分离多用户社区项目.本项目难度适中,为便于大家学习, ...
- springboot之Jwt验证
简介 什么是JWT(Json Web Token) jwt是为了在网络应用环境间传递声明而执行的一种基于json的开放标准.该token被设计紧凑且安全的,特别适用于SSO场景. jwt的声明一般被用 ...
- springboot+vue前后端分离,nginx代理配置 tomcat 部署war包详细配置
1.做一个小系统,使用了springboot+vue 基础框架参考这哥们的,直接拿过来用,链接https://github.com/smallsnail-wh/interest 前期的开发环境搭建就不 ...
- SpringBoot集成JWT实现token验证
原文:https://www.jianshu.com/p/e88d3f8151db JWT官网: https://jwt.io/ JWT(Java版)的github地址:https://github. ...
- SpringBoot集成JWT 实现接口权限认证
JWT介绍 Json web token (JWT), 是为了在网络应用环境间传递声明而执行的一种基于JSON的开放标准((RFC 7519).该token被设计为紧凑且安全的, 特别适用于分布式站点 ...
- SpringBoot集成JWT实现权限认证
目录 一.JWT认证流程 二.SpringBoot整合JWT 三.测试 上一篇文章<一分钟带你了解JWT认证!>介绍了JWT的组成和认证原理,本文将介绍下SpringBoot整合JWT实现 ...
- SpringBoot+Vue+WebSocket 实现在线聊天
一.前言 本文将基于 SpringBoot + Vue + WebSocket 实现一个简单的在线聊天功能 页面如下: 在线体验地址:http://www.zhengqingya.com:8101 二 ...
- Springboot vue.js html 跨域 前后分离 shiro权限 集成代码生成器
本代码为 Springboot vue.js 前后分离 + 跨域 版本 (权限控制到菜单和按钮) 后台框架:springboot2.1.2+ mybaits+maven+接口 前端页面:html + ...
- .gitignore 标准模板 -适用于SpringBoot+Vue项目 -Idea+VSCode开发
.gitignore 标准模板 -适用于SpringBoot+Vue项目 node_modules/ target/ !.mvn/wrapper/maven-wrapper.jar ### STS # ...
随机推荐
- cocos2d::CCFileUtils::sharedFileUtils()->getFileData(szFile, "r", &bufferSize) 不同平台返回值不一样
string pathKey = CCFileUtils::sharedFileUtils()->fullPathForFilename(fileName); unsigned char* pB ...
- Java工具类(util) 之01- 数学运算工具(精确运算)
数学运算工具(精确运算) /** * * @author maple * */ public abstract class AmountUtil { private AmountUtil() { } ...
- 【[APIO2007]动物园】
我好\(sb\)啊,把\(>>\)打成\(<<\)结果就写了两节课 那个一个人只能看到五个动物显然很鬼畜 那我们就可以压这一维了 \(dp[i][s]\)表示从第\(i\)个位 ...
- Odoo模块添加logo
模块的static目录是专门用于存放静态文件内容如:图片.css等的.其中,description目录是存放关于模块的一些描述性的文件的,其中,模块的图标也放在下面,以icon命名.
- 【nodejs】学习笔记
学习链接:http://www.cnblogs.com/zhongweiv/p/nodejs_environment.html (一)简介及环境安装 Node.js是让Javascript脱离浏览器运 ...
- hdu_1009 贪心
FatMouse' Trade Time Limit: 2000/1000 MS (Java/Others) Memory Limit: 65536/32768 K (Java/Others)T ...
- Centos7 KDE 桌面Konsole 光标错位解决方法
在使用linux 系统,桌面为KDE 时,在使用Konsole 时,光标的位置是错位的. 如下图效果 解决办法 用命令进入/home/cfox/.kde/share/apps/konsole 修改S ...
- Linux 启动进程结束进程通用代码
linux启动springboot项目 start.sh #!/bin/sh rm -f tpid nohup java -jar restDate--SNAPSHOT.jar --spring.pr ...
- [LuoguP2403][SDOI2010]所驼门王的宝藏
题目描述 在宽广的非洲荒漠中,生活着一群勤劳勇敢的羊驼家族.被族人恭称为"先知"的Alpaca L. Sotomon是这个家族的领袖,外人也称其为"所驼门王". ...
- CentOS 7.0 防火墙操作
CentOS 7.0默认使用的是firewall作为防火墙,之前版本是使用iptables.所以在CentOS 7执行下面命令是无法查看防火墙状态的. [root@localhost ~]# serv ...