【ASP.NET Core快速入门】(十四)MVC开发:UI、 EF + Identity实现、注册实现、登陆实现
前言
之前我们进行了MVC的web页面的Cookie-based认证实现,接下来的开发我们要基于之前的MvcCookieAuthSample项目做修改。
MvcCookieAuthSample项目地址:http://www.cnblogs.com/wyt007/p/8128186.html
UI
我们首先在AccountController中添加两个Action
        public IActionResult Register()
     {

        return View();
        }

        public IActionResult Login()

        {

            return View();

        }
然后在Views文件夹下新增Account文件夹并新增Register.cshtml与Login.cshtml视图,样式我们尽量从上一节的Identity视图中拷贝过来。
我们还需要新建一个ViewModels,在ViewModels中新建RegisterViewModel.cs来接收表单提交的值以及来进行强类型视图
namespace MvcCookieAuthSample.ViewModels

{

    public class RegisterViewModel

    {

        //邮箱

        public string Email { get; set; }

        //密码

        public string Password { get; set; }

        //确认密码

        public string ConfirmedPassword { get; set; }

    }

}
Register.cshtml代码(只保留部分拷贝过来的内容,并加入强类型视图引用):
@{

    ViewData["Title"] = "Register";

}

@using MvcCookieAuthSample.ViewModels;

@model RegisterViewModel;

<h2>@ViewData["Title"]</h2>

<h3>@ViewData["Message"]</h3>

<div class="row">

    <div class="col-md-4">

        <form  method="post">

            <h4>Create a new account.</h4>

            <hr />

            <div class="form-group">

                <label asp-for="Email"></label>

                <input asp-for="Email" class="form-control" />

            </div>

            <div class="form-group">

                <label asp-for="Password"></label>

                <input asp-for="Password" class="form-control" />

            </div>

            <div class="form-group">

                <label asp-for="ConfirmedPassword"></label>

                <input asp-for="ConfirmedPassword" class="form-control" />

            </div>

            <button type="submit" class="btn btn-default">Register</button>

        </form>

    </div>

</div>
Login.cshtml代码(只保留部分拷贝过来的内容,并加入强类型视图引用):
@{

    ViewData["Title"] = "Login";

}

@using MvcCookieAuthSample.ViewModels;

@model RegisterViewModel;

<div class="row">

    <div class="col-md-4">

        <section>

            <form  method="post">

                <h4>Use a local account to log in.</h4>

                <hr />

                <div class="form-group">

                    <label asp-for="Email"></label>

                    <input asp-for="Email" class="form-control" />

                </div>

                <div class="form-group">

                    <label asp-for="Password"></label>

                    <input asp-for="Password" type="password" class="form-control" />

                </div>

                <div class="form-group">

                    <button type="submit" class="btn btn-default">Log in</button>

                </div>

            </form>

        </section>

    </div>

</div>
然后在_Layout.cshtml中添加导航代码:
<ul class="nav navbar-nav navbar-right">

    <li><a asp-area="" asp-controller="Account" asp-action="Register">Register</a></li>

    <li><a asp-area="" asp-controller="Account" asp-action="Login">Log in</a></li>

</ul>
然后运行网站,UI已经实现

EF + Identity实现
EF实现
首先我们添加一个Data文件夹,由于VSCode的代码提示不是很好,接下来我们用VS2017开发。
我们首先在Models文件夹下面新建ApplicationUser.cs与ApplicationUserRole.cs
ApplicationUser.cs代码:
using Microsoft.AspNetCore.Identity;

namespace MvcCookieAuthSample.Models

{

    public class ApplicationUser:IdentityUser<int>//不加int的话是默认主键为guid

    {

    }

}
ApplicationUserRole.cs代码:
using Microsoft.AspNetCore.Identity;

namespace MvcCookieAuthSample.Models

{

    public class ApplicationUserRole: IdentityRole<int>//不加int的话是默认主键为guid

    {

    }

}
然后在Data文件夹下新建一个ApplicationDbContext.cs类,使它继承IdentityDbContext
using Microsoft.AspNetCore.Identity.EntityFrameworkCore;

using Microsoft.EntityFrameworkCore;

using MvcCookieAuthSample.Models;

namespace MvcCookieAuthSample.Data

{

    public class ApplicationDbContext:IdentityDbContext<ApplicationUser, ApplicationUserRole,int>

    {

        public ApplicationDbContext(DbContextOptions<ApplicationDbContext> options):base(options)

        {

        }

    }

}
然后我们需要在Startup.cs添加EF的注册进来
//使用配置ApplicationDbContext使用sqlserver数据库,并配置数据库连接字符串

services.AddDbContext<ApplicationDbContext>(options=> {

    options.UseSqlServer(Configuration.GetConnectionString("DefaultConnection"));

});
然后我们需要在appsettings.json中配置数据库连接字符串
"ConnectionStrings": {

  "DefaultConnection": "Server=192.168.1.184;Database=aspnet-IdentitySample-9A22BB3E-8D53-4F44-B533-2EF927C959DE;Trusted_Connection=True;MultipleActiveResultSets=true;uid=sa;pwd=123456"

}
EF实现结束
Identity实现
我们需要在Startup.cs添加Identity的注册进来
//配置Identity

services.AddIdentity<ApplicationUser, ApplicationUserRole>()

    .AddEntityFrameworkStores<ApplicationDbContext>()

    .AddDefaultTokenProviders();
由于默认的Identity在密码上限制比较严格,我们把它改的宽松简单一点(不设置也行)
//修改Identity配置

services.Configure<IdentityOptions>(options =>

{

    options.Password.RequireLowercase = false;//需要小写

    options.Password.RequireNonAlphanumeric = false;//需要字母

    options.Password.RequireUppercase = false;//需要大写

});
然后我们把认证的地址改成/Account/Login

然后我们修改AccountController,加入以下代码
private UserManager<ApplicationUser> _userManager;//创建用户的

private SignInManager<ApplicationUser> _signInManager;//用来登录的

//依赖注入

public AccountController(UserManager<ApplicationUser> userManager, SignInManager<ApplicationUser> signInManager)

{

    _userManager = userManager;

    _signInManager = signInManager;

}

[HttpPost]

public async Task<IActionResult> Register(RegisterViewModel registerViewModel)

{

    var identityUser = new ApplicationUser

    {

        Email = registerViewModel.Email,

        UserName = registerViewModel.Email,

        NormalizedUserName = registerViewModel.Email

    };

    var identityResult=await _userManager.CreateAsync(identityUser, registerViewModel.Password);

    if (identityResult.Succeeded)

    {

        return RedirectToAction("Index", "Home");

    }

    return View();

}
完整的AccountController
using System;

using System.Collections.Generic;

using System.Diagnostics;

using System.Linq;

using System.Threading.Tasks;

using Microsoft.AspNetCore.Mvc;

using MvcCookieAuthSample.Models;

using Microsoft.AspNetCore.Authorization;

using Microsoft.AspNetCore.Authentication;

using Microsoft.AspNetCore.Authentication.Cookies;

using System.Security.Claims;

using MvcCookieAuthSample.ViewModels;

using Microsoft.AspNetCore.Identity;

namespace MvcCookieAuthSample.Controllers

{

    public class AccountController : Controller

    {

        private UserManager<ApplicationUser> _userManager;//创建用户的

        private SignInManager<ApplicationUser> _signInManager;//用来登录的

        //依赖注入

        public AccountController(UserManager<ApplicationUser> userManager, SignInManager<ApplicationUser> signInManager)

        {

            _userManager = userManager;

            _signInManager = signInManager;

        }

        public IActionResult Register()

        {

            return View();

        }

        [HttpPost]

        public async Task<IActionResult> Register(RegisterViewModel registerViewModel)

        {

            var identityUser = new ApplicationUser

            {

                Email = registerViewModel.Email,

                UserName = registerViewModel.Email,

                NormalizedUserName = registerViewModel.Email

            };

            var identityResult=await _userManager.CreateAsync(identityUser, registerViewModel.Password);

            if (identityResult.Succeeded)

            {

                return RedirectToAction("Index", "Home");

            }

            return View();

        }

        public IActionResult Login()

        {

            return View();

        }

        //登陆

        public IActionResult MakeLogin()

        {

            var claims=new List<Claim>(){

                new Claim(ClaimTypes.Name,"wyt"),

                new Claim(ClaimTypes.Role,"admin")

            };

            var claimIdentity= new ClaimsIdentity(claims,CookieAuthenticationDefaults.AuthenticationScheme);

            HttpContext.SignInAsync(CookieAuthenticationDefaults.AuthenticationScheme,new ClaimsPrincipal(claimIdentity));

            return Ok();

        }

        //登出

        public IActionResult Logout()

        {

            HttpContext.SignOutAsync(CookieAuthenticationDefaults.AuthenticationScheme);

            return Ok();

        }

    }

}
接下来我们重新生成一下,我们需要执行shell命令生成一下数据库,只有添加 Microsoft.EntityFrameworkCore.Tools 才会生成成功,否则会报以下错误

执行命令总是提示 未找到与命令“dotnet-ef”匹配的可执行文件,根据网上的解决办法引用 Microsoft.EntityFrameworkCore.Tools 问题依旧不能得到解决。
解决办法:
右击项目弹出菜单点击编辑***.csprog,增加如下配置。
<ItemGroup>

    <DotNetCliToolReference Include="Microsoft.EntityFrameworkCore.Tools.DotNet" Version="2.0.0" />

</ItemGroup>
执行增加配置命令后

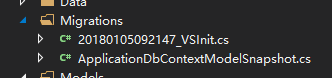
这时候Data文件夹下已经有新增的数据库更新配置文件了
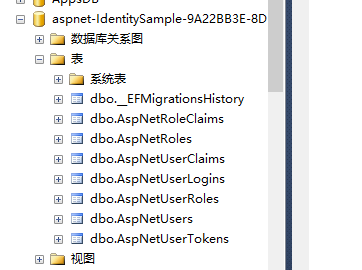
然后我们执行更新命令,执行成功后我们就可以看到数据库表已经生成了
接下来我们运行一下网站进行注册,注册成功,已经存储进数据库

注册实现
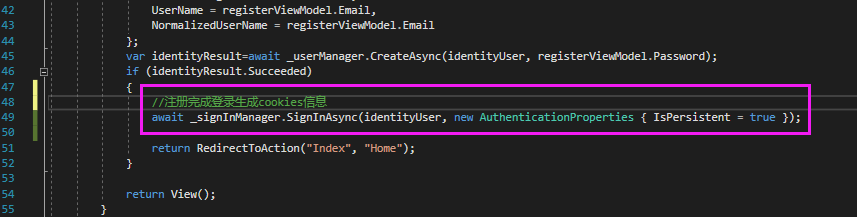
前面虽然可以注册了,但是我们注册完成后并没有生成Cookies信息。所以我们要在Register方法中进行登陆生成Cookies
完整的注册方法如下:
[HttpPost]

public async Task<IActionResult> Register(RegisterViewModel registerViewModel)

{

    var identityUser = new ApplicationUser

    {

        Email = registerViewModel.Email,

        UserName = registerViewModel.Email,

        NormalizedUserName = registerViewModel.Email

    };

    var identityResult=await _userManager.CreateAsync(identityUser, registerViewModel.Password);

    if (identityResult.Succeeded)

    {

        //注册完成登录生成cookies信息

        await _signInManager.SignInAsync(identityUser, new AuthenticationProperties { IsPersistent = true });

        return RedirectToAction("Index", "Home");

    }

    return View();

}
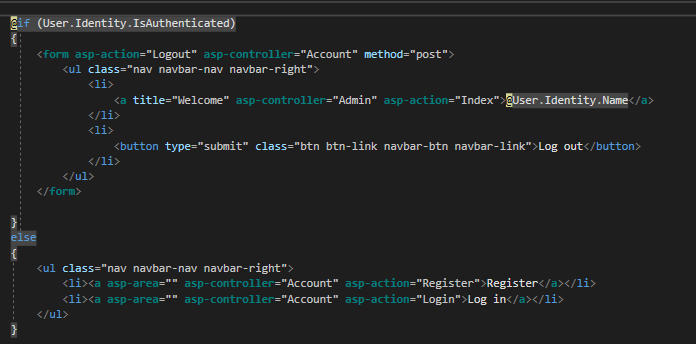
一般来说,如果用户已经注册或者登陆了,注册和登陆按钮是要隐藏的,所以我们接下来要修改_Layout.cshtml视图页面判断注册/登陆按钮是否应该隐藏
完整的_Layout.cshtml代码:
<!DOCTYPE html>
<html>
<head>
<meta charset="utf-8" />
<meta name="viewport" content="width=device-width, initial-scale=1.0" />
<title>@ViewData["Title"] - MvcCookieAuthSample</title> <environment include="Development">
<link rel="stylesheet" href="~/lib/bootstrap/dist/css/bootstrap.css" />
<link rel="stylesheet" href="~/css/site.css" />
</environment>
<environment exclude="Development">
<link rel="stylesheet" href="https://ajax.aspnetcdn.com/ajax/bootstrap/3.3.7/css/bootstrap.min.css"
asp-fallback-href="~/lib/bootstrap/dist/css/bootstrap.min.css"
asp-fallback-test-class="sr-only" asp-fallback-test-property="position" asp-fallback-test-value="absolute" />
<link rel="stylesheet" href="~/css/site.min.css" asp-append-version="true" />
</environment>
</head>
<body>
<nav class="navbar navbar-inverse navbar-fixed-top">
<div class="container">
<div class="navbar-header">
<button type="button" class="navbar-toggle" data-toggle="collapse" data-target=".navbar-collapse">
<span class="sr-only">Toggle navigation</span>
<span class="icon-bar"></span>
<span class="icon-bar"></span>
<span class="icon-bar"></span>
</button>
<a asp-area="" asp-controller="Home" asp-action="Index" class="navbar-brand">MvcCookieAuthSample</a>
</div>
<div class="navbar-collapse collapse">
<ul class="nav navbar-nav">
<li><a asp-area="" asp-controller="Home" asp-action="Index">Home</a></li>
<li><a asp-area="" asp-controller="Home" asp-action="About">About</a></li>
<li><a asp-area="" asp-controller="Home" asp-action="Contact">Contact</a></li>
</ul> @if (User.Identity.IsAuthenticated)
{
<form asp-action="Logout" asp-controller="Account" method="post">
<ul class="nav navbar-nav navbar-right">
<li>
<a title="Welcome" asp-controller="Admin" asp-action="Index">@User.Identity.Name</a>
</li>
<li>
<button type="submit" class="btn btn-link navbar-btn navbar-link">Log out</button>
</li>
</ul>
</form> }
else
{
<ul class="nav navbar-nav navbar-right">
<li><a asp-area="" asp-controller="Account" asp-action="Register">Register</a></li>
<li><a asp-area="" asp-controller="Account" asp-action="Login">Log in</a></li>
</ul>
} </div>
</div>
</nav>
<div class="container body-content">
@RenderBody()
<hr />
<footer>
<p>© - MvcCookieAuthSample</p>
</footer>
</div> <environment include="Development">
<script src="~/lib/jquery/dist/jquery.js"></script>
<script src="~/lib/bootstrap/dist/js/bootstrap.js"></script>
<script src="~/js/site.js" asp-append-version="true"></script>
</environment>
<environment exclude="Development">
<script src="https://ajax.aspnetcdn.com/ajax/jquery/jquery-2.2.0.min.js"
asp-fallback-src="~/lib/jquery/dist/jquery.min.js"
asp-fallback-test="window.jQuery"
crossorigin="anonymous"
integrity="sha384-K+ctZQ+LL8q6tP7I94W+qzQsfRV2a+AfHIi9k8z8l9ggpc8X+Ytst4yBo/hH+8Fk">
</script>
<script src="https://ajax.aspnetcdn.com/ajax/bootstrap/3.3.7/bootstrap.min.js"
asp-fallback-src="~/lib/bootstrap/dist/js/bootstrap.min.js"
asp-fallback-test="window.jQuery && window.jQuery.fn && window.jQuery.fn.modal"
crossorigin="anonymous"
integrity="sha384-Tc5IQib027qvyjSMfHjOMaLkfuWVxZxUPnCJA7l2mCWNIpG9mGCD8wGNIcPD7Txa">
</script>
<script src="~/js/site.min.js" asp-append-version="true"></script>
</environment> @RenderSection("Scripts", required: false)
</body>
</html>
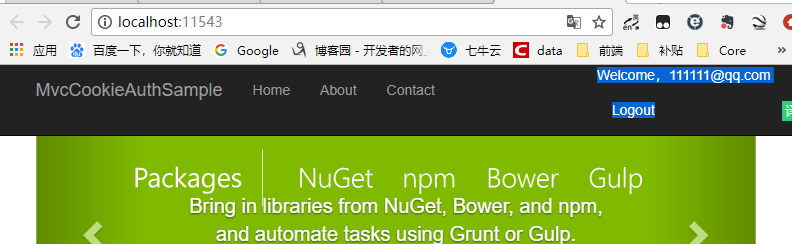
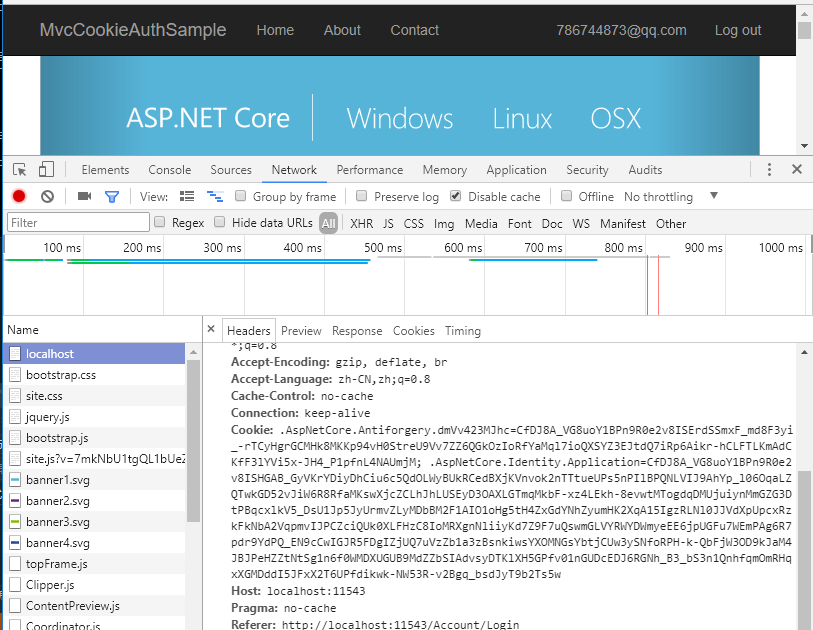
这时候登陆的之后的导航栏信息就有了
登陆实现
我们接下来实现一下登陆逻辑,我们首先新建一个HttpPost的Login的Action
[HttpPost]

public async Task<IActionResult> Login(RegisterViewModel loginViewModel)

{

    var user= await _userManager.FindByEmailAsync(loginViewModel.Email);

    if (user==null)

    {

        //异常先不写,后期统一收集

    }

    //账号密码先不做验证,需要可以自己写

    await _signInManager.SignInAsync(user, new AuthenticationProperties { IsPersistent = true });

    return RedirectToAction("Index", "Home");

}
然后我们把原来的Logout也顺便修改一下,不能是return OK();而要跳转到首页
//登出

public async Task<IActionResult> Logout()

{

    //HttpContext.SignOutAsync(CookieAuthenticationDefaults.AuthenticationScheme);

    //return Ok();

    await _signInManager.SignOutAsync();

    return RedirectToAction("Index", "Home");

}
接下来我们修改一下Login.cshtml页面
@{

    ViewData["Title"] = "Login";

}

@using MvcCookieAuthSample.ViewModels;

@model RegisterViewModel;

<div class="row">

    <div class="col-md-4">

        <section>

            <form  method="post" asp-controller="Account" asp-action="Login">

                <h4>Use a local account to log in.</h4>

                <hr />

                <div class="form-group">

                    <label asp-for="Email"></label>

                    <input asp-for="Email" class="form-control" />

                </div>

                <div class="form-group">

                    <label asp-for="Password"></label>

                    <input asp-for="Password" type="password" class="form-control" />

                </div>

                <div class="form-group">

                    <button type="submit" class="btn btn-default">Log in</button>

                </div>

            </form>

        </section>

    </div>

</div>
接下来我们可以运行一下登陆注册,即可成功登陆后跳转到首页,注册后跳转倒是首页
【ASP.NET Core快速入门】(十四)MVC开发:UI、 EF + Identity实现、注册实现、登陆实现的更多相关文章
- ASP.NET Core快速入门--学习笔记系列文章索引目录
课程链接:http://video.jessetalk.cn/course/explore 良心课程,大家一起来学习哈! 抓住国庆假期的尾巴完成了此系列课程的学习笔记输出! ASP.NET Core快 ...
- 【笔记目录2】【jessetalk 】ASP.NET Core快速入门_学习笔记汇总
当前标签: ASP.NET Core快速入门 共2页: 上一页 1 2 任务27:Middleware管道介绍 GASA 2019-02-12 20:07 阅读:15 评论:0 任务26:dotne ...
- 【笔记目录1】【jessetalk 】ASP.NET Core快速入门_学习笔记汇总
当前标签: ASP.NET Core快速入门 共2页: 1 2 下一页 任务50:Identity MVC:DbContextSeed初始化 GASA 2019-03-02 14:09 阅读:16 ...
- ASP.NET Core快速入门(第6章:ASP.NET Core MVC)--学习笔记
课程链接:http://video.jessetalk.cn/course/explore 良心课程,大家一起来学习哈! 任务40:介绍 1.Individual authentication 模板 ...
- 【ASP.NET Core快速入门】(五)命令行配置、Json文件配置、Bind读取配置到C#实例、在Core Mvc中使用Options
命令行配置 我们通过vs2017创建一个控制台项目CommandLineSample 可以看到现在项目以来的是dotnet core framework 我们需要吧asp.net core引用进来,我 ...
- ASP.NET Core 快速入门(Razor Pages + Entity Framework Core)
引子 自从 2009 年开始在博客园写文章,这是目前我写的最长的一篇文章了. 前前后后,我总共花了 5 天的时间,每天超过 3 小时不间断写作和代码调试.总共有 8 篇文章,每篇 5~6 个小结,总截 ...
- ASP.NET Core 2.1 : 十四.静态文件与访问授权、防盗链
我的网站的图片不想被公开浏览.下载.盗链怎么办?本文主要通过解读一下ASP.NET Core对于静态文件的处理方式的相关源码,来看一下为什么是wwwroot文件夹,如何修改或新增一个静态文件夹,为什么 ...
- ASP.NET Core 快速入门【第二弹-实战篇】
上篇讲了asp.net core在linux上的环境部署.今天我们将做几个小玩意实战一下.用到的技术和工具有mysql.websocket.AngleSharp(爬虫html解析).nginx多站点部 ...
- ASP.NET Core 快速入门(实战篇)
上篇讲了<asp.net core在linux上的环境部署>.今天我们将做几个小玩意实战一下.用到的技术和工具有mysql.websocket.AngleSharp(爬虫html解析).n ...
随机推荐
- 解析时间parse time
下面是一个解析时间的一个类 <?php /** * @purpose : 解析时间 * author: 袋鼠 * date: 2019/3/1 * time: 19:43 */ class Pa ...
- 动态设置bootstrapswitch状态
checkbox的html <input type="checkbox" name="mySwitch" id="mySwitch"& ...
- Redis 集群的安装
Redis 集群介绍.特性.规范等Redis 集群的安装(Redis3.0.3 + CentOS6.6_x64)要让 Redis3.0 集群正常工作至少需要 3 个 Master 节点,要想实现高可用 ...
- 创建Jdbc封装工具类
jdbc.propertie url=jdbc:mysql:///empye user=root password=root driver=com.mysql.jdbc.Driver 读取资源文件 ...
- 浅谈开发中python通过os模块存储数据
#其实本人很烦发博客,但为了面试还是发一下好,证明一下自己的能力 前言 首先说一下适用环境,在开发中我们有一些经常用到的数据(数据量大)需要存储起来. 存sql嘛又不合适,要知道在开发中每条sql语句 ...
- 认识Python和基础知识
一.第一个Python程序 用vim编写,格式: vim hello.py 然后按 i 进入插入模式开始写代码,注意所有的代码都要用英文输入法,先写括号和引号,再在引号里面写内容(为了避免引号.括号不 ...
- Spring Cloud,Dubbo及HSF对比
Round 1:背景 Dubbo,是阿里巴巴服务化治理的核心框架,并被广泛应用于阿里巴巴集团的各成员站点.阿里巴巴近几年对开源社区的贡献不论在国内还是国外都是引人注目的,比如:JStorm捐赠给Apa ...
- #Java学习之路——第一部分总结
今天主要是Java的入门以及idea的安装说实话,没有什么有技术含量的东西,发的也全是皮毛,但是在数组部分有很多细节需要注意,在JDK环境变量配置的地方不光光只有windows 的环境配置,还要掌握补 ...
- [Swift]LeetCode158. 用Read4来读取N个字符II $ Read N Characters Given Read4 II
The API: int read4(char *buf) reads 4 characters at a time from a file. The return value is the actu ...
- [Swift]LeetCode264.丑数 II | Ugly Number II
Write a program to find the n-th ugly number. Ugly numbers are positive numbers whose prime factors ...