
七、Vue组件库:Element、Swiper(轮播专用组件)
一、vue的Element组件库
官网:https://element.eleme.cn/#/zh-CN
1.1安装
推荐安装方法:
首先要进入项目目录
cnpm i element-ui -S

	或

npm i element-ui -S
1.1.2 CDN安装
直接引入无需安装:
<!-- 引入样式 -->

<link rel="stylesheet" href="https://unpkg.com/element-ui/lib/theme-chalk/index.css">

<!-- 引入组件库 -->

<script src="https://unpkg.com/element-ui/lib/index.js"></script>
1.2引入所有
官方:https://element.eleme.cn/2.13/#/zh-CN/component/quickstart
在src/main.js里引入
import Vue from 'vue';

import ElementUI from 'element-ui';

import 'element-ui/lib/theme-chalk/index.css';

import App from './App.vue';

Vue.use(ElementUI);

new Vue({

  el: '#app',

  render: h => h(App)

});
二、按需引入
第1步,安装 babel-plugin-component:
cnpm install babel-plugin-component -D
第2步,配置src/.babelrc文件
【1】配置部分
{

  "presets": [

    ["env", {

      "modules": false,

      "targets": {

        "browsers": ["> 1%", "last 2 versions", "not ie <= 8"]

      }

    }],

    "stage-2"

  ],

  "plugins": [

    "transform-vue-jsx", "transform-runtime",

    [//【1】配置部分

          "component",

          {

            "libraryName": "element-ui",

            "styleLibraryName": "theme-chalk"

          }

    ]//配置结尾

  ]

}
第3步,引入部分组件,比如 Button 和 Select
那么需要在 main.js 中写入以下内容(全局引入):
【1】引入所需组件
【2】使用对应组件(以下2个)
import Vue from 'vue';

import { Button, Select } from 'element-ui'; //【1】引入所需组件

import App from './App.vue';

Vue.use(Button) //【2】使用对应组件(以下2个)

Vue.use(Select)

/* 或写为

 * Vue.component(Button.name, Button);

 * Vue.component(Select.name, Select);

 */

new Vue({

  el: '#app',

  render: h => h(App)

});
完整组件列表和引入方式详见:
(完整组件列表以 components.json 为准)
https://element.eleme.cn/2.13/#/zh-CN/component/quickstart
第4步,全局配置(可选步骤)
在引入 Element 时,可以传入一个全局配置对象。该对象目前支持 size 与 zIndex 字段。size 用于改变组件的默认尺寸,zIndex 设置弹框的初始 z-index(默认值:2000)。按照引入 Element 的方式,具体操作如下:
完整引入 Element:
import Vue from 'vue';

import Element from 'element-ui';

Vue.use(Element, { size: 'small', zIndex: 3000 });
按需引入 Element:
import Vue from 'vue';

import { Button } from 'element-ui';

Vue.prototype.$ELEMENT = { size: 'small', zIndex: 3000 };

Vue.use(Button);
按照以上设置,项目中所有拥有 size 属性的组件的默认尺寸均为 'small',弹框的初始 z-index 为 3000。
第5步,开始使用
至此,一个基于 Vue 和 Element 的开发环境已经搭建完毕,现在就可以编写代码了。
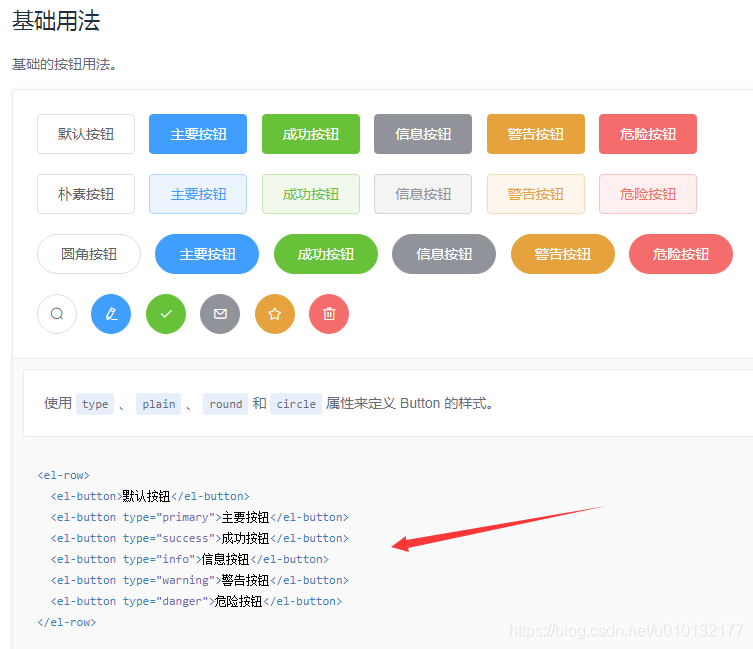
官方使用文档: https://element.eleme.cn/2.13/#/zh-CN/component/button
在文档中找到button组件使用方法,把想要的样式复制到想要的地方即可
src/parent.vue
【1】使用Element的组件
<template>

  <div class="parent">

    <h1>路由实例parent</h1>

    <!-- 【1】使用Element的组件 -->

    <el-button>默认按钮</el-button>

    <el-button type="primary">主要按钮</el-button>

    <el-button type="success">成功按钮</el-button>

    <el-button type="info">信息按钮</el-button>

    <el-button type="warning">警告按钮</el-button>

    <el-button type="danger">危险按钮</el-button>

    <hr/>

    <el-button plain>朴素按钮</el-button>

    <el-button type="primary" plain>主要按钮</el-button>

    <el-button type="success" plain>成功按钮</el-button>

    <el-button type="info" plain>信息按钮</el-button>

    <el-button type="warning" plain>警告按钮</el-button>

    <el-button type="danger" plain>危险按钮</el-button>

  </div>

</template>

<script>

  export default{

    name:'parent',

    components:{},

    data(){

      return{

        list:[]

      }

    },

    filters:{},

    directives:{},

  }

</script>

<style scoped>

</style>
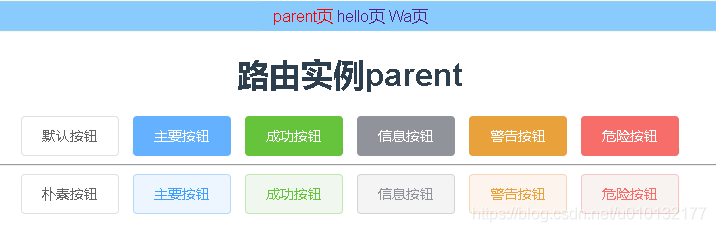
效果:
2.2 走马灯(轮播)图片展示组件使用示例
src/main.js
【1】以下2个为引入走马灯必须组件
【2】以下2个为使用走马灯组件
import Vue from 'vue'

import App from './App'

import router from '@/router.js'//先引入自定义路由

import {

  Button,

  Select,

  Carousel,//【1】以下2个为引入走马灯必须组件

  CarouselItem,

   } from 'element-ui';

Vue.use(Button)

Vue.use(Select)

Vue.use(Carousel)//【2】以下2个为使用走马灯必须组件

Vue.use(CarouselItem)

Vue.config.productionTip = false

new Vue({

  el: '#app',

  template: '<App/>',

  router,//把路由投到vue实例

  components: {

    App

  }

})
src/components/parent.vue
【0】定义一些图片
【1】使用Element的走马灯组件
【2】控制走马灯图片样式
<template>

  <div class="parent">

    <h1>路由实例parent</h1>

    <hr/>

    <!-- 【1】使用Element的走马灯组件 -->

    <el-carousel height="550px">

        <el-carousel-item v-for="(img,index) in imgs" :key="index">

          <img :src="img" /> <!-- 循环图片 -->

        </el-carousel-item>

      </el-carousel>

  </div>

</template>

<script>

  export default{

    name:'parent',

    components:{},

    data(){

      return{

        imgs:[//【0】定义一些图片

          "http://www.wallcoo.com/nature/2010_Landscape_1920_Desktop_11/wallpapers/1600x1200/Moose%20Pond%20and%20Mount%20Pleasant%20in%20Autumn%2C%20Maine.jpg",

          "https://cli.clewm.net/file/2015/01/20/81b71bc509d09368d4602a4b5b05d093.jpg",

          "https://hbimg.huabanimg.com/a84ec58661bc95efb974e2eebea2b3fd880a8fb12870a-ksYmbV_fw658",

        ]

      }

    },

    filters:{},

    directives:{},

  }

</script>

<style scoped>

  /* 【2】控制走马灯图片样式 */

    .el-carousel__item h3 {

      color: #475669;

      font-size: 14px;

      opacity: 0.75;

      line-height: 150px;

      margin: 0;

    }

    .el-carousel__item:nth-child(2n) {

       background-color: #99a9bf;

    }

    .el-carousel__item:nth-child(2n+1) {

       background-color: #d3dce6;

    }

    img {

      width:100%;

    }

</style>
效果:

三、Swiper(轮播专用组件)
官网:https://www.swiper.com.cn
Vue中使用:https://github.com/surmon-china/vue-awesome-swiper
官方API文档:https://www.swiper.com.cn/api/index.html
1.1 概述
- Swiper常用于移动端网站的内容触摸滑动
- Swiper是纯javascript打造的滑动特效插件,面向手机、平板电脑等移动终端。
- Swiper能实现触屏焦点图、触屏Tab切换、触屏多图切换等常用效果。
- Swiper开源、免费、稳定、使用简单、功能强大,是架构移动终端网站的重要选择!
1.2 安装Swiper
CDN
<link rel="stylesheet" href="path/to/swiper/dist/css/swiper.css"/>

<script type="text/javascript" src="path/to/swiper.js"></script>

<script type="text/javascript" src="path/to/vue.min.js"></script>

<script type="text/javascript" src="path/to/dist/vue-awesome-swiper.js"></script>

<script type="text/javascript">

  Vue.use(window.VueAwesomeSwiper)

</script>
NPM
首先要进入项目目录。
cnpm install vue-awesome-swiper --save

或

npm install vue-awesome-swiper --save
1.3 引入
1.3.1全局引入 (mount with global)
src/main.js
import Vue from 'vue'

import VueAwesomeSwiper from 'vue-awesome-swiper'

// require styles

import 'swiper/dist/css/swiper.css'

Vue.use(VueAwesomeSwiper, /* { default global options } */)
1.3.2组件内安装(局部引入)(mount with component)
src/components/parent.vue
// require styles

import 'swiper/dist/css/swiper.css'

import { swiper, swiperSlide } from 'vue-awesome-swiper'

export default {

  components: {

    swiper,

    swiperSlide

  }

}
1.3.3 ssr安装(mount with ssr)
// If used in nuxt.js/ssr, you should keep it only in browser build environment

if (process.browser) {

  const VueAwesomeSwiper = require('vue-awesome-swiper/dist/ssr')

  Vue.use(VueAwesomeSwiper)

}
1.4 定义插件相关参数(custom swiper plugin)
src/main.js
import Swiper from 'swiper'

Swiper.use({

  name: 'pluginName',

  params: {

    pluginSwitch: false,

  },

  on: {

    init() {

      if (!this.params.pluginSwitch) return

      console.log('init')

    },

    // swiper callback...

  }

})
1.5 使用swiper
参数配置相关详见官方API文档:https://www.swiper.com.cn/api/index.html
src/main.js
import Vue from 'vue'

import App from './App'

import router from '@/router.js'//先引入自定义路由

//[1]引入swiper

import VueAwesomeSwiper from 'vue-awesome-swiper'

import 'swiper/dist/css/swiper.css'

Vue.use(VueAwesomeSwiper)//[2]使用swiper

Vue.use(Carousel)//以下2个为使用走马灯必须组件

Vue.use(CarouselItem)

Vue.config.productionTip = false

new Vue({

  el: '#app',

  template: '<App/>',

  router,//把路由投到vue实例

  components: {

    App

  }

})
parent.vue
【0】-【3】
<template>

  <div class="parent">

    <h1>路由实例parent</h1>

    <hr/>

    <!-- 【1】使用swiper的轮播组件 -->

    <swiper :options="swiperOption" ref="mySwiper" @someSwiperEvent="callback">

        <!-- slides -->

        <swiper-slide v-for="(img,i) in imgs" :key="i">

          <img :src="img"/>

        </swiper-slide>

        <!-- Optional controls -->

        <div class="swiper-pagination"  slot="pagination"></div><!--分页器。如果放置在swiper-container外面,需要自定义样式。-->

        <!-- <div class="swiper-button-prev" slot="button-prev"></div>

        <div class="swiper-button-next" slot="button-next"></div>

        <div class="swiper-scrollbar"   slot="scrollbar"></div> -->

      </swiper>

  </div>

</template>

<script>

  export default{

    name:'parent',

    components:{},

    data(){

      return{

        //【2】配置轮播相关参数都写在此对象内部

        swiperOption: {

                  pagination: {

                      el: '.swiper-pagination',

                    },

                },

        imgs:[//【0】定义一些图片

          "https://hbimg.huabanimg.com/a84ec58661bc95efb974e2eebea2b3fd880a8fb12870a-ksYmbV_fw658",

          "https://cli.clewm.net/file/2015/01/20/81b71bc509d09368d4602a4b5b05d093.jpg",

          "https://hbimg.huabanimg.com/a84ec58661bc95efb974e2eebea2b3fd880a8fb12870a-ksYmbV_fw658",

        ]

      }

    },

    filters:{},

    directives:{},

  }

</script>

<style scoped>

  /* 【3】控制轮播图样式 */

.swiper-container{

    --swiper-theme-color: #ff6600;

    --swiper-pagination-color: #00ff33;/* 两种都可以 */

  }

img {

width:800px;

}

</style>
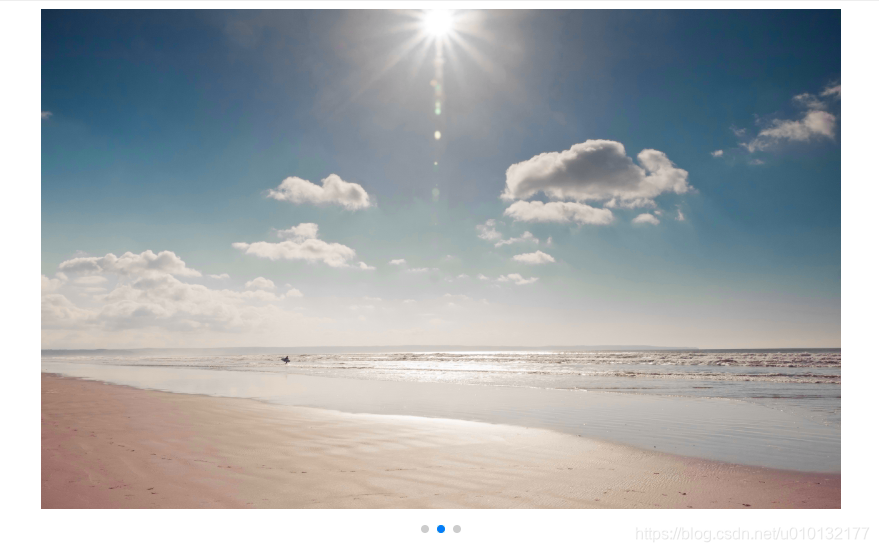
效果:
七、Vue组件库:Element、Swiper(轮播专用组件)的更多相关文章
- Ionic4.x 中的 UI 组件(UI Components) Slides 轮播图组件、Searchbar 组件、 Segment 组件
Slides 轮播图组件 Ionic4.x 中的轮播图组件是基于 swiper 插件,所以配置 slides 的属性需要在 swiper 的 api 中 找 Swiper Api:http://ida ...
- 微信小程序_(组件)swiper轮播图
微信小程序swiper轮播图组件官方文档 传送门 Learn: swiper组件 一.swiper组件 indicator-dots:是否显示面板指示点[默认值false] autoplay:是否自动 ...
- vue自定义轮播图组件 swiper
1.banner 组件 components/Banner.vue <!-- 轮播图 组件 --> <template> <div class="swiper- ...
- Vue实现音乐播放器(七):轮播图组件(二)
轮播图组件 <template> <div class="slider" ref="slider"> <div class=&qu ...
- reactjs-swiper react轮播图组件基于swiper
react轮播图组件基于swiper demo地址:http://reactjs-ui.github.io/reactjs-swiper/simple.html 1. 下载安装 npm install ...
- vue移动音乐app开发学习(三):轮播图组件的开发
本系列文章是为了记录学习中的知识点,便于后期自己观看.如果有需要的同学请登录慕课网,找到Vue 2.0 高级实战-开发移动端音乐WebApp进行观看,传送门. 完成后的页面状态以及项目结构如下: 一: ...
- Vue如何使用vue-awesome-swiper实现轮播效果
在Vue项目中如何实现轮播图的效果呢,在传统项目中第一个想到的一般都是swiper插件,代码简单好用.一开始我也是直接npm安装swiper然后照着之前的传统写法写,然而却没有效果,只会显示图片但没有 ...
- 原生JS面向对象思想封装轮播图组件
原生JS面向对象思想封装轮播图组件 在前端页面开发过程中,页面中的轮播图特效很常见,因此我就想封装一个自己的原生JS的轮播图组件.有了这个需求就开始着手准备了,代码当然是以简洁为目标,轮播图的各个功能 ...
- 视频swiper轮播
关于本次文章的内容,实际上是咪咕阅读详情页中的一个前端需求要做的效果,不过比起原需求,此次案例已经被删减掉许多部分了.音频部分舍弃,调用客户端接口舍弃,并做一些整理.最后留下的是这个精简版的案例.方便 ...
随机推荐
- Android之Builder对话框的一些常用方式
原文: http://blog.csdn.net/kkfdsa132/article/details/6322835 Android为我们提供几种对话框,主要有:AlertDialog.Progres ...
- 调用天气预报webservice接口
1.将 服务端的wsdl文档保存至 本地 http://ws.webxml.com.cn/WebServices/WeatherWS.asmx?WSDL 2.将里面的 <s:element re ...
- spring mvc web应用启动时就执行特定处理(线程启动)
package com.sdt.platform.index.controller; import java.net.URL; import java.util.List; import java.u ...
- JS回弹原理-高级
<!DOCTYPE html PUBLIC "-//W3C//DTD XHTML 1.0 Transitional//EN" "http://www.w3.org/ ...
- Spark实验汇总(七个实验相结合)
日期:2020.01.20 博客期:128 星期一 一.环境搭建篇 1.安装虚拟机应用程序 VMware Workstation Pro [编写日期:2020-01-20] 去到 官网 下载 VMwa ...
- Java异常的限制
Java异常的限制 我在看JAVA编程思想,讲到异常的限制,看的代码和解释,非常的难看下去,直接写了他的代码. java编程思想关于异常限制的逻辑 它以棒球比赛为例子. 定义了Inning(一局比赛) ...
- Codeforces 598D:Igor In the Museum
D. Igor In the Museum time limit per test 1 second memory limit per test 256 megabytes input standar ...
- Android View转换成图片保存
package zhangphil.viewtoimage; import java.io.File;import java.io.FileOutputStream; import android.o ...
- stm32_f103使用gcc编译的环境下printf打印函数的实现
前记 gcc编译使用的printf打印函数需要的底层函数是和其他编译器不同的,以前的是无法使用的,这里有两种方法,一种是使用gcc库里面的printf函数,自己实现底层IO函数_write.另外一 ...
- Python【day 19】反射
'''''' ''' 一.昨日内容回顾 1.依赖关系 1.弱关系.多态 1.松耦合 2.大象可以装冰箱,也可以装高压锅,就是多态 2.例子: 1.大象装冰箱 2.大象装高压锅 3.你打车 3.写法 大 ...