爬取伯乐在线文章(四)将爬取结果保存到MySQL
Item Pipeline
当Item在Spider中被收集之后,它将会被传递到Item Pipeline,这些Item Pipeline组件按定义的顺序处理Item。
每个Item Pipeline都是实现了简单方法的Python类,比如决定此Item是丢弃而存储。以下是item pipeline的一些典型应用:
- 验证爬取的数据(检查item包含某些字段,比如说name字段)
- 查重(并丢弃)
- 将爬取结果保存到文件或者数据库中
编写item
在items.py中进行编写
class JobBoleArticleItem(scrapy.Item):

    title = scrapy.Field()

    create_date = scrapy.Field()

    praise_num = scrapy.Field()

    collect_num = scrapy.Field()

    comment_num = scrapy.Field()

    front_image_url = scrapy.Field()
编写之后在提取文章逻辑里面进行实例化
    def parse_detail(self,response):

        print("目前爬取的URL是:"+response.url)

        #提取文章的具体逻辑

        article_item = JobBoleArticleItem()

        front_image_url = response.meta.get("front_image_url", "")

        #  获取文章标题

        title = response.css('.entry-header h1::text').extract()[0]

        #  获取发布日期

        create_date = response.css('.entry-meta .entry-meta-hide-on-mobile::text').extract()[0].strip().replace("·", "")

        #  获取点赞数

        praise_num = response.css('.vote-post-up h10::text').extract()[0]

        #  获取收藏数

        collect_num = response.css('.post-adds .bookmark-btn::text').extract()[0].split(" ")[1]

        collect_match_re = re.match(r'.*?(\d+).*', collect_num)

        if collect_match_re:

            collect_num = int(collect_match_re.group(1))

        else:

            collect_num = 0

        #  获取评论数

        comment_num = response.css('.post-adds .hide-on-480::text').extract()[0]

        comment_match_re = re.match(r'.*?(\d+).*', comment_num)

        if comment_match_re:

            comment_num = int(comment_match_re.group(1))

        else:

            comment_num = 0

        content = response.css('div.entry').extract()[0]

        article_item["title"] = title

        article_item["create_date"] =create_date

        article_item["praise_num"] = praise_num

        article_item["collect_num"] = collect_num

        article_item["comment_num"] = comment_num

        article_item["front_image_url"] = front_image_url

        yield article_item
最后调用yield article_item之后,article_item会传递到pipelines.py里面
编写pipelines
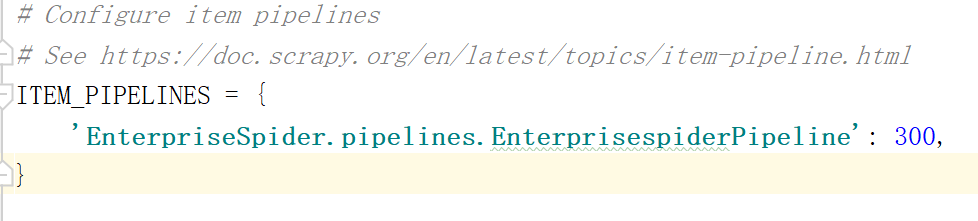
在pipelines.py文件中模板已经写好,但是如果要使之生效,需要修改settings.py文件,将ITEM_PIPELINES的注释去掉
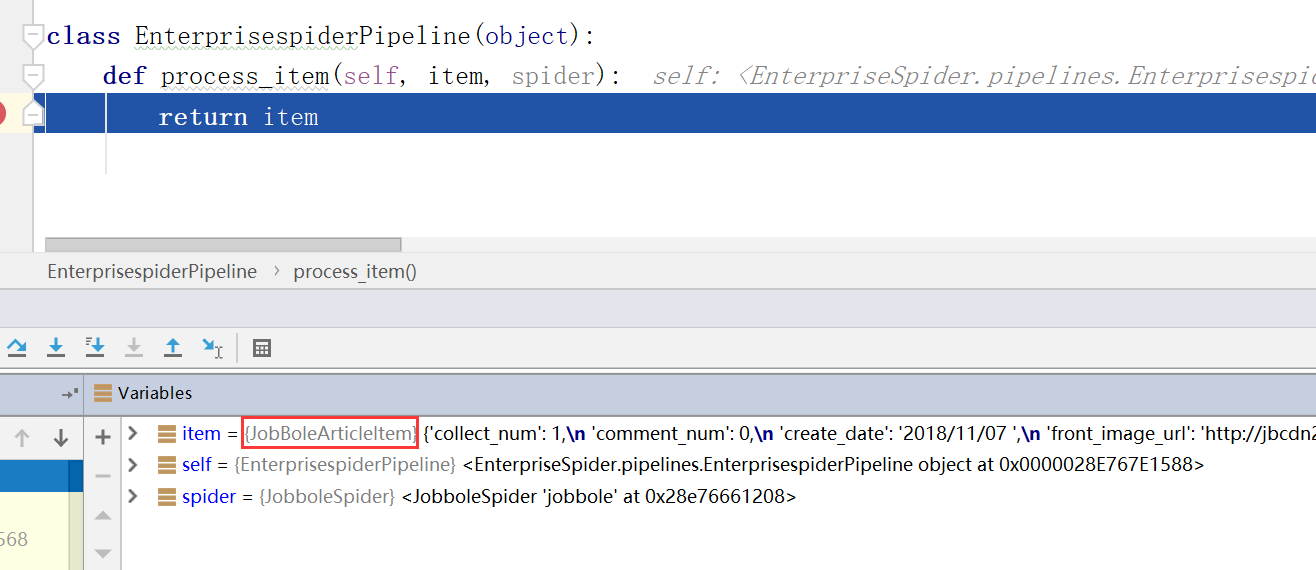
在pipelines.py里面打断点进行调试,看article_item是否能传递尽来
如何将图片保存到本地
继续修改item,scrapy提供了一些方法,方便快速开发,修改settings.py
ITEM_PIPELINES = {

    'EnterpriseSpider.pipelines.EnterprisespiderPipeline': 300,

    'scrapy.pipelines.images.ImagesPipeline': 1,

}

IMAGES_URLS_FIELD = "front_image_url"

project_dir = os.path.abspath(os.path.dirname(__file__))

IMAGES_STORE = os.path.join(project_dir, "images")
'scrapy.pipelines.images.ImagesPipeline': 1-------设置scrapy自带的普票保存方法,后面设置数字是流经管道的顺序,数字小的先流经
IMAGES_URLS_FIELD = "front_image_url"------从item中提取图片的URL,前面的IMAGES_URLS_FIELD是固定写法
project_dir = os.path.abspath(os.path.dirname(__file__)):获取当前项目的路径
IMAGES_STORE = os.path.join(project_dir, "images"):设置图片存储的路径
此时运行我们的main看是否能将图片保存
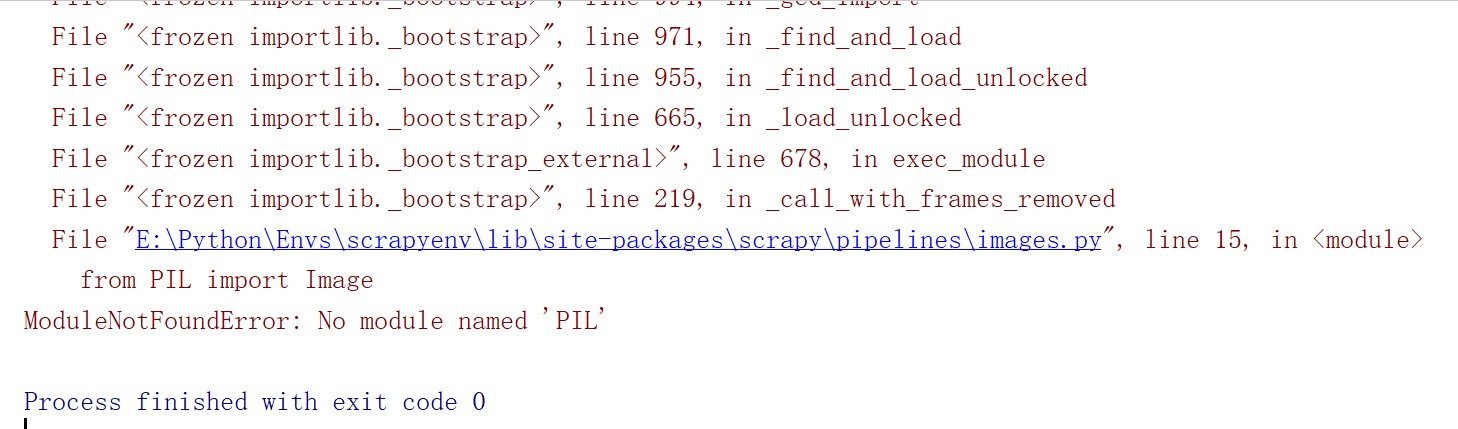
报错,没有PIL这个模块,这个是与图片文件相关的库,我们没有按照,所以报错,在虚拟环境中安装PIL模块
(scrapyenv) E:\Python\Envs>pip install -i https://pypi.douban.com/simple pillow
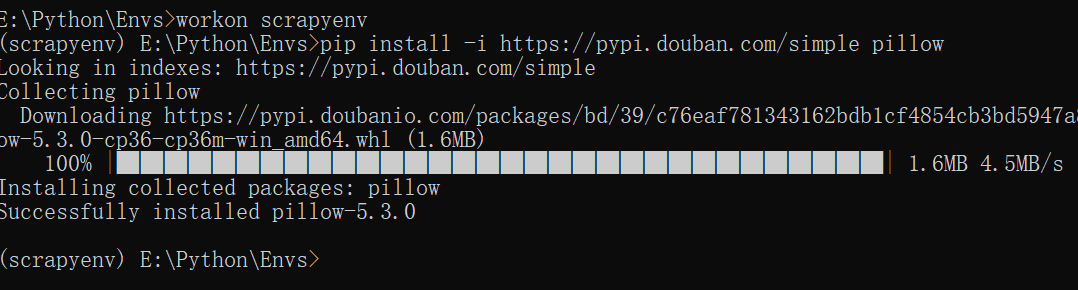
安装之后重新运行程序,此时又报另一个错误
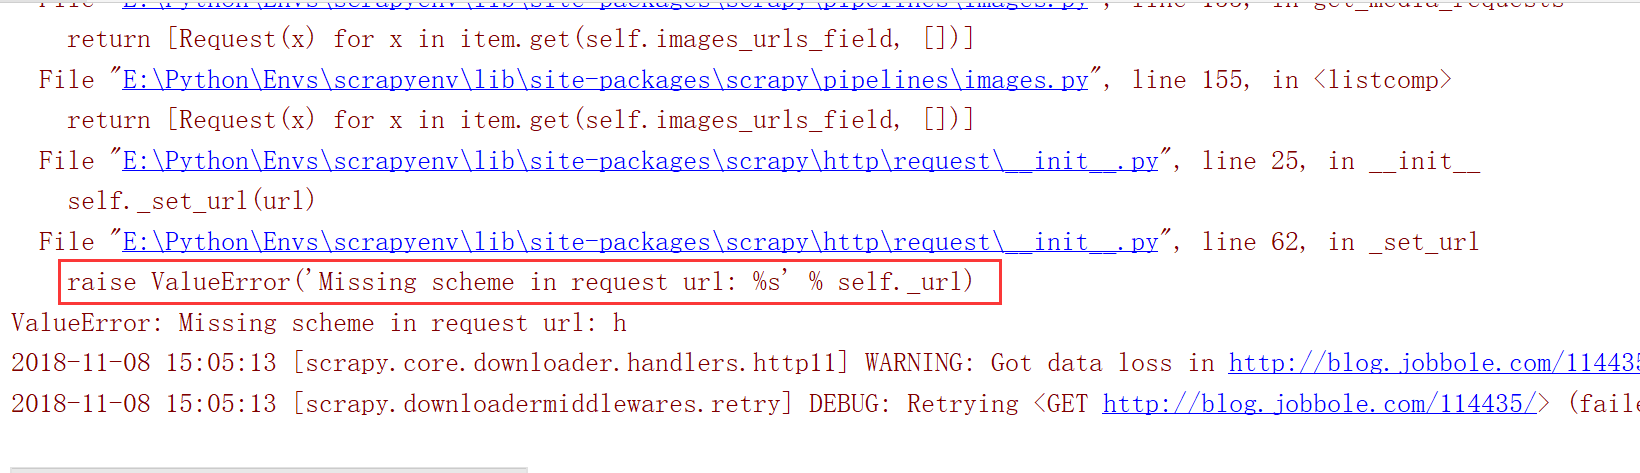
这个因为item传递到pipline的时候,下面的front_image_url 会被当做数组处理,但是我们在业务逻辑处理时候只是把他当做一个值进行处理
IMAGES_URLS_FIELD = "front_image_url"
修改业务处理逻辑
        article_item["title"] = title

        article_item["create_date"] =create_date

        article_item["praise_num"] = praise_num

        article_item["collect_num"] = collect_num

        article_item["comment_num"] = comment_num

        article_item["front_image_url"] = [front_image_url]

        yield article_item
修改完之后在运行程序,此时爬取的图片成功保存到images文件夹下面
既然图片已经保存到本地了,那么是否可以提取出路径,是否能把item里面的front_image_url与本地路径绑定在一起,此时我们需要定义一个自己pipeline,重载ImagesPipeline 中的item_completed
方法。
class ArticleImagePipeline(ImagesPipeline):

    def item_completed(self, results, item, info):

        pass
此时在修改settings.py文件,设置问我们自定义的图片处理pipeline
ITEM_PIPELINES = {

    'EnterpriseSpider.pipelines.EnterprisespiderPipeline': 300,

   # 'scrapy.pipelines.images.ImagesPipeline': 1,

    'EnterpriseSpider.pipelines.ArticleImagePipeline': 1,

}
打断点进行调试

重写item_completed方法
class ArticleImagePipeline(ImagesPipeline):

    def item_completed(self, results, item, info):

        for ok, value in results:

            image_file_path = results["path"]

        item["front_image_url"] = image_file_path

        return item
保存到JSON
class JsonWithEncodingPipeline(object):

    def __init__(self):

        self.file = codecs.open('article.json', 'w', encoding='utf-8')

    def process_item(self,item,spider):

        lines = json.dumps(dict(item), ensure_ascii=False) + "\n"

        self.file.write(lines)

        return item

    def spider_closed(self,spider):

        self.file.close()
保存到MySQL
同步保存
class MysqlPipeline(object):

    def __init__(self):

        self.conn = MySQLdb.connect('127.0.0.1', 'root', '', 'article', charset='utf8', use_unicode=True)

        self.cursor = self.conn.cursor()

    def process_item(self,item,spider):

        insert_sql = '''

        insert into jobbole(title,create_date,front_image_url,praise_num,collect_num,comment_num,url,url_object_id)

        VALUES (%s, %s, %s, %s, %s, %s, %s, %s)

        '''

        self.cursor.execute(insert_sql, (item['title'], item['create_date'], item["front_image_url"],

                                         item["praise_num"], item["collect_num"], item["comment_num"],

                                         item["url"], item["url_object_id"]))

        self.conn.commit()
异步保存
class MysqlTwistedPipeline(object):

    def __init__(self, dbpool):

        self.dbpool = dbpool

    @classmethod

    def from_settings(cls, settings):

        dbparams = dict(

            host=settings['MYSQL_HOST'],

            db=settings['MYSQL_DBNAME'],

            user=settings['MYSQL_USER'],

            password=settings['MYSQL_PASSWORD'],

            charset='utf8',

            cursorclass=MySQLdb.cursors.DictCursor,

            use_unicode=True,

        )

        dbpool = adbapi.ConnectionPool("MySQLdb", **dbparams)

        return cls(dbpool)

    def process_item(self,item,spider):

        #使用twisted将mysql插入变成异步插入

        query = self.dbpool.runInteraction(self.db_insert, item)

        query.addErrback(self.handler_error, item, spider)

    def handler_error(self,failuer,item,spider):

        #处理异步插入的异常

        print(failuer)

    def db_insert(self,cursor,item):

        insert_sql = '''

                    insert into jobbole(title,create_date,front_image_url,praise_num,collect_num,comment_num,url,url_object_id)

                    VALUES (%s, %s, %s, %s, %s, %s, %s, %s)

                '''

        cursor.execute(insert_sql, (item['title'], item['create_date'], item["front_image_url"],

                                         item["praise_num"], item["collect_num"], item["comment_num"],

                                         item["url"], item["url_object_id"]))
爬取伯乐在线文章(四)将爬取结果保存到MySQL的更多相关文章
- 第三天,爬取伯乐在线文章代码,编写items.py,保存数据到本地json文件中
一. 爬取http://blog.jobbole.com/all-posts/中的所有文章 1. 编写jobbole.py简单代码 import scrapy from scrapy. ...
- 爬取伯乐在线文章(五)itemloader
ItemLoader 在我们执行scrapy爬取字段中,会有大量的CSS或是Xpath代码,当要爬取的网站多了,要维护起来很麻烦,为解决这类问题,我们可以根据scrapy提供的loader机制. 导入 ...
- 爬取伯乐在线文章(二)通过xpath提取源文件中需要的内容
爬取说明 以单个页面为例,如:http://blog.jobbole.com/110287/ 我们可以提取标题.日期.多少个评论.正文内容等 Xpath介绍 1. xpath简介 (1) xpath使 ...
- Scrapy爬取伯乐在线文章
首先搭建虚拟环境,创建工程 scrapy startproject ArticleSpider cd ArticleSpider scrapy genspider jobbole blog.jobbo ...
- scrapy爬取伯乐在线文章数据
创建项目 切换到ArticleSpider目录下创建爬虫文件 设置settings.py爬虫协议为False 编写启动爬虫文件main.py
- python爬虫scrapy框架——爬取伯乐在线网站文章
一.前言 1. scrapy依赖包: 二.创建工程 1. 创建scrapy工程: scrapy staratproject ArticleSpider 2. 开始(创建)新的爬虫: cd Artic ...
- 爬虫实战——Scrapy爬取伯乐在线所有文章
Scrapy简单介绍及爬取伯乐在线所有文章 一.简说安装相关环境及依赖包 1.安装Python(2或3都行,我这里用的是3) 2.虚拟环境搭建: 依赖包:virtualenv,virtualenvwr ...
- Scrapy爬取伯乐在线的所有文章
本篇文章将从搭建虚拟环境开始,爬取伯乐在线上的所有文章的数据. 搭建虚拟环境之前需要配置环境变量,该环境变量的变量值为虚拟环境的存放目录 1. 配置环境变量 2.创建虚拟环境 用mkvirtualen ...
- python爬虫实战(七)--------伯乐在线文章(模版)
相关代码已经修改调试成功----2017-4-21 一.说明 1.目标网址:伯乐在线 2.实现:如图字段的爬取 3.数据:存放在百度网盘,有需要的可以拿取 链接:http://pan.baidu.co ...
随机推荐
- 微信小程序之发送模板消息(通过openid推送消息给用户)
一.获取access_token access_token是接口调用的凭证,目前有效期为两个小时,需要定时刷新,重复获取将导致上次获取的access_token失效.(注:不建议每次调用需要acces ...
- 弹性盒模型flex
一.flex flex是flexible box的缩写,意为“弹性布局”: 定义弹性布局 display:flex; box{ display:flex; } 二.基本定义 我只简单的说一下容器和项目 ...
- Django的模板系统
一.语法 关于模板渲染只需要记住两种特殊符号(语法): {{ }} 和 {% %} (变量相关用{{ }} 逻辑相关用{% %}) 二.变量 在Django的模板语言中按照{{ 变量名 }}来使用 ...
- 2018-08-11 中文代码示例之Spring Boot 2.0.3问好
上次试用Spring Boot还是两年前: 中文代码示例之Spring Boot 1.3.3演示. 打算用在一个讨论组内小项目上, 于是从官网Building an Application with ...
- 获取请求的ip工具类
package com.example.util; import javax.servlet.http.HttpServletRequest; /** * get remote msg * 获取访问的 ...
- Android包管理机制(二)PackageInstaller安装APK
前言 在本系列上一篇文章Android包管理机制(一)PackageInstaller的初始化中我们学习了PackageInstaller是如何初始化的,这一篇文章我们接着学习PackageInsta ...
- pyinstaller使用错误 SyntaxError: Non-UTF-8 code starting with '\xb4' in file C:......
注:我的博客原本在CSDN,现转到博客园,图片采用以前的图片,并没有盗图. 在将.py文件打包时,出现了下列错误 >>C:\Users\小呆\PycharmProjects\pycha ...
- [20181015]为什么是3秒.txt
[20181015]为什么是3秒.txt --//以前测试:连接http://blog.itpub.net/267265/viewspace-2144765/=>为什么是12秒.txt.--// ...
- DAC连接
专用管理员连接是一种特殊的SQL Server服务器诊断性质的连接,用于在正常或者说标准连接形式无法连接SQL Server服务器的情况下连接到服务器进行服务器性能或者错误诊断.DAC同样支持安全加密 ...
- spring拦截器(interceptor)简介
1. 拦截器用途 (1)拦截未登录用户直接访问某些链接 (2)拦截日志信息 (3)拦截非法攻击,比如sql注入 2. 涉及jar.类 (1)spring-webmvc.jar (2)HandlerIn ...