Mybatis之连接池
一,前言
连接池有很多种,最为熟悉的比如c3p0,DBCP,druid等。
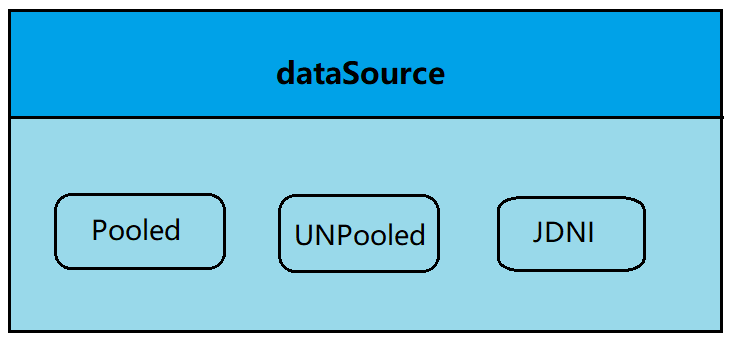
mybatis支持三种内置的数据源类型:
Pooled:实现dataSource接口,并且使用了池的思想。UNPooled:同样也是实现了dataSource接口,但是该类型并没有使用池的思想。JDNI:采用服务器提供的JDNI技术实现的,并且在不同服务器之间获取的连接池是不一样的。
注意:如果项目不是web或者maven的war工程,则是无法使用的。比如Tomcat服务器采用的就是DBCP连接池。
那么在Mybatis种如何配置数据源,如下所示:
<!-- 数据库连接池 -->

			<dataSource type="POOLED">

				<property name="driver" value="${driver}" />

				<property name="url" value="${url}" />

				<property name="username" value="${username}" />

				<property name="password" value="${password}" />

			</dataSource>
在dataSource属性中,type标签可以指定所使用的数据源类型。
二,UnPooled
1,首先从获取连接的源码开始。
@Override

  public Connection getConnection() throws SQLException {

    return doGetConnection(username, password);

  }
2,接着再进入到doGetConnection()方法中:
private Connection doGetConnection(String username, String password) throws SQLException {

    // 实例化一个集合

    Properties props = new Properties();

    if (driverProperties != null) {

      props.putAll(driverProperties);

    }

    // 判断用户名是否为空

    if (username != null) {

      props.setProperty("user", username);

    }

    // 判断密码是否为空

    if (password != null) {

      props.setProperty("password", password);

    }

    return doGetConnection(props);

  }
3,此时又返回一个doGetConnection(),这是重载的另一个方法。
private Connection doGetConnection(Properties properties) throws SQLException {

    // 初始化

    initializeDriver();

    // 获取一个连接对象

    Connection connection = DriverManager.getConnection(url, properties);

    configureConnection(connection);

    return connection;

  }
4,第一行代码中,调用了initializeDriver()方法。
private synchronized void initializeDriver() throws SQLException {

    if (!registeredDrivers.containsKey(driver)) {

      Class<?> driverType;

      try {

        if (driverClassLoader != null) {

            // 使用反射获取到连接驱动

          driverType = Class.forName(driver, true, driverClassLoader);

        } else {

          driverType = Resources.classForName(driver);

        }

        // DriverManager requires the driver to be loaded via the system ClassLoader.

        // http://www.kfu.com/~nsayer/Java/dyn-jdbc.html

        // 实例化连接驱动

          Driver driverInstance = (Driver)driverType.newInstance();

          // 注册驱动

        DriverManager.registerDriver(new DriverProxy(driverInstance));

        registeredDrivers.put(driver, driverInstance);

      } catch (Exception e) {

        throw new SQLException("Error setting driver on UnpooledDataSource. Cause: " + e);

      }

    }

  }
大致流程:
- 在获取连接对象时,调用
initializeDriver()方法判断是否已经注册连接驱动。 - 完成驱动注册,使用
DriverManager.getConnection获取一个连接对象。 - 将连接对象交给
configureConnection()方法,并设置自动提交事务,及事务的隔离级别。
private void configureConnection(Connection conn) throws SQLException {

    if (autoCommit != null && autoCommit != conn.getAutoCommit()) {

      conn.setAutoCommit(autoCommit);

    }

    if (defaultTransactionIsolationLevel != null) {

      conn.setTransactionIsolation(defaultTransactionIsolationLevel);

    }

  }
这种方式是不具备连接池的思想,如果频繁的创建和销毁连接对象,会影响程序的运行效率。
三,Pooled
再来看看使用连接池思想的数据源实现。
在此之前先来说说什么是连接池,连接池就是用于存储连接对象的一个容器。而容器就是一个集合,且必须是线程安全的,即两个线程不能拿到同一个连接对象。同时还要具备队列的特性:先进先出原则。
使用连接池的好处:避免频繁创建和关闭数据库连接造成的开销,节省系统资源。
1,先从获取连接源码开始。
@Override

  public Connection getConnection() throws SQLException {

    return popConnection(dataSource.getUsername(), dataSource.getPassword()).getProxyConnection();

  }
2,调用popConnection()方法(有点长)。
private PooledConnection popConnection(String username, String password) throws SQLException {

    boolean countedWait = false;

    PooledConnection conn = null;

    long t = System.currentTimeMillis();

    int localBadConnectionCount = 0;

    while (conn == null) {

      synchronized (state) {

        if (!state.idleConnections.isEmpty()) {

          // Pool has available connection

          conn = state.idleConnections.remove(0);

          if (log.isDebugEnabled()) {

            log.debug("Checked out connection " + conn.getRealHashCode() + " from pool.");

          }

        } else {

          // Pool does not have available connection

          if (state.activeConnections.size() < poolMaximumActiveConnections) {

            // Can create new connection

            conn = new PooledConnection(dataSource.getConnection(), this);

            if (log.isDebugEnabled()) {

              log.debug("Created connection " + conn.getRealHashCode() + ".");

            }

          } else {

            // Cannot create new connection

            PooledConnection oldestActiveConnection = state.activeConnections.get(0);

            long longestCheckoutTime = oldestActiveConnection.getCheckoutTime();

            if (longestCheckoutTime > poolMaximumCheckoutTime) {

              // Can claim overdue connection

              state.claimedOverdueConnectionCount++;

              state.accumulatedCheckoutTimeOfOverdueConnections += longestCheckoutTime;

              state.accumulatedCheckoutTime += longestCheckoutTime;

              state.activeConnections.remove(oldestActiveConnection);

              if (!oldestActiveConnection.getRealConnection().getAutoCommit()) {

                try {

                  oldestActiveConnection.getRealConnection().rollback();

                } catch (SQLException e) {

                  log.debug("Bad connection. Could not roll back");

                }

              }

              conn = new PooledConnection(oldestActiveConnection.getRealConnection(), this);

              conn.setCreatedTimestamp(oldestActiveConnection.getCreatedTimestamp());

              conn.setLastUsedTimestamp(oldestActiveConnection.getLastUsedTimestamp());

              oldestActiveConnection.invalidate();

              if (log.isDebugEnabled()) {

                log.debug("Claimed overdue connection " + conn.getRealHashCode() + ".");

              }

            } else {

              // Must wait

              try {

                if (!countedWait) {

                  state.hadToWaitCount++;

                  countedWait = true;

                }

                if (log.isDebugEnabled()) {

                  log.debug("Waiting as long as " + poolTimeToWait + " milliseconds for connection.");

                }

                long wt = System.currentTimeMillis();

                state.wait(poolTimeToWait);

                state.accumulatedWaitTime += System.currentTimeMillis() - wt;

              } catch (InterruptedException e) {

                break;

              }

            }

          }

        }

        if (conn != null) {

          // ping to server and check the connection is valid or not

          if (conn.isValid()) {

            if (!conn.getRealConnection().getAutoCommit()) {

              conn.getRealConnection().rollback();

            }

            conn.setConnectionTypeCode(assembleConnectionTypeCode(dataSource.getUrl(), username, password));

            conn.setCheckoutTimestamp(System.currentTimeMillis());

            conn.setLastUsedTimestamp(System.currentTimeMillis());

            state.activeConnections.add(conn);

            state.requestCount++;

            state.accumulatedRequestTime += System.currentTimeMillis() - t;

          } else {

            if (log.isDebugEnabled()) {

              log.debug("A bad connection (" + conn.getRealHashCode() + ") was returned from the pool, getting another connection.");

            }

            state.badConnectionCount++;

            localBadConnectionCount++;

            conn = null;

            if (localBadConnectionCount > (poolMaximumIdleConnections + poolMaximumLocalBadConnectionTolerance)) {

              if (log.isDebugEnabled()) {

                log.debug("PooledDataSource: Could not get a good connection to the database.");

              }

              throw new SQLException("PooledDataSource: Could not get a good connection to the database.");

            }

          }

        }

      }

    }

    if (conn == null) {

      if (log.isDebugEnabled()) {

        log.debug("PooledDataSource: Unknown severe error condition.  The connection pool returned a null connection.");

      }

      throw new SQLException("PooledDataSource: Unknown severe error condition.  The connection pool returned a null connection.");

    }

    return conn;

  }
分析:
1,判断连接池中是否有空闲的连接对象,有则直接返回。
2,如果连接池没有空闲的连接,先判断活动连接池是否小于连接池承载的最大数量,小于则再创建新的连接对象。
3,但是如果连接池已经达到最大承载数量,那么在连接池中就把最先进来的连接(oldest)返回出去。
四,总结
关于JDNI的使用就不分享了,因为博客不太清楚,没有去研究里面的细节实现,不过后期会对这一点进行补充。
那么关于Mybatis中另外两种数据源的使用,也总结完了,其最主要的就是关于池的思想,以及使用连接池带来的好处。
最后以上内容均是自主学习总结,如有不适之处欢迎留言指正。
感谢阅读!
Mybatis之连接池的更多相关文章
- Mybatis 的连接池技术
我们在前面的 WEB 课程中也学习过类似的连接池技术,而在 Mybatis 中也有连接池技术,但是它采用的是自 己的连接池技术.在 Mybatis 的 SqlMapConfig.xml 配置文件中,通 ...
- Mybatis 打开连接池和关闭连接池性能对比
1 创建数据库表 -- phpMyAdmin SQL Dump -- version 4.2.11 -- http://www.phpmyadmin.net -- -- Host: localhos ...
- Mybatis的连接池
先总结一个原则:mytatis的连接池最大值poolMaximumActiveConnections尽量跟服务器的并发访问量持平以至于大于并发访问量. 原因:在org.apache.ibatis.da ...
- spring 5.x 系列第6篇 —— 整合 mybatis + druid 连接池 (代码配置方式)
源码Gitub地址:https://github.com/heibaiying/spring-samples-for-all 项目目录结构 1.创建maven工程,除了Spring基本依赖外,还需要导 ...
- spring 5.x 系列第5篇 —— 整合 mybatis + druid 连接池 (xml配置方式)
源码Gitub地址:https://github.com/heibaiying/spring-samples-for-all 项目目录结构 1.创建maven工程,除了Spring基本依赖外,还需要导 ...
- 阶段3 1.Mybatis_07.Mybatis的连接池及事务_6 mybatis中的事务原理和自动提交设置
在实际的开发中,建议使用连接池的形式. JNDI的资料 H:\BaiDu\黑马传智JavaEE57期 2019最新基础+就业+在职加薪\讲义+笔记+资料\主流框架\31.会员版(2.0)-就业课(2. ...
- 阶段3 1.Mybatis_07.Mybatis的连接池及事务_3 mybatis连接池的分类
2.mybatis中的连接池 mybatis连接池提供了3种方式的配置: 配置的位置: 主配置文件SqlMapConfig.xml中的dataSourc ...
- Mybatis数据连接池的配置---增删改查(以及遇见的问题)
1.首先创建项目和各个文件,如图所示: 2.配置相关数据库连接 在jdbc.properties中加入 1 db.driver=com.mysql.jdbc.Driver 2 db.url=jdbc: ...
- mybatis 配置连接池
<!-- 配置数据源 --> <bean id="dataSource" class="com.alibaba.druid.pool.DruidData ...
随机推荐
- 传智播客C++视频学习笔记(1)
下载Visual Studio Community版本, #include<iostream> using namespace std; int main() { cout << ...
- Windows10访问Ubuntu子系统(WSL)的桌面环境
原文地址:https://blog.csdn.net/xmh19936688/article/details/90212960 Windows10访问Ubuntu子系统(WSL)的桌面环境文章目录Wi ...
- java 企业站源码 兼容手机平板PC 自适应响应式 SSM主流框架 freemaker 静态引擎
前台: 支持四套模版, 可以在后台切换 系统介绍: 1.网站后台采用主流的 SSM 框架 jsp JSTL,网站后台采用freemaker静态化模版引擎生成html 2.因为是生成的html,所以 ...
- Linux下VIM编译器的使用以及shell编程基础
VIM编译器的安装与使用 vim编辑器安装 在CentOS中,执行:yum -y install vim 普通模式 h: 左移一个字符 j: 下移一行 k: 上移一行 l: 右移一个字符 PageDo ...
- Java Web 笔记(3)
8.JSP 8.1.什么是JSP Java Server Pages : Java服务器端页面,也和Servlet一样,用于动态Web技术! 最大的特点: 写JSP就像在写HTML 区别: HTML只 ...
- PAT甲级代码仓库
大道至简,知易行难.希望能够坚持刷题. PAT甲级真题题库,附上我的代码. Label Title Score Code Level 1001 A+B Format 20 1001 * 1002 A+ ...
- SQL Server远程数据库操作(备份、还原等)
· SQL Server远程数据库备份到本地: exp sauser/sapassword@192.168.8.233:1433/DBName file=d:/backup.dmp OWNER=sum ...
- layui弹出表单提交后,界面model验证部分起作用
情况1----input属性中type=submit时验证都可以起作用,但是弹出层表单的返回值不能获取,所以用ajax二次提交后会出现重复添加数据的问题 情况2----input属性中type=but ...
- ArcMap 新建空白图层,并添加元素
想要添加新的图层,不能从File 里找,那里都是添加数据,貌似ArcGIS的定位是对数据的处理. 比如导入其他格式文件,或者导入对应的数据文件.excel csv cad 等,在此基础上进行分析,而不 ...
- 小程序texarea 输入内容回显失败
原因:输入框是textarea,输入的数据是含有换行符的字符串,小程序能渲染这种数据的标签有text,和textarea.(view 标签不能识别 /n 等字符) 1.使用text失败是由于不能覆盖视 ...