9.Spring Cloud Config统一管理微服务配置
Spring Cloud Config统一管理微服务配置
9.1. 为什么要统一管理微服务配置
9.2. Spring Cloud Config简介
Spring Cloud Config为分布式系统中的外部配置提供服务器和客户端支持。
使用Config Server,您可以在所有环境中管理应用程序的外部属性。客户端和服务器上
的概念映射与Spring Environment和PropertySource抽象相同,因此它们与Spring应用
程序非常契合,但可以与任何以任何语言运行的应用程序一起使用。随着应用程序通过
从开发人员到测试和生产的部署流程,您可以管理这些环境之间的配置,并确定应用程
序具有迁移时需要运行的一切。服务器存储后端的默认实现使用git,因此它轻松支持标
签版本的配置环境,以及可以访问用于管理内容的各种工具。很容易添加替代实现,并
使用Spring配置将其插入。
9.3. 编写Config Server
pom.xml
<project xmlns="http://maven.apache.org/POM/4.0.0" xmlns:xsi="http://www.w3.org/2001/XMLSchema-instance"

  xsi:schemaLocation="http://maven.apache.org/POM/4.0.0 http://maven.apache.org/xsd/maven-4.0.0.xsd">

  <modelVersion>4.0.</modelVersion>

  <parent>

        <groupId>com.itmuch.clod</groupId>

        <artifactId>spring-cloud-config</artifactId>

        <version>0.0.-SNAPSHOT</version>

        <relativePath/> <!-- lookup parent from repository -->

    </parent>

  <artifactId>spring-cloud-config-servers</artifactId>

  <packaging>jar</packaging>

  <properties>

    <project.build.sourceEncoding>UTF-</project.build.sourceEncoding>

  </properties>

  <dependencies>

        <dependency>

            <groupId>org.springframework.cloud</groupId>

            <artifactId>spring-cloud-config-server</artifactId>

        </dependency>

        <!--

        <dependency>

            <groupId>org.springframework.boot</groupId>

            <artifactId>spring-boot-starter-security</artifactId>

        </dependency>

        -->

  </dependencies>

</project>
启动类
package com.itmuch.cloud;

import org.springframework.boot.SpringApplication;

import org.springframework.boot.autoconfigure.SpringBootApplication;

import org.springframework.cloud.config.server.EnableConfigServer;

@EnableConfigServer

@SpringBootApplication

public class ConfigServerApplication {

    public static void main(String[] args) {

        SpringApplication.run(ConfigServerApplication.class, args);

    }

}
配置文件
server:

  port:

spring:

  application:

    name: spring-cloud-config-server

  cloud:

    config:

      server:

        git:

          uri: https://gitee.com/cyj930307/spring-cloud-starter/     # 配置git仓库的地址

#          search-paths: config-repo                              # git仓库地址下的相对地址,可以配置多个,用,分割。

#          username:                                              # git仓库的账号

#          password:                                              # git仓库的密码

#security:

#  basic:

#    enabled: true

#  user:

#    name: user

#    password:

#encrypt:

#  key: foo
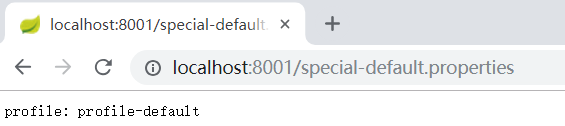
git仓库----》文件
profile: profile-default
访问路径
http://localhost:8001/abc-default.properties


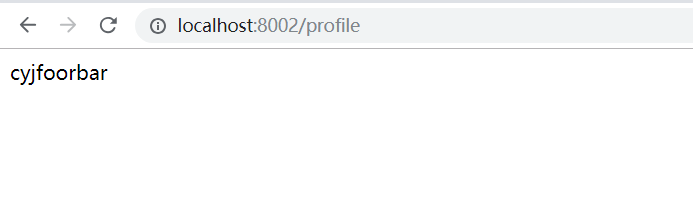
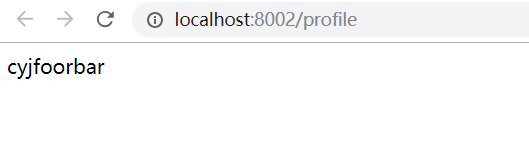
git仓库----》文件
profile: cyjfoorbar
访问路径

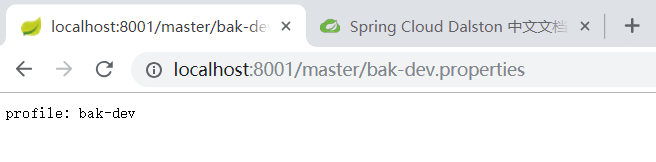
访问路径规则
/{application}/{profile}[/{label}]

/{application}-{profile}.yml

/{label}/{application}-{profile}.yml

/{application}-{profile}.properties

/{label}/{application}-{profile}.properties
其中“应用程序”作为SpringApplication中的spring.config.name注入(即常规的Spring Boot应用程序中通常是“应用程序”),
“配置文件”是活动配置文件(或逗号分隔列表的属性),“label”是可选的git标签(默认为“master”)。
9.4. 编写Config Client
pom.xml
<project xmlns="http://maven.apache.org/POM/4.0.0" xmlns:xsi="http://www.w3.org/2001/XMLSchema-instance"

  xsi:schemaLocation="http://maven.apache.org/POM/4.0.0 http://maven.apache.org/xsd/maven-4.0.0.xsd">

  <modelVersion>4.0.</modelVersion>

  <parent>

        <groupId>com.itmuch.clod</groupId>

        <artifactId>spring-cloud-config</artifactId>

        <version>0.0.-SNAPSHOT</version>

        <relativePath/> <!-- lookup parent from repository -->

    </parent>

  <artifactId>spring-cloud-config-clients</artifactId>

  <packaging>jar</packaging>

  <properties>

    <project.build.sourceEncoding>UTF-</project.build.sourceEncoding>

  </properties>

  <dependencies>

          <dependency>

            <groupId>org.springframework.cloud</groupId>

            <artifactId>spring-cloud-starter-config</artifactId>

        </dependency>

        <dependency>

            <groupId>org.springframework.boot</groupId>

            <artifactId>spring-boot-starter-web</artifactId>

        </dependency>

        <dependency>

            <groupId>org.springframework.boot</groupId>

            <artifactId>spring-boot-starter-test</artifactId>

            <scope>test</scope>

        </dependency>

  </dependencies>

</project>
配置文件
application.yml
server:

  port:
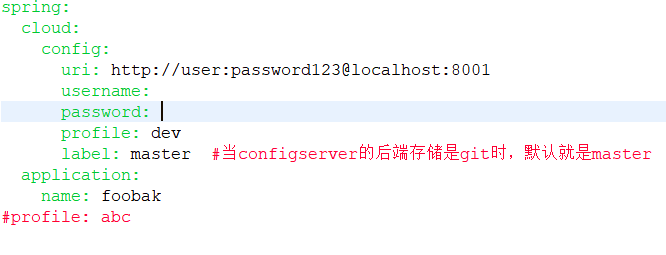
bootstrap.yml
spring:

  cloud:

    config:

      uri: http://localhost:8001

      profile: dev

      label: master  #当configserver的后端存储是git时,默认就是master

  application:

    name: foobak

#profile: abc
启动类
package com.itmuch.cloud;

import org.springframework.boot.SpringApplication;

import org.springframework.boot.autoconfigure.SpringBootApplication;

@SpringBootApplication

public class ConfigClientApplication

{

    public static void main( String[] args )

    {

        SpringApplication.run(ConfigClientApplication.class, args);

    }

}
Controller类
package com.itmuch.cloud;

import org.springframework.beans.factory.annotation.Value;

import org.springframework.web.bind.annotation.GetMapping;

import org.springframework.web.bind.annotation.RestController;

@RestController

class ConfigClientController {

	@Value("${profile}")

	private String profile;

	@GetMapping("/profile")

	public String getProfile(){

		return this.profile;

	}

}
访问路径:
9.5. Config Server的Git仓库配置详解


Git URI中的占位符
Spring Cloud Config服务器支持一个Git仓库URL,其中包含{application}和{profile}(以及{label})的占位符,
如果需要,请记住标签应用为git标签)。因此,您可以使用(例如)轻松支持“每个应用程序的一个repo”策略:
配置文件的修改
server:

  port:

spring:

  application:

    name: spring-cloud-config-server

  cloud:

    config:

      server:

        git:

          uri: https://gitee.com/cyj930307/{application}
访问路径:


模式匹配和多个存储库
还可以通过应用程序和配置文件名称的模式匹配来支持更复杂的需求。
模式格式是带有通配符的{application}/{profile}名称的逗号分隔列表(可能需要引用以通配符开头的模式)。
配置文件
server:
port:
spring:
application:
name: spring-cloud-config-server
cloud:
config:
server:
git:
uri: https://gitee.com/cyj930307/spring-cloud-starter
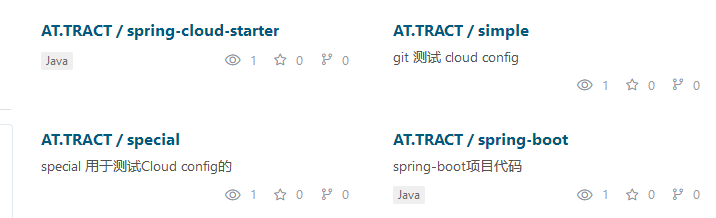
repos:
simple: https://gitee.com/cyj930307/simple
special:
pattern: special*/dev*,special*/test*
uri: https://gitee.com/cyj930307/special
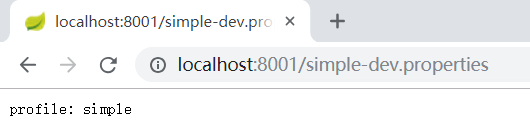
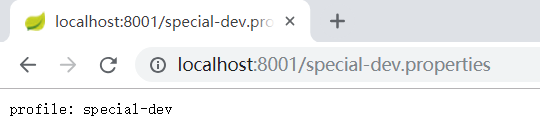
访问路径:
问题:
pattern: special*/dev*,special*/test* 匹配不到,就到上述的路径
如果{application}/{profile}不匹配任何模式,它将使用在“spring.cloud.config.server.git.uri”下定义的默认uri。
在上面的例子中,对于“简单”存储库,模式是simple/*(即所有配置文件中只匹配一个名为“简单”的应用程序)。
“本地”存储库与所有配置文件中以“local”开头的所有应用程序名称匹配(将/*后缀自动添加到任何没有配置文件匹配器的模式)。
搜索路径


server:

  port: 8001

spring:

  application:

    name: spring-cloud-config-server

  cloud:

    config:

      server:

        git:

          uri: https://gitee.com/cyj930307/spring-cloud-starter

          search-paths:

              - foo  #路径

              - bar  #路径

9.6. Config Server的健康状况指示器
9.7. 配置内容的加解密
9.7.1. 安装JCE
要使用加密和解密功能,您需要在JVM中安装全面的JCE(默认情况下不存在)。
您可以从Oracle下载“Java加密扩展(JCE)无限强度管理策略文件”,并按照安装说明
(实际上将JRE lib / security目录中的2个策略文件替换为您下载的文件)。
9.7.2. Config Server的加解密端点
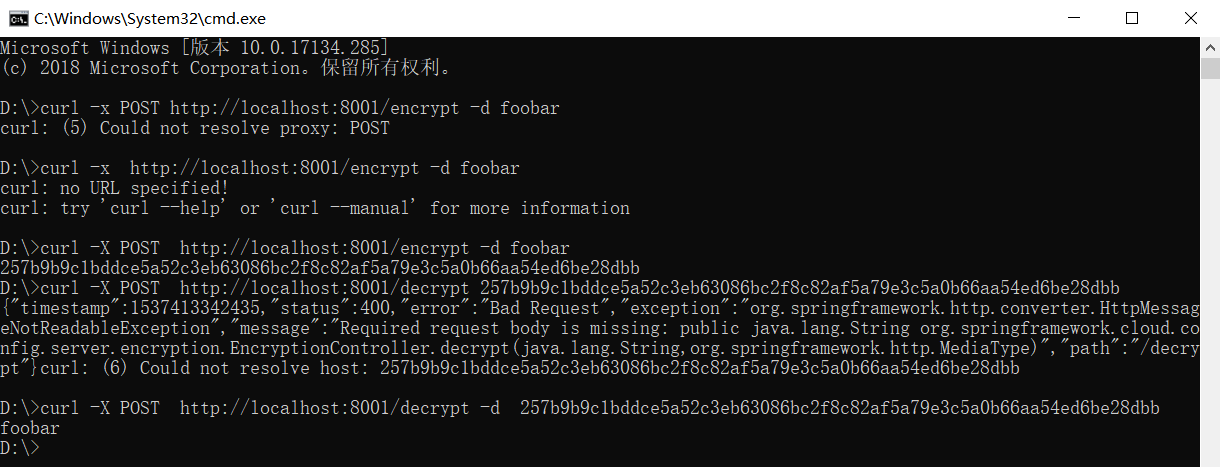
9.7.3. 对称加密

server:

  port:

spring:

  application:

    name: spring-cloud-config-server

  cloud:

    config:

      server:

        git:

          uri: https://gitee.com/cyj930307/spring-cloud-starter

          username:

          password:

encrypt:

  key: foo

9.7.4. 存储加密后的内容
spring:

  datasource:

    username: dbuser

    password: '{cipher}FKSAJDFGYOS8F7GLHAKERGFHLSAJ'
.properties文件中的加密值不能用引号括起来,否则不会解密该值:
spring.datasource.username: dbuser

spring.datasource.password: {cipher}FKSAJDFGYOS8F7GLHAKERGFHLSAJ
9.7.5. 非对称加密
命令
keytool -genkeypair -alias mytestkey -keyalg RSA \

  -dname "CN=Web Server,OU=Unit,O=Organization,L=City,S=State,C=US" \

  -keypass changeme -keystore server.jks -storepass letmein
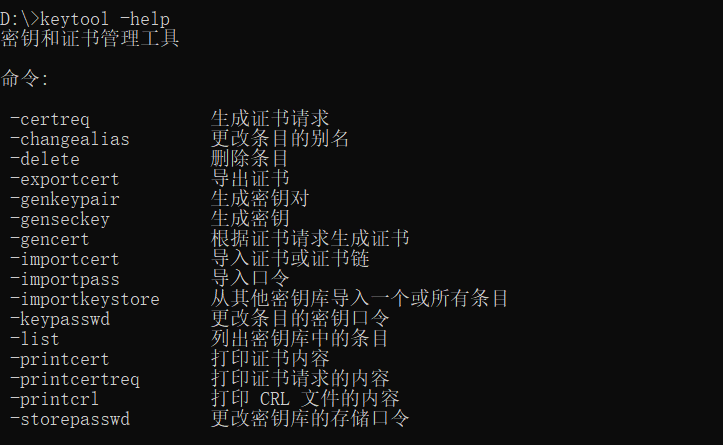

在win下运行
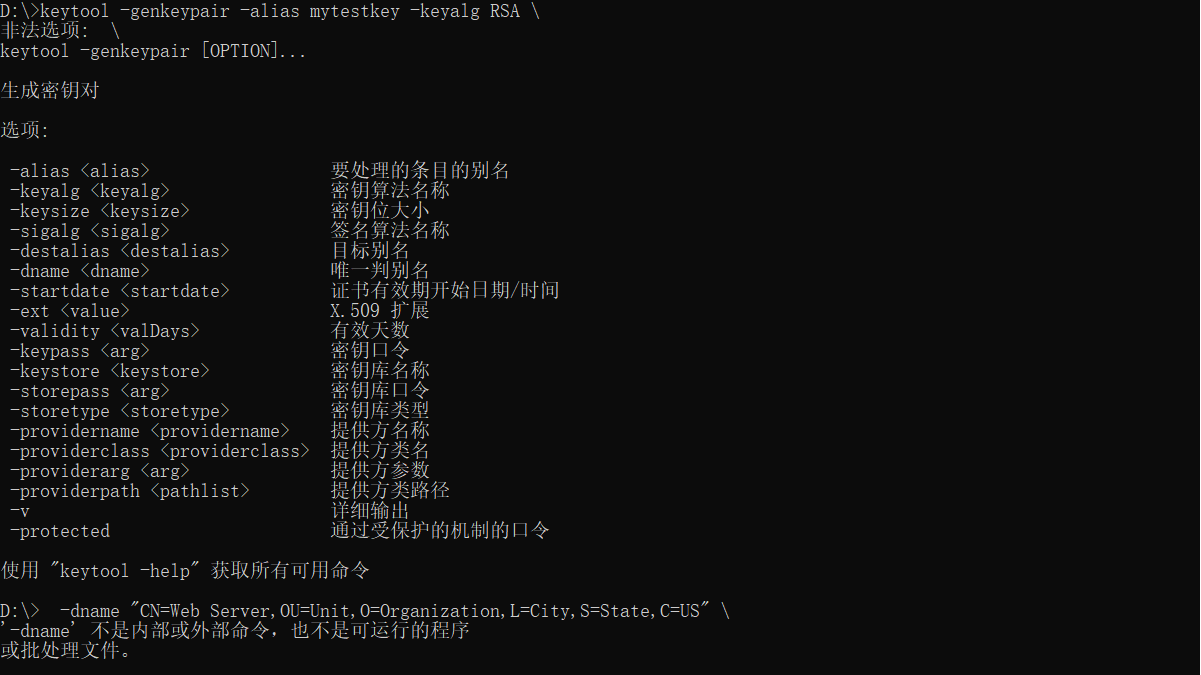
原因:
win下 \ 不支持
keytool -genkeypair -alias mytestkey -keyalg RSA -dname "CN=Web Server,OU=Unit,O=Organization,L=City,S=State,C=US" -keypass changeme -keystore server.jks -storepass letmein
在文件中会出现一个server.jks文件
将server.jks文件放在类路径(例如)中,然后在您的application.yml中配置服务器:
encrypt:

  keyStore:

    location: classpath:/server.jks

    password: letmein

    alias: mytestkey

    secret: changeme

9.7.6. 安全
服务端:
pom.xml
<project xmlns="http://maven.apache.org/POM/4.0.0" xmlns:xsi="http://www.w3.org/2001/XMLSchema-instance"

  xsi:schemaLocation="http://maven.apache.org/POM/4.0.0 http://maven.apache.org/xsd/maven-4.0.0.xsd">

  <modelVersion>4.0.</modelVersion>

  <parent>

        <groupId>com.itmuch.clod</groupId>

        <artifactId>spring-cloud-config</artifactId>

        <version>0.0.-SNAPSHOT</version>

        <relativePath/> <!-- lookup parent from repository -->

    </parent>

  <artifactId>spring-cloud-config-servers-authc</artifactId>

  <packaging>jar</packaging>

  <properties>

    <project.build.sourceEncoding>UTF-</project.build.sourceEncoding>

  </properties>

  <dependencies>

        <dependency>

            <groupId>org.springframework.cloud</groupId>

            <artifactId>spring-cloud-config-server</artifactId>

        </dependency>

        <dependency>

            <groupId>org.springframework.boot</groupId>

            <artifactId>spring-boot-starter-security</artifactId>

        </dependency>

  </dependencies>

</project>
启动类
package com.itmuch.cloud;

import org.springframework.boot.SpringApplication;

import org.springframework.boot.autoconfigure.SpringBootApplication;

import org.springframework.cloud.config.server.EnableConfigServer;

@EnableConfigServer

@SpringBootApplication

public class ConfigServerApplication {

    public static void main(String[] args) {

        SpringApplication.run(ConfigServerApplication.class, args);

    }

}
配置文件
security:

  basic:

    enabled: true

  user:

    name: user

    password: password123

server:

  port:

spring:

  application:

    name: spring-cloud-config-server

  cloud:

    config:

      server:

        git:

          uri: https://gitee.com/cyj930307/spring-cloud-starter

          username:

          password:

encrypt:

  key: foo
访问路径: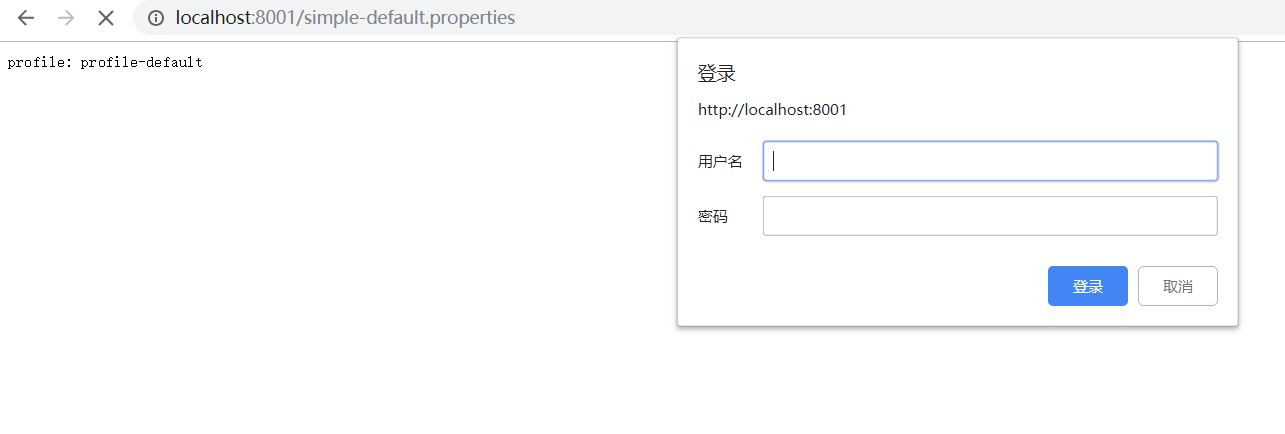
客服端:
pom.xml
<project xmlns="http://maven.apache.org/POM/4.0.0" xmlns:xsi="http://www.w3.org/2001/XMLSchema-instance"

  xsi:schemaLocation="http://maven.apache.org/POM/4.0.0 http://maven.apache.org/xsd/maven-4.0.0.xsd">

  <modelVersion>4.0.</modelVersion>

  <parent>

        <groupId>com.itmuch.clod</groupId>

        <artifactId>spring-cloud-config</artifactId>

        <version>0.0.-SNAPSHOT</version>

        <relativePath/> <!-- lookup parent from repository -->

    </parent>

  <artifactId>spring-cloud-config-clients-authc</artifactId>

  <packaging>jar</packaging>

  <properties>

    <project.build.sourceEncoding>UTF-</project.build.sourceEncoding>

  </properties>

  <dependencies>

          <dependency>

            <groupId>org.springframework.cloud</groupId>

            <artifactId>spring-cloud-starter-config</artifactId>

        </dependency>

        <dependency>

            <groupId>org.springframework.boot</groupId>

            <artifactId>spring-boot-starter-web</artifactId>

        </dependency>

        <dependency>

            <groupId>org.springframework.boot</groupId>

            <artifactId>spring-boot-starter-test</artifactId>

            <scope>test</scope>

        </dependency>

  </dependencies>

</project>
配置文件
application.yml
server:

  port:
bootstrap.yml
spring:

  cloud:

    config:

      uri: http://user:password123@localhost:8001

      profile: dev

      label: master  #当configserver的后端存储是git时,默认就是master

  application:

    name: foobak

#profile: abc
启动类
package com.itmuch.cloud;

import org.springframework.boot.SpringApplication;

import org.springframework.boot.autoconfigure.SpringBootApplication;

@SpringBootApplication

public class ConfigClientApplication

{

    public static void main( String[] args )

    {

        SpringApplication.run(ConfigClientApplication.class, args);

    }

}
Controller类
package com.itmuch.cloud;

import org.springframework.beans.factory.annotation.Value;

import org.springframework.web.bind.annotation.GetMapping;

import org.springframework.web.bind.annotation.RestController;

@RestController

class ConfigClientController {

    @Value("${profile}")

    private String profile;

    @GetMapping("/profile")

    public String getProfile(){

        return this.profile;

    }

}
访问路径:
问题:
配置的优先级高于路径
9.8. 使用/refresh端点手动刷新配置
服务端:
pom.xml
<project xmlns="http://maven.apache.org/POM/4.0.0" xmlns:xsi="http://www.w3.org/2001/XMLSchema-instance"

  xsi:schemaLocation="http://maven.apache.org/POM/4.0.0 http://maven.apache.org/xsd/maven-4.0.0.xsd">

  <modelVersion>4.0.</modelVersion>

  <parent>

        <groupId>com.itmuch.clod</groupId>

        <artifactId>spring-cloud-config</artifactId>

        <version>0.0.-SNAPSHOT</version>

        <relativePath/> <!-- lookup parent from repository -->

    </parent>

  <artifactId>spring-cloud-config-servers</artifactId>

  <packaging>jar</packaging>

  <properties>

    <project.build.sourceEncoding>UTF-</project.build.sourceEncoding>

  </properties>

  <dependencies>

        <dependency>

            <groupId>org.springframework.cloud</groupId>

            <artifactId>spring-cloud-config-server</artifactId>

        </dependency>

        <!--

        <dependency>

            <groupId>org.springframework.boot</groupId>

            <artifactId>spring-boot-starter-security</artifactId>

        </dependency>

        -->

  </dependencies>

</project>
配置文件
server:

  port:

spring:

  application:

    name: spring-cloud-config-server

  cloud:

    config:

      server:

        git:

          uri: https://gitee.com/cyj930307/spring-cloud-starter

          username:

          password:
启动类
package com.itmuch.cloud;

import org.springframework.boot.SpringApplication;

import org.springframework.boot.autoconfigure.SpringBootApplication;

import org.springframework.cloud.config.server.EnableConfigServer;

@EnableConfigServer

@SpringBootApplication

public class ConfigServerApplication {

    public static void main(String[] args) {

        SpringApplication.run(ConfigServerApplication.class, args);

    }

}
客服端:
pom.xml
<project xmlns="http://maven.apache.org/POM/4.0.0" xmlns:xsi="http://www.w3.org/2001/XMLSchema-instance"

  xsi:schemaLocation="http://maven.apache.org/POM/4.0.0 http://maven.apache.org/xsd/maven-4.0.0.xsd">

  <modelVersion>4.0.</modelVersion>

  <parent>

        <groupId>com.itmuch.clod</groupId>

        <artifactId>spring-cloud-config</artifactId>

        <version>0.0.-SNAPSHOT</version>

        <relativePath/> <!-- lookup parent from repository -->

    </parent>

  <artifactId>spring-cloud-config-clients-refresh</artifactId>

  <packaging>jar</packaging>

  <properties>

    <project.build.sourceEncoding>UTF-</project.build.sourceEncoding>

  </properties>

  <dependencies>

          <dependency>

            <groupId>org.springframework.cloud</groupId>

            <artifactId>spring-cloud-starter-config</artifactId>

        </dependency>

        <dependency>

            <groupId>org.springframework.boot</groupId>

            <artifactId>spring-boot-starter-web</artifactId>

        </dependency>

        <dependency>

            <groupId>org.springframework.boot</groupId>

            <artifactId>spring-boot-starter-test</artifactId>

            <scope>test</scope>

        </dependency>

        <dependency>

             <groupId>org.springframework.boot</groupId>

             <artifactId>spring-boot-starter-actuator</artifactId>

        </dependency>

  </dependencies>

</project>
配置文件 application.yml ,bootstrap.yml
server:

  port:

spring:

  cloud:

    config:

      uri: http://localhost:8001

      profile: dev

      label: master  #当configserver的后端存储是git时,默认就是master

  application:

    name: foobak

#profile: abc

management:

  security:

    enabled: false
启动类
package com.itmuch.cloud;

import org.springframework.boot.SpringApplication;

import org.springframework.boot.autoconfigure.SpringBootApplication;

@SpringBootApplication

public class ConfigClientApplication

{

    public static void main( String[] args )

    {

        SpringApplication.run(ConfigClientApplication.class, args);

    }

}
接口类
package com.itmuch.cloud; import org.springframework.beans.factory.annotation.Value;
import org.springframework.cloud.context.config.annotation.RefreshScope;
import org.springframework.web.bind.annotation.GetMapping;
import org.springframework.web.bind.annotation.RestController; @RestController
@RefreshScope
class HelloController { @Value("${profile}")
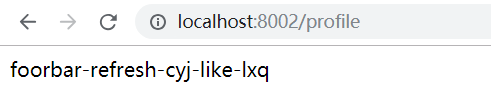
private String profile; @GetMapping("/profile")
public String getProfile(){
return this.profile;
}
}
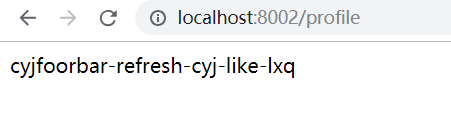
访问路径:

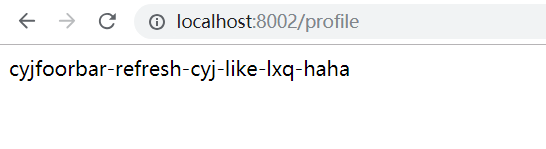
9.9. 使用Spring Cloud Bus实现自动刷新配置
9.9.1. Spring Cloud Bus简介
Spring Cloud Bus将分布式系统的节点与轻量级消息代理链接。
这可以用于广播状态更改(例如配置更改)或其他管理指令。一个关键
的想法是,总线就像一个分布式执行器,用于扩展的Spring Boot应用
程序,但也可以用作应用程序之间的通信通道。目前唯一的实现是使用AMQP
代理作为传输,但是相同的基本功能集(还有一些取决于传输)在其他传输的
路线图上。
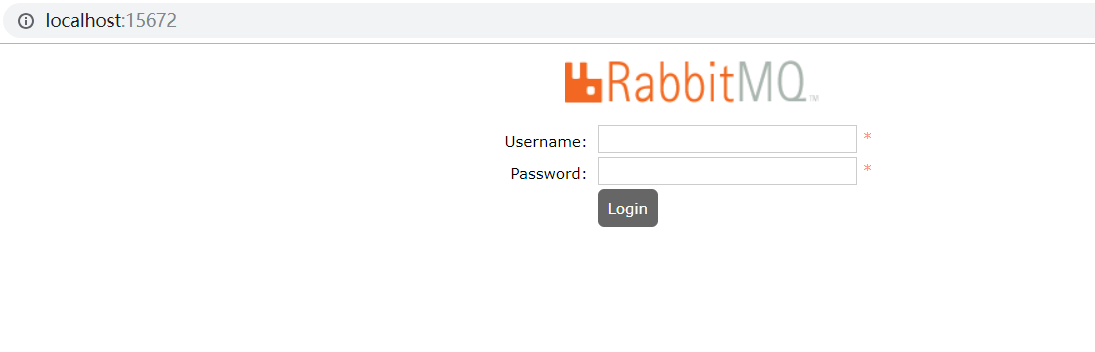
环境的配置:
下载:RabbitMQ 和erlang


9.9.2. 实现自动刷新
pom.xml
<project xmlns="http://maven.apache.org/POM/4.0.0" xmlns:xsi="http://www.w3.org/2001/XMLSchema-instance"

  xsi:schemaLocation="http://maven.apache.org/POM/4.0.0 http://maven.apache.org/xsd/maven-4.0.0.xsd">

  <modelVersion>4.0.</modelVersion>

  <parent>

        <groupId>com.itmuch.clod</groupId>

        <artifactId>spring-cloud-config</artifactId>

        <version>0.0.-SNAPSHOT</version>

        <relativePath/> <!-- lookup parent from repository -->

    </parent>

  <artifactId>spring-cloud-config-clients-refresh-bus</artifactId>

  <packaging>jar</packaging>

  <properties>

    <project.build.sourceEncoding>UTF-</project.build.sourceEncoding>

  </properties>

  <dependencies>

          <dependency>

            <groupId>org.springframework.cloud</groupId>

            <artifactId>spring-cloud-starter-config</artifactId>

        </dependency>

        <dependency>

            <groupId>org.springframework.boot</groupId>

            <artifactId>spring-boot-starter-web</artifactId>

        </dependency>

        <dependency>

            <groupId>org.springframework.boot</groupId>

            <artifactId>spring-boot-starter-test</artifactId>

            <scope>test</scope>

        </dependency>

        <dependency>

             <groupId>org.springframework.boot</groupId>

             <artifactId>spring-boot-starter-actuator</artifactId>

        </dependency>

        <dependency>

             <groupId>org.springframework.cloud</groupId>

             <artifactId>spring-cloud-starter-bus-amqp</artifactId>

        </dependency>

  </dependencies>

</project>
配置文件
server:

  port:

spring:

  cloud:

    config:

      uri: http://localhost:8001

      profile: dev

      label: master  #当configserver的后端存储是git时,默认就是master

  application:

    name: foobak

  rabbitmq:

    host: localhost

    port:

    username: guest

    password: guest

management:

  security:

    enabled: false
启动类
package com.itmuch.cloud;

import org.springframework.boot.SpringApplication;

import org.springframework.boot.autoconfigure.SpringBootApplication;

@SpringBootApplication

public class ConfigClientApplication

{

    public static void main( String[] args )

    {

        SpringApplication.run(ConfigClientApplication.class, args);

    }

}
Controller类
package com.itmuch.cloud;

import org.springframework.beans.factory.annotation.Value;

import org.springframework.cloud.context.config.annotation.RefreshScope;

import org.springframework.web.bind.annotation.GetMapping;

import org.springframework.web.bind.annotation.RestController;

@RestController

@RefreshScope

class HelloController {

    @Value("${profile}")

    private String profile;

    @GetMapping("/profile")

    public String getProfile(){

        return this.profile;

    }

}

9.9.3. 局部刷新
某些场景下(例如灰度发布),我们可能只想刷新部分微服务的配置,此时可通过/bus/refresh端点的destination参数来定位要刷新的应用程序。
例如:/bus/refresh?destination=customers:8000,这样消息总线上的微服务实例就会根据destination参数的值来判断是否需要要刷新。
其中,customers:8000指的是各个微服务的ApplicationContext ID。
destination参数也可以用来定位特定的微服务。例如:/bus/refresh?destination=customers:**,这样就可以触发customers微服务所有实例的配置刷新。
9.9.4. 架构改进
9.9.5. 跟踪总线事件
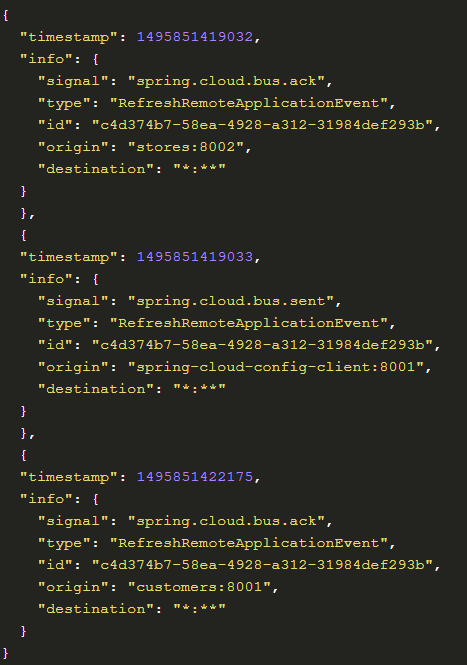
一些场景下,我们可能希望知道Spring Cloud Bus事件传播的细节。此时,我们可以跟踪总线事件(RemoteApplicationEvent的子类都是总线事件)。
跟踪总线事件非常简单,只需设置spring.cloud.bus.trace.enabled=true,这样在/bus/refresh端点被请求后,访问/trace端点就可获得类似如下的结果:
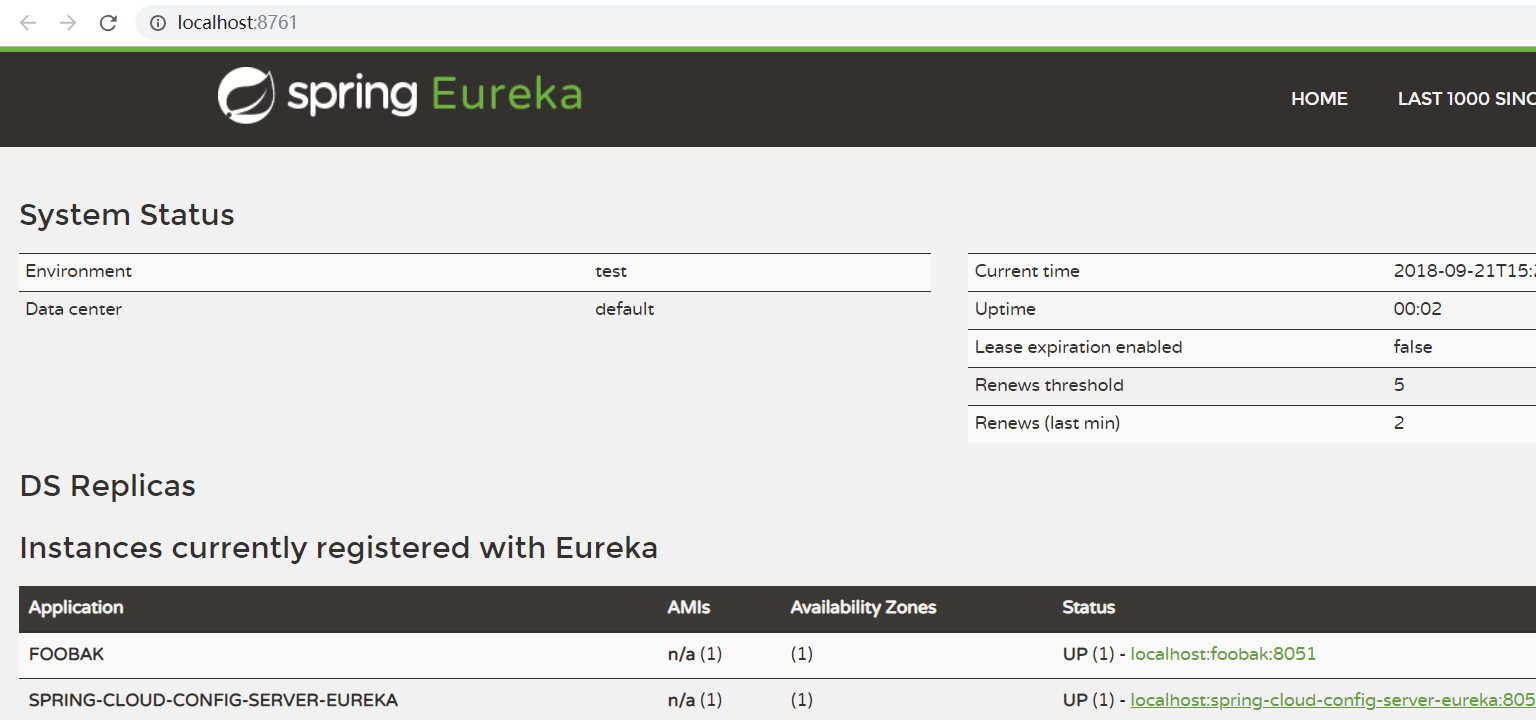
9.10. Spring Cloud Config与Eureka配合使用


spring-cloud-eureka
1.pom.xml
<project xmlns="http://maven.apache.org/POM/4.0.0" xmlns:xsi="http://www.w3.org/2001/XMLSchema-instance"

  xsi:schemaLocation="http://maven.apache.org/POM/4.0.0 http://maven.apache.org/xsd/maven-4.0.0.xsd">

  <modelVersion>4.0.</modelVersion>

  <parent>

        <groupId>com.itmuch.clod</groupId>

        <artifactId>spring-cloud-config</artifactId>

        <version>0.0.-SNAPSHOT</version>

        <relativePath/> <!-- lookup parent from repository -->

    </parent>

  <artifactId>spring-cloud-eureka</artifactId>

  <packaging>jar</packaging>

  <properties>

    <project.build.sourceEncoding>UTF-</project.build.sourceEncoding>

  </properties>

  <dependencies>

        <dependency>

           <groupId>org.springframework.cloud</groupId>

           <artifactId>spring-cloud-starter-eureka-server</artifactId>

        </dependency>

  </dependencies>

</project>
配置文件
server:

 port:

eureka:

  client:

    register-with-eureka: false

    fetch-registry: false

    service-url:

        defaultZone: http://localhost:8761/eureka
启动类
package com.itmuch.cloud;

import org.springframework.boot.SpringApplication;

import org.springframework.boot.autoconfigure.SpringBootApplication;

import org.springframework.cloud.netflix.eureka.server.EnableEurekaServer;

@SpringBootApplication

@EnableEurekaServer

public class EurekaApplication

{

    public static void main( String[] args )

    {

        SpringApplication.run(EurekaApplication.class, args);

    }

}
spring-cloud-config-serve-eureka
pom.xml
<project xmlns="http://maven.apache.org/POM/4.0.0" xmlns:xsi="http://www.w3.org/2001/XMLSchema-instance"

  xsi:schemaLocation="http://maven.apache.org/POM/4.0.0 http://maven.apache.org/xsd/maven-4.0.0.xsd">

  <modelVersion>4.0.</modelVersion>

  <parent>

        <groupId>com.itmuch.clod</groupId>

        <artifactId>spring-cloud-config</artifactId>

        <version>0.0.-SNAPSHOT</version>

        <relativePath/> <!-- lookup parent from repository -->

    </parent>

  <artifactId>spring-cloud-config-servers-eureka</artifactId>

  <packaging>jar</packaging>

  <properties>

    <project.build.sourceEncoding>UTF-</project.build.sourceEncoding>

  </properties>

  <dependencies>

        <dependency>

            <groupId>org.springframework.cloud</groupId>

            <artifactId>spring-cloud-config-server</artifactId>

        </dependency>

         <dependency>

            <groupId>org.springframework.cloud</groupId>

            <artifactId>spring-cloud-starter-eureka</artifactId>

        </dependency>

  </dependencies>

</project>
配置文件
server:

  port:

spring:

  application:

    name: spring-cloud-config-server-eureka

  cloud:

    config:

      server:

        git:

          uri: https://gitee.com/cyj930307/spring-cloud-starter/

#         search-paths: config-repo

          username:

          password:

eureka:

  client:

    service-url:

       defaultZone: http://localhost:8761/eureka
启动类
package com.itmuch.cloud;

import org.springframework.boot.SpringApplication;

import org.springframework.boot.autoconfigure.SpringBootApplication;

import org.springframework.cloud.client.discovery.EnableDiscoveryClient;

import org.springframework.cloud.config.server.EnableConfigServer;

@EnableConfigServer

@SpringBootApplication

@EnableDiscoveryClient

public class ConfigServerApplication {

    public static void main(String[] args) {

        SpringApplication.run(ConfigServerApplication.class, args);

    }

}
spring-cloud-config-clients-eureka
pom.xml
<project xmlns="http://maven.apache.org/POM/4.0.0" xmlns:xsi="http://www.w3.org/2001/XMLSchema-instance"

  xsi:schemaLocation="http://maven.apache.org/POM/4.0.0 http://maven.apache.org/xsd/maven-4.0.0.xsd">

  <modelVersion>4.0.</modelVersion>

  <parent>

        <groupId>com.itmuch.clod</groupId>

        <artifactId>spring-cloud-config</artifactId>

        <version>0.0.-SNAPSHOT</version>

        <relativePath/> <!-- lookup parent from repository -->

    </parent>

  <artifactId>spring-cloud-config-clients-eureka</artifactId>

  <packaging>jar</packaging>

  <properties>

    <project.build.sourceEncoding>UTF-</project.build.sourceEncoding>

  </properties>

  <dependencies>

          <dependency>

            <groupId>org.springframework.cloud</groupId>

            <artifactId>spring-cloud-starter-config</artifactId>

        </dependency>

        <dependency>

            <groupId>org.springframework.boot</groupId>

            <artifactId>spring-boot-starter-web</artifactId>

        </dependency>

         <dependency>

            <groupId>org.springframework.cloud</groupId>

            <artifactId>spring-cloud-starter-eureka</artifactId>

        </dependency>

        <dependency>

             <groupId>org.springframework.boot</groupId>

             <artifactId>spring-boot-starter-actuator</artifactId>

        </dependency>

  </dependencies>

</project>
配置文件
application.yml
server:

  port:
bootstrap.yml
spring:

  application:

    name: foobak

  cloud:

    config:

      profile: dev

      label: master

      discovery:

        enabled: true                                 # 默认false,设为true表示使用注册中心中的configserver配置而不自己配置configserver的uri

        service-id: spring-cloud-config-server-eureka  # 指定config server在服务发现中的serviceId,默认为:configserver

eureka:

  client:

    service-url:

       defaultZone: http://user:123456@localhost:8761/eureka
启动类
package com.itmuch.cloud;

import org.springframework.boot.SpringApplication;

import org.springframework.boot.autoconfigure.SpringBootApplication;

import org.springframework.cloud.client.discovery.EnableDiscoveryClient;

@SpringBootApplication

@EnableDiscoveryClient

public class ConfigClientApplication

{

    public static void main( String[] args )

    {

        SpringApplication.run(ConfigClientApplication.class, args);

    }

}
Controller文件
package com.itmuch.cloud;
import org.springframework.beans.factory.annotation.Value;
import org.springframework.cloud.context.config.annotation.RefreshScope;
import org.springframework.web.bind.annotation.GetMapping;
import org.springframework.web.bind.annotation.RestController;
/**
* 这边的@RefreshScope注解不能少,否则即使调用/refresh,配置也不会刷新
* @author eacdy
*/
@RestController
@RefreshScope
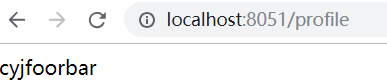
class ConfigClientController { @Value("${profile}")
private String profile; @GetMapping("/profile")
public String getprofile(){
return this.profile;
}
}
访问路径
9.11. Spring Cloud Config的用户认证
项目名称:spring-cloud-config-servers-authc
配置文件:
server:

  port:

spring:

  application:

    name: spring-cloud-config-server-basic

  cloud:

    config:

      server:

        git:

          uri: https://gitee.com/cyj930307/spring-cloud-starter

          username:

          password:

eureka:

  client:

    service-url:

       defaultZone: http://localhost:8761/eureka

security:

  basic:

    enabled: true               # 开启基于HTTP basic的认证

  user:

    name: user                  # 配置登录的账号是user

    password: password123       # 配置登录的密码是password123
启动该服务,并输入http://localhost:8001/microservice-foo/dev
9.12. Config Server的高可用
9.12.1. Git仓库的高可用
9.12.2. RabbitMQ的高可用
9.12.3. Config Server自身的高可用
Config Server的高可用也分为2种:
1.Config Server未注册到Eureka Server上
这种情况在Spring Cloud中称之为“Config First Bootstrap”。可以使用一个负载均衡软件(如nginx)来做高可用,Cloud Config Client URI指向Nginx。
2.Config Server注册到了Eureka Server上
这种情况,在Spring Cloud中称之为“Discovery First Bootstrap”。实现Config Server的高可用很简单,只需要将多个Config Server注册到Eureka server即可。
将Config Server作为一个普通的微服务应用,纳入Eureka的服务治理体系中。
这样我们的微服务应用就可以通过配置中心的服务名来获取配置信息,这种方式比起传统的实现模式来说更加有利于维护,
因为对于服务端的负载均衡配置和客户端的配置中心指定都通过服务治理机制一并解决了,既实现了高可用,也实现了自维护。
9.Spring Cloud Config统一管理微服务配置的更多相关文章
- 【SpringCloud构建微服务系列】使用Spring Cloud Config统一管理服务配置
一.为什么要统一管理微服务配置 对于传统的单体应用而言,常使用配置文件来管理所有配置,比如SpringBoot的application.yml文件,但是在微服务架构中全部手动修改的话很麻烦而且不易维护 ...
- 使用Spring Cloud Config统一管理配置,别再到处放配置文件了
1 前言 欢迎访问南瓜慢说 www.pkslow.com获取更多精彩文章! 可配置是一个成熟软件系统应该提供的特性,而配置管理对于大型系统就显得十分重要,特别是对于拥有多个应用的微服务系统.可喜的是, ...
- springcloud(十二)-springcloud-config统一管理微服务配置
1.为什么要统一管理微服务配置 对于传统的单体应用,常使用配置文件管理所有配置.例如一个SpringBoot开发的单体应用,可将配置内容放在application.yml文件中.如果需要切换环境,可设 ...
- .NET Core微服务之基于Steeltoe使用Spring Cloud Config统一管理配置
Tip: 此篇已加入.NET Core微服务基础系列文章索引 => Steeltoe目录快速导航: 1. 基于Steeltoe使用Spring Cloud Eureka 2. 基于Steelt ...
- 从 Spring Cloud 开始,聊聊微服务架构实践之路
[编者的话]随着公司业务量的飞速发展,平台面临的挑战已经远远大于业务,需求量不断增加,技术人员数量增加,面临的复杂度也大大增加.在这个背景下,平台的技术架构也完成了从传统的单体应用到微服务化的演进. ...
- 【译文】用Spring Cloud和Docker搭建微服务平台
by Kenny Bastani Sunday, July 12, 2015 转自:http://www.kennybastani.com/2015/07/spring-cloud-docker-mi ...
- 使用 Spring Cloud 和 Docker 构建微服务架构
如何使用Spring Boot.Spring Cloud.Docker和Netflix的一些开源工具来构建一个微服务架构. 本文通过使用Spring Boot.Spring Cloud和Docker构 ...
- 【spring cloud】子模块module -->导入一个新的spring boot项目作为spring cloud的一个子模块微服务,怎么做/或者 每次导入一个新的spring boot项目,IDEA不识别子module,启动类无法启动/右下角没有蓝色图标
如题:导入一个新的spring boot项目作为spring cloud的一个子模块微服务,怎么做 或者说每次导入一个新的spring boot项目,IDEA不识别,启动类无法启动,怎么解决 下面分别 ...
- Spring Cloud和Docker搭建微服务平台
用Spring Cloud和Docker搭建微服务平台 This blog series will introduce you to some of the foundational concepts ...
随机推荐
- Java生成随机数列表
生成随机数列表 1.Java8以前 (1)Math.random private List<UserEntity> random1() { ArrayList<UserEntity& ...
- 批量Insert
oracle INSERT ALL ,) ,) ,) FROM DUAL
- iOS 更改状态栏文字颜色
第一步:在info.plist中添加一个字段:view controller -base status bar 设置为NO 第二步: 在AppDelegate.m的 didFinishLaunchin ...
- 【php设计模式】装饰器模式
装饰器模式,顾名思义,就是对已经存在的某些类进行装饰,以此来扩展一些功能.其结构图如下: Component为统一接口,也是装饰类和被装饰类的基本类型. ConcreteComponent为具体实现类 ...
- LEANGOO卡片
转自:https://www.leangoo.com/leangoo_guide/leangoo_cards.html#toggle-id-10 Leangoo的卡片可以是需求.目标.任务.问题.缺陷 ...
- vim学习(一)
vim是linux和mac中常用到的编辑器. 其分为4种模式: normal模式:普通模式,浏览作用 insert模式: i(insert) 在当前光标处进行插入 a(append) 在当前光 ...
- dedecms:限制栏目列表生成的最大页数防止被采集
dedecms:限制栏目列表生成的最大页数防止被采集 如果您的网站数据量较大,列表很多的话甚至达到上千页,生成列表时就特别耗费时间,这个缺点可以被优化掉:网站好不容易建起来,担心网站内容被采集走,如果 ...
- How to Change the Default Theme Appearance [editing with no theme]
Windows Live Writer has the ability to allow users to see their blog as it'd be posted as they are c ...
- Matlab修改数值格式/精度/小数位数
————————————命令行方法————————————— 直接在命令行中输入以下命令,但该命令不影响数据的存储形式和计算精度,下次还需进行修改. format 默认格式 format short ...
- web开发:javascript高级
一.事件案例 二.循环绑定之变量污染 三.事件的绑定与取消 四.事件对象 一.事件案例 <!DOCTYPE html> <html> <head> <meta ...