【译】Spring 4 @Profile注解示例
前言
译文链接:http://websystique.com/spring/spring-profile-example/
本文将探索Spring中的@Profile注解,可以实现不同环境(开发、测试、部署等)使用不同的配置。同样,除了使用注解也会给出基于XML配置的示例作为对比。
假设你有一个应用涉及数据库交互,你可能希望在开发环境上使用mysql数据库,在生产环境上使用oracle数据库,那么使用Spring的Profiles,可以轻松达到这个目的,接下来我们将给出一个实例详细介绍这种情况。
涉及技术及开发工具
- Spring 4.0.6.RELEASE
- Maven 3
- JDK 1.6
- Eclipse JUNO Service Release 2
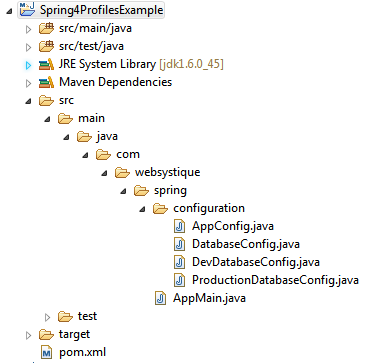
工程目录结构
步骤一:往pom.xml中添加依赖
<project xmlns="http://maven.apache.org/POM/4.0.0" xmlns:xsi="http://www.w3.org/2001/XMLSchema-instance"

    xsi:schemaLocation="http://maven.apache.org/POM/4.0.0 http://maven.apache.org/xsd/maven-4.0.0.xsd">

    <modelVersion>4.0.0</modelVersion>

    <groupId>com.websystique.spring</groupId>

    <artifactId>Spring4ProfilesExample</artifactId>

    <version>1.0.0</version>

    <packaging>jar</packaging>

    <name>Spring4ProfilesExample</name>

    <properties>

        <springframework.version>4.0.6.RELEASE</springframework.version>

    </properties>

    <dependencies>

        <dependency>

            <groupId>org.springframework</groupId>

            <artifactId>spring-core</artifactId>

            <version>${springframework.version}</version>

        </dependency>

        <dependency>

            <groupId>org.springframework</groupId>

            <artifactId>spring-context</artifactId>

            <version>${springframework.version}</version>

        </dependency>

        <dependency>

            <groupId>org.springframework</groupId>

            <artifactId>spring-orm</artifactId>

            <version>${springframework.version}</version>

        </dependency>

    </dependencies>

    <build>

        <pluginManagement>

            <plugins>

                <plugin>

                    <groupId>org.apache.maven.plugins</groupId>

                    <artifactId>maven-compiler-plugin</artifactId>

                    <version>3.2</version>

                    <configuration>

                        <source>1.6</source>

                        <target>1.6</target>

                    </configuration>

                </plugin>

            </plugins>

        </pluginManagement>

    </build>

</project>
步骤二:创建Spring配置类
Spring配置类是指用@Configuration注解标注的类,这些类包含了用@Bean标注的方法。这些被@Bean标注的方法可以生成bean并交由spring容器管理。
package com.websystique.spring.configuration;

import javax.sql.DataSource;

import org.springframework.beans.factory.annotation.Autowired;

import org.springframework.context.annotation.ComponentScan;

import org.springframework.context.annotation.Configuration;

@Configuration

@ComponentScan(basePackages = "com.websystique.spring")

public class AppConfig {

    @Autowired

    public DataSource dataSource;

}
以上配置只有一个属性被自动注入,接下来我们将展示这个dataSource属性可以根据不同的环境(开发环境或生产环境)注入不同的bean。
package com.websystique.spring.configuration;

import javax.sql.DataSource;

public interface DatabaseConfig {

    DataSource createDataSource();

}
一个简单的接口,可以被所有可能的环境配置实现
package com.websystique.spring.configuration;

import javax.sql.DataSource;

import org.springframework.context.annotation.Bean;

import org.springframework.context.annotation.Configuration;

import org.springframework.context.annotation.Profile;

import org.springframework.jdbc.datasource.DriverManagerDataSource;

@Profile("Development")

@Configuration

public class DevDatabaseConfig implements DatabaseConfig {

    @Override

    @Bean

    public DataSource createDataSource() {

        System.out.println("Creating DEV database");

        DriverManagerDataSource dataSource = new DriverManagerDataSource();

        /*

         * Set MySQL specific properties for Development Environment

         */

        return dataSource;

    }

}
package com.websystique.spring.configuration;

import javax.sql.DataSource;

import org.springframework.context.annotation.Bean;

import org.springframework.context.annotation.Configuration;

import org.springframework.context.annotation.Profile;

import org.springframework.jdbc.datasource.DriverManagerDataSource;

@Profile("Production")

@Configuration

public class ProductionDatabaseConfig implements DatabaseConfig {

    @Override

    @Bean

    public DataSource createDataSource() {

        System.out.println("Creating Production database");

        DriverManagerDataSource dataSource = new DriverManagerDataSource();

        /*

         * Set ORACLE specific properties for Production environment

         */

        return dataSource;

    }

}
以上两个配置类都实现了DatabaseConfig接口,特殊的地方在于它们都用@Profile标注。
被@Profile标注的组件只有当指定profile值匹配时才生效。
可以通过以下方式设置profile值:
1、设置spring.profiles.active属性(通过JVM参数、环境变量或者web.xml中的Servlet context参数)
2、ApplicationContext.getEnvironment().setActiveProfiles(“ProfileName”)
根据你的实际环境设置profile值,然后被profile标注(而且value=设置值)的bean才会被注册到spring容器。
步骤三:运行main方法测试
package com.websystique.spring;

import org.springframework.context.annotation.AnnotationConfigApplicationContext;

public class AppMain {

    public static void main(String args[]){

        AnnotationConfigApplicationContext  context = new AnnotationConfigApplicationContext();

        //Sets the active profiles

        context.getEnvironment().setActiveProfiles("Development");

        //Scans the mentioned package[s] and register all the @Component available to Spring

        context.scan("com.websystique.spring");

        context.refresh();

        context.close();

    }

}
注意以上代码,context.scan("com.websystique.spring")扫描到该包并开始注册所有被@Component标注的bean时,如果同时遇到被@Profile注解标注的bean时,会与profile值做比较,profile值匹配则注册到spring容器,否则直接跳过。
在我们这个例子中,DevDatabaseConfig会被注册到Spring容器中。
运行以上程序,结果如下:
Creating DEV database
附:基于XML的配置
替换DevelopmentDatabaseConfig配置为dev-config-context.xml (src/main/resources/dev-config-context.xml)
<?xml version="1.0" encoding="UTF-8"?>

<beans xmlns="http://www.springframework.org/schema/beans"

        xmlns:xsi="http://www.w3.org/2001/XMLSchema-instance"

        xsi:schemaLocation="http://www.springframework.org/schema/beans http://www.springframework.org/schema/beans/spring-beans-4.0.xsd">

    <bean id="dataSource" class="org.springframework.jdbc.datasource.DriverManagerDataSource">

        <property name="driverClassName" value="com.mysql.jdbc.Driver" />

        <property name="url" value="jdbc:mysql://localhost:3306/websystique" />

        <property name="username" value="myuser" />

        <property name="password" value="mypassword" />

    </bean>

</beans>
替换ProductionDatabaseConfig配置为prod-config-context.xml (src/main/resources/prod-config-context.xml)
<?xml version="1.0" encoding="UTF-8"?>

<beans xmlns="http://www.springframework.org/schema/beans"

    xmlns:xsi="http://www.w3.org/2001/XMLSchema-instance"

    xsi:schemaLocation="http://www.springframework.org/schema/beans http://www.springframework.org/schema/beans/spring-beans-4.0.xsd">

    <bean id="dataSource" class="org.springframework.jdbc.datasource.DriverManagerDataSource">

        <property name="driverClassName" value=" oracle.jdbc.driver.OracleDriver" />

        <property name="url"     value="jdbc:oracle:thin:@PRODHOST:PRODPORT/websystique" />

        <property name="username" value="myproduser" />

        <property name="password" value="myprodpassword" />

    </bean>

</beans>
替换AppConfig配置为app-config.xml (src/main/resources/app-config.xml)
<?xml version="1.0" encoding="UTF-8"?>

<beans xmlns="http://www.springframework.org/schema/beans"

        xmlns:xsi="http://www.w3.org/2001/XMLSchema-instance"

        xmlns:context="http://www.springframework.org/schema/context"

        xsi:schemaLocation="http://www.springframework.org/schema/beans http://www.springframework.org/schema/beans/spring-beans-4.0.xsd

                            http://www.springframework.org/schema/context http://www.springframework.org/schema/context/spring-context-4.0.xsd">

    <context:component-scan base-package="com.websystique.spring"/>

    <beans profile="Development">

        <import resource="dev-config-context.xml"/>

    </beans>

    <beans profile="Production">

        <import resource="prod-config-context.xml"/>

    </beans>

</beans>
根据实际的profile配置,相应的config-context.xml文件会被加载,其它的会被忽略。
最后,main方法如下:
package com.websystique.spring;

import org.springframework.context.support.AbstractApplicationContext;

import org.springframework.context.support.ClassPathXmlApplicationContext;

public class AppMain {

    public static void main(String args[]){

        AbstractApplicationContext  context = new ClassPathXmlApplicationContext("app-config.xml");

        //Sets the active profiles

        context.getEnvironment().setActiveProfiles("Development");

        /*

         * Perform any logic here

         */

        context.close();

    }

}
运行程序,会得到相同的结果。
程序源码
http://websystique.com/?smd_process_download=1&download_id=799
【译】Spring 4 @Profile注解示例的更多相关文章
- 十、Spring的@Profile注解
首先我们来看看spring官方文档对这个注解的解释: The @Profile annotation allows you to indicate that a component is eligib ...
- 【转】Spring Boot Profile使用
http://blog.csdn.net/he90227/article/details/52981747 摘要: spring Boot使用@Profile注解可以实现不同环境下配置参数的切换,任何 ...
- 【译】Spring 4 @PropertySource和@Value注解示例
前言 译文链接:http://websystique.com/spring/spring-propertysource-value-annotations-example/ 本篇文章将展示如何通过@P ...
- spring切换环境变量——@Profile注解的使用
在容器中如果存在同一类型的多个组件,也可以使用@Profile注解标识要获取的是哪一个bean,这在不同的环境使用不同的变量的情景特别有用.例如,开发环境.测试环境.生产环境使用不同的数据源,在不改变 ...
- 使用 spring.profiles.active 及 @profile 注解 动态化配置内部及外部配置
引言:使用 spring.profiles.active 参数,搭配@Profile注解,可以实现不同环境下(开发.测试.生产)配置参数的切换 一.根据springboot的配置文件命名约定,结合ac ...
- spring boot: 一般注入说明(四) Profile配置,Environment环境配置 @Profile注解
1.通过设定Environment的ActiveProfile来设置当前context所需要的环境配置,在开发中使用@Profile注解类或方法,达到不同情况下选择实例化不同的Bean. 2.使用jv ...
- 【Spring Cloud】Spring Cloud之自定义@SpringCloudProfile注解实现@Profile注解的功能
一.为什么会想到定义@SpringCloudProfile这样的注解 首页提一下@Profile注解:它主要用与Spring Boot多环境配置中,指定某个类只在指定环境中生效,比如swagger的配 ...
- 【Spring】使用@Profile注解实现开发、测试和生产环境的配置和切换,看完这篇我彻底会了!!
写在前面 在实际的企业开发环境中,往往都会将环境分为:开发环境.测试环境和生产环境,而每个环境基本上都是互相隔离的,也就是说,开发环境.测试环境和生产环境是互不相通的.在以前的开发过程中,如果开发人员 ...
- 【Spring】简单的Spring AOP注解示例
引入相关包: <properties> <spring.version>3.0.5.RELEASE</spring.version> <aspectj.ver ...
随机推荐
- ztreeDeptSelect 基于jquery和ztree的部门选择插件
插件介绍 首先我们来看插件的功能演示(效果): 插件准备好后.前台只需编写html: <input type="text" class="deptName" ...
- js中几种实用的跨域方法原理详解(转)
今天研究js跨域问题的时候发现一篇好博,非常详细地讲解了js几种跨域方法的原理,特分享一下. 原博地址:http://www.cnblogs.com/2050/p/3191744.html 下面正文开 ...
- ASP.NET MVC Model验证(三)
ASP.NET MVC Model验证(三) 前言 上篇中说到在MVC框架中默认的Model验证是在哪里验证的,还讲到DefaultModelBinder类型的内部执行的示意图,让大家可以看到默认的M ...
- 如何利用 Visual Studio 自定义项目或工程模板
在开发项目的时候,由其是商业性质的大型项目时,往往需要在每个代码文件上都加上一段关于版权.开发人员的信息,并且名称空间上都需要带有公司的标志.这个时候,是选择在开发的时候手动添加还是自动生成呢? 我们 ...
- JavaScript的基准测试-不服跑个分?
原文:Bulletproof JavaScript benchmarks 做JavaScript的基准测试并没有想的那么简单.即使不考虑浏览器差异所带来的影响,也有很多难点-或者说陷阱需要面对. 这是 ...
- Javascript之函数模型
分析: 对于js自定义函数,函数体的内容大致可抽象为:变量(局部变量,由var关键字定义,全局变量)和函数(一般函数,匿名函数,闭包函数). function SelfDefineFunc() { v ...
- xamarin android ListView手动分组
xamarin的listview控件其实自带有分组方法,关于xamarin listview的自带分组方法请自行参考官方文档,我这里只写自己写的分组方法.xamarin自带的分组好是好,功能多,但是加 ...
- redis命令1
SADD numbers 1 3 5 创建一个名为numbers的intset SADD fruites "apple" "peach" 创建一个hashtab ...
- IIS7.5上的REST服务的Put,Delete操作发生HTTP Error 405.0 - Method Not Allowed 解决方法
WebDAV 是超文本传输协议 (HTTP) 的一组扩展,为 Internet 上计算机之间的编辑和文件管理提供了标准.利用这个协议用户可以通过Web进行远程的基本文件操作,如拷贝.移动.删除等.在I ...
- Linux 解决数量庞大wildfly容器启动与停止的脚本
一.问题 因公司业务的发展,后台架构的变更,导致测试环境(Linux)部署与管理困难成倍增长,duang的一下,增加N倍.进入正题说问题: 问题1. 测试环境包含普通用户环境.开发者用户环境,原来只 ...