主备(keepalived+haproxy)
系统:centos6.9 mini
主机名 ip 虚拟ip
kh1 192.168.126.210
kh2 192.168.126.220 192.168.126.100
web11 192.168.126.230
web22 192.168.126.240
1、在kh1和kh2安装keepalived和haproxy
[root@kh1 ~]# yum install -y keepavlivd haproxy
[root@kh2 ~]# yum install -y keepavlivd haproxy
2、在web1和web2上部署web服务
[root@web11 ~]# yum install -y httpd
[root@web11 ~]# echo "web1">/var/www/html/index.html
[root@web11 ~]# service httpd restart
[root@web11 ~]# chkconfig httpd on
[root@web22 ~]# yum install -y httpd
[root@web22 ~]# echo "web2">/var/www/html/index.html
[root@web22 ~]# service httpd restart
[root@web22 ~]# chkconfig httpd on
3、在kh1和kh2 配置keepalived,在kh1上查看虚拟ip
[root@kh1 ~]# cat /etc/keepalived/keepalived.conf
! Configuration File for keepalived
global_defs {
router_id kh1
}
vrrp_instance VI_1 {
state MASTER
interface eth0
virtual_router_id 51
priority 100
advert_int 1
authentication {
auth_type PASS
auth_pass 1111
}
virtual_ipaddress {
192.168.126.100
}
}
[root@kh1 ~]# /etc/init.d/keepalived restart
[root@kh1 ~]# ip addr list
link/ether 00:0c:29:da:01:36 brd ff:ff:ff:ff:ff:ff
inet 192.168.126.210/24 brd 192.168.126.255 scope global eth0
inet 192.168.126.100/32 scope global eth0
[root@kh2 ~]# cat /etc/keepalived/keepalived.conf
! Configuration File for keepalived
global_defs {
router_id kn2
}
vrrp_instance VI_1 {
state BACKUP
interface eth0
virtual_router_id 51
priority 90
advert_int 1
authentication {
auth_type PASS
auth_pass 1111
}
virtual_ipaddress {
192.168.126.100
}
}
[root@kh2 ~]# /etc/init.d/keepalived restart
4、在kh1和kh2上配置haproxy(两个节点的配置一样的,红色部分为添加部分)
[root@kh1 ~]# cat /etc/haproxy/haproxy.cfg
#---------------------------------------------------------------------
# Example configuration for a possible web application. See the
# full configuration options online.
#
# http://haproxy.1wt.eu/download/1.4/doc/configuration.txt
#
#---------------------------------------------------------------------
#---------------------------------------------------------------------
# Global settings
#---------------------------------------------------------------------
global
# to have these messages end up in /var/log/haproxy.log you will
# need to:
#
# 1) configure syslog to accept network log events. This is done
# by adding the '-r' option to the SYSLOGD_OPTIONS in
# /etc/sysconfig/syslog
#
# 2) configure local2 events to go to the /var/log/haproxy.log
# file. A line like the following can be added to
# /etc/sysconfig/syslog
#
# local2.* /var/log/haproxy.log
#
log 127.0.0.1 local2
chroot /var/lib/haproxy
pidfile /var/run/haproxy.pid
maxconn 4000
user haproxy
group haproxy
daemon
# turn on stats unix socket
stats socket /var/lib/haproxy/stats
#---------------------------------------------------------------------
# common defaults that all the 'listen' and 'backend' sections will
# use if not designated in their block
#---------------------------------------------------------------------
defaults
mode http
log global
option httplog
option dontlognull
option http-server-close
option forwardfor except 127.0.0.0/8
option redispatch
retries 3
timeout http-request 10s
timeout queue 1m
timeout connect 10s
timeout client 1m
timeout server 1m
timeout http-keep-alive 10s
timeout check 10s
maxconn 3000
stats uri /haproxy-stats #监控页面的url
stats refresh 30s #更新页面时间
stats auth admin:admin #监控页面的提示信息
stats hide-version #隐藏统计页面上的HAproxy版本信息
#---------------------------------------------------------------------
# main frontend which proxys to the backends
#---------------------------------------------------------------------
frontend http_80_in
bind *:80 #监听端口,即haproxy提供web服务的端口,和lvs的vip端口类似
mode http #http的7层模式
log global
default_backend test1
#---------------------------------------------------------------------
# static backend for serving up images, stylesheets and such
#---------------------------------------------------------------------
#backend static
# balance roundrobin
#---------------------------------------------------------------------
# round robin balancing between the various backends
#---------------------------------------------------------------------
backend test1
balance roundrobin
server web11 192.168.126.230:80 weight 1 check inter 15000 rise 2 fall 4
server web22 192.168.126.240:80 weight 2 check inter 15000 rise 2 fall 4
#web集群配置,服务器定义web11,webv22 ,check inter 1500是检测心跳频率rise 2是2次正确认为服务器可用,
fall 4是4次失败认为服务器不可用,weight代表权重
[root@kh1 ~]# scp /etc/haproxy/haproxy.cfg root@192.168.126.220:/etc/haproxy/haproxy.cfg
#复制配置文件到kh2上
[root@kh1 ~]# /etc/init.d/haproxy restart
[root@kh2 ~]# /etc/init.d/haproxy restart
5、验证
5.1 在kh1上关掉keepalived和haproxy 服务,vip 转移到kh2上,后端服务正常
[root@kh1 ~]# /etc/init.d/keepalived stop
Stopping keepalived: [ OK ]
[root@kh1 ~]# /etc/init.d/haproxy stop
Stopping haproxy:
[root@kh2 ~]# ip addr list
2: eth0: <BROADCAST,MULTICAST,UP,LOWER_UP> mtu 1500 qdisc pfifo_fast state UP qlen 1000
link/ether 00:0c:29:80:2e:09 brd ff:ff:ff:ff:ff:ff
inet 192.168.126.220/24 brd 192.168.126.255 scope global eth0
inet 192.168.126.100/32 scope global eth0
inet6 fe80::20c:29ff:fe80:2e09/64 scope link
valid_lft forever preferred_lft forever
[root@kh2 ~]# curl http://192.168.126.100
web2
[root@kh2 ~]# curl http://192.168.126.100
web2
[root@kh2 ~]# curl http://192.168.126.100
web1
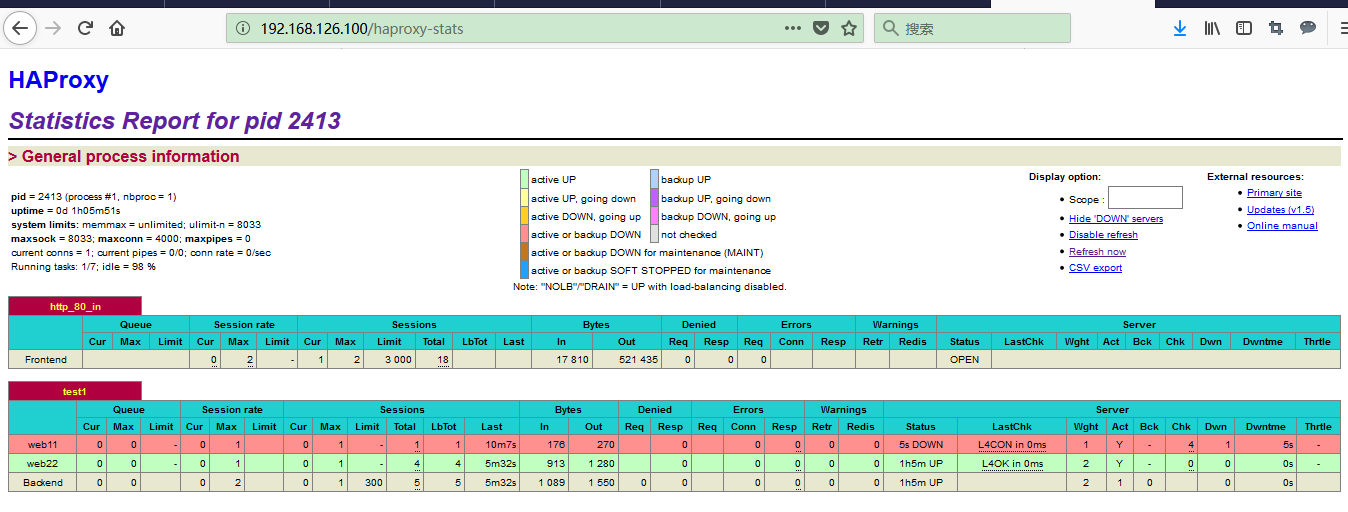
5.2 访问haproxy 监控页面,最浏览器输入http://192.168.126.100/haproxy-stats ,填入用户名admin和密码admin(图一),接着看到的是监控的页面(图二),可以看到web11,web2都是up的,当web11 宕机了,再次刷新,可以看到web11的状态是down 的,颜色变成了红色(图三)
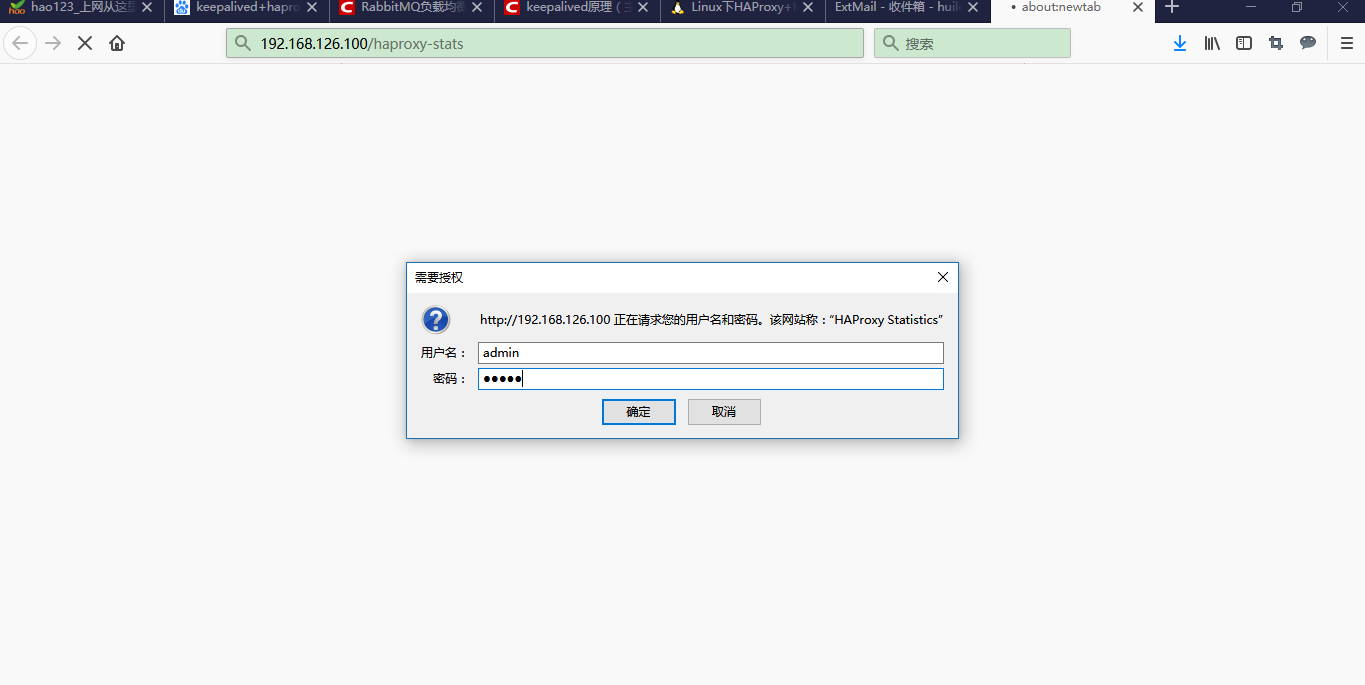
图一

图二
图三
主备(keepalived+haproxy)的更多相关文章
- Keepalived 主备配置
keepalived主备或多主多备,配置都是一样配置方法,只是搭建多少的问题. 1.keepalived安装 参考:https://www.cnblogs.com/zwcry/p/9542867.ht ...
- Centos7.6部署k8s v1.16.4高可用集群(主备模式)
一.部署环境 主机列表: 主机名 Centos版本 ip docker version flannel version Keepalived version 主机配置 备注 master01 7.6. ...
- haproxy+keepalived主备与双主模式配置
Haproxy+Keepalived主备模式 主备节点设置 主备节点上各安装配置haproxy,配置内容且要相同 global log 127.0.0.1 local2 chroot /var/lib ...
- 二十七. Keepalived热备 Keepalived+LVS 、 HAProxy服务器
1.Keepalived高可用服务器 proxy:192.168.4.5(客户端主机) web1:192.168.4.100(Web服务器,部署Keepalived高可用软件) web2:192.16 ...
- KeepAlived主备/主主模型高可用Nginx
部署准备: 两台CentOS 7主机HA1和HA2 CentOS 7 基于rpm包安装Nginx: 由于Base源中没有Nginx,所以要安装EPEL源,命令如下: wget http://dl.fe ...
- KeepAlived主备模型高可用LVS
部署前准备: 1.至少4台主机:两个Director(HA1,HA2),两个Real Server(RS1,RS2) 2.Director之间时间必须同步,且关闭各主机的防火墙和Selinux 3.出 ...
- keepalived工作原理和配置说明 腾讯云VPC内通过keepalived搭建高可用主备集群
keepalived工作原理和配置说明 腾讯云VPC内通过keepalived搭建高可用主备集群 内网路由都用mac地址 一个mac地址绑定多个ip一个网卡只能一个mac地址,而且mac地址无法改,但 ...
- Nginx+Keepalived主备切换(包含nginx服务停止)
原文地址:http://blog.sina.com.cn/s/blog_79ac6aa80101bmed.html Nginx+Keepalived主备切换(包含nginx服务停止) 环境: VM中4 ...
- 测试redis+keepalived实现简单的主备切换【转载】
转自: 测试redis+keepalived实现简单的主备切换 - Try My Best 尽力而为 - ITeye技术网站http://raising.iteye.com/blog/2311757 ...
- Nginx+Keepalived 主备高可用 安装与配置
环境说明:操作系统:CentOS6.7 x86_64Nginx版本:nginx-1.9.7Keepalived版本:keepalived-1.2.24 主nginx + Keepalived :10. ...
随机推荐
- HDU 1024 Max Sum Plus Plus【动态规划求最大M子段和详解 】
Max Sum Plus Plus Time Limit: 2000/1000 MS (Java/Others) Memory Limit: 65536/32768 K (Java/Others ...
- android手机安全卫士、Kotlin漫画、支付宝动画、沉浸状态栏等源码
Android精选源码 轻量级底部导航栏 android手机卫士源码 android实现高仿今日头条源码 一个用Kotlin写的简单漫画App源码 android吐槽项目完整源码 ...
- Git服务搭建及github使用教程
.pos { position: fixed; top: 35%; left: 90% } .pos a { border: 2px solid white; background: #99CCFF; ...
- 全面理解Java内存模型
尊重原创:http://blog.csdn.net/suifeng3051/article/details/52611310 Java内存模型即JavaMemory Model,简称JMM.JMM定义 ...
- Vue-cli搭建完项目,各文件解释
脚手架vue-cli搭建完成后,会生成一些文件,总结学习一下这些文件是做什么用的:1.一级目录: build和config文件夹是wbepack配置的文件夹: node_modules是在我npm i ...
- HDU 5912 Fraction(模拟——分子式化简求解)
题目链接: http://acm.hdu.edu.cn/showproblem.php?pid=5912 Problem Description Mr. Frog recently studied h ...
- EhCache 在集群环境中使用缓存系统
EhCache 分布式缓存/缓存集群 EhCache提供了很多种解决方案 这里只介绍一种最常用而且简单的RMI方式分布式缓存决绝方案 Automatic Peer Discovery 自动成员发现方 ...
- 从零开始学习前端开发 — 16、CSS3圆角与阴影
一.css3圆角: border-radius:数值+单位; 1.设置一个值:border-radius:20px; 四个方向圆角都为20px(水平半径和垂直半径相等) 2.设置两个值 border- ...
- Linux 将本地文件上传Linux服务器, 即ssh 命令上传本地文件
利用ssh传输文件 在linux下一般用scp这个命令来通过ssh传输文件. 1.从服务器上下载文件 scp username@servername:/path/filename /var/www ...
- block一点也不神秘————如何利用block进行回调
我们在开发中常常会用到函数回调,你可以用通知来替代回调,但是大多数时候回调是比通知方便的,所以何乐而不为呢?如果你不知道回调使用的场景,我们来假设一下: 1.我现在玩手机 2.突然手机没有电了 3.我 ...