
java与es8实战之四:SpringBoot应用中操作es8(无安全检查)
欢迎访问我的GitHub
这里分类和汇总了欣宸的全部原创(含配套源码):https://github.com/zq2599/blog_demos
本篇概览
- 本篇是《java与es8实战》系列的第四篇,系列文章写到现在,连个HelloWorld都没运行起来,实在说不过去了...
- 因此,本篇总体目标明确:实战在SpringBoot应用中操作elasticsearch8
- 为了降低难度,本篇部署的elasticsearch8未设置安全检查,无需证书、账号、密码,只要连接到es的IP和端口就能执行操作
- 总体目标可以拆解为两个子任务
- 在SpringBoot中连接elasticsearch8
- 在SpringBoot中使用elasticsearch8官方的Java API Client
- 接下来直接开始
部署elasticsearch集群(无安全检查)
- 关于快速部署elasticsearch集群(无安全检查),可以参考《docker-compose快速部署elasticsearch-8.x集群+kibana》
Java应用连接elasticsearch的核心套路
- 不论是直连,还是带安全检查的连接,亦或是与SpringBoot的集成使之更方便易用,都紧紧围绕着一个不变的核心套路,该套路由两部分组成,掌握了它们就能在各种条件下成功连接es
- 首先,是builder pattern,连接es有关的代码,各种对象都是其builder对象的build方法创建的,建议您提前阅读《java与es8实战之一》一文,看完后,满屏的builder代码可以从丑变成美...
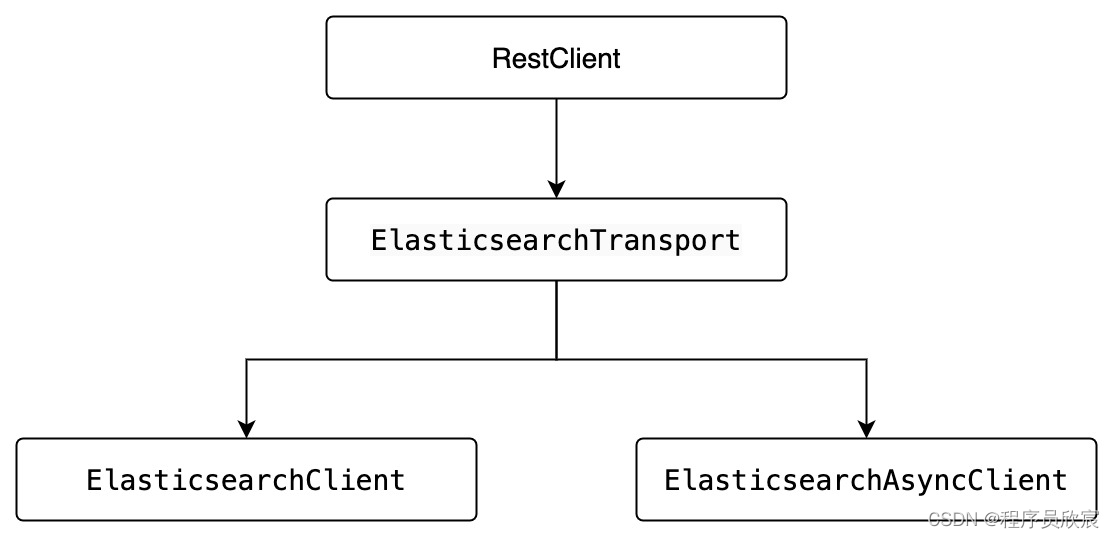
- 其次,就是java应用能向es发请求的关键:ElasticsearchClient对象,该对象的创建是有套路的,如下图,先创建RestClient,再基于RestClient创建ElasticsearchTransport,最后基于ElasticsearchTransport创建ElasticsearchClient,这是个固定的套路,咱们后面的操作都是基于此的,可能会加一点东西,但不会改变流程和图中的对象
- 准备完毕,开始写代码
新建子工程
为了便于管理依赖库版本和源码,《java与es8实战》系列的所有代码都以子工程的形式存放在父工程elasticsearch-tutorials中
《java与es8实战之二:实战前的准备工作》一文说明了创建父工程的详细过程
在父工程elasticsearch-tutorials中新建名为basic-crud的子工程,其pom.xml内容如下
<?xml version="1.0" encoding="UTF-8"?>

<project xmlns="http://maven.apache.org/POM/4.0.0" xmlns:xsi="http://www.w3.org/2001/XMLSchema-instance"

         xsi:schemaLocation="http://maven.apache.org/POM/4.0.0 http://maven.apache.org/xsd/maven-4.0.0.xsd">

    <!-- 请改为自己项目的parent坐标 -->

    <parent>

        <artifactId>elasticsearch-tutorials</artifactId>

        <groupId>com.bolingcavalry</groupId>

        <version>1.0-SNAPSHOT</version>

        <relativePath>../pom.xml</relativePath>

    </parent>

    <modelVersion>4.0.0</modelVersion>

    <!-- 请改为自己项目的artifactId -->

    <artifactId>basic-crud</artifactId>

    <packaging>jar</packaging>

    <!-- 请改为自己项目的name -->

    <name>basic-crud</name>

    <url>https://github.com/zq2599</url>

    <!--不用spring-boot-starter-parent作为parent时的配置-->

    <dependencyManagement>

        <dependencies>

            <dependency>

                <groupId>org.springframework.boot</groupId>

                <artifactId>spring-boot-dependencies</artifactId>

                <version>${springboot.version}</version>

                <type>pom</type>

                <scope>import</scope>

            </dependency>

        </dependencies>

    </dependencyManagement>

    <dependencies>

        <dependency>

            <groupId>org.springframework.boot</groupId>

            <artifactId>spring-boot-starter-actuator</artifactId>

        </dependency>

        <!-- 不加这个,configuration类中,IDEA总会添加一些提示 -->

        <dependency>

            <groupId>org.springframework.boot</groupId>

            <artifactId>spring-boot-configuration-processor</artifactId>

            <optional>true</optional>

        </dependency>

        <dependency>

            <groupId>org.projectlombok</groupId>

            <artifactId>lombok</artifactId>

        </dependency>

        <dependency>

            <groupId>org.springframework.boot</groupId>

            <artifactId>spring-boot-starter-web</artifactId>

        </dependency>

        <dependency>

            <groupId>org.springframework.boot</groupId>

            <artifactId>spring-boot-starter-test</artifactId>

            <scope>test</scope>

            <!-- exclude junit 4 -->

            <exclusions>

                <exclusion>

                    <groupId>junit</groupId>

                    <artifactId>junit</artifactId>

                </exclusion>

            </exclusions>

        </dependency>

        <!-- junit 5 -->

        <dependency>

            <groupId>org.junit.jupiter</groupId>

            <artifactId>junit-jupiter-api</artifactId>

            <scope>test</scope>

        </dependency>

        <dependency>

            <groupId>org.junit.jupiter</groupId>

            <artifactId>junit-jupiter-engine</artifactId>

            <scope>test</scope>

        </dependency>

        <!-- elasticsearch引入依赖  start -->

        <dependency>

            <groupId>co.elastic.clients</groupId>

            <artifactId>elasticsearch-java</artifactId>

        </dependency>

        <dependency>

            <groupId>com.fasterxml.jackson.core</groupId>

            <artifactId>jackson-databind</artifactId>

        </dependency>

        <!-- 使用spring boot Maven插件时需要添加该依赖 -->

        <dependency>

            <groupId>jakarta.json</groupId>

            <artifactId>jakarta.json-api</artifactId>

        </dependency>

        <dependency>

            <groupId>org.springframework.boot</groupId>

            <artifactId>spring-boot-starter-web</artifactId>

        </dependency>

    </dependencies>

    <build>

        <plugins>

            <!-- 需要此插件,在执行mvn test命令时才会执行单元测试 -->

            <plugin>

                <groupId>org.apache.maven.plugins</groupId>

                <artifactId>maven-surefire-plugin</artifactId>

                <version>3.0.0-M4</version>

                <configuration>

                    <skipTests>false</skipTests>

                </configuration>

            </plugin>

            <plugin>

                <groupId>org.springframework.boot</groupId>

                <artifactId>spring-boot-maven-plugin</artifactId>

                <configuration>

                    <excludes>

                        <exclude>

                            <groupId>org.projectlombok</groupId>

                            <artifactId>lombok</artifactId>

                        </exclude>

                    </excludes>

                </configuration>

            </plugin>

        </plugins>

        <resources>

            <resource>

                <directory>src/main/resources</directory>

                <includes>

                    <include>**/*.*</include>

                </includes>

            </resource>

        </resources>

    </build>

</project>
编码:配置文件
- 先准备好配置文件application.yml,内容如下,很简单,只有es的地址信息
elasticsearch:

  # 多个IP逗号隔开

  hosts: 127.0.0.1:9200
编码:配置类
- 首先把启动类写好,平平无奇的启动类BasicCrudApplication.java
@SpringBootApplication

public class BasicCrudApplication {

    public static void main(String[] args) {

        SpringApplication.run(BasicCrudApplication.class, args);

    }

}
- 然后是配置类ClientConfig.java,这是本篇的关键,操作ES所需的ElasticsearchClient实例如何创建,ES的IP地址如何传入,全部写在这里了
package com.bolingcavalry.basic.config;

import co.elastic.clients.elasticsearch.ElasticsearchAsyncClient;

import co.elastic.clients.elasticsearch.ElasticsearchClient;

import co.elastic.clients.json.jackson.JacksonJsonpMapper;

import co.elastic.clients.transport.rest_client.RestClientTransport;

import lombok.Setter;

import org.apache.http.HttpHost;

import org.elasticsearch.client.RestClient;

import org.springframework.boot.context.properties.ConfigurationProperties;

import org.springframework.context.annotation.Bean;

import org.springframework.context.annotation.Configuration;

import org.springframework.util.StringUtils;

@ConfigurationProperties(prefix = "elasticsearch") //配置的前缀

@Configuration

public class ClientConfig {

    @Setter

    private String hosts;

    /**

     * 解析配置的字符串,转为HttpHost对象数组

     * @return

     */

    private HttpHost[] toHttpHost() {

        if (!StringUtils.hasLength(hosts)) {

            throw new RuntimeException("invalid elasticsearch configuration");

        }

        String[] hostArray = hosts.split(",");

        HttpHost[] httpHosts = new HttpHost[hostArray.length];

        HttpHost httpHost;

        for (int i = 0; i < hostArray.length; i++) {

            String[] strings = hostArray[i].split(":");

            httpHost = new HttpHost(strings[0], Integer.parseInt(strings[1]), "http");

            httpHosts[i] = httpHost;

        }

        return httpHosts;

    }

    @Bean

    public ElasticsearchClient elasticsearchClient() {

        HttpHost[] httpHosts = toHttpHost();

        RestClient restClient = RestClient.builder(httpHosts).build();

        RestClientTransport transport = new RestClientTransport(restClient, new JacksonJsonpMapper());

        return new ElasticsearchClient(transport);

    }

    @Bean

    public ElasticsearchAsyncClient elasticsearchAsyncClient() {

        HttpHost[] httpHosts = toHttpHost();

        RestClient restClient = RestClient.builder(httpHosts).build();

        RestClientTransport transport = new RestClientTransport(restClient, new JacksonJsonpMapper());

        return new ElasticsearchAsyncClient(transport);

    }

}
- 从上面的代码可以看出,配置类已经向Spring容器注册了ElasticsearchClient实例,后面的业务都可以使用此实例来操作ES
编码:服务类
本篇只是为了演示SpringBoot应用如何连接和操作ES,还不会深入ES操作的细节,因此只对索引做一些基本操作即可
先写一个接口IndexService.java,里面定义了多个索引操作的方法
package com.bolingcavalry.basic.service;

import co.elastic.clients.elasticsearch._types.mapping.TypeMapping;

import co.elastic.clients.elasticsearch.indices.IndexSettings;

import co.elastic.clients.util.ObjectBuilder;

import java.io.IOException;

import java.util.function.Function;

public interface IndexService {

    /**

     * 新建指定名称的索引

     * @param name

     * @throws IOException

     */

    void addIndex(String name) throws IOException;

    /**

     * 检查指定名称的索引是否存在

     * @param name

     * @return

     * @throws IOException

     */

    boolean indexExists(String name) throws IOException;

    /**

     * 删除指定索引

     * @param name

     * @throws IOException

     */

    void delIndex(String name) throws IOException;

    /**

     * 创建索引,指定setting和mapping

     * @param name 索引名称

     * @param settingFn 索引参数

     * @param mappingFn 索引结构

     * @throws IOException

     */

    void create(String name,

                Function<IndexSettings.Builder, ObjectBuilder<IndexSettings>> settingFn,

                Function<TypeMapping.Builder, ObjectBuilder<TypeMapping>> mappingFn) throws IOException;

}
- 然后接口的实现,可见所有操作都是在调用ElasticsearchClient实例的API
package com.bolingcavalry.basic.service.impl;

import co.elastic.clients.elasticsearch.ElasticsearchClient;

import co.elastic.clients.elasticsearch._types.mapping.TypeMapping;

import co.elastic.clients.elasticsearch.indices.IndexSettings;

import co.elastic.clients.util.ObjectBuilder;

import com.bolingcavalry.basic.service.IndexService;

import org.springframework.beans.factory.annotation.Autowired;

import org.springframework.context.ApplicationContext;

import org.springframework.stereotype.Service;

import java.io.IOException;

import java.util.function.Function;

@Service

public class IndexServiceImpl implements IndexService {

    @Autowired

    private ElasticsearchClient elasticsearchClient;

    @Override

    public void addIndex(String name) throws IOException {

        ApplicationContext applicationContext;

        elasticsearchClient.indices().create(c -> c.index(name));

    }

    @Override

    public boolean indexExists(String name) throws IOException {

        ApplicationContext a;

        return elasticsearchClient.indices().exists(b -> b.index(name)).value();

    }

    @Override

    public void delIndex(String name) throws IOException {

        elasticsearchClient.indices().delete(c -> c.index(name));

    }

    @Override

    public void create(String name,

                       Function<IndexSettings.Builder, ObjectBuilder<IndexSettings>> settingFn,

                       Function<TypeMapping.Builder, ObjectBuilder<TypeMapping>> mappingFn) throws IOException {

       elasticsearchClient

               .indices()

               .create(c -> c

                       .index(name)

                       .settings(settingFn)

                       .mappings(mappingFn)

               );

    }

}
- 以上就是本篇的功能代码了,连接ES在其上进行索引相关操作
编码:单元测试
- 为了验证上述代码是否生效,接下来写一个单元测试类IndexServiceTest.java,可以重点关注createIndex方法,里面演示了Builder pattern构建参数的详细步骤
package com.bolingcavalry.basic.service;

import co.elastic.clients.elasticsearch._types.mapping.Property;

import co.elastic.clients.elasticsearch._types.mapping.TypeMapping;

import co.elastic.clients.elasticsearch.indices.IndexSettings;

import co.elastic.clients.util.ObjectBuilder;

import org.junit.jupiter.api.Assertions;

import org.junit.jupiter.api.Test;

import org.springframework.beans.factory.annotation.Autowired;

import org.springframework.boot.test.context.SpringBootTest;

import java.util.function.Function;

@SpringBootTest

class IndexServiceTest {

    @Autowired

    IndexService indexService;

    @Test

    void addIndex() throws Exception {

        String indexName = "test_index";

        Assertions.assertFalse(indexService.indexExists(indexName));

        indexService.addIndex(indexName);

        Assertions.assertTrue(indexService.indexExists(indexName));

        indexService.delIndex(indexName);

        Assertions.assertFalse(indexService.indexExists(indexName));

    }

    @Test

    void indexExists() throws Exception {

        indexService.indexExists("a");

    }

    @Test

    void createIndex() throws Exception {

        // 索引名

        String indexName = "product002";

        // 构建setting时,builder用到的lambda

        Function<IndexSettings.Builder, ObjectBuilder<IndexSettings>> settingFn = sBuilder -> sBuilder

                .index(iBuilder -> iBuilder

                        // 三个分片

                        .numberOfShards("3")

                        // 一个副本

                        .numberOfReplicas("1")

                );

        // 新的索引有三个字段,每个字段都有自己的property,这里依次创建

        Property keywordProperty = Property.of(pBuilder -> pBuilder.keyword(kBuilder -> kBuilder.ignoreAbove(256)));

        Property textProperty = Property.of(pBuilder -> pBuilder.text(tBuilder -> tBuilder));

        Property integerProperty = Property.of(pBuilder -> pBuilder.integer(iBuilder -> iBuilder));

        // // 构建mapping时,builder用到的lambda

        Function<TypeMapping.Builder, ObjectBuilder<TypeMapping>> mappingFn = mBuilder -> mBuilder

                .properties("name", keywordProperty)

                .properties("description", textProperty)

                .properties("price", integerProperty);

        // 创建索引,并且指定了setting和mapping

        indexService.create(indexName, settingFn, mappingFn);

    }

}
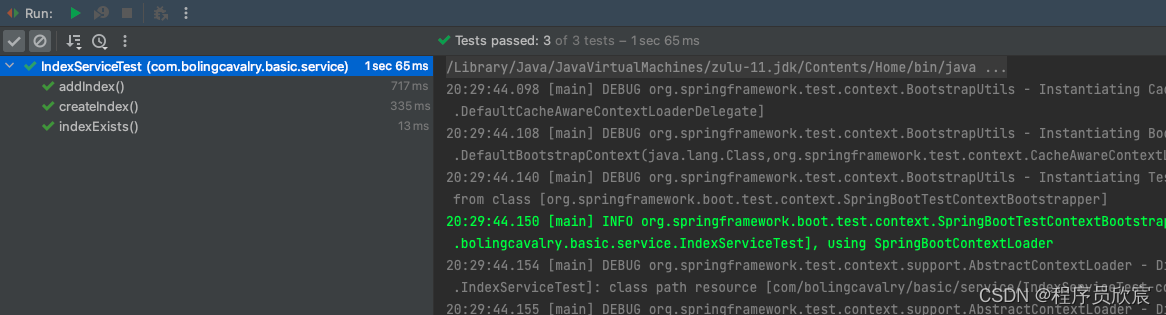
- 确保不做安全检查的ES集群运行正常,再执行单元测试,如下图,顺利通过,证明所有对ES的操作都符合预期
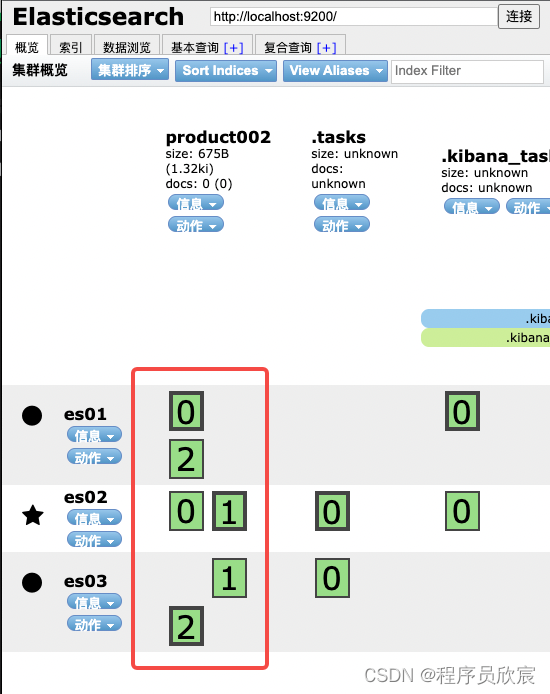
- 再用eshead观察product002索引的情况,如下图,三个分片,一个副本,与代码中设置的一致
- 至此最简单的连接和操作ES实战已经完成,希望本篇能给您一些参考,助您顺利完成基本操作
是不是线程安全的
- 官方回应:https://discuss.elastic.co/t/is-elasticsearch-client-is-thread-safe/151745
- 有人在问这个问题,es团队的成员Simon Willnauer的回答是:java的client肯定是线程安全的,golang的不清楚
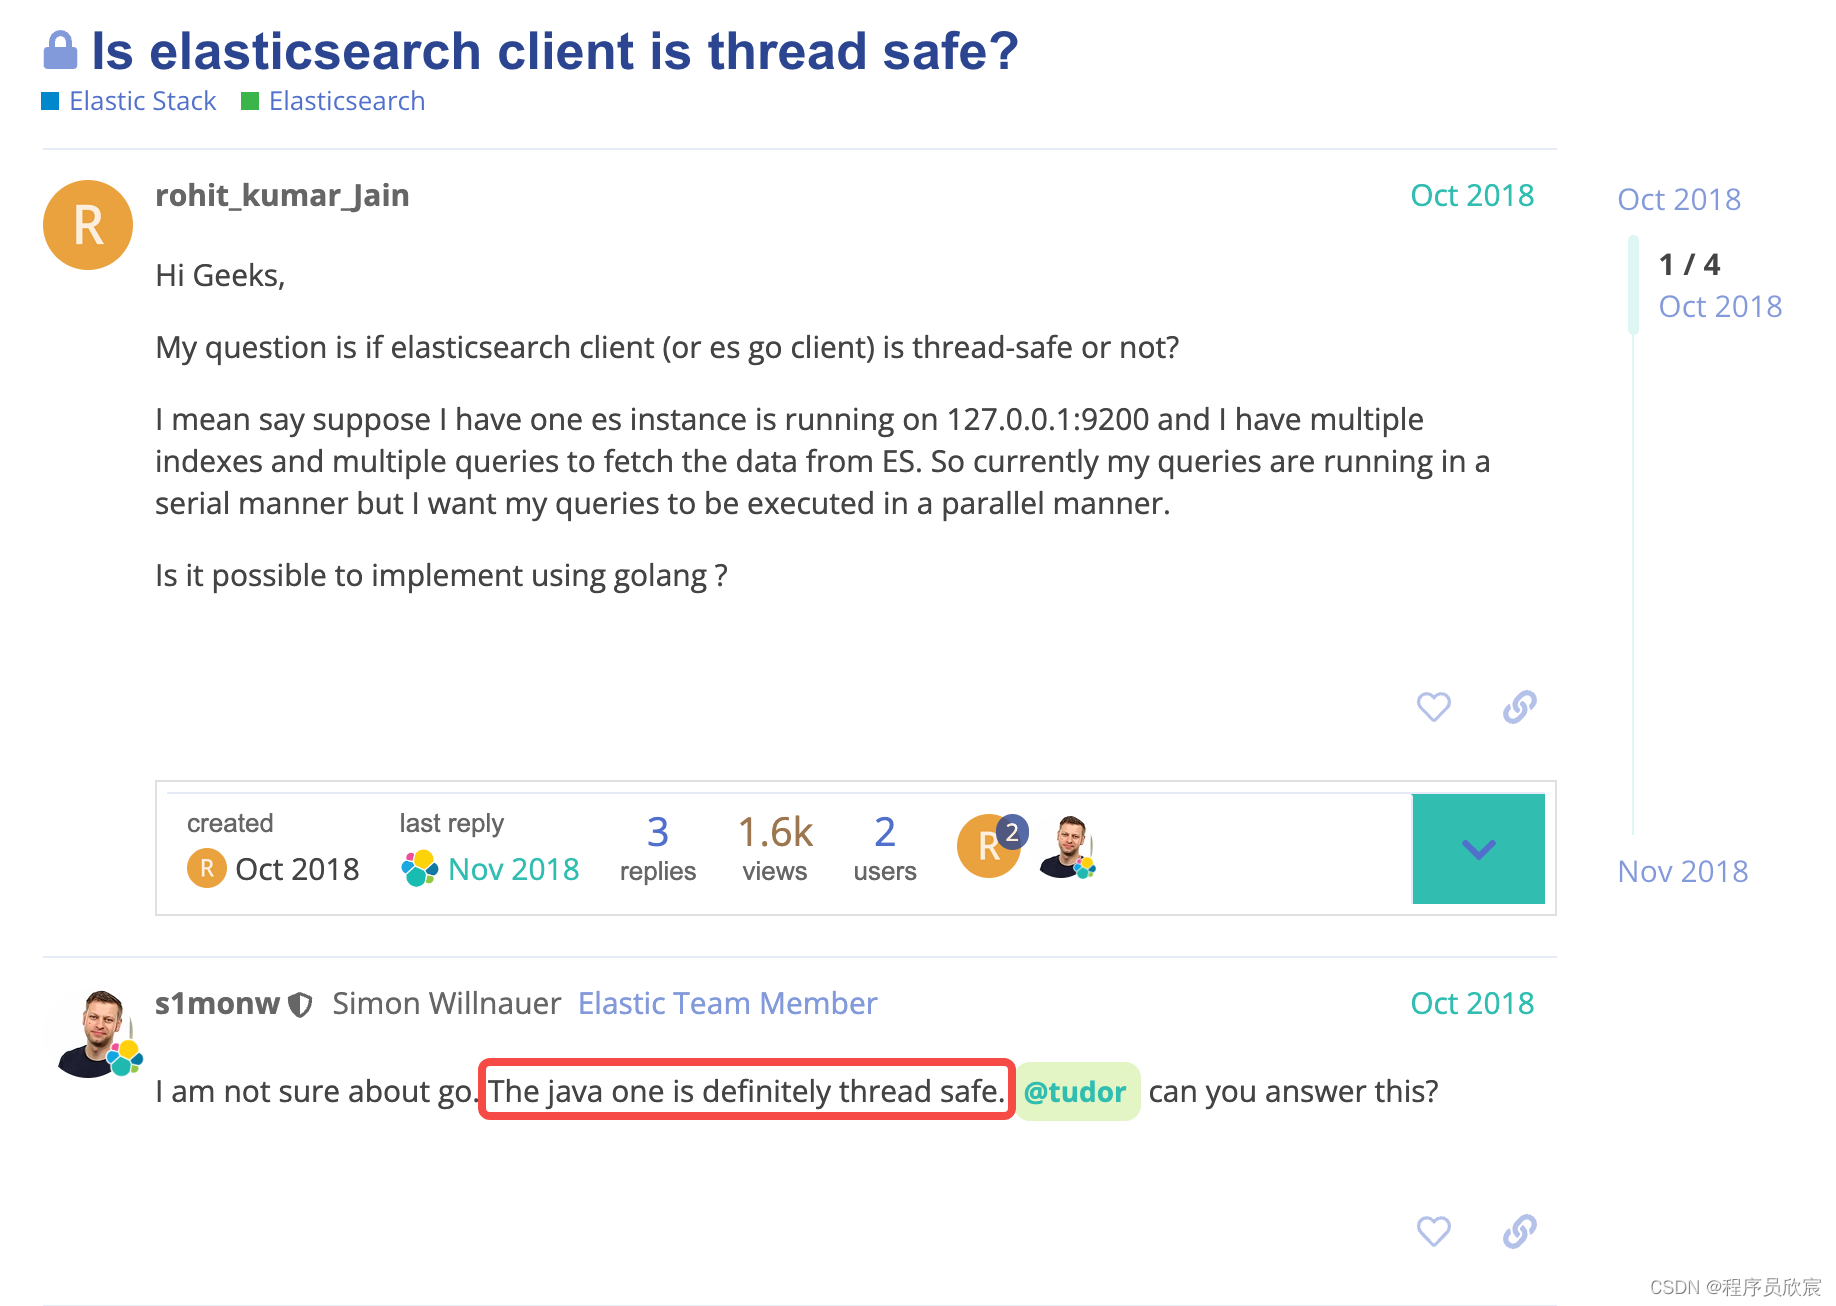
- 对我来说,有他这话就够了,至于golang的嘛,在本文就不讨论了
源码下载
- 本篇实战的完整源码可在GitHub下载到,地址和链接信息如下表所示(https://github.com/zq2599/blog_demos)
| 名称 | 链接 | 备注 |
|---|---|---|
| 项目主页 | https://github.com/zq2599/blog_demos | 该项目在GitHub上的主页 |
| git仓库地址(https) | https://github.com/zq2599/blog_demos.git | 该项目源码的仓库地址,https协议 |
| git仓库地址(ssh) | git@github.com:zq2599/blog_demos.git | 该项目源码的仓库地址,ssh协议 |
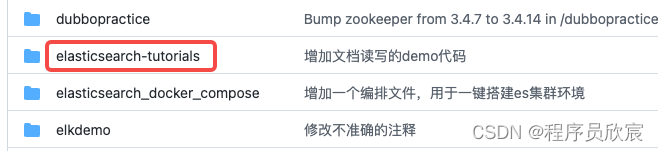
- 这个git项目中有多个文件夹,本次实战的源码在elasticsearch-tutorials文件夹下,如下图红框
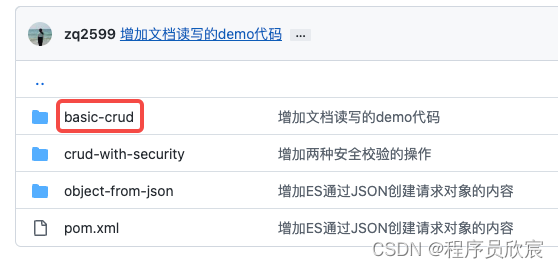
- elasticsearch-tutorials是个父工程,里面有多个module,本篇实战的module是basic-crud,如下图红框
欢迎关注博客园:程序员欣宸
java与es8实战之四:SpringBoot应用中操作es8(无安全检查)的更多相关文章
- java版gRPC实战之四:客户端流
欢迎访问我的GitHub https://github.com/zq2599/blog_demos 内容:所有原创文章分类汇总及配套源码,涉及Java.Docker.Kubernetes.DevOPS ...
- Android(java)学习笔记208:Android中操作JSON数据(Json和Jsonarray)
1.Json 和 Xml JSON(JavaScript Object Notation) 是一种轻量级的数据交换格式.它基于ECMAScript的一个子集. JSON采用完全独立于语言的 ...
- Android(java)学习笔记151:Android中操作JSON数据(Json和Jsonarray)
1.Json 和 Xml JSON(JavaScript Object Notation) 是一种轻量级的数据交换格式.它基于ECMAScript的一个子集. JSON采用完全独立于语言的 ...
- Android(java)学习笔记187:Android中操作XML数据(使用Pull解析器)
1. Pull解析器的运行方式与 SAX 解析器相似.它提供了类似的事件,如:开始元素和结束元素事件,使用parser.next()可以进入下一个元素并触发相应事件.跟SAX不同的是, Pull解析器 ...
- Android(java)学习笔记130:Android中操作XML数据(使用Pull解析器)
1. Pull解析器的运行方式与 SAX 解析器相似.它提供了类似的事件,如:开始元素和结束元素事件,使用parser.next()可以进入下一个元素并触发相应事件.跟SAX不同的是, Pull解析器 ...
- Java秒杀系统实战系列~构建SpringBoot多模块项目
摘要:本篇博文是“Java秒杀系统实战系列文章”的第二篇,主要分享介绍如何采用IDEA,基于SpringBoot+SpringMVC+Mybatis+分布式中间件构建一个多模块的项目,即“秒杀系统”! ...
- 重学 Java 设计模式:实战外观模式「基于SpringBoot开发门面模式中间件,统一控制接口白名单场景」
作者:小傅哥 博客:https://bugstack.cn 沉淀.分享.成长,让自己和他人都能有所收获! 一.前言 你感受到的容易,一定有人为你承担不容易 这句话更像是描述生活的,许许多多的磕磕绊绊总 ...
- 重学 Java 设计模式:实战代理模式「模拟mybatis-spring中定义DAO接口,使用代理类方式操作数据库原理实现场景」
作者:小傅哥 博客:https://bugstack.cn 沉淀.分享.成长,让自己和他人都能有所收获! 一.前言 难以跨越的瓶颈期,把你拿捏滴死死的! 编程开发学习过程中遇到的瓶颈期,往往是由于看不 ...
- 重学 Java 设计模式:实战备忘录模式「模拟互联网系统上线过程中,配置文件回滚场景」
作者:小傅哥 博客:https://bugstack.cn - 原创系列专题文章 沉淀.分享.成长,让自己和他人都能有所收获! 一.前言 实现不了是研发的借口? 实现不了,有时候是功能复杂度较高难以实 ...
- Java生鲜电商平台-生鲜系统中微服务架构设计与分析实战
Java生鲜电商平台-生鲜系统中微服务架构设计与分析实战 说明: Java生鲜系统中微服务的拆分应该如何架构设计与分析呢?以下是我的实战中的设计与经验分析. 目录 1. 微服务简介2. 当前现状3. ...
随机推荐
- Apache Arrow DataFusion原理与架构
本篇主要介绍了一种使用Rust语言编写的查询引擎--DataFusion,其使用了基于Arrow格式的内存模型,结合Rust语言本身的优势,达成了非常优秀的性能指标 DataFusion是一个查询引擎 ...
- Jenkins - 更改插件镜像源地址
Jenkins - 更改插件镜像源地址 进入 系统管理 > 插件管理 > 高级 在升级站点输入框,输入清华的Jenkins镜像源地址:点击提交保存即可: jenkins插件清华大学镜像地址 ...
- ITIL介绍
摘自:金角大王 https://www.cnblogs.com/alex3714/articles/5420433.html 本节内容 浅谈ITIL CMDB介绍 Django自定义用户认证 Rest ...
- reverse逆转,即反向排序
reverse逆转,即反向排序 print(Student.objects.all().exclude(nickname='A').reverse()
- mysql报错Unknown collation: utf8mb4_0900_ai_ci
mysql报错Unknown collation: utf8mb4_0900_ai_ci 解决方案: 将文件内的所有 utf8mb4_0900_ai_ci 换成 utf8_general_ci utf ...
- odoo开发教程十一:视图综述
一:视图标签等公共结构 name (必选) 用于通过名字查找标签 model: 与view相关联的model priority 当搜索查找view时,优先级最低的view会被返回 arch 视图lay ...
- 图解VirtualBox安装CentOS 7
VirtualBox简介 VirtualBox是由德国InnoTek软件公司出品的虚拟机软件,现在则由甲骨文公司进行开发,是甲骨文公司xVM虚拟化平台技术的一部分. VirtualBox提供用户在32 ...
- pyhton - parallel - programming - cookbook(THREAD)
基于线程的并行 通常,一个应用有一个进程,分成多个独立的线程,并行运行.互相配合,执行不同类型的任务. 线程是独立的处理流程,可以和系统的其他线程并行或并发地执行.多线程可以共享数据和资源,利用所谓的 ...
- Visual Studio2019如何添加引用
同一解决方案中添加引用 比如我们想在Test项目中添加Queue项目的引用 1.鼠标右击引用-->添加引用 2."引用管理器"-->项目-->解决方案--&g ...
- Redis数据类型之Stream系列一
一:Stream简介 Redis Stream是5.0版本之后新增的一种数据结构,其结构类似于'仅追加日志'.但也实现了多种操作来克服'仅追加日志'的一些限制,如读取策略(xread,xrange ...