全网最详细最好懂 PyTorch CNN案例分析 识别手写数字
先来看一下这是什么任务。就是给你手写数组的图片,然后识别这是什么数字:

dataset
首先先来看PyTorch的dataset类:
我已经在从零学习pytorch 第2课 Dataset类讲解了什么是dataset类以及他的运行原理
class MNIST_data(Dataset):

    """MNIST dtaa set"""

    def __init__(self, file_path,

                 transform = transforms.Compose([transforms.ToPILImage(), transforms.ToTensor(),

                     transforms.Normalize(mean=(0.5,), std=(0.5,))])

                ):

        df = pd.read_csv(file_path)

        if len(df.columns) == n_pixels:

            # test data

            self.X = df.values.reshape((-1,28,28)).astype(np.uint8)[:,:,:,None]

            self.y = None

        else:

            # training data

            self.X = df.iloc[:,1:].values.reshape((-1,28,28)).astype(np.uint8)[:,:,:,None]

            self.y = torch.from_numpy(df.iloc[:,0].values)

        self.transform = transform

    def __len__(self):

        return len(self.X)

    def __getitem__(self, idx):

        if self.y is not None:

            return self.transform(self.X[idx]), self.y[idx]

        else:

            return self.transform(self.X[idx])
- __init__中可以看到,file_path就是数据的读取地方,不同竞赛中的数据呈现模式不同,因此这个需要自行修改。
- transform默认是一个“转化成Image数据”,“转化成ToTensor”,“对图像数据进行归一化”。
- 我们先对df文件读取,这里的图像数据是存储在dataframe当中的,每个图片都是1784的数据,然后self.X是图像数据2828(tip:28*28 = 784)。如果数据是训练集,则有slef.y就是label(0~9),如果是测试集,就为None
- 然后在DataLoader中调用的__getitem__,我们对图像数据进行transform操作。
dataset构建结束。
加载数据
batch_size = 64

train_dataset = MNIST_data('../input/train.csv', transform= transforms.Compose(

                            [transforms.ToPILImage(), RandomRotation(degrees=20), RandomShift(3),

                             transforms.ToTensor(), transforms.Normalize(mean=(0.5,), std=(0.5,))]))

test_dataset = MNIST_data('../input/test.csv')

train_loader = torch.utils.data.DataLoader(dataset=train_dataset,

                                           batch_size=batch_size, shuffle=True)

test_loader = torch.utils.data.DataLoader(dataset=test_dataset,

                                           batch_size=batch_size, shuffle=False)
先来看:
可以看到transoforms.Compose()啥?
- transforms.ToPILImage()
- RanomRotation(degrees=20)
- RandomShift(3)
- transforms.ToTensor()
- transforms.Normalize(mean=(0.5,),std=(0.5,))
第一个第四个第五个不用说,那个CNN图像处理的基本都有。第二个和第三个,Rotation是随机旋转degrees角度,shift是随机平移一段距离。
因为目前版本的torchvision.transform不带有旋转和平移的方法,所以需要自己写class。下面是直接从github复制下来的,可以直接照着使用,不用修改,非常良心,建议收藏方便下次直接复制哈哈:
class RandomRotation(object):

    """

    https://github.com/pytorch/vision/tree/master/torchvision/transforms

    Rotate the image by angle.

    Args:

        degrees (sequence or float or int): Range of degrees to select from.

            If degrees is a number instead of sequence like (min, max), the range of degrees

            will be (-degrees, +degrees).

        resample ({PIL.Image.NEAREST, PIL.Image.BILINEAR, PIL.Image.BICUBIC}, optional):

            An optional resampling filter.

            See http://pillow.readthedocs.io/en/3.4.x/handbook/concepts.html#filters

            If omitted, or if the image has mode "1" or "P", it is set to PIL.Image.NEAREST.

        expand (bool, optional): Optional expansion flag.

            If true, expands the output to make it large enough to hold the entire rotated image.

            If false or omitted, make the output image the same size as the input image.

            Note that the expand flag assumes rotation around the center and no translation.

        center (2-tuple, optional): Optional center of rotation.

            Origin is the upper left corner.

            Default is the center of the image.

    """

    def __init__(self, degrees, resample=False, expand=False, center=None):

        if isinstance(degrees, numbers.Number):

            if degrees < 0:

                raise ValueError("If degrees is a single number, it must be positive.")

            self.degrees = (-degrees, degrees)

        else:

            if len(degrees) != 2:

                raise ValueError("If degrees is a sequence, it must be of len 2.")

            self.degrees = degrees

        self.resample = resample

        self.expand = expand

        self.center = center

    @staticmethod

    def get_params(degrees):

        """Get parameters for ``rotate`` for a random rotation.

        Returns:

            sequence: params to be passed to ``rotate`` for random rotation.

        """

        angle = np.random.uniform(degrees[0], degrees[1])

        return angle

    def __call__(self, img):

        """

            img (PIL Image): Image to be rotated.

        Returns:

            PIL Image: Rotated image.

        """

        def rotate(img, angle, resample=False, expand=False, center=None):

            """Rotate the image by angle and then (optionally) translate it by (n_columns, n_rows)

            Args:

            img (PIL Image): PIL Image to be rotated.

            angle ({float, int}): In degrees degrees counter clockwise order.

            resample ({PIL.Image.NEAREST, PIL.Image.BILINEAR, PIL.Image.BICUBIC}, optional):

            An optional resampling filter.

            See http://pillow.readthedocs.io/en/3.4.x/handbook/concepts.html#filters

            If omitted, or if the image has mode "1" or "P", it is set to PIL.Image.NEAREST.

            expand (bool, optional): Optional expansion flag.

            If true, expands the output image to make it large enough to hold the entire rotated image.

            If false or omitted, make the output image the same size as the input image.

            Note that the expand flag assumes rotation around the center and no translation.

            center (2-tuple, optional): Optional center of rotation.

            Origin is the upper left corner.

            Default is the center of the image.

            """

            return img.rotate(angle, resample, expand, center)

        angle = self.get_params(self.degrees)

        return rotate(img, angle, self.resample, self.expand, self.center)
class RandomShift(object):

    def __init__(self, shift):

        self.shift = shift

    @staticmethod

    def get_params(shift):

        """Get parameters for ``rotate`` for a random rotation.

        Returns:

            sequence: params to be passed to ``rotate`` for random rotation.

        """

        hshift, vshift = np.random.uniform(-shift, shift, size=2)

        return hshift, vshift

    def __call__(self, img):

        hshift, vshift = self.get_params(self.shift)

        return img.transform(img.size, Image.AFFINE, (1,0,hshift,0,1,vshift), resample=Image.BICUBIC, fill=1)
我们不妨看一下运行的可视化:
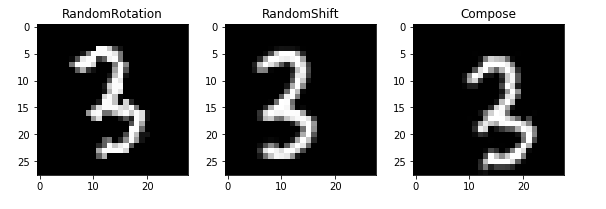
第一个图是旋转,第二个图是随机平移,第二图是组合,(平移加旋转)
class Net(nn.Module):

    def __init__(self):

        super(Net, self).__init__()

        self.features = nn.Sequential(

            nn.Conv2d(1, 32, kernel_size=3, stride=1, padding=1),

            nn.BatchNorm2d(32),

            nn.ReLU(inplace=True),

            nn.Conv2d(32, 32, kernel_size=3, stride=1, padding=1),

            nn.BatchNorm2d(32),

            nn.ReLU(inplace=True),

            nn.MaxPool2d(kernel_size=2, stride=2),

            nn.Conv2d(32, 64, kernel_size=3, padding=1),

            nn.BatchNorm2d(64),

            nn.ReLU(inplace=True),

            nn.Conv2d(64, 64, kernel_size=3, padding=1),

            nn.BatchNorm2d(64),

            nn.ReLU(inplace=True),

            nn.MaxPool2d(kernel_size=2, stride=2)

        )

        self.classifier = nn.Sequential(

            nn.Dropout(p = 0.5),

            nn.Linear(64 * 7 * 7, 512),

            nn.BatchNorm1d(512),

            nn.ReLU(inplace=True),

            nn.Dropout(p = 0.5),

            nn.Linear(512, 512),

            nn.BatchNorm1d(512),

            nn.ReLU(inplace=True),

            nn.Dropout(p = 0.5),

            nn.Linear(512, 10),

        )

        for m in self.features.children():

            if isinstance(m, nn.Conv2d):

                n = m.kernel_size[0] * m.kernel_size[1] * m.out_channels

                m.weight.data.normal_(0, math.sqrt(2. / n))

            elif isinstance(m, nn.BatchNorm2d):

                m.weight.data.fill_(1)

                m.bias.data.zero_()

        for m in self.classifier.children():

            if isinstance(m, nn.Linear):

                nn.init.xavier_uniform(m.weight)

            elif isinstance(m, nn.BatchNorm1d):

                m.weight.data.fill_(1)

                m.bias.data.zero_()

    def forward(self, x):

        x = self.features(x)

        x = x.view(x.size(0), -1)

        x = self.classifier(x)

        return x
这个模型的构建,还记得模型构建的三定义吗?
从零学习pytorch 第5课 PyTorch模型搭建三要素
这个模型就是现实Conv2d层,然后batch归一化层,然后ReLU激活函数。之后又定义了线形层。
Conv2d的参数1是指输入图片有一个通道(因为是黑白图像,如果是RGB图片,这里为3),然后输出通道32,然后stride步长1,padding填充1.具体可以看一下:
Pytorch 中nn.Conv2d的参数用法 channel含义详解
优化器
model = Net()

optimizer = optim.Adam(model.parameters(), lr=0.003)

criterion = nn.CrossEntropyLoss()

exp_lr_scheduler = lr_scheduler.StepLR(optimizer, step_size=7, gamma=0.1)

if torch.cuda.is_available():

    model = model.cuda()

    criterion = criterion.cuda()
这里选中的优化器是Adam,吧model的参数传到优化器中。
从零学习PyTorch 第8课 PyTorch优化器基类Optimier
定义损失函数
这里的torch.optim.lr_scheduler提供了一个可以让学习率随着epoch变化而变化的方法。
StepLR是让epoch到某一条件,学习率*gamma变得更小,这个过程会有7次。
if torch.cuda.is_available():

    model = model.cuda()

    criterion = criterion.cuda()
这是判断模型是否使用GPU来训练。
trian
def train(epoch):

    model.train()

    exp_lr_scheduler.step()

    for batch_idx, (data, target) in enumerate(train_loader):

        data, target = Variable(data), Variable(target)

        if torch.cuda.is_available():

            data = data.cuda()

            target = target.cuda()

        optimizer.zero_grad()

        output = model(data)

        loss = criterion(output, target)

        loss.backward()

        optimizer.step()

        if (batch_idx + 1)% 100 == 0:

            print('Train Epoch: {} [{}/{} ({:.0f}%)]\tLoss: {:.6f}'.format(

                epoch, (batch_idx + 1) * len(data), len(train_loader.dataset),

                100. * (batch_idx + 1) / len(train_loader), loss.data[0]))
这里面就是从train_loader中获取数据集和label,然后判断是否用GPU,是否吧数据从CPU转移到GPU内存中。然后吧优化器的梯度归零,然后通过model得到预测output,然后计算loss,然后让loss反向传播更新参数。
完整代码
# %% [markdown]

# # Convolutional Neural Network With PyTorch

# # ----------------------------------------------

# #

# # Here I only train for a few epochs as training takes couple of hours without GPU.  But this network achieves 0.995 accuracy

# # after 50 epochs of training.

# %% [code]

import pandas as pd

import numpy as np

import torch

import torch.nn as nn

import torch.nn.functional as F

import torch.optim as optim

from torch.optim import lr_scheduler

from torch.autograd import Variable

from torch.utils.data import DataLoader, Dataset

from torchvision import transforms

from torchvision.utils import make_grid

import math

import random

from PIL import Image, ImageOps, ImageEnhance

import numbers

import matplotlib.pyplot as plt

%matplotlib inline

# %% [markdown]

# ## Explore the Data

# %% [code]

train_df = pd.read_csv('../input/train.csv')

n_train = len(train_df)

n_pixels = len(train_df.columns) - 1

n_class = len(set(train_df['label']))

print('Number of training samples: {0}'.format(n_train))

print('Number of training pixels: {0}'.format(n_pixels))

print('Number of classes: {0}'.format(n_class))

# %% [code]

test_df = pd.read_csv('../input/test.csv')

n_test = len(test_df)

n_pixels = len(test_df.columns)

print('Number of train samples: {0}'.format(n_test))

print('Number of test pixels: {0}'.format(n_pixels))

# %% [markdown]

# ### Display some images

# %% [code]

random_sel = np.random.randint(n_train, size=8)

grid = make_grid(torch.Tensor((train_df.iloc[random_sel, 1:].as_matrix()/255.).reshape((-1, 28, 28))).unsqueeze(1), nrow=8)

plt.rcParams['figure.figsize'] = (16, 2)

plt.imshow(grid.numpy().transpose((1,2,0)))

plt.axis('off')

print(*list(train_df.iloc[random_sel, 0].values), sep = ', ')

# %% [markdown]

# ### Histogram of the classes

# %% [code]

plt.rcParams['figure.figsize'] = (8, 5)

plt.bar(train_df['label'].value_counts().index, train_df['label'].value_counts())

plt.xticks(np.arange(n_class))

plt.xlabel('Class', fontsize=16)

plt.ylabel('Count', fontsize=16)

plt.grid('on', axis='y')

# %% [markdown]

# ## Data Loader

# %% [code]

class MNIST_data(Dataset):

    """MNIST dtaa set"""

    def __init__(self, file_path,

                 transform = transforms.Compose([transforms.ToPILImage(), transforms.ToTensor(),

                     transforms.Normalize(mean=(0.5,), std=(0.5,))])

                ):

        df = pd.read_csv(file_path)

        if len(df.columns) == n_pixels:

            # test data

            self.X = df.values.reshape((-1,28,28)).astype(np.uint8)[:,:,:,None]

            self.y = None

        else:

            # training data

            self.X = df.iloc[:,1:].values.reshape((-1,28,28)).astype(np.uint8)[:,:,:,None]

            self.y = torch.from_numpy(df.iloc[:,0].values)

        self.transform = transform

    def __len__(self):

        return len(self.X)

    def __getitem__(self, idx):

        if self.y is not None:

            return self.transform(self.X[idx]), self.y[idx]

        else:

            return self.transform(self.X[idx])

# %% [markdown]

# ### Random Rotation Transformation

# # Randomly rotate the image. Available in upcoming torchvision but not now.

# %% [code]

class RandomRotation(object):

    """

    https://github.com/pytorch/vision/tree/master/torchvision/transforms

    Rotate the image by angle.

    Args:

        degrees (sequence or float or int): Range of degrees to select from.

            If degrees is a number instead of sequence like (min, max), the range of degrees

            will be (-degrees, +degrees).

        resample ({PIL.Image.NEAREST, PIL.Image.BILINEAR, PIL.Image.BICUBIC}, optional):

            An optional resampling filter.

            See http://pillow.readthedocs.io/en/3.4.x/handbook/concepts.html#filters

            If omitted, or if the image has mode "1" or "P", it is set to PIL.Image.NEAREST.

        expand (bool, optional): Optional expansion flag.

            If true, expands the output to make it large enough to hold the entire rotated image.

            If false or omitted, make the output image the same size as the input image.

            Note that the expand flag assumes rotation around the center and no translation.

        center (2-tuple, optional): Optional center of rotation.

            Origin is the upper left corner.

            Default is the center of the image.

    """

    def __init__(self, degrees, resample=False, expand=False, center=None):

        if isinstance(degrees, numbers.Number):

            if degrees < 0:

                raise ValueError("If degrees is a single number, it must be positive.")

            self.degrees = (-degrees, degrees)

        else:

            if len(degrees) != 2:

                raise ValueError("If degrees is a sequence, it must be of len 2.")

            self.degrees = degrees

        self.resample = resample

        self.expand = expand

        self.center = center

    @staticmethod

    def get_params(degrees):

        """Get parameters for ``rotate`` for a random rotation.

        Returns:

            sequence: params to be passed to ``rotate`` for random rotation.

        """

        angle = np.random.uniform(degrees[0], degrees[1])

        return angle

    def __call__(self, img):

        """

            img (PIL Image): Image to be rotated.

        Returns:

            PIL Image: Rotated image.

        """

        def rotate(img, angle, resample=False, expand=False, center=None):

            """Rotate the image by angle and then (optionally) translate it by (n_columns, n_rows)

            Args:

            img (PIL Image): PIL Image to be rotated.

            angle ({float, int}): In degrees degrees counter clockwise order.

            resample ({PIL.Image.NEAREST, PIL.Image.BILINEAR, PIL.Image.BICUBIC}, optional):

            An optional resampling filter.

            See http://pillow.readthedocs.io/en/3.4.x/handbook/concepts.html#filters

            If omitted, or if the image has mode "1" or "P", it is set to PIL.Image.NEAREST.

            expand (bool, optional): Optional expansion flag.

            If true, expands the output image to make it large enough to hold the entire rotated image.

            If false or omitted, make the output image the same size as the input image.

            Note that the expand flag assumes rotation around the center and no translation.

            center (2-tuple, optional): Optional center of rotation.

            Origin is the upper left corner.

            Default is the center of the image.

            """

            return img.rotate(angle, resample, expand, center)

        angle = self.get_params(self.degrees)

        return rotate(img, angle, self.resample, self.expand, self.center)

# %% [markdown]

# ### Random Vertical and Horizontal Shift

# %% [code]

class RandomShift(object):

    def __init__(self, shift):

        self.shift = shift

    @staticmethod

    def get_params(shift):

        """Get parameters for ``rotate`` for a random rotation.

        Returns:

            sequence: params to be passed to ``rotate`` for random rotation.

        """

        hshift, vshift = np.random.uniform(-shift, shift, size=2)

        return hshift, vshift

    def __call__(self, img):

        hshift, vshift = self.get_params(self.shift)

        return img.transform(img.size, Image.AFFINE, (1,0,hshift,0,1,vshift), resample=Image.BICUBIC, fill=1)

# %% [code]

np.random.uniform(-4, 4, size=2)

# %% [markdown]

# ## Load the Data into Tensors

# # For the training set, apply random rotation within the range of (-45, 45) degrees, shift by (-3, 3) pixels

# # and normalize pixel values to [-1, 1].  For the test set, only apply nomalization.

# %% [code]

batch_size = 64

train_dataset = MNIST_data('../input/train.csv', transform= transforms.Compose(

                            [transforms.ToPILImage(), RandomRotation(degrees=20), RandomShift(3),

                             transforms.ToTensor(), transforms.Normalize(mean=(0.5,), std=(0.5,))]))

test_dataset = MNIST_data('../input/test.csv')

train_loader = torch.utils.data.DataLoader(dataset=train_dataset,

                                           batch_size=batch_size, shuffle=True)

test_loader = torch.utils.data.DataLoader(dataset=test_dataset,

                                           batch_size=batch_size, shuffle=False)

# %% [markdown]

# ### Visualize the Transformations

# %% [code]

rotate = RandomRotation(20)

shift = RandomShift(3)

composed = transforms.Compose([RandomRotation(20),

                               RandomShift(3)])

# Apply each of the above transforms on sample.

fig = plt.figure()

sample = transforms.ToPILImage()(train_df.iloc[65,1:].as_matrix().reshape((28,28)).astype(np.uint8)[:,:,None])

for i, tsfrm in enumerate([rotate, shift, composed]):

    transformed_sample = tsfrm(sample)

    ax = plt.subplot(1, 3, i + 1)

    plt.tight_layout()

    ax.set_title(type(tsfrm).__name__)

    ax.imshow(np.reshape(np.array(list(transformed_sample.getdata())), (-1,28)), cmap='gray')

plt.show()

# %% [markdown]

# ## Network Structure

# %% [code]

class Net(nn.Module):

    def __init__(self):

        super(Net, self).__init__()

        self.features = nn.Sequential(

            nn.Conv2d(1, 32, kernel_size=3, stride=1, padding=1),

            nn.BatchNorm2d(32),

            nn.ReLU(inplace=True),

            nn.Conv2d(32, 32, kernel_size=3, stride=1, padding=1),

            nn.BatchNorm2d(32),

            nn.ReLU(inplace=True),

            nn.MaxPool2d(kernel_size=2, stride=2),

            nn.Conv2d(32, 64, kernel_size=3, padding=1),

            nn.BatchNorm2d(64),

            nn.ReLU(inplace=True),

            nn.Conv2d(64, 64, kernel_size=3, padding=1),

            nn.BatchNorm2d(64),

            nn.ReLU(inplace=True),

            nn.MaxPool2d(kernel_size=2, stride=2)

        )

        self.classifier = nn.Sequential(

            nn.Dropout(p = 0.5),

            nn.Linear(64 * 7 * 7, 512),

            nn.BatchNorm1d(512),

            nn.ReLU(inplace=True),

            nn.Dropout(p = 0.5),

            nn.Linear(512, 512),

            nn.BatchNorm1d(512),

            nn.ReLU(inplace=True),

            nn.Dropout(p = 0.5),

            nn.Linear(512, 10),

        )

        for m in self.features.children():

            if isinstance(m, nn.Conv2d):

                n = m.kernel_size[0] * m.kernel_size[1] * m.out_channels

                m.weight.data.normal_(0, math.sqrt(2. / n))

            elif isinstance(m, nn.BatchNorm2d):

                m.weight.data.fill_(1)

                m.bias.data.zero_()

        for m in self.classifier.children():

            if isinstance(m, nn.Linear):

                nn.init.xavier_uniform(m.weight)

            elif isinstance(m, nn.BatchNorm1d):

                m.weight.data.fill_(1)

                m.bias.data.zero_()

    def forward(self, x):

        x = self.features(x)

        x = x.view(x.size(0), -1)

        x = self.classifier(x)

        return x

# %% [code]

model = Net()

optimizer = optim.Adam(model.parameters(), lr=0.003)

criterion = nn.CrossEntropyLoss()

exp_lr_scheduler = lr_scheduler.StepLR(optimizer, step_size=7, gamma=0.1)

if torch.cuda.is_available():

    model = model.cuda()

    criterion = criterion.cuda()

# %% [markdown]

# ## Training and Evaluation

# %% [code]

def train(epoch):

    model.train()

    exp_lr_scheduler.step()

    for batch_idx, (data, target) in enumerate(train_loader):

        data, target = Variable(data), Variable(target)

        if torch.cuda.is_available():

            data = data.cuda()

            target = target.cuda()

        optimizer.zero_grad()

        output = model(data)

        loss = criterion(output, target)

        loss.backward()

        optimizer.step()

        if (batch_idx + 1)% 100 == 0:

            print('Train Epoch: {} [{}/{} ({:.0f}%)]\tLoss: {:.6f}'.format(

                epoch, (batch_idx + 1) * len(data), len(train_loader.dataset),

                100. * (batch_idx + 1) / len(train_loader), loss.data[0]))

# %% [code]

def evaluate(data_loader):

    model.eval()

    loss = 0

    correct = 0

    for data, target in data_loader:

        data, target = Variable(data, volatile=True), Variable(target)

        if torch.cuda.is_available():

            data = data.cuda()

            target = target.cuda()

        output = model(data)

        loss += F.cross_entropy(output, target, size_average=False).data[0]

        pred = output.data.max(1, keepdim=True)[1]

        correct += pred.eq(target.data.view_as(pred)).cpu().sum()

    loss /= len(data_loader.dataset)

    print('\nAverage loss: {:.4f}, Accuracy: {}/{} ({:.3f}%)\n'.format(

        loss, correct, len(data_loader.dataset),

        100. * correct / len(data_loader.dataset)))

# %% [markdown]

# ### Train the network

# #

# # Reaches 0.995 accuracy on test set after 50 epochs

# %% [code]

n_epochs = 1

for epoch in range(n_epochs):

    train(epoch)

    evaluate(train_loader)

# %% [markdown]

# ## Prediction on Test Set

# %% [code]

def prediciton(data_loader):

    model.eval()

    test_pred = torch.LongTensor()

    for i, data in enumerate(data_loader):

        data = Variable(data, volatile=True)

        if torch.cuda.is_available():

            data = data.cuda()

        output = model(data)

        pred = output.cpu().data.max(1, keepdim=True)[1]

        test_pred = torch.cat((test_pred, pred), dim=0)

    return test_pred

# %% [code]

test_pred = prediciton(test_loader)

# %% [code]

out_df = pd.DataFrame(np.c_[np.arange(1, len(test_dataset)+1)[:,None], test_pred.numpy()],

                      columns=['ImageId', 'Label'])

# %% [code] {"scrolled":true}

out_df.head()

# %% [code]

out_df.to_csv('submission.csv', index=False)
全网最详细最好懂 PyTorch CNN案例分析 识别手写数字的更多相关文章
- 6 TensorFlow实现cnn识别手写数字
------------------------------------ 写在开头:此文参照莫烦python教程(墙裂推荐!!!) ---------------------------------- ...
- 用Keras搭建神经网络 简单模版(三)—— CNN 卷积神经网络(手写数字图片识别)
# -*- coding: utf-8 -*- import numpy as np np.random.seed(1337) #for reproducibility再现性 from keras.d ...
- 识别手写数字增强版100% - pytorch从入门到入道(一)
手写数字识别,神经网络领域的“hello world”例子,通过pytorch一步步构建,通过训练与调整,达到“100%”准确率 1.快速开始 1.1 定义神经网络类,继承torch.nn.Modul ...
- PyTorch基础——使用卷积神经网络识别手写数字
一.介绍 实验内容 内容包括用 PyTorch 来实现一个卷积神经网络,从而实现手写数字识别任务. 除此之外,还对卷积神经网络的卷积核.特征图等进行了分析,引出了过滤器的概念,并简单示了卷积神经网络的 ...
- 图片训练:使用卷积神经网络(CNN)识别手写数字
这篇文章中,我们将使用CNN构建一个Tensorflow.js模型来分辨手写的数字.首先,我们通过使之“查看”数以千计的数字图片以及他们对应的标识来训练分辨器.然后我们再通过此模型从未“见到”过的测试 ...
- CNN完成mnist数据集手写数字识别
# coding: utf-8 import tensorflow as tf from tensorflow.examples.tutorials.mnist import input_data d ...
- 【深度学习系列】手写数字识别卷积神经--卷积神经网络CNN原理详解(一)
上篇文章我们给出了用paddlepaddle来做手写数字识别的示例,并对网络结构进行到了调整,提高了识别的精度.有的同学表示不是很理解原理,为什么传统的机器学习算法,简单的神经网络(如多层感知机)都可 ...
- CNN 手写数字识别
1. 知识点准备 在了解 CNN 网络神经之前有两个概念要理解,第一是二维图像上卷积的概念,第二是 pooling 的概念. a. 卷积 关于卷积的概念和细节可以参考这里,卷积运算有两个非常重要特性, ...
- 卷积神经网络CNN 手写数字识别
1. 知识点准备 在了解 CNN 网络神经之前有两个概念要理解,第一是二维图像上卷积的概念,第二是 pooling 的概念. a. 卷积 关于卷积的概念和细节可以参考这里,卷积运算有两个非常重要特性, ...
随机推荐
- <algorithm>中sort()函数的用法
先说一下,本篇文章我没有讲sort()实现排序的原理,我写在另一篇文章中了,如果想了解的话,可以看一下,附上链接:https://www.cnblogs.com/buanxu/p/12772700.h ...
- PL/SQL 九九乘法表
和shell脚本九九乘法表一样,只是语法有少出入 先看看效果图先: 利用for循环: SET SERVEROUTPUT ON DECLARE x INT :=1; y INT :=1; BEGIN F ...
- Task Scheduler API Error 80041318
https://stackoverflow.com/questions/42307917/task-scheduler-api-error-80041318/42462235#42462235 Hi ...
- cut,xargs,sort,tr,rename命令解析
cut 文件内容查看 显示行中的指定部分,删除文件中指定字段 显示文件的内容,类似于下的type命令. 语法: cut(选项)(参数) 选项: -b:仅显示行中指定直接范围的内容: -c:仅显示行中指 ...
- Vagrant (二) - 日常操作
立即上手 上一节中,我们介绍了怎样安装 Vagrant,安装本身并不困难.本章节中我们首先要快速上手,以便获得一个直观的概念: 建立一个工作目录 打开命令行工具,终端工具,或者iTerm2等,建立一个 ...
- Node.js快速创建一个访问html文件的服务器
var http = require('http'), // 引入需要的模块 fs = require('fs'), //引入文件读取模块 cp = require('child_process'), ...
- 微软Project Online落地中国
1月18日,微软中国宣布,从即日起,Project Online服务将正式落地中国,通过由世纪互联运营的Office 365向中国用户提供卓越的项目组合管理(PPM)联机解决方案,助力团队迅速启动项目 ...
- [开发笔记]-unix时间戳、GMT时间与datetime类型时间之前的转换
前段时间项目中涉及到了MySql和MsSql数据类型之间的转换,最近又在研究新浪微博的API,涉及到了带有时区的GMT时间类型的转换,所以,特记录于此,以备日后查询. 一:UNIX时间戳与dateti ...
- java的基础知识01
来自<head first java>书籍的摘录
- Python基础00 教程
Python: 简明 Python 教程 廖雪峰Python3教程 Python快速教程 (手册) 爬虫: 汪海的实验室:Python爬虫入门教程 静觅: Python爬虫学习系列教程 Flask: ...