
springmvc教程(1)
idea搭建springmvc maven项目
jdk:1.8
maven:Bundled (Maven 3)
idea版本:
开始搭建第一个springmvc maven项目
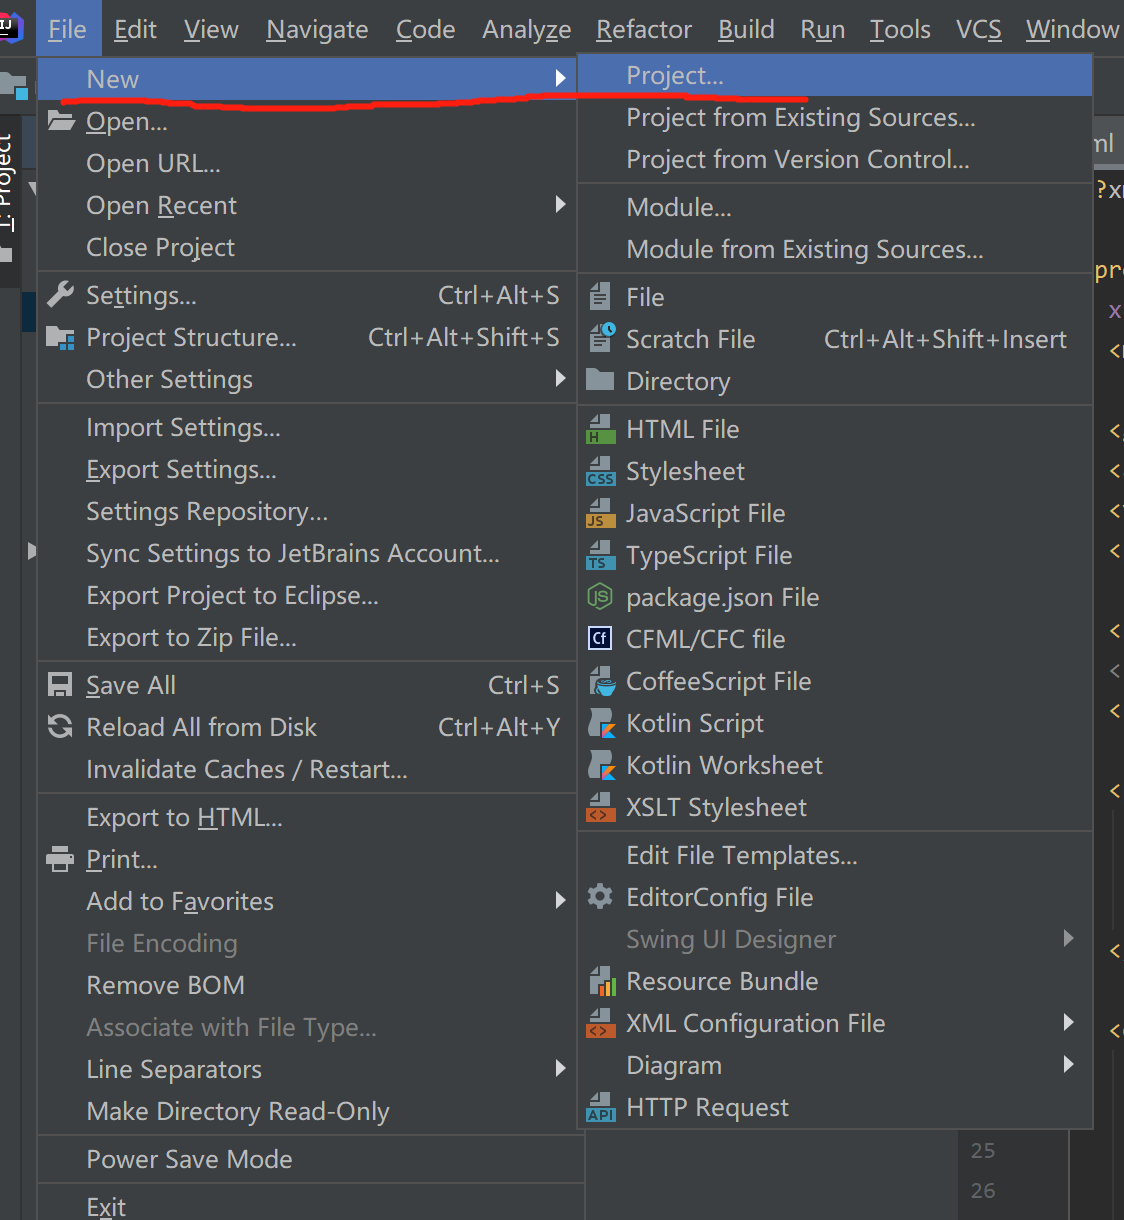
1.点击File->New->Project
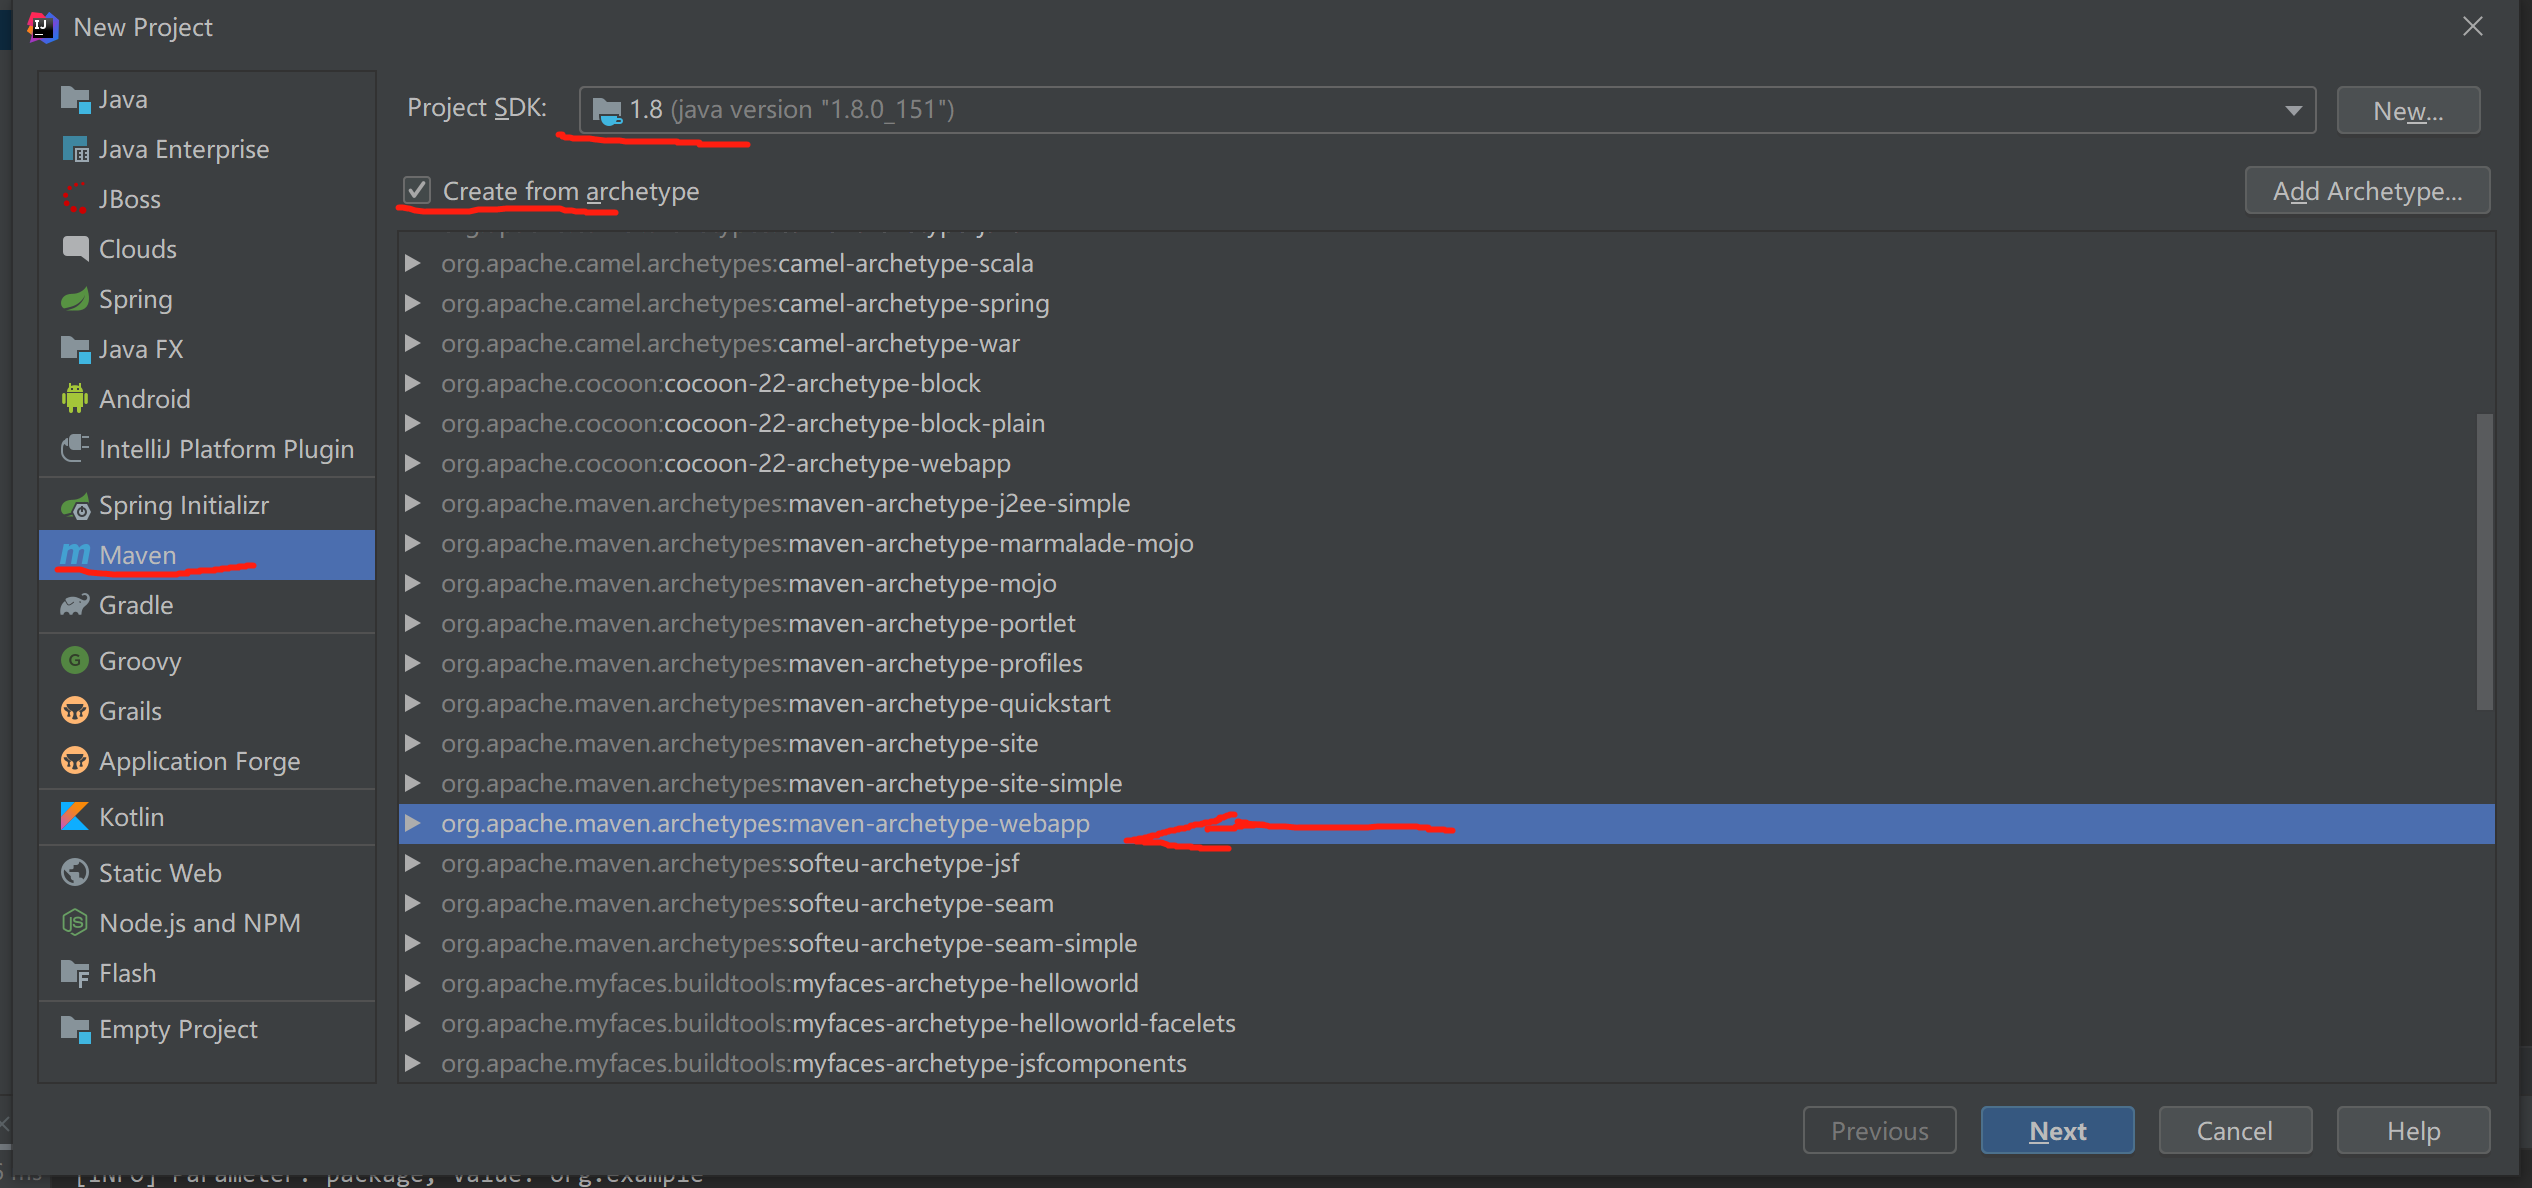
2.选择maven->勾选Create from archetype->选中 maven-archetype-webapp->点击next
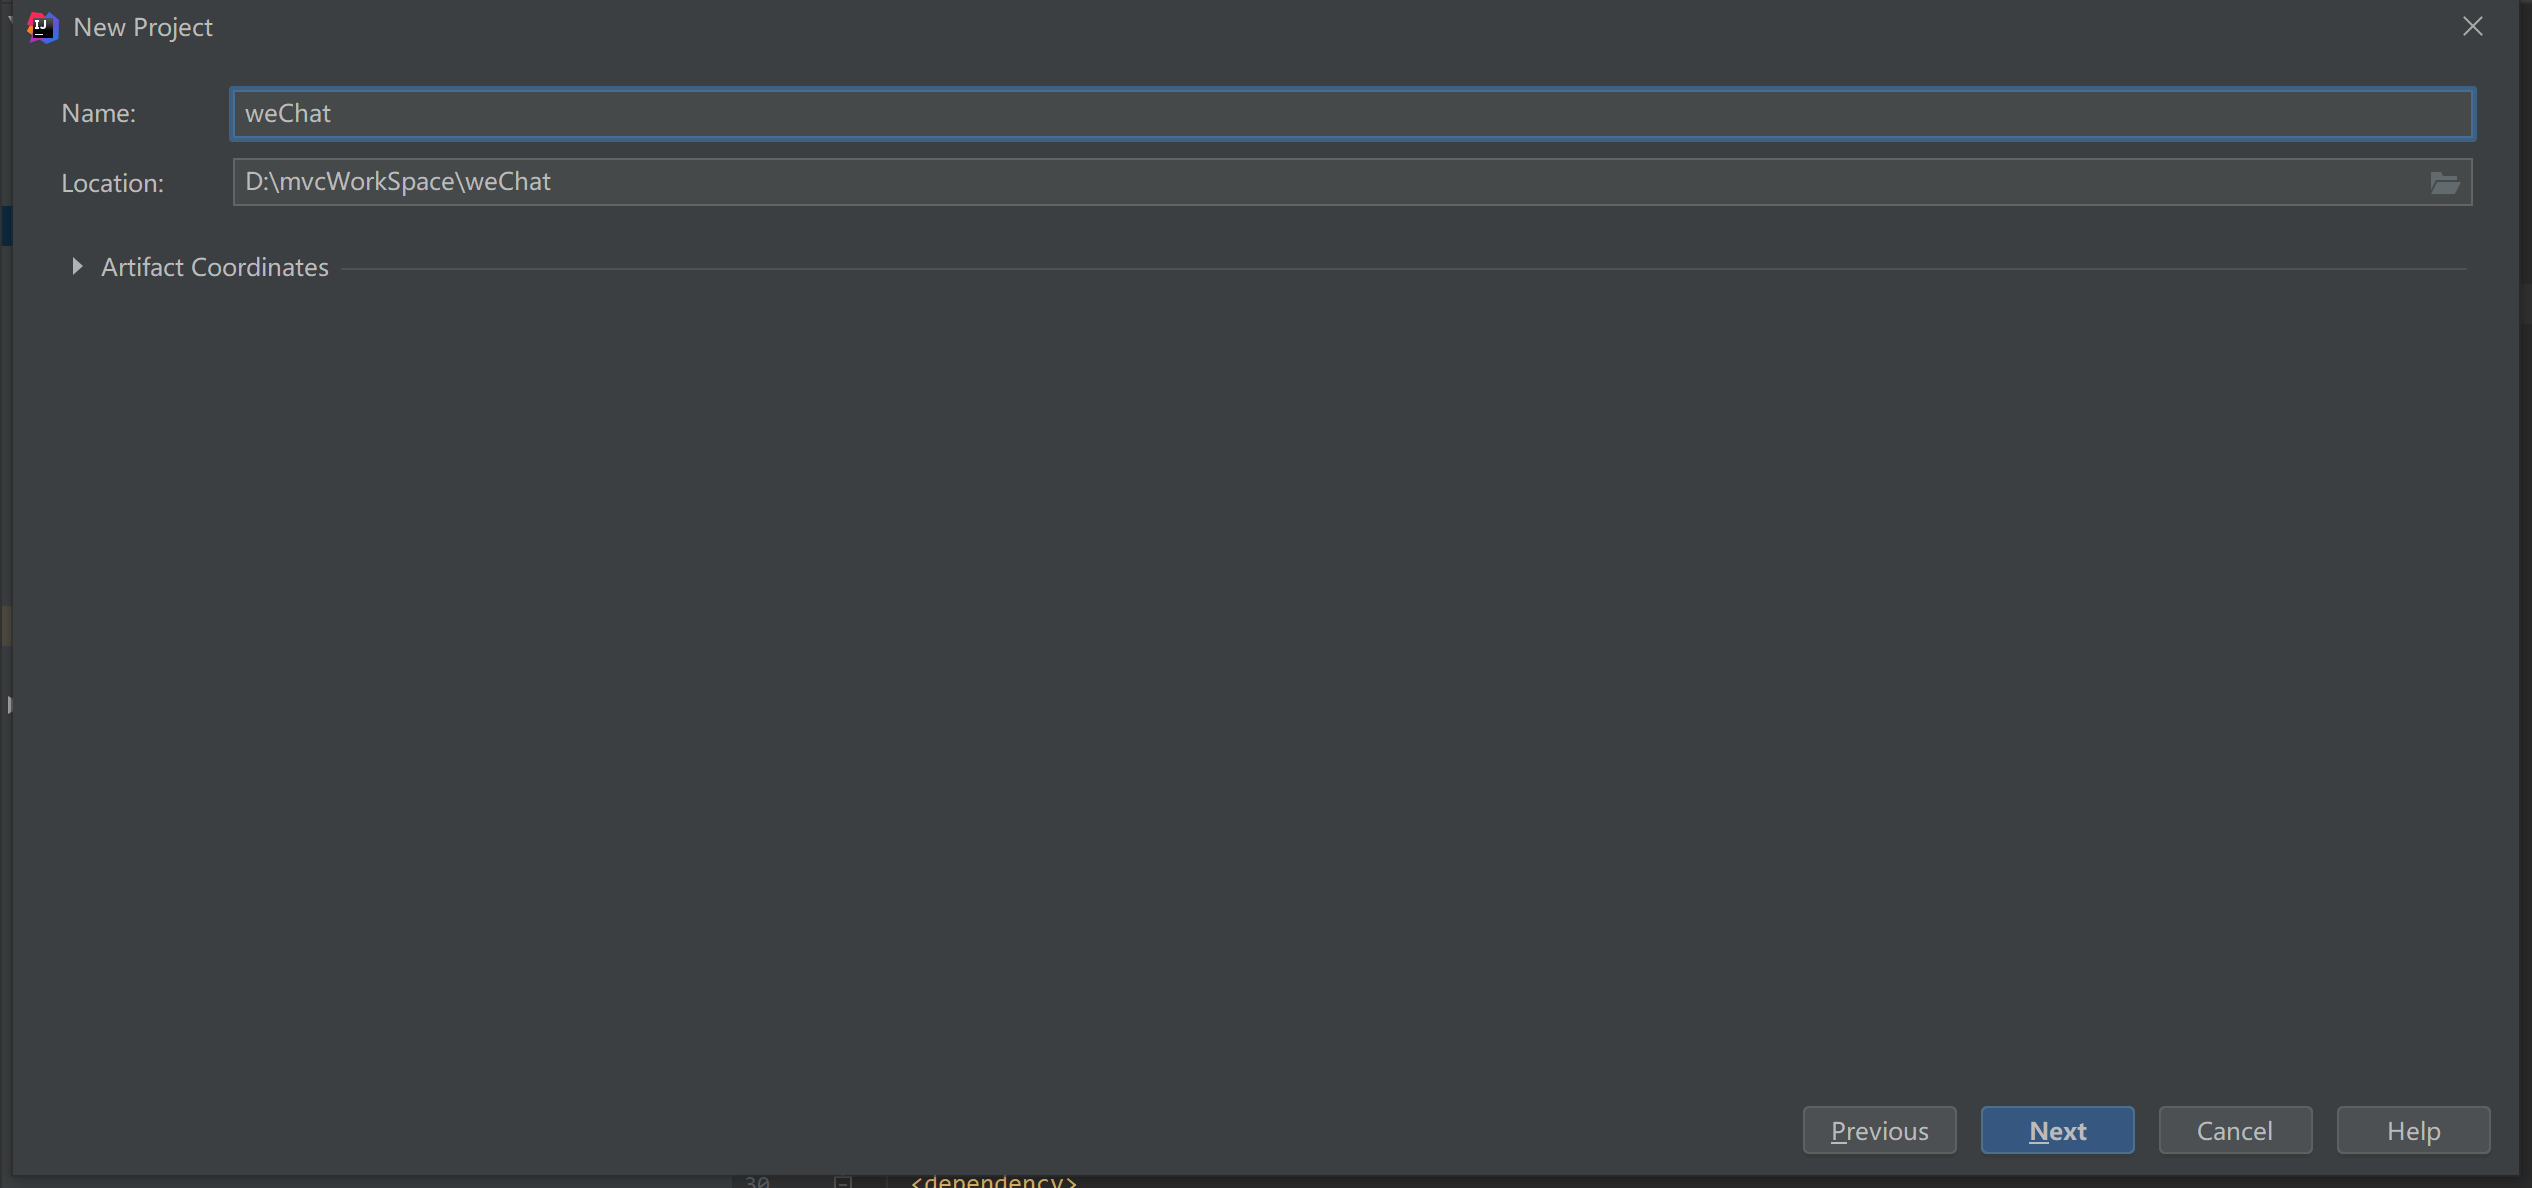
3.Name:项目名称 Location:本地工作空间 填写后点击next
4.我没下maven所有就用了默认的,如果本地有的话就使用本地的,填好后finish
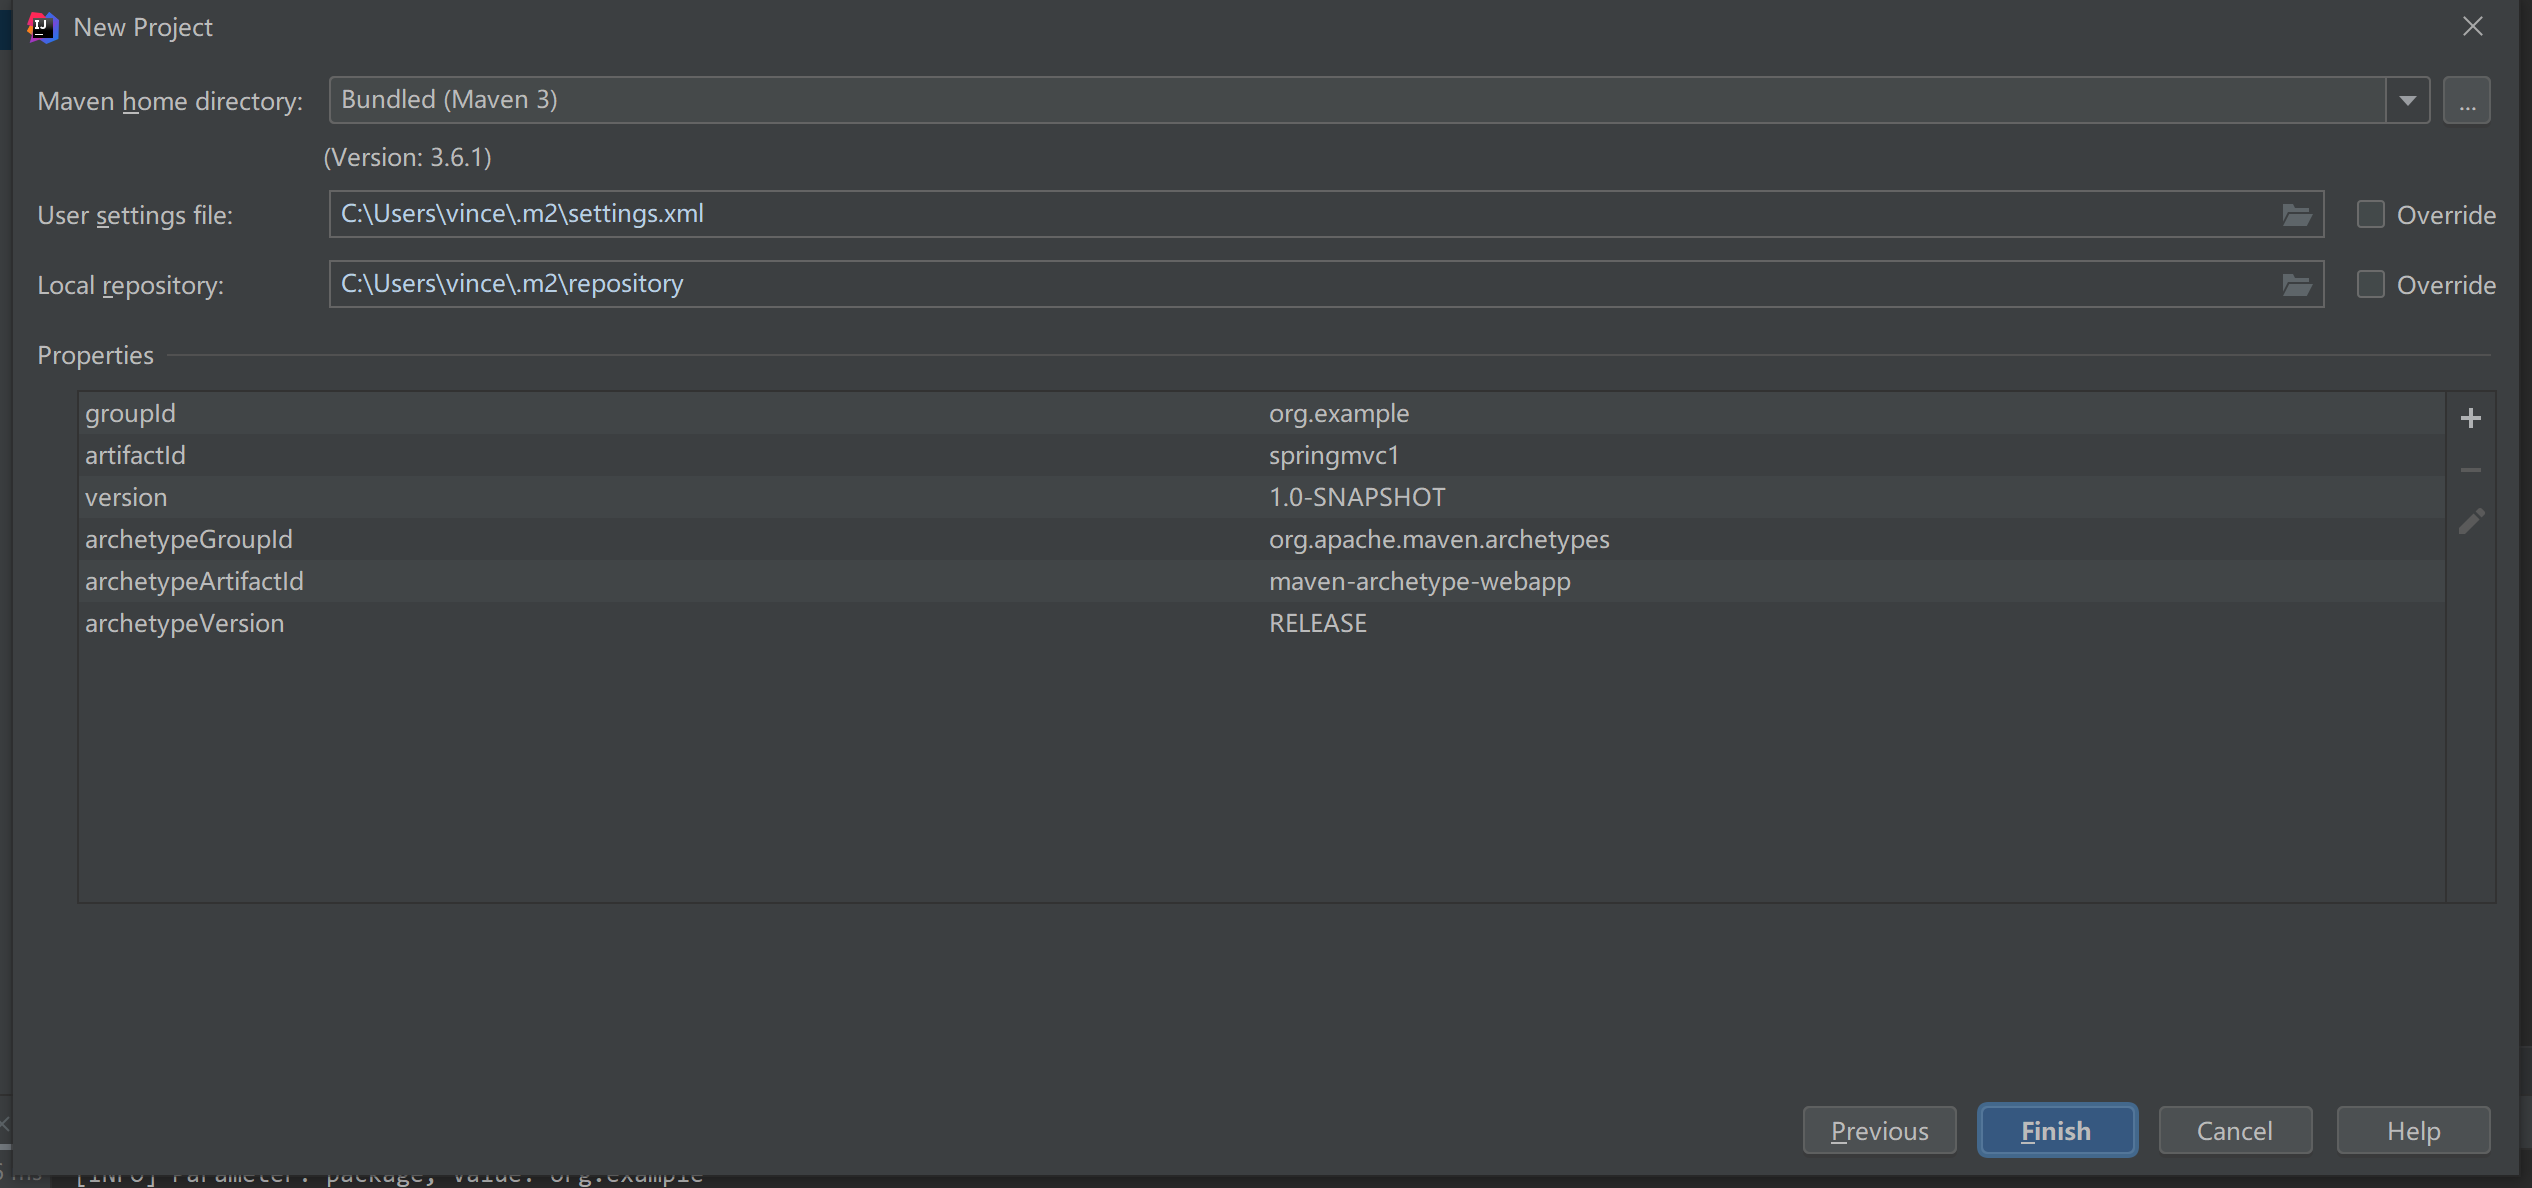
5.创建好的项目结构如下
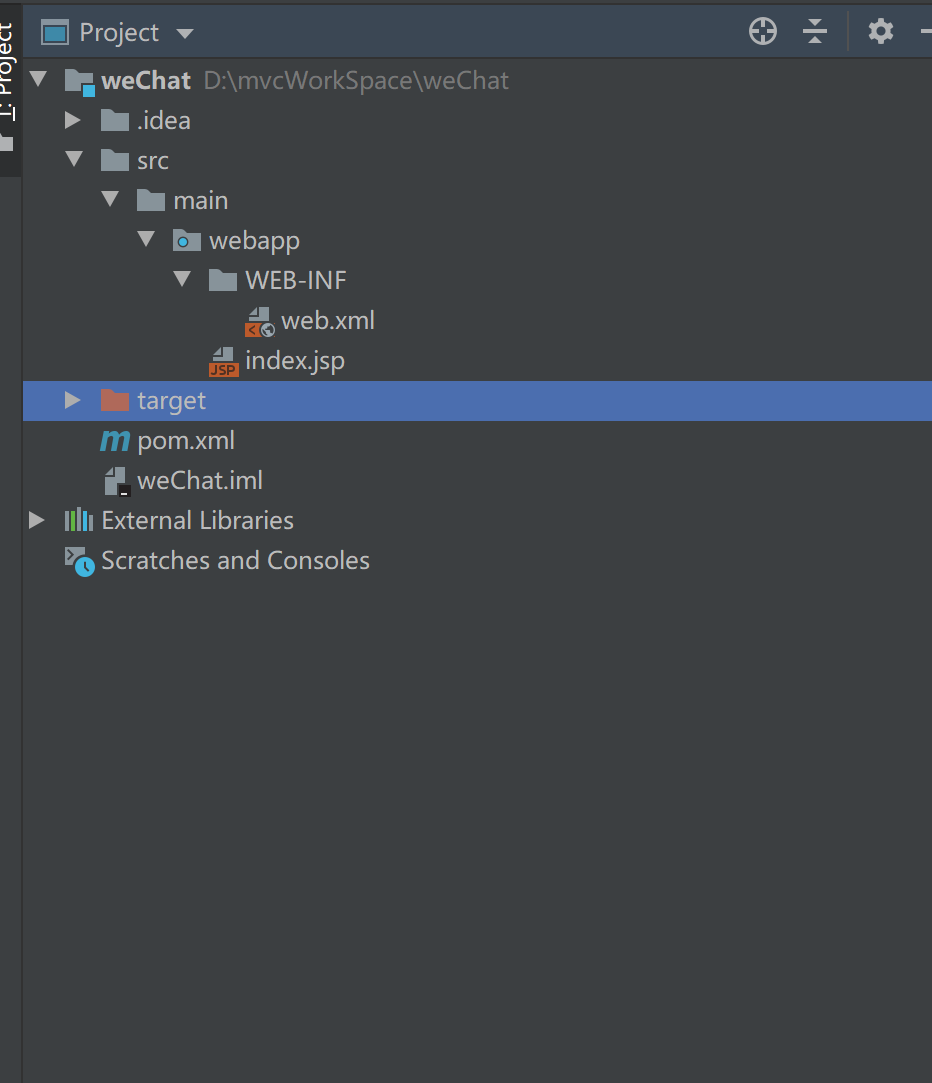
5.1.pom.xml如下:
<?xml version="1.0" encoding="UTF-8"?>

<project xmlns="http://maven.apache.org/POM/4.0.0" xmlns:xsi="http://www.w3.org/2001/XMLSchema-instance"
  xsi:schemaLocation="http://maven.apache.org/POM/4.0.0 http://maven.apache.org/xsd/maven-4.0.0.xsd">
  <modelVersion>4.0.0</modelVersion>

  <groupId>org.example</groupId>
  <artifactId>weChat</artifactId>
  <version>1.0-SNAPSHOT</version>
  <packaging>war</packaging>

  <name>weChat Maven Webapp</name>
  <!-- FIXME change it to the project's website -->
  <url>http://www.example.com</url>

  <properties>
    <project.build.sourceEncoding>UTF-8</project.build.sourceEncoding>
    <maven.compiler.source>1.7</maven.compiler.source>
    <maven.compiler.target>1.7</maven.compiler.target>
    <spring.version>4.2.4.RELEASE</spring.version>
  </properties>

  <dependencies>
    <dependency>
      <groupId>junit</groupId>
      <artifactId>junit</artifactId>
      <version>4.11</version>
      <scope>test</scope>
    </dependency>
    <!-- Spring -->
    <dependency>
      <groupId>org.springframework</groupId>
      <artifactId>spring-context</artifactId>
      <version>${spring.version}</version>
    </dependency>

    <dependency>
      <groupId>org.springframework</groupId>
      <artifactId>spring-webmvc</artifactId>
      <version>${spring.version}</version>
    </dependency>

    <dependency>
      <groupId>org.aspectj</groupId>
      <artifactId>aspectjweaver</artifactId>
      <version>1.8.7</version>
    </dependency>
  </dependencies>

  <build>
    <finalName>weChat</finalName>
    <pluginManagement><!-- lock down plugins versions to avoid using Maven defaults (may be moved to parent pom) -->
      <plugins>
        <plugin>
          <artifactId>maven-clean-plugin</artifactId>
          <version>3.1.0</version>
        </plugin>
        <!-- see http://maven.apache.org/ref/current/maven-core/default-bindings.html#Plugin_bindings_for_war_packaging -->
        <plugin>
          <artifactId>maven-resources-plugin</artifactId>
          <version>3.0.2</version>
        </plugin>
        <plugin>
          <artifactId>maven-compiler-plugin</artifactId>
          <version>3.8.0</version>
        </plugin>
        <plugin>
          <artifactId>maven-surefire-plugin</artifactId>
          <version>2.22.1</version>
        </plugin>
        <plugin>
          <artifactId>maven-war-plugin</artifactId>
          <version>3.2.2</version>
        </plugin>
        <plugin>
          <artifactId>maven-install-plugin</artifactId>
          <version>2.5.2</version>
        </plugin>
        <plugin>
          <artifactId>maven-deploy-plugin</artifactId>
          <version>2.8.2</version>
        </plugin>
        <!--Tomcat7插件  -->
        <plugin>
          <groupId>org.apache.tomcat.maven</groupId>
          <artifactId>tomcat7-maven-plugin</artifactId>
          <version>2.2</version>
          <configuration>
            <uriEncoding>UTF-8</uriEncoding>
            <path>/weChat</path>
            <port>8080</port>
          </configuration>
        </plugin>
      </plugins>
    </pluginManagement>
  </build>
</project>
5.2.web.xml如下:
<?xml version="1.0" encoding="UTF-8"?>
<web-app xmlns="http://java.sun.com/xml/ns/javaee" xmlns:xsi="http://www.w3.org/2001/XMLSchema-instance"
         xsi:schemaLocation="http://java.sun.com/xml/ns/javaee
                      http://java.sun.com/xml/ns/javaee/web-app_3_0.xsd"
         version="3.0">
  <display-name>Archetype Created Web Application</display-name>
  <servlet>
    <servlet-name>springMvc</servlet-name>
    <servlet-class>org.springframework.web.servlet.DispatcherServlet</servlet-class>
    <init-param>
      <param-name>contextConfigLocation</param-name>
      <param-value>classpath:mvc.xml</param-value>
    </init-param>
    <load-on-startup>1</load-on-startup>
  </servlet>
  <servlet-mapping>
    <servlet-name>springMvc</servlet-name>
    <url-pattern>*.do</url-pattern>
  </servlet-mapping>
</web-app>
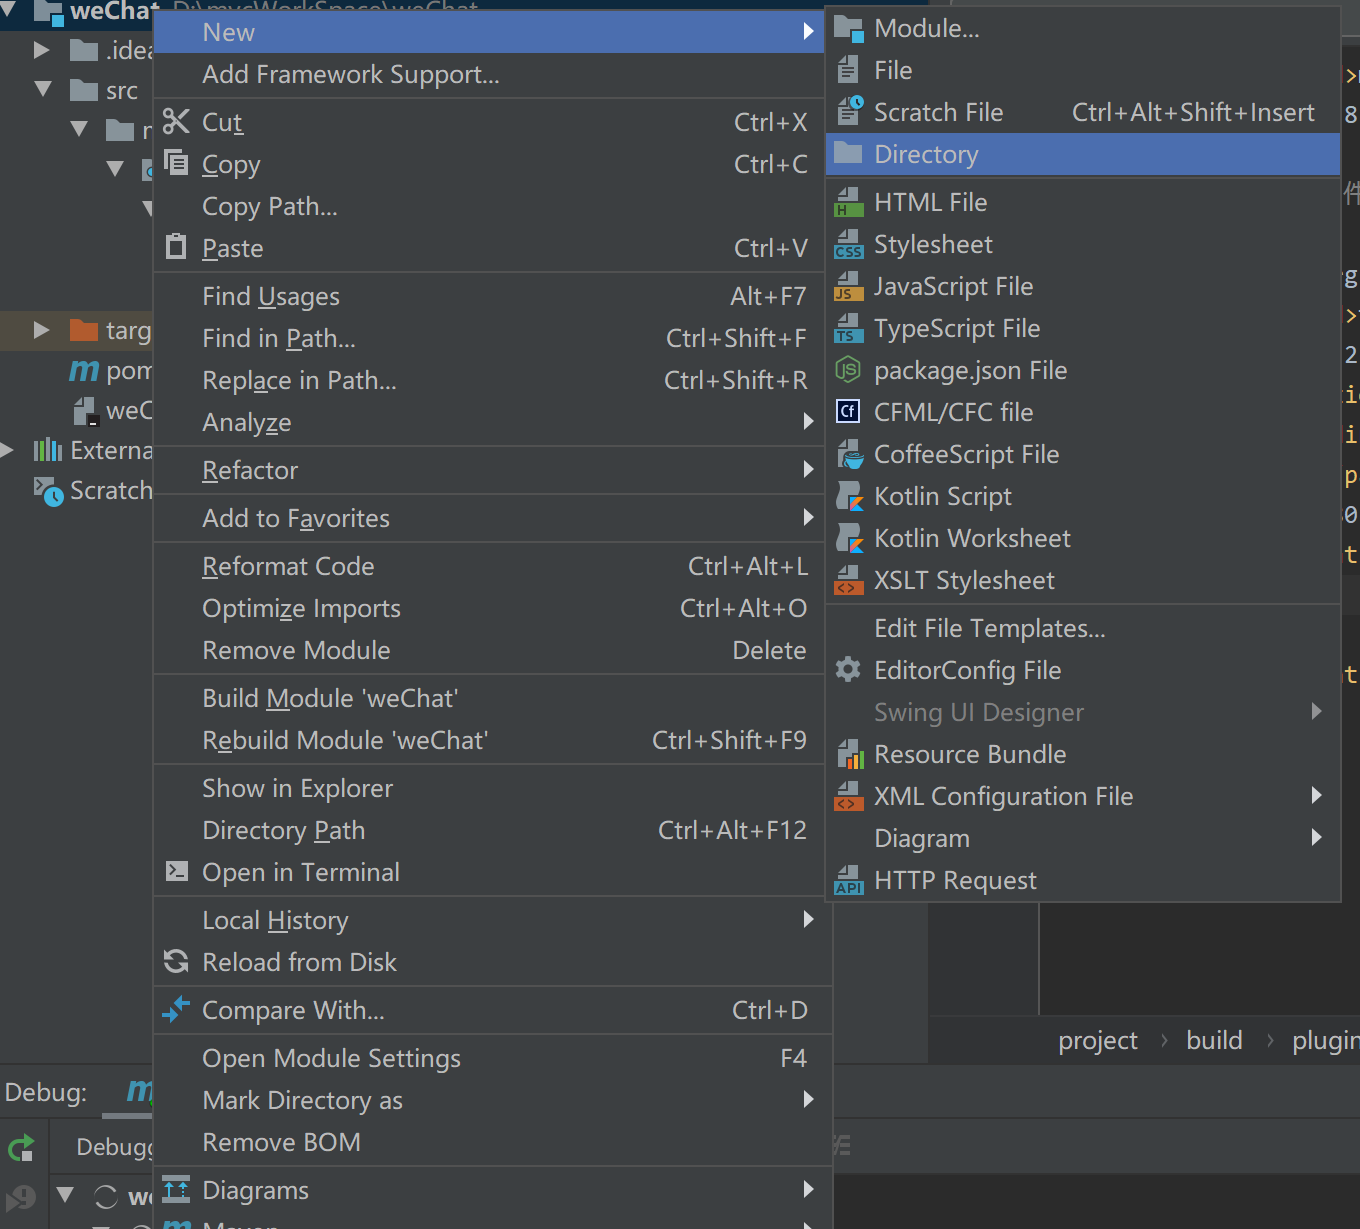
6.这个时候你会发现少了目录,选中项目右键->new->Directory
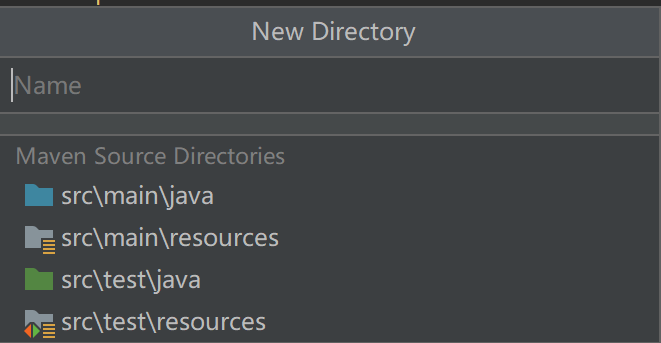
7.这个时候你会发现有这四个你熟悉的目录,我只需要前面两个即可
8.resource下创建mvc.xml文件,我的如下:
<?xml version="1.0" encoding="UTF-8"?>
<web-app xmlns="http://java.sun.com/xml/ns/javaee" xmlns:xsi="http://www.w3.org/2001/XMLSchema-instance"
         xsi:schemaLocation="http://java.sun.com/xml/ns/javaee
                      http://java.sun.com/xml/ns/javaee/web-app_3_0.xsd"
         version="3.0">
  <display-name>Archetype Created Web Application</display-name>
  <servlet>
    <servlet-name>springMvc</servlet-name>
    <servlet-class>org.springframework.web.servlet.DispatcherServlet</servlet-class>
    <init-param>
      <param-name>contextConfigLocation</param-name>
      <param-value>classpath:mvc.xml</param-value>
    </init-param>
    <load-on-startup>1</load-on-startup>
  </servlet>
  <servlet-mapping>
    <servlet-name>springMvc</servlet-name>
    <url-pattern>*.do</url-pattern>
  </servlet-mapping>
</web-app>
9.创建controller类
package com.test.controller;

import org.springframework.stereotype.Controller;
import org.springframework.web.bind.annotation.RequestMapping;

@Controller
public class HelloController {
    @RequestMapping(value = "/test")
    public String test(){
        return  "test";
    }
}
10.WEB-INF下创建views文件夹后添加test.jsp页面
<html>
<body>
<h2>Hello World! weChat</h2>
</body>
</html>
11.现在的目录如下:
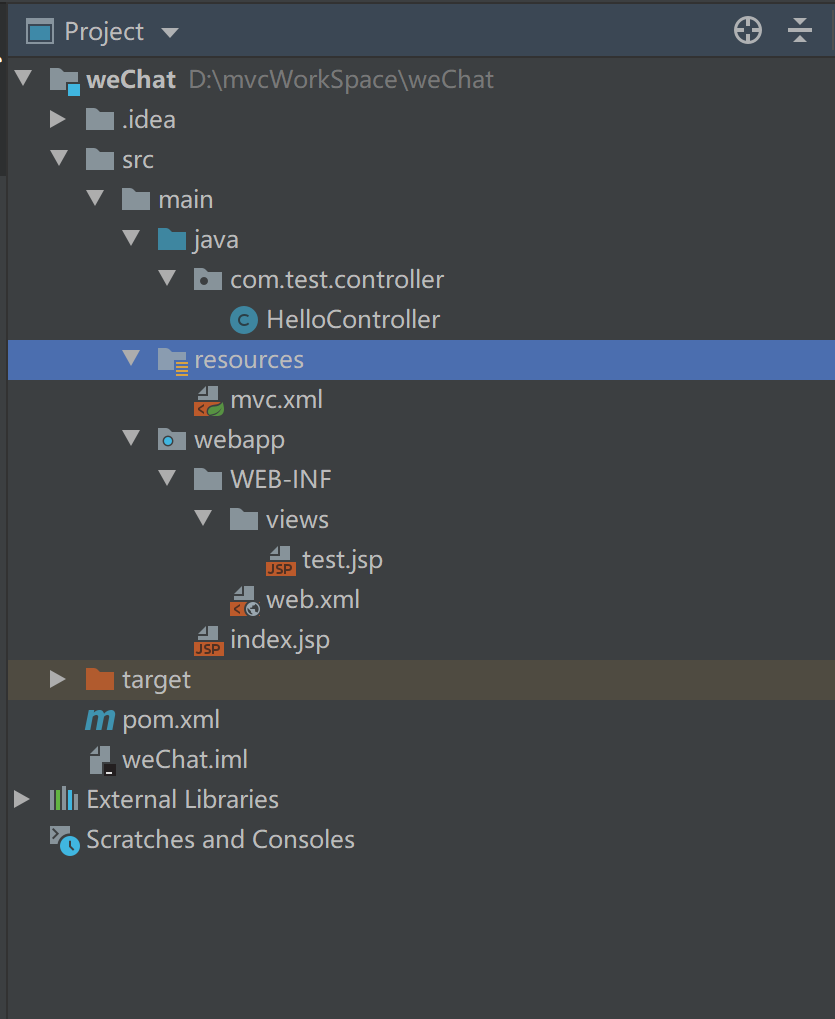
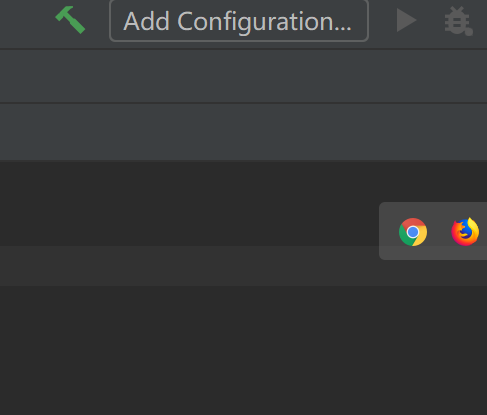
12.使用Tomcat7插件配置启动项目;点击Add Configuration
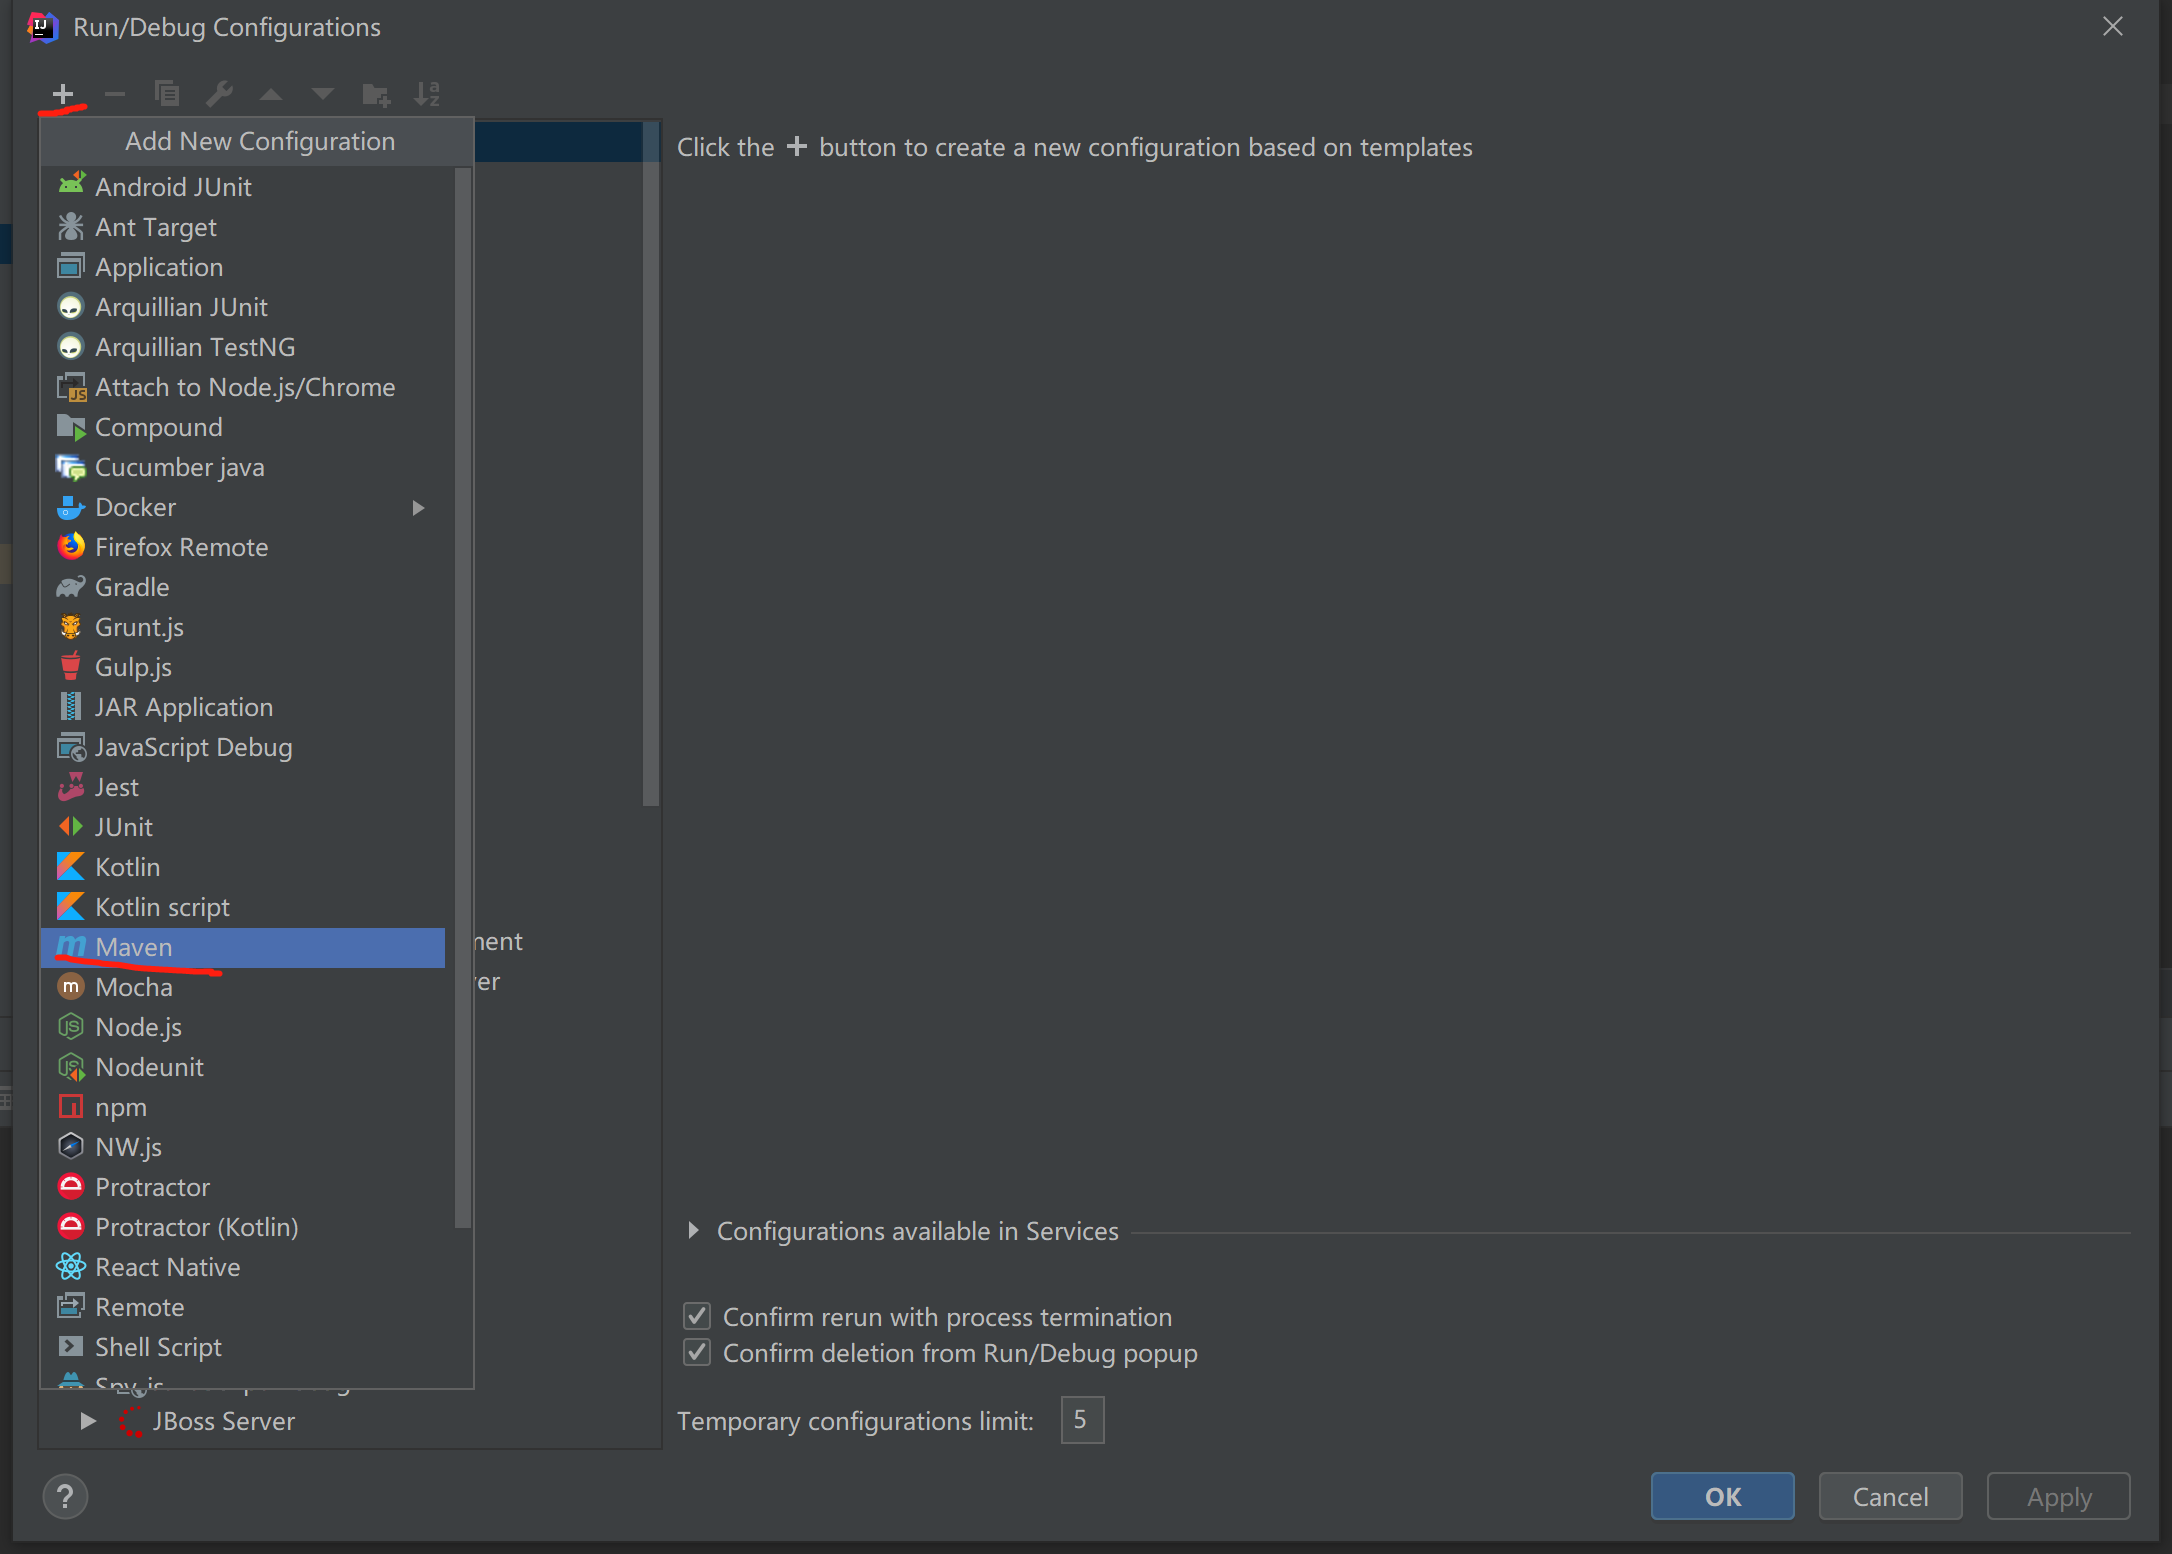
13.点击+-》点击Maven
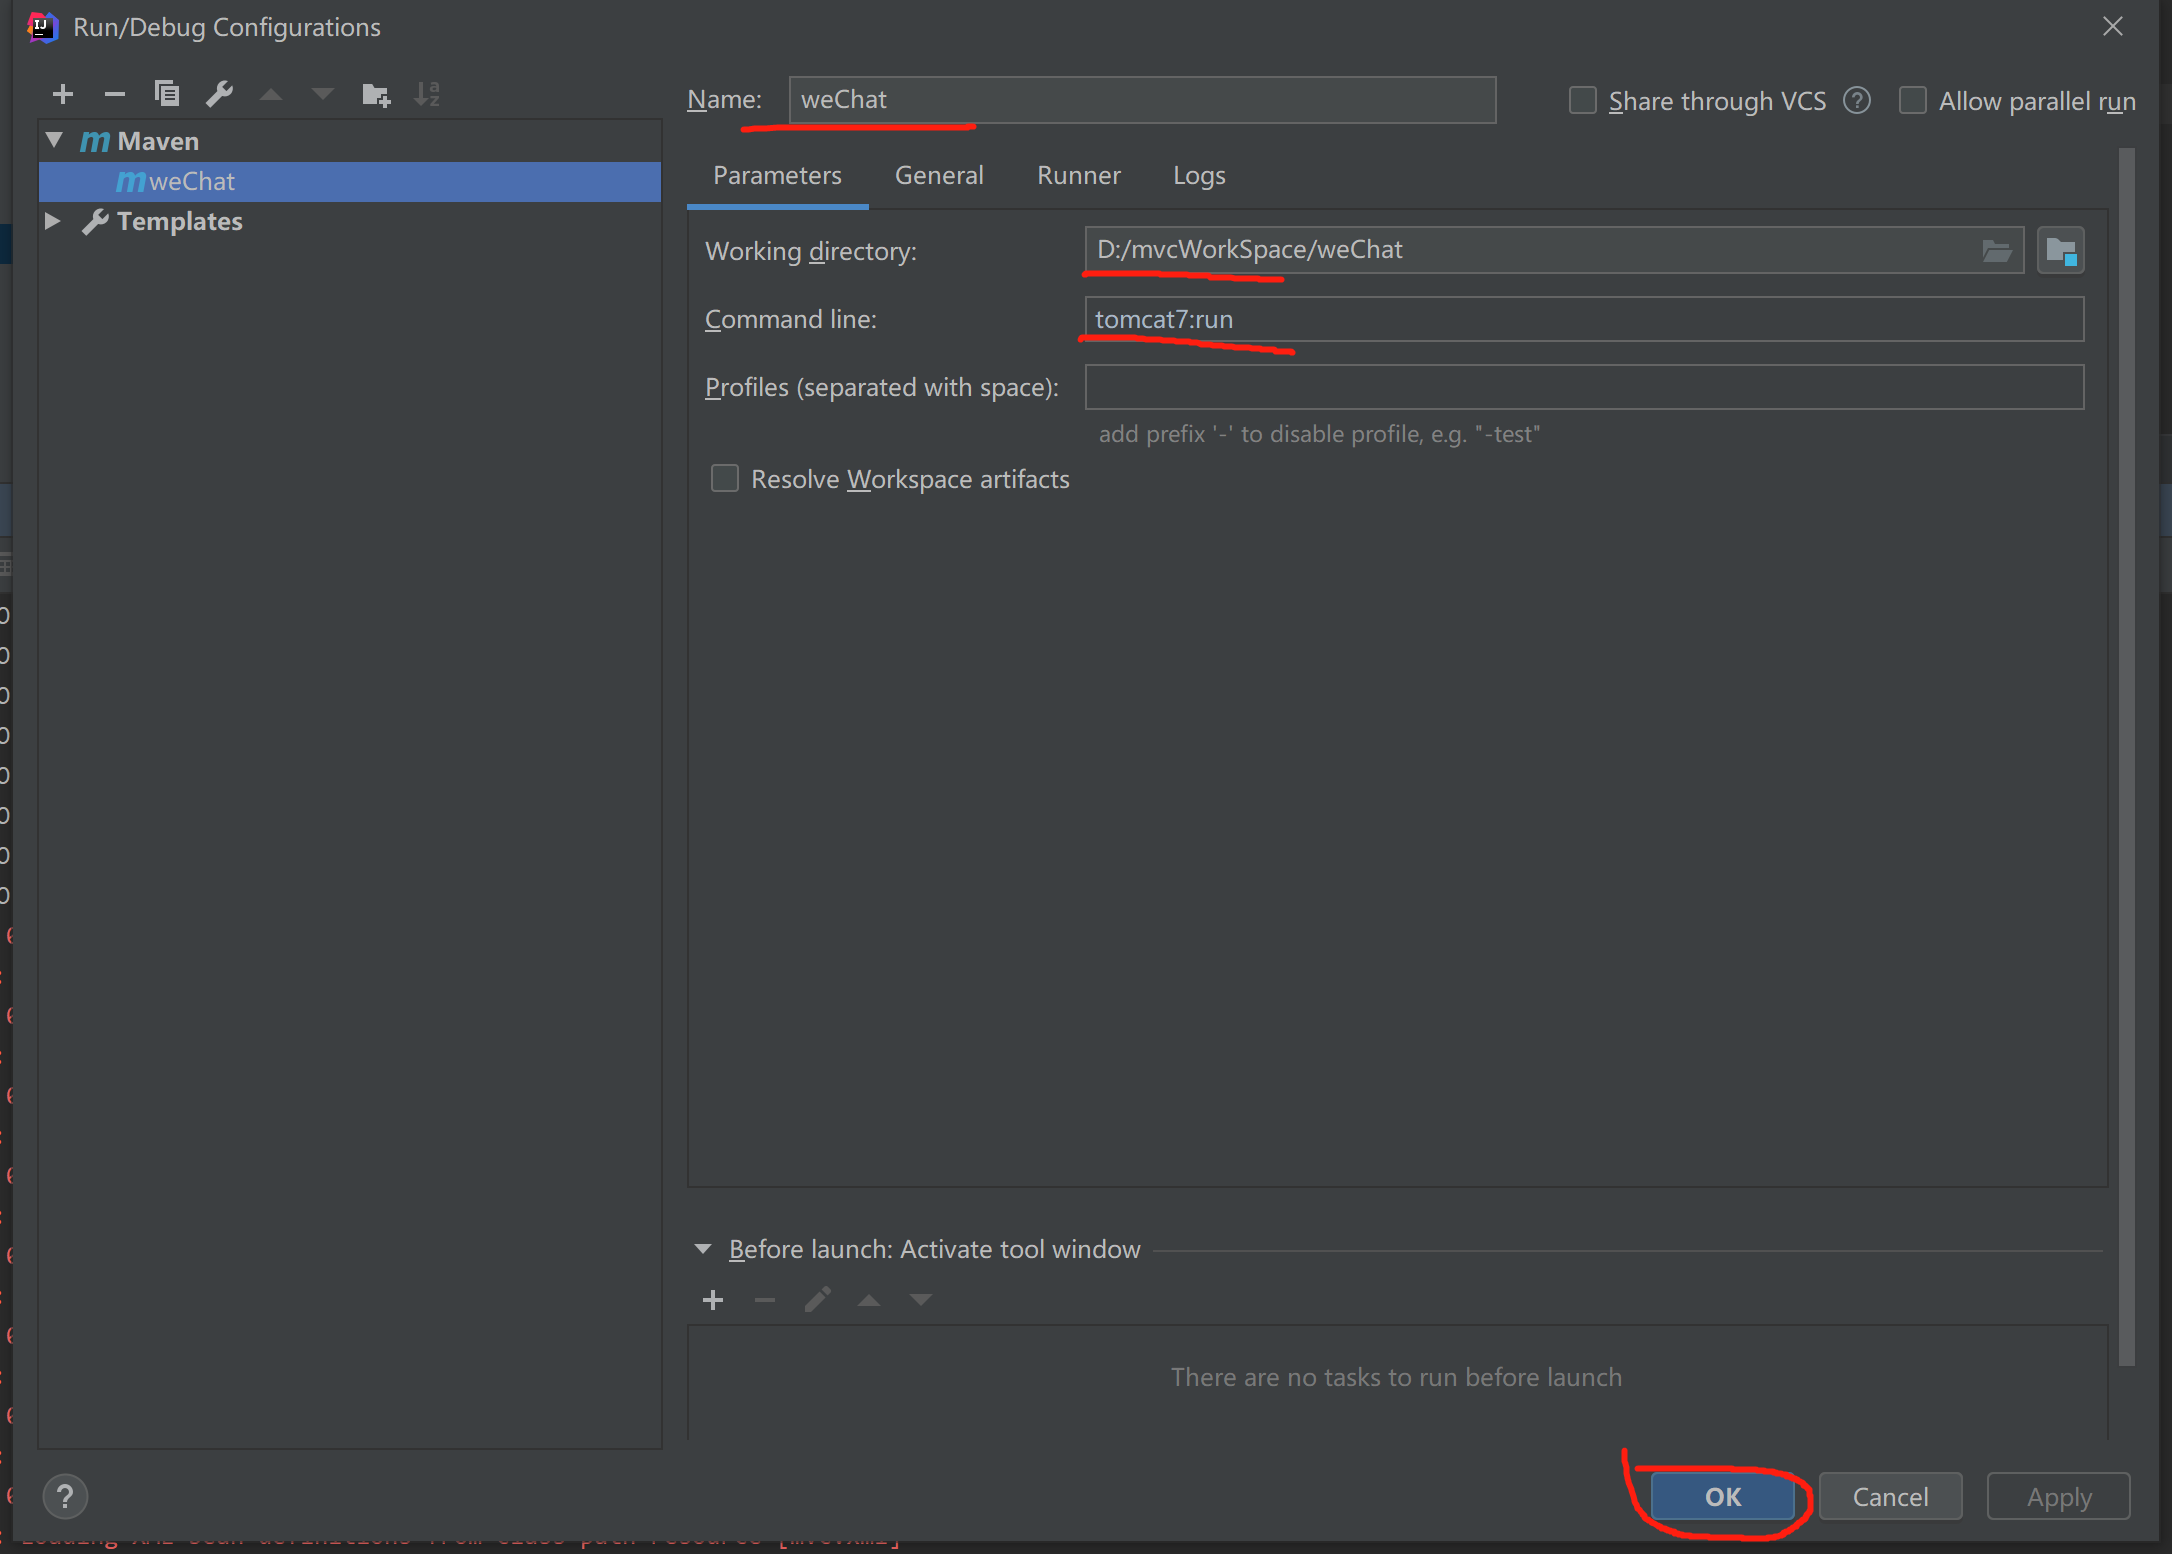
14.Name:项目名称 Working directory:工作空间 Command line:启动命令 填完后点击ok
15.启动成功
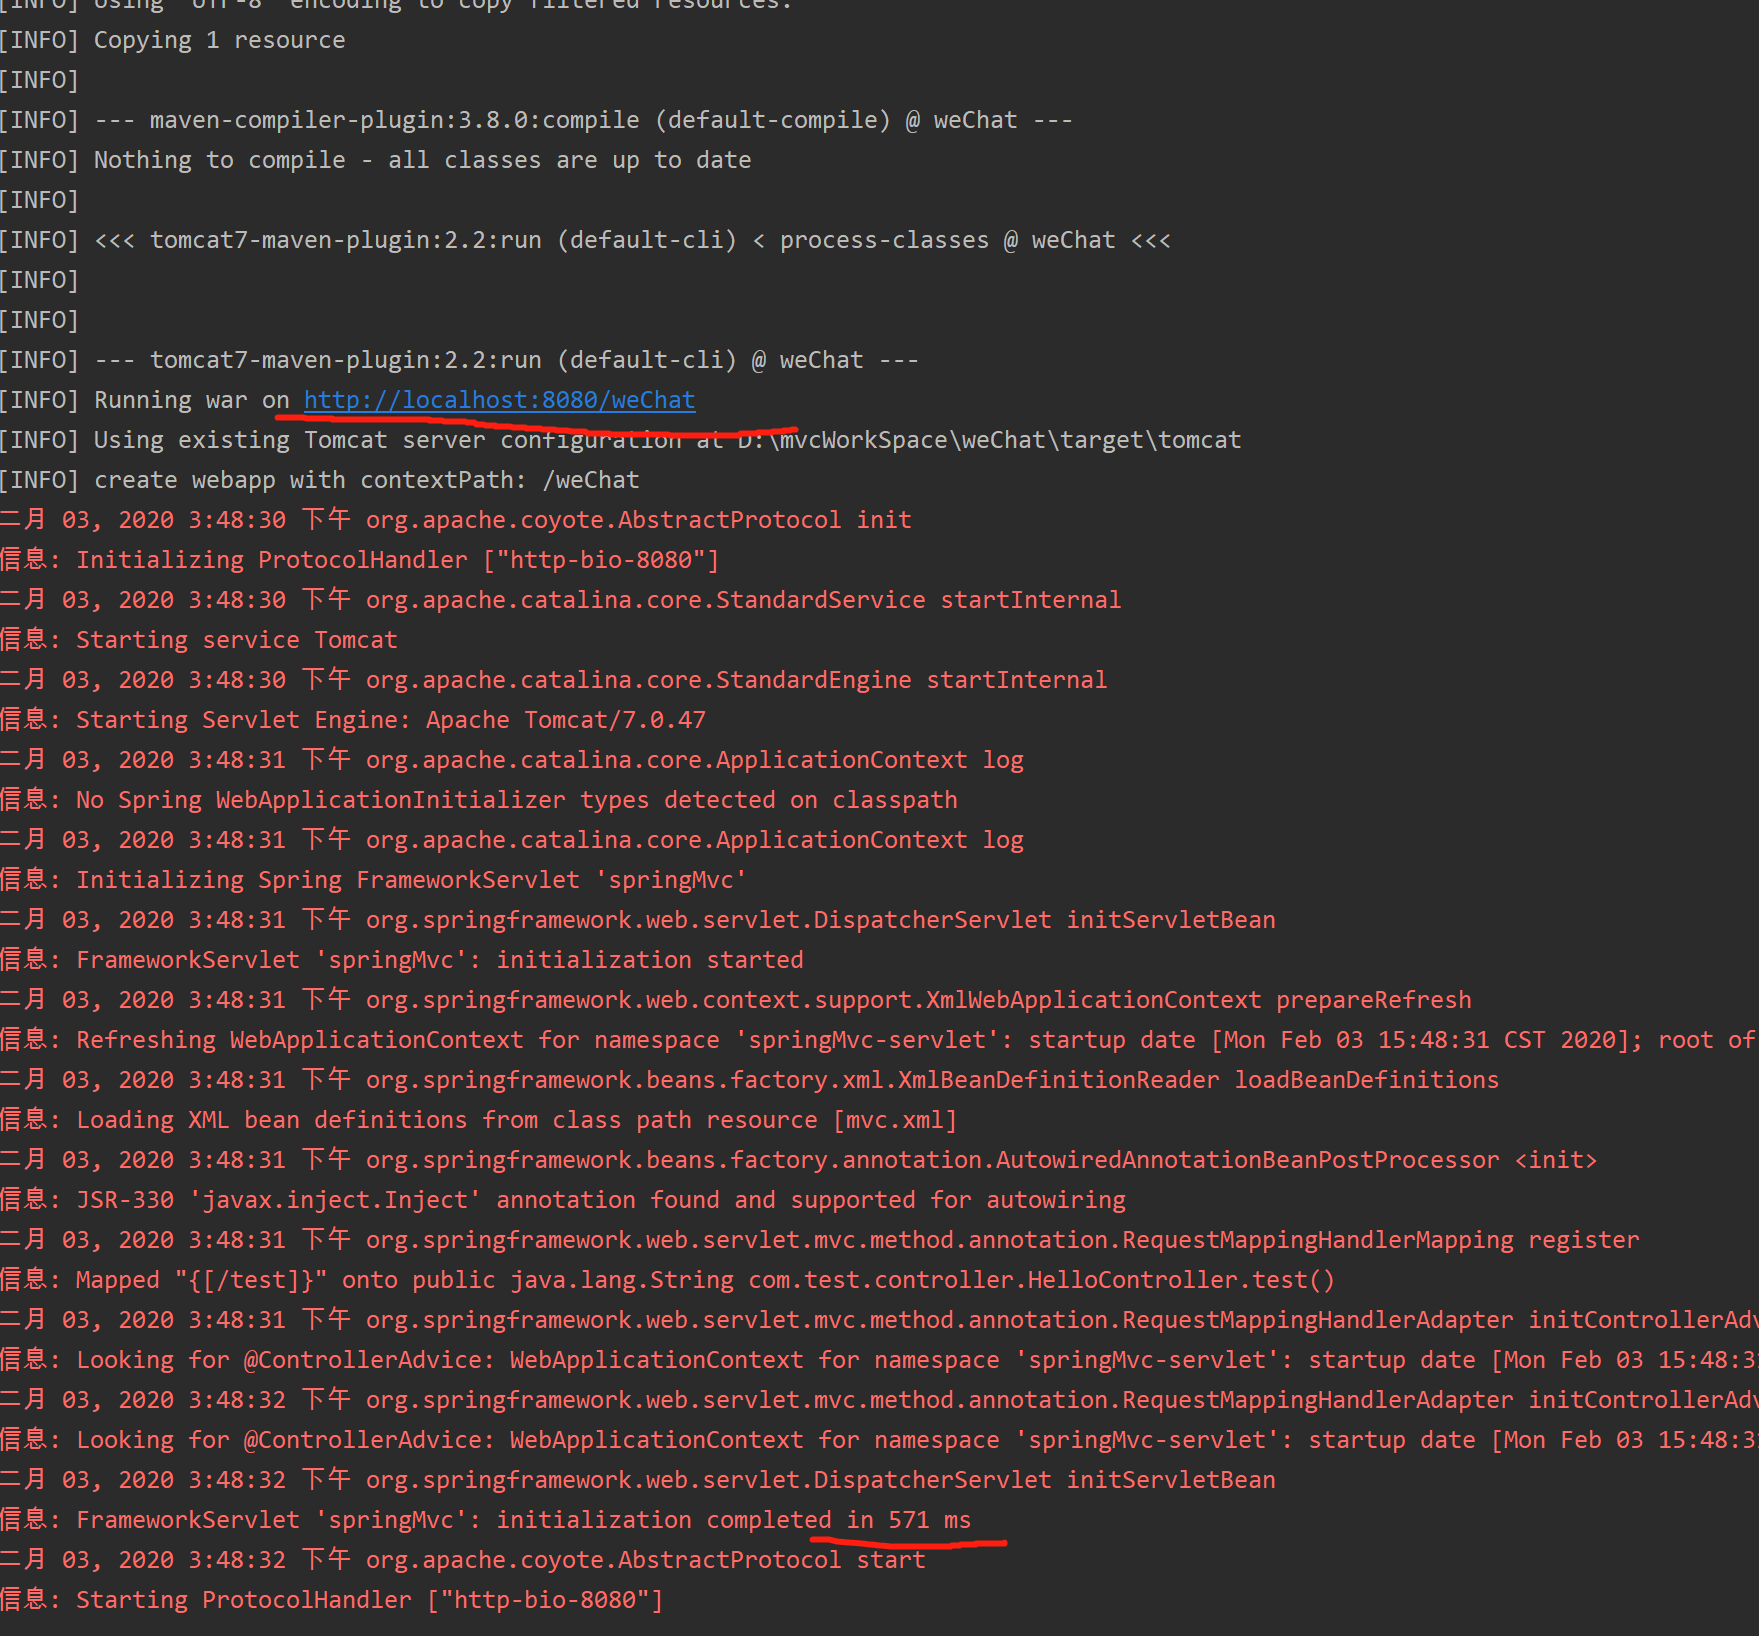
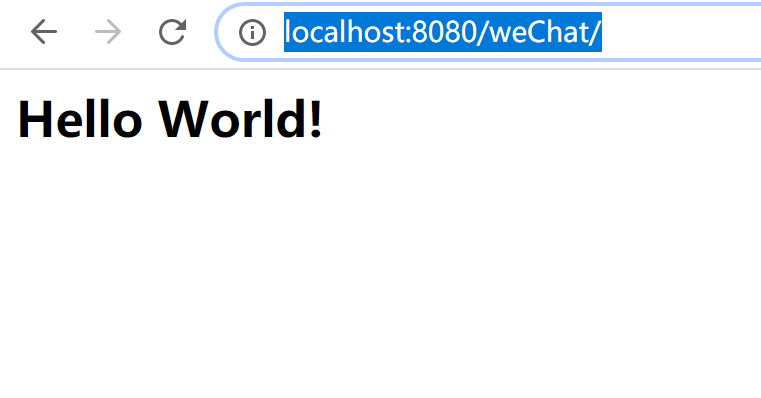
16,访问页面
17.访问页面http://localhost:8080/weChat/test.do
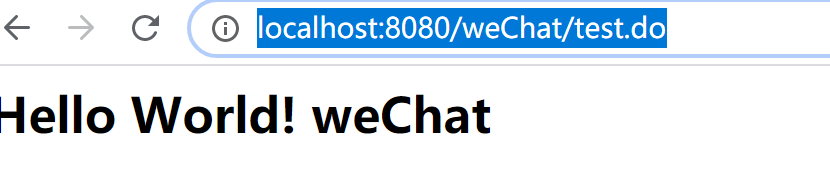
18.一个springmvc项目就创建成功啦,你也试试吧。。。。。。
springmvc教程(1)的更多相关文章
- SpringMVC教程3
SpringMVC教程2 一.文件上传 1.引入相关jar包 maven坐标 <!-- fileUpload 解析上传的文件用到的jar --> <dependency> &l ...
- SpringMVC教程4
SpringMVC教程3 一.数据回写 数据回写:在做数据更新的时候服务端查询的数据自动填充到表单中. 1.1默认方式 通过前面讲解的 Map Mode ModelMap绑定数据 @RequestMa ...
- SpringMVC教程1
一.SpringMVC介绍 1.MVC介绍 ==模型-视图-控制器(MVC== 是一个众所周知的以设计界面应用程序为基础的设计模式.它主要通过分离模型.视图及控制器在应用程序中的角色将业务逻辑从界面中 ...
- SpringMVC教程2
接上篇文章-SpringMVC教程1 五.基本操作 1.响应请求的方式 1.1ModeAndView /** * 查询方法 * @return */ @RequestMapping("/qu ...
- Java系列教程-SpringMVC教程
SpringMVC教程 1.SpringMVC概述 1.回顾MVC 1.什么是MVC MVC是模型(Model).视图(View).控制器(Controller)的简写,是一种软件设计规范. 是将业务 ...
- SpringMVC教程--Idea中使用Maven创建SpringMVC项目
1.新建项目 参照idea教程中的创建maven项目https://www.cnblogs.com/daxiang2008/p/9061653.html 2.POM中加入依赖包 (1)指定版本 (2) ...
- myeclipse配置springmvc教程
之前一直是使用Eclipse创建Web项目,用IDEA和MyEclipse的创建SpringMVC项目的时候时不时会遇到一些问题,这里把这个过程记录一下,希望能帮助到那些有需要的朋友.我是用的是MyE ...
- SpringMVC教程--eclipse中使用maven创建springMVC项目
一.在eclipse中创建maven-archetype-webapp项目: 1.新建项目选择maven项目 2.默认,下一步 3.选择maven-archetype-webapp,其他保持默认即可 ...
- SpringMVC 教程 - Controller
原文地址:https://www.codemore.top/cates/Backend/post/2018-04-10/spring-mvc-controller 声明Controller Contr ...
随机推荐
- ISR high memory参数
1.通过 show process memory 获取的数据参数解释: 来自 <http://blog.router-switch.com/2013/12/show-processes-memo ...
- Cisco AP-Mobility Express基础
Part I 介绍 1.1基本概况 Cisco Mobility Express这个名词出现在Cisco “8”系列的AP上,例如现在的AP1852,AP2802,AP3802等都是Mobility ...
- #P2010 回文日期 的题解
题目描述 在日常生活中,通过年.月.日这三个要素可以表示出一个唯一确定的日期. 牛牛习惯用88位数字表示一个日期,其中,前44位代表年份,接下来22位代表月 份,最后22位代表日期.显然:一个日期只有 ...
- SpringBoot实现restuful风格的CRUD
restuful风格: 百度百科: RESTFUL是一种网络应用程序的设计风格和开发方式,基于HTTP,可以使用XML格式定义或JSON格式定义.RESTFUL适用于移动互联网厂商作为业务使能接口的场 ...
- 学习之学习--混沌大学商学院--第一课--HHR计划
<学习之学习> 第一课:混沌初开 李善友 1,课程目标:建立个人的多元思维模型,帮助企业找到创新驱动的增长战略. 2,创新:第二曲线创新,创新理论之父熊彼特. 3,核心课:第二曲线,非连续 ...
- ubuntu16.04下安装docker和docker-compose
开始安装 由于apt官方库里的docker版本可能比较旧,所以先卸载可能存在的旧版本:$ sudo apt-get remove docker docker-engine docker-ce dock ...
- Xftp和Xshell
Xftp 用于跟云虚拟机文件传输的工具,Xftp官网 Xshell Xftp的兄弟工具,用于执行云虚拟机命令,Xshell官网 两个都是付费工具,各需要几百块钱,当然破解的版本也很多 登陆 这两个的连 ...
- 「AHOI2008」紧急集合/聚会
题目描述 这次也是很长的题面啊\(qwq\) 题目大意如下: 给定一棵\(N\)个节点的树以及\(M\)次询问,每次询问给出\(x,\ y,\ z\)三个节点,程序需要在树上找一个点\(p\) 使得\ ...
- python爬虫处理在线预览的pdf文档
引言 最近在爬一个网站,然后爬到详情页的时候发现,目标内容是用pdf在线预览的 比如如下网站: https://camelot-py.readthedocs.io/en/master/_static/ ...
- 无线冲方案 MCU vs SoC
参考: MCU还是SoC:2018无线充电技术走向何方? 方案 分立/集成 特点 框图 MCU方案 分立方案 MCU芯片负责Qi协议的运算和外围电路控制,ST MCU居多:单线圈,双线圈,三线圈都有: ...