UIBarButtonItem
1、UINavigationController导航控制器如何使用
UINavigationController可以翻译为导航控制器,在IOS里经常用到。
我们看看它的如何使用:
下面的图显示了导航控制器的流程。最左侧是根视图,当用户点击其中的General项时 ,General视图会滑入屏幕;当用户继续点击Auto-Lock项时,Auto-Lock视图将滑入屏幕。相应地,在对象管理上,导航控制器使用了导 航堆栈。根视图控制器在堆栈最底层,接下来入栈的是General视图控制器和Auto-Lock视图控制器。可以调用 pushViewControllerAnimated:方法将视图控制器推入栈顶,也可以调用popViewControllerAnimated:方 法将视图控制器弹出堆栈。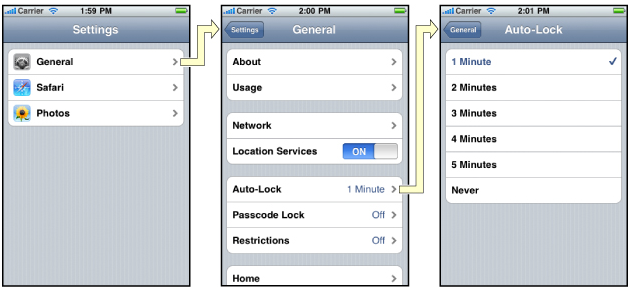
上图来自苹果官网。
2、UINavigationController的结构组成
看下图,UINavigationController有Navigation bar ,Navigation View ,Navigation toobar等组成。

现在我们建立一个例子,看看如何使用UINavigationController
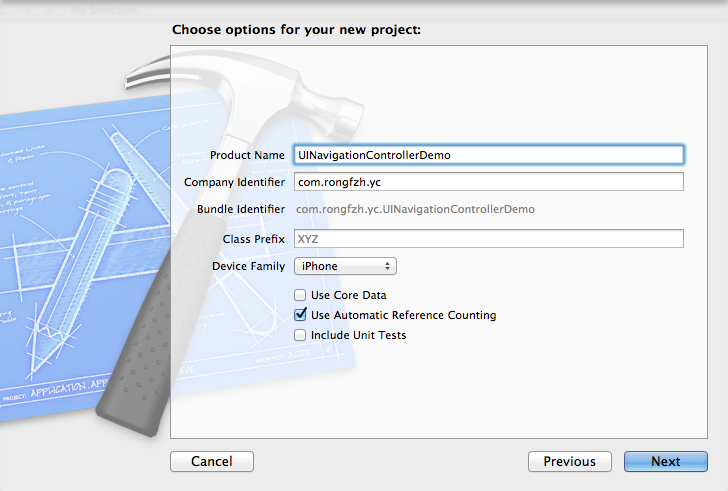
3、新建一个项目
命名为UINavigationControllerDemo,为了更好理解UINavigationController,我们选择Empty Application模板
4、创建一个View Controller,命名为RootViewController:依次选择File——New——New File,默认勾上With XIB for user interface.
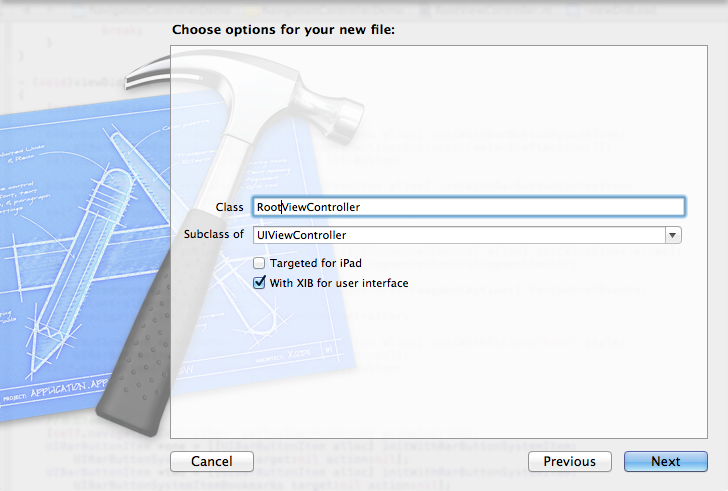
选择正确位置创建完成,这时项目里多了三个文件,分别是RootViewController.h RootViewController.m RootViewController.xib文件。
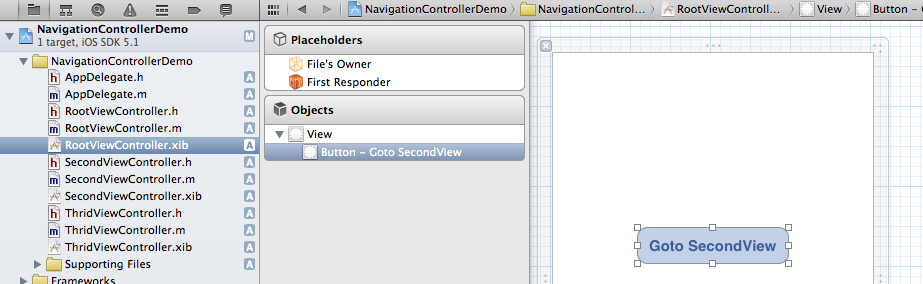
打开RootViewController.xib,添加一个按钮控件,按钮Button改成 :Goto SecondView,为跳转做准备
5、打开AppDelegate.h,向其中添加属性:
- @property (strong, nonatomic) UINavigationController *navController;
添加后AppDelegate.h文件代码如下:
- #import <UIKit/UIKit.h>
- @class ViewController;
- @interface AppDelegate : UIResponder <UIApplicationDelegate>
- @property (strong, nonatomic) UIWindow *window;
- @property (strong, nonatomic) ViewController *viewController;
- @property (strong, nonatomic) UINavigationController *navController;
- @end
6、在AppDelegate.m 文件的didFinishLaunchingWithOptions方法中创建添加navController,RootViewController视图。
- - (BOOL)application:(UIApplication *)application didFinishLaunchingWithOptions:(NSDictionary *)launchOptions
- {
- self.window = [[UIWindow alloc] initWithFrame:[[UIScreen mainScreen] bounds]];
- RootViewController *rootView = [[RootViewController alloc] init];
- rootView.title = @"Root View";
- self.navController = [[UINavigationController alloc] init];
- [self.navController pushViewController:rootView animated:YES];
- [self.window addSubview:self.navController.view];
- [self.window makeKeyAndVisible];
- return YES;
- }
给rootView的titie命名为 Root View,好识别View直接的切换关系。用pushViewController把rootView加入到navController的视图栈中。
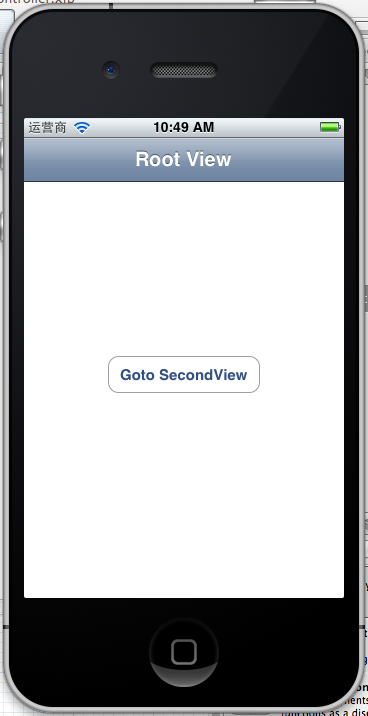
7、现在Root视图添加完成
看看效果:
 '
'
现在还没有Navigation bar 。只有title。
8、添加UIBarButtonItem
bar ButtonItem分左右UIBarButtonItem。我们把左右的都添加上去。
在RootViewController.m中添加代码如下:
- - (void)viewDidLoad
- {
- [super viewDidLoad];
- UIBarButtonItem *leftButton = [[UIBarButtonItem alloc] initWithBarButtonSystemItem:UIBarButtonSystemItemAction target:self action:@selector(selectLeftAction:)];
- self.navigationItem.leftBarButtonItem = leftButton;
- UIBarButtonItem *rightButton = [[UIBarButtonItem alloc] initWithBarButtonSystemItem:UIBarButtonSystemItemAdd target:self action:@selector(selectRightAction:)];
- self.navigationItem.rightBarButtonItem = rightButton;<p class="p1">}</p>
这样添加了UIBarButtonItem了,效果如下:

这里重点介绍下
UIBarButtonItem *leftButton = [[UIBarButtonItemalloc]initWithBarButtonSystemItem:UIBarButtonSystemItemActiontarget:selfaction:@selector(selectLeftAction:)];
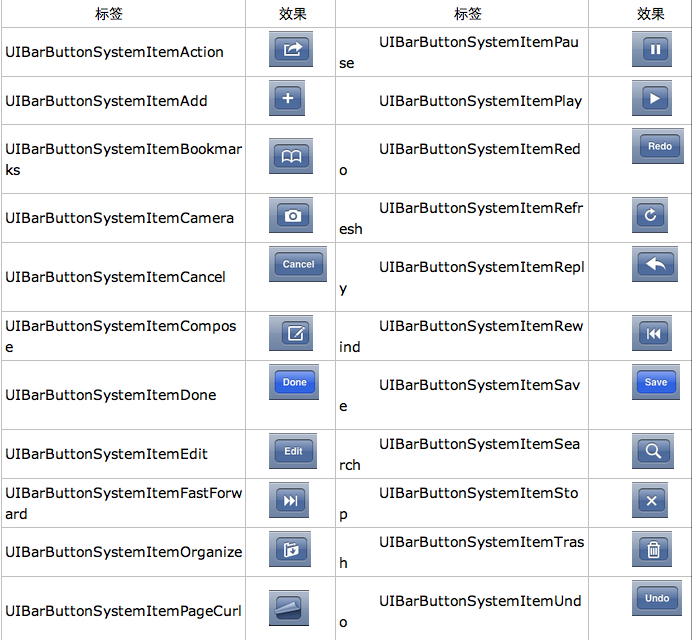
UIBarButtonSystemItemAction的风格,这是系统自带的按钮风格,看下图,你不用一个个试验,你也知道想用那个item,如下图:
9、响应UIBarButtonItem的事件的实现
我们在 action:@selector(selectLeftAction:);
action添加了selectLeftAction和selectRightAction
在RootViewController.m文件中添加代码实现:
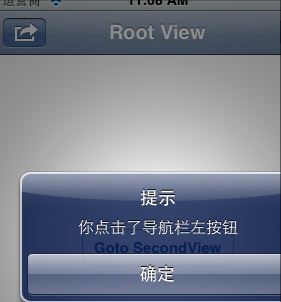
- -(void)selectLeftAction:(id)sender
- {
- UIAlertView *alter = [[UIAlertView alloc] initWithTitle:@"提示" message:@"你点击了导航栏左按钮" delegate:self cancelButtonTitle:@"确定" otherButtonTitles:nil, nil];
- [alter show];
- }
- -(void)selectRightAction:(id)sender
- {
- UIAlertView *alter = [[UIAlertView alloc] initWithTitle:@"提示" message:@"你点击了导航栏右按钮" delegate:self cancelButtonTitle:@"确定" otherButtonTitles:nil, nil];
- [alter show];
- }
这样在点击左右的UIBarButtonItem时,弹出提示:
这篇先讲添加UIBarButtonItem,下篇讲解页面跳转和添加UISegmentedControl
例子代码:https://github.com/schelling/YcDemo
本文转载至:http://my.oschina.net/jackyyang/blog/67151
UIBarButtonItem的更多相关文章
- 自定义UIBarButtonItem
如果是通过UIButton自定义UIBarButtonItem,那么通过如下这个方式设置title是无效的.必须要直接给button设置title. self.navigationItem.right ...
- iOS学习之UINavigationController详解与使用(一)添加UIBarButtonItem
http://blog.csdn.net/totogo2010/article/details/7681879 1.UINavigationController导航控制器如何使用 UINavigati ...
- UIBarButtonItem的创建
1. rightBarButtonItem的创建 -(void)initRightBar{ UIBarButtonItem *done =[UIBarButtonItem rightItemWithT ...
- 新浪微博客户端(3)-封装UIBarButtonItem
单独给NavigationBar上的两个NavigationItem设置图片显得比较麻烦,下面对创建单个UIBarButtonItem的过程进行封装. UIBarButtonItem+Extensio ...
- UIBarButtonItem不能获取frame
在使用KxMenu这个厉害的控件做竖直列表的时候,发现UIBarButtonItem不能获取到frame,UIBarButtonItem是NSObject的子类,他不是一个uiresponed或者ui ...
- UIBarButtonItem变弹簧
UIBarButtonItem * spaceItem = [[UIBarButtonItem alloc] initWithBarButtonSystemItem:UIBarButtonSystem ...
- UINavigationController详解一(转)UIBarButtonItem
本文出自:http://www.cnblogs.com/smileEvday/archive/2012/05/14/2495153.html 特别感谢. 1.UINavigationControlle ...
- [转]iOS学习之UINavigationController详解与使用(一)添加UIBarButtonItem
转载地址:http://blog.csdn.net/totogo2010/article/details/7681879 1.UINavigationController导航控制器如何使用 UINav ...
- ios基础篇(十)——UINavgationController的使用(一)UIBarButtonItem的添加
UINavigationController又被成为导航控制器,继承自UIViewController,以栈的方式管理所控制的视图控制器,下面就详细说一下UINavigationController的 ...
- ios7 自定义UINavigationBar UIBarButtonItem 10px的偏移纠正
为UINavigationBar 写一个分类.UINavigationItem+correct_offset.h 转载 http://www.colabug.com/thread-1112420-1 ...
随机推荐
- VC 与Matlab混合编程之引擎操作详解
Visual C++ 是当前主流的应用程序开发环境之一,开发环境强大,开发的程序执行速度快.但在科学计算方面函数库显得不够丰富.读取.显示数据图形不方便. Matlab 是一款将数值分析.矩阵计算.信 ...
- Winform DatagridviewcomboboxColumn Disable Style
DataGridViewComboBoxCell cell =(DataGridViewComboBoxCell)dataGridView1[e.ColumnIndex, e.RowIndex]; c ...
- 浏览器向下兼容之polyfill[阅后即瞎]
我们入门JavaScript的时候都写过polyfill: 比如手写一个弹窗, 手动模拟实现一个表格, 这些魔力的对象都是浏览器原生支持的, 虽然当我成为JS专家之后再也没造过轮子, 但是最近才发现我 ...
- 轻量级ORM框架Dapper应用六:Dapper支持存储过程
在Entity Framework中讲解了EF如何支持存储过程,同样,Dapper也支持存储过程,只需要在Query()方法的CommandType中标记使用的是存储过程就可以了.在Users表上面创 ...
- Ubuntu安装MediaInfo
Ubuntu版 打包下载:艺搜下载 适用于Ubuntu 12.10(i386) 安装libzen0_v0.4.29 _i386.xUbuntu_12.10.deb 安装libmediainfo0_v0 ...
- ci框架model中的进行增删改的写法
<?php if ( ! defined('BASEPATH')) exit('No direct script access allowed'); // 商品类别模型class Categor ...
- CSS实现圆角六色渐变自适应按钮
Css代码 .g_a{display:-moz-inline-stack; display:inline-block; border-bottom:1px solid #cccccc; border- ...
- 关于Cocos2d-x中字体的使用
1.如果使用的是系统自带的 static Label* createWithSystemFont ( const std::string & text, const std::s ...
- (转)一种开源的跨平台视频开发框架:VideoLAN - VLC media player
VLC原先是几个法国的大学生做的项目,后来他们把VLC作为了一个开源的项目,吸引了来自世界各国的很多优秀程序员来共同编写和维护VLC,才逐渐变成了现在这个样子.至于为什么叫VideoLan Clien ...
- linux -- 查看Ubuntu命令行调用的文件
which 如: 输入:which reboot 输出:/sbin/reboot 输入:which shutdown -h now 输出:/sbin/shutdown