php版本CKEditor 4和CKFinder安装及配置
下载并解压CKEditor 4和CKFinder
CKEditor 4下载地址:https://ckeditor.com/cke4/builder,选择自定义的版本,记得加上中文语言包
CKFinder下载地址:https://download.cksource.com/CKFinder/CKFinder%20for%20PHP/3.4.4/ckfinder_php_3.4.4.zip
查看CKEditor的示例文件,http://127.0.0.1/ckeditor/samples/
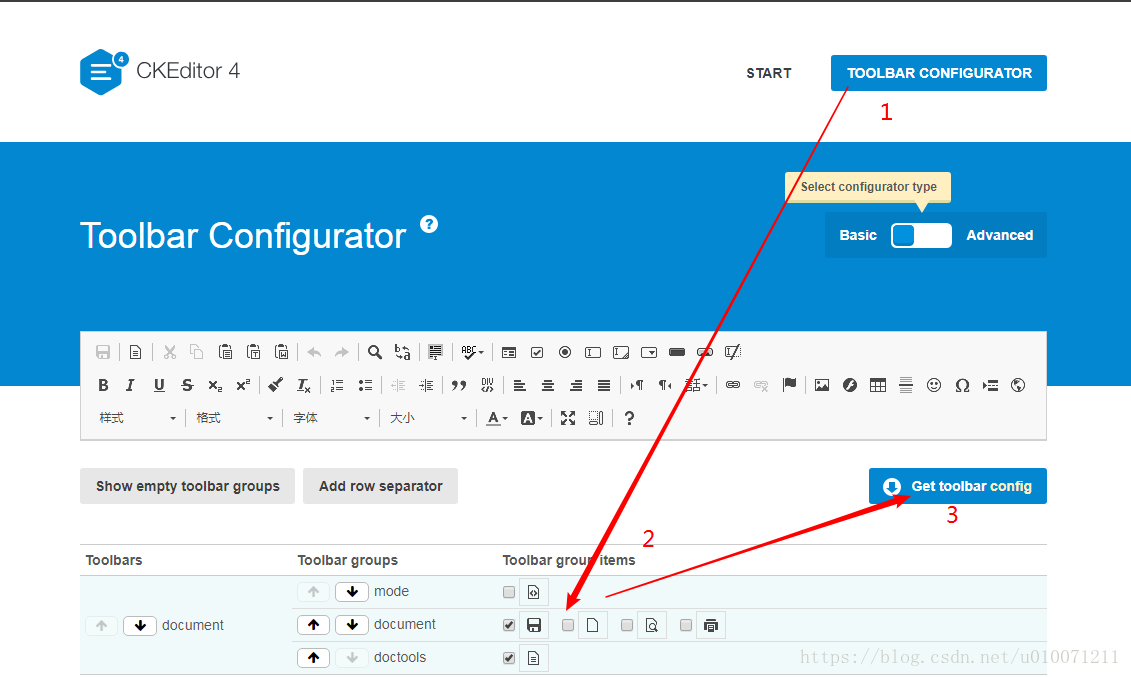
根据你的需求选择自定义工具栏,选好之后点击Get toolbar config,把这个配置代码复制,备用
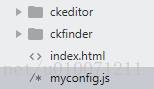
在CKEditor 4同级目录新建index.html,和myconfig.js
index.html的源代码为:
<!DOCTYPE html>

<html>

<head>

	<meta charset="utf-8">

	<title>CKEditor Sample</title>

	<!-- 加载ckeditor.js -->

	<script src="./ckeditor/ckeditor.js"></script>

</head>

<body id="main">

	<textarea name="editor1" id="editor1" cols="30" rows="10">

		这是一个CKEditor测试

	</textarea>

<script>

	// 这样就可以使用啦

	CKEDITOR.replace('editor1',{

		//toolbar : 'Basic',            //方式1,在此直接写配置

		//uiColor : '#9ab8f5'

		customConfig : '../myconfig.js'  //方式2,加载配置js,相对于ckeditor.js的路径

	});

</script>

</body>

</html>
myconfig.js的源代码为:
//特别注意,每次修改都要ctrl+f5 清除缓存后查看

CKEDITOR.editorConfig = function( config ) {

    config.language =  "zh-cn" ;  //语言,对应ckeditor下的lang文件夹

	config.uiColor = '#9ab8f5';   //编辑器颜色

	config.width = '900';         //编辑器宽

	config.height = '500';        //编辑器高

	//自定义工具栏,刚才从示例哪里复制的代码

	config.toolbarGroups = [

		'/',

		{ name: 'document', groups: [ 'mode', 'document', 'doctools' ] },

		{ name: 'clipboard', groups: [ 'clipboard', 'undo' ] },

		{ name: 'editing', groups: [ 'find', 'selection', 'spellchecker', 'editing' ] },

		{ name: 'forms', groups: [ 'forms' ] },

		{ name: 'basicstyles', groups: [ 'basicstyles', 'cleanup' ] },

		{ name: 'paragraph', groups: [ 'list', 'indent', 'blocks', 'align', 'bidi', 'paragraph' ] },

		{ name: 'links', groups: [ 'links' ] },

		{ name: 'insert', groups: [ 'insert' ] },

		{ name: 'styles', groups: [ 'styles' ] },

		{ name: 'colors', groups: [ 'colors' ] },

		{ name: 'tools', groups: [ 'tools' ] },

		{ name: 'others', groups: [ 'others' ] },

		{ name: 'about', groups: [ 'about' ] }

	];

	config.removeButtons = 'NewPage,Save,Preview,Cut,Copy,Paste,PasteText,PasteFromWord,Find,Replace,SelectAll,Scayt,HiddenField,Form,Radio,TextField,Textarea,Select,Button,ImageButton,Outdent,Indent,Subscript,Superscript,Strike,Blockquote,CreateDiv,BidiLtr,BidiRtl,Language,Anchor,Table,HorizontalRule,Smiley,SpecialChar,PageBreak,Iframe,ShowBlocks,About,Source';

	//ckfinder的相关配置项

	config.filebrowserBrowseUrl =  './ckfinder/ckfinder.html' ;

    config.filebrowserImageBrowseUrl =  './ckfinder/ckfinder.html?type=Images' ;

    config.filebrowserFlashBrowseUrl =  './ckfinder/ckfinder.html?type=Flash' ;

    config.filebrowserUploadUrl =  './ckfinder/core/connector/php/connector.php?command=QuickUpload&type=Files' ;

    config.filebrowserImageUploadUrl =  './ckfinder/core/connector/php/connector.php?command=QuickUpload&type=Images' ;

    config.filebrowserFlashUploadUrl =  './ckfinder/core/connector/php/connector.php?command=QuickUpload&type=Flash' ;

    config.filebrowserWindowWidth = '600';     //文件浏览宽

    config.filebrowserWindowHeight = '300';     //文件浏览宽

};
网上搜索有同学总结了最全的配置项,详见:https://blog.csdn.net/com185272358/article/details/24814109
图片上传,点击浏览服务器,会出下面的提示
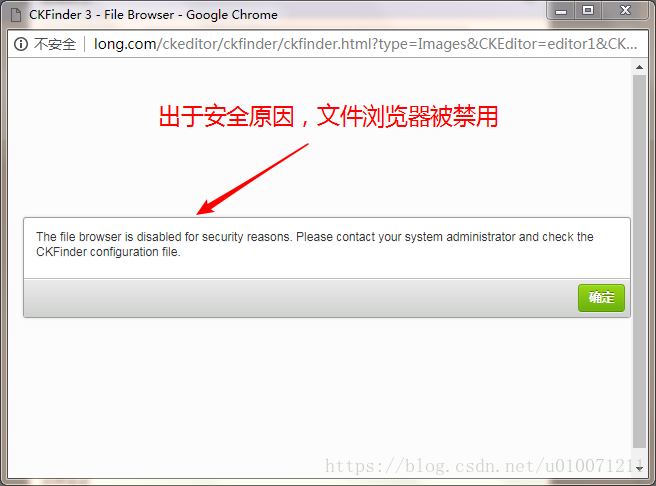
修改ckfinder文件夹下config.php,将29行的return false;改为return ture;

ckfinder即可正常使用,上传图片的默认保存位置为根目录下的ckfinder->userfiles->images。
php版本CKEditor 4和CKFinder安装及配置的更多相关文章
- mongodb4版本,windows下的安装与配置(史上步骤最全最详细+图解)
安装的是4.2.1版本,安装途中出现过很多错误,找遍各种博客基本没能解决 1.mongodb安装的官方地址: https://www.mongodb.com/download-center/commu ...
- win10 免安装版本的MySQL的下载安装和配置
一.概述 网上找了好多,发现好多不是linux系统的就是与现在新版本有出入,自己做小项目亲手实践了一下,供大家借鉴. MySQL版本:mysql-5.7.17 下载方法: 1.MySQL官方网址htt ...
- win10免安装版本的MySQL的下载安装和配置
下载mysql-xxx.zip(免安装版) 解压到自己想要的目录下(我的是D:\mysql\),打开mysql-5.7.21-winx64文件夹,新建my.ini文件,输入: [mysql] # 设置 ...
- PostgreSQL 9.6.2版本在centOS下的安装和配置
1.如果有用yum安装过旧版,卸载掉: yum remove postgresql* 2.更新一下yum: sudo yum update 3.去 官网 找到 适合你系统 的资源的下载地址,然后使用w ...
- hdfs-over-ftp安装与配置
hdfs-over-ftp是一个开源,简单易用的实现了对HDFS系统的下载和上传功能的小工具.可以作为管理工具来使用,快捷方便. 1 安装jdk(1.6以上版本)并配置环境变量分别执行java -ve ...
- Synergy使用(安装及配置)
最近在看一篇文章,找到了一款符合我需求的软件:Synergy. Synergy可以在多台电脑上进行鼠标与键盘及剪贴板(只能共享文本)的共享.不用每台电脑都插上这些外设了... 共享文件可以参看微软出品 ...
- mysql nonInstall 版本的安装与配置
最近用到mysql,发现如果想使用最新版本64 bit mysql 需要独特的配置和使用方式 结合最近的研究总结一下安装过程. 首先下载:http://dev.mysql.com/downloads/ ...
- Centos 6.5 SNMP客户端安装及配置版本net-snmp-5.7.3
Centos 6.5 SNMP客户端安装及配置SNMP版本:net-snmp-5.7.3.tar.gz1.下载软件cd /usr/local/srcyum -y install gccwget htt ...
- windows版本的phantomjs-2.1.1-windows安装
windows版本的phantomjs-2.1.1-windows安装 1.下载 链接:http://pan.baidu.com/s/1dEUl6dN 密码:oij8 2.安装 下载好之后解压放到某个 ...
随机推荐
- 网络报错:“The connection is not for this device.”
网络报错:“The connection is not for this device.” 作者:尹正杰 版权声明:原创作品,谢绝转载!否则将追究法律责任. 记得在前几天工作的时候,有一个同时通过微信 ...
- jdk1.8.0_45源码解读——HashMap的实现
jdk1.8.0_45源码解读——HashMap的实现 一.HashMap概述 HashMap是基于哈希表的Map接口实现的,此实现提供所有可选的映射操作.存储的是<key,value>对 ...
- [转载]Web API OData Inlinecount not working
http://stackoverflow.com/questions/15422831/web-api-odata-inlinecount-not-working
- DataTable转Json(兼容easyUI特殊json分页)
用法:上述方法是DataTable的扩展方法:静态类静态方法,变量前用this (一)ps:普通datatable转标准json DataTable dt = 获取db中的datatable数据. s ...
- 【CTF WEB】函数绕过
函数绕过 <?php show_source(__FILE__); $c = "<?php exit;?>"; @$c.=$_GET['c']; @$filena ...
- The Smallest Difference
Given two array of integers(the first array is array A, the second array is arrayB), now we are goin ...
- Linux Power Managment详解 【转】
转自:http://blog.chinaunix.net/uid-24517893-id-254740.html Linux Power Managment 谨以此文纪念过往的岁月 一.前言 在这个对 ...
- springboot配置mybatis的mapper路径
1.在src/main/resources/目录下新建mybatis文件夹,将xxx.xml文件放入该文件夹内 2.在application.yml文件中配置: mybatis: configurat ...
- 001_fpm打包命令详解
使用fpm来制作rpm包 2017/2/22 1 2 3 4 5 6 7 8 9 10 11 12 13 14 15 16 17 18 19 20 21 22 23 24 25 26 27 28 29 ...
- centos6.5环境Redis下载及编译安装
centos6.5环境Redis下载及编译安装 1:官方站点: http://redis.io/download 下载最新版或者最新stable版 2:解压源码并进入目录 tar -zxvf redi ...