MindSpore 自动微分
代码原地址:
https://www.mindspore.cn/tutorial/zh-CN/r1.2/autograd.html
MindSpore计算一阶导数方法 mindspore.ops.GradOperation (get_all=False, get_by_list=False, sens_param=False),其中get_all为False时,只会对第一个输入求导,为True时,会对所有输入求导;
get_by_list为False时,不会对权重求导,为True时,会对权重求导;
sens_param对网络的输出值做缩放以改变最终梯度。
get_all : 决定着是否根据输出对输入进行求导。
get_by_list : 决定着是否对神经网络内的参数权重求导。
sens_param : 对网络的输出进行乘积运算后再求导。(通过对网络的输出值进行缩放后再进行求导)
网络的前向传播:
import numpy as np
import mindspore.nn as nn
import mindspore.ops as ops
from mindspore import Tensor
from mindspore import ParameterTuple, Parameter
from mindspore import dtype as mstype class Net(nn.Cell):
def __init__(self):
super(Net, self).__init__()
self.matmul = ops.MatMul()
self.z = Parameter(Tensor(np.array([1.0, 1.0, 1.0], np.float32)), name='z') def construct(self, x, y):
x = x * self.z
out = self.matmul(x, y)
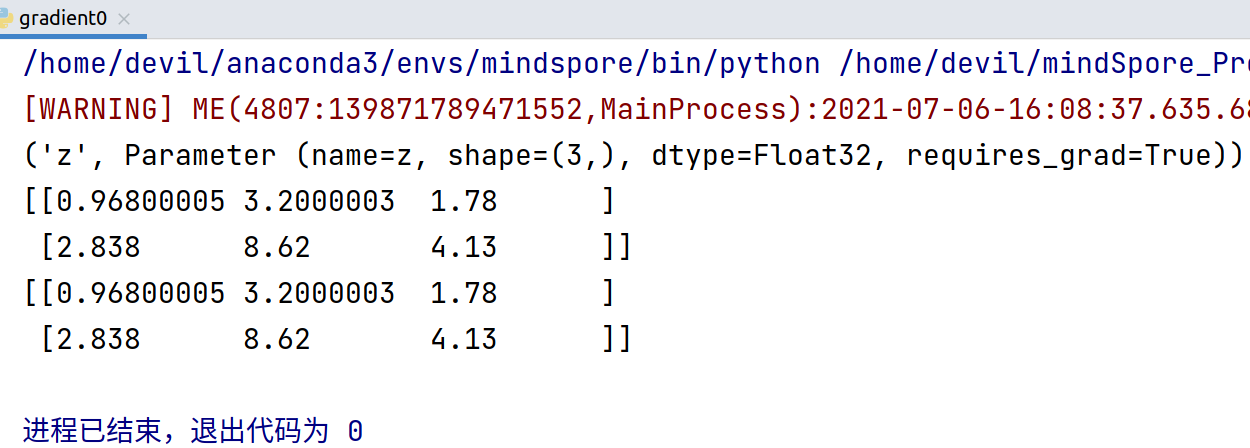
return out model = Net() for m in model.parameters_and_names():
print(m) x = Tensor([[0.8, 0.6, 0.2], [1.8, 1.3, 1.1]], dtype=mstype.float32)
y = Tensor([[0.11, 3.3, 1.1], [1.1, 0.2, 1.4], [1.1, 2.2, 0.3]], dtype=mstype.float32)
result = model(x, y)
print(result) n_x = np.array([[0.8, 0.6, 0.2], [1.8, 1.3, 1.1]], dtype=np.float32)
n_y = np.array([[0.11, 3.3, 1.1], [1.1, 0.2, 1.4], [1.1, 2.2, 0.3]], dtype=np.float32)
result = model(x, y)
print(result)
=======================================================
反向传播:
import numpy as np
import mindspore.nn as nn
import mindspore.ops as ops
from mindspore import Tensor
from mindspore import ParameterTuple, Parameter
from mindspore import dtype as mstype class Net(nn.Cell):
def __init__(self):
super(Net, self).__init__()
self.matmul = ops.MatMul()
self.z = Parameter(Tensor(np.array([1.0, 1.0, 1.0], np.float32)), name='z') def construct(self, x, y):
x = x * self.z
out = self.matmul(x, y)
return out class GradNetWrtX(nn.Cell):
def __init__(self, net):
super(GradNetWrtX, self).__init__()
self.net = net
self.grad_op = ops.GradOperation() def construct(self, x, y):
gradient_function = self.grad_op(self.net)
return gradient_function(x, y) x = Tensor([[0.8, 0.6, 0.2], [1.8, 1.3, 1.1]], dtype=mstype.float32)
y = Tensor([[0.11, 3.3, 1.1], [1.1, 0.2, 1.4], [1.1, 2.2, 0.3]], dtype=mstype.float32)
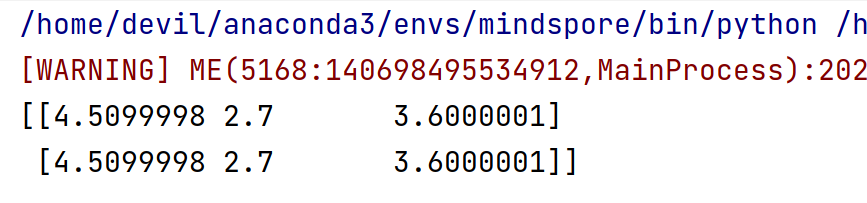
output = GradNetWrtX(Net())(x, y)
print(output)
因为, ops.GradOperation(),
mindspore.ops.GradOperation (get_all=False, get_by_list=False, sens_param=False)
get_all=False, 表示只对第一个输入向量求导,也就是对x 求梯度, 结果得到x的梯度:
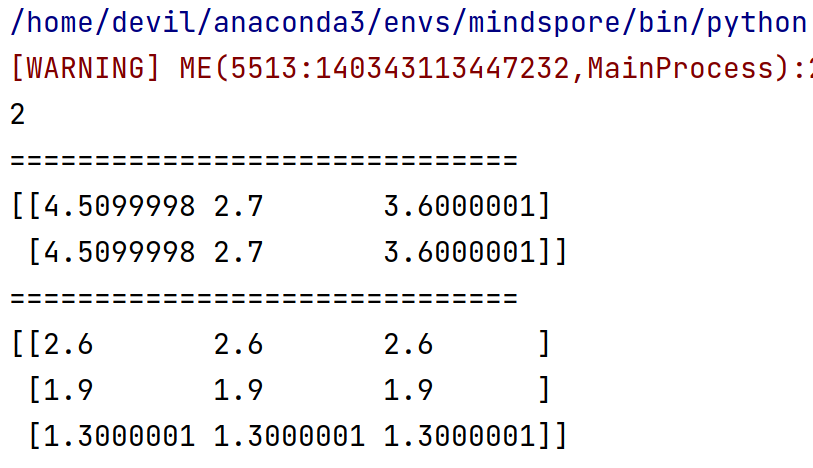
如果想对所有的输入求梯度, ops.GradOperation(get_all=True)
代码:
import numpy as np

import mindspore.nn as nn

import mindspore.ops as ops

from mindspore import Tensor

from mindspore import ParameterTuple, Parameter

from mindspore import dtype as mstype

class Net(nn.Cell):

    def __init__(self):

        super(Net, self).__init__()

        self.matmul = ops.MatMul()

        self.z = Parameter(Tensor(np.array([1.0, 1.0, 1.0], np.float32)), name='z')

    def construct(self, x, y):

        x = x * self.z

        out = self.matmul(x, y)

        return out

class GradNetWrtX(nn.Cell):

    def __init__(self, net):

        super(GradNetWrtX, self).__init__()

        self.net = net

        self.grad_op = ops.GradOperation(get_all=True)

    def construct(self, x, y):

        gradient_function = self.grad_op(self.net)

        return gradient_function(x, y)

x = Tensor([[0.8, 0.6, 0.2], [1.8, 1.3, 1.1]], dtype=mstype.float32)

y = Tensor([[0.11, 3.3, 1.1], [1.1, 0.2, 1.4], [1.1, 2.2, 0.3]], dtype=mstype.float32)

output = GradNetWrtX(Net())(x, y)

print(len(output))

print('='*30)

print(output[0])

print('='*30)

print(output[1])
对网络的所有输入求导,即,对 x ,y 求梯度。
对权重求一阶导
对权重求一阶导数其实与前面相比有两个地方要更改:
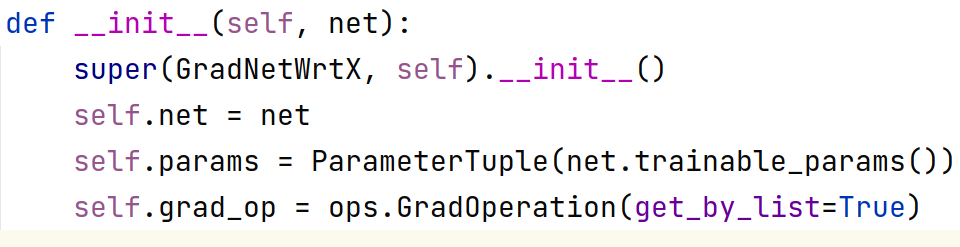
1. 求导函数要写明对权重求导,即传入参数 get_by_list=True
即,
self.grad_op = ops.GradOperation(get_by_list=True)
2. 具体求导时要传入具体待求导的参数(即,权重):
self.params = ParameterTuple(net.trainable_params())
gradient_function = self.grad_op(self.net, self.params)
细节:

需要知道的一点是如果我们设置了对权重求梯度,则默认不会再对输入求梯度:
代码:
import numpy as np

import mindspore.nn as nn

import mindspore.ops as ops

from mindspore import Tensor

from mindspore import ParameterTuple, Parameter

from mindspore import dtype as mstype

class Net(nn.Cell):

    def __init__(self):

        super(Net, self).__init__()

        self.matmul = ops.MatMul()

        self.z = Parameter(Tensor(np.array([1.0, 1.0, 1.0], np.float32)), name='z')

    def construct(self, x, y):

        x = x * self.z

        out = self.matmul(x, y)

        return out

class GradNetWrtX(nn.Cell):

    def __init__(self, net):

        super(GradNetWrtX, self).__init__()

        self.net = net

        self.params = ParameterTuple(net.trainable_params())

        self.grad_op = ops.GradOperation(get_by_list=True)

    def construct(self, x, y):

        gradient_function = self.grad_op(self.net, self.params)

        return gradient_function(x, y)

model = Net()

x = Tensor([[0.8, 0.6, 0.2], [1.8, 1.3, 1.1]], dtype=mstype.float32)

y = Tensor([[0.11, 3.3, 1.1], [1.1, 0.2, 1.4], [1.1, 2.2, 0.3]], dtype=mstype.float32)

output = GradNetWrtX(model)(x, y)

print(len(output))

print('='*30)

print(output[0])

print('='*30)
如果对网络内部权重求梯度同时也想对输入求梯度,只能显示的设置 get_all=True,
即,
self.grad_op = ops.GradOperation(get_all=True, get_by_list=True)
此时输出的梯度为 元组 , tuple(所有输入的梯度, 内部权重梯度)
也就是说这种情况返回的是一个两个元素的元组,元组中第一个元素是所有输入的梯度,第二个是所有内部权重的梯度。
代码:
import numpy as np

import mindspore.nn as nn

import mindspore.ops as ops

from mindspore import Tensor

from mindspore import ParameterTuple, Parameter

from mindspore import dtype as mstype

class Net(nn.Cell):

    def __init__(self):

        super(Net, self).__init__()

        self.matmul = ops.MatMul()

        self.z = Parameter(Tensor(np.array([1.0, 1.0, 1.0], np.float32)), name='z')

    def construct(self, x, y):

        x = x * self.z

        out = self.matmul(x, y)

        return out

class GradNetWrtX(nn.Cell):

    def __init__(self, net):

        super(GradNetWrtX, self).__init__()

        self.net = net

        self.params = ParameterTuple(net.trainable_params())

        self.grad_op = ops.GradOperation(get_all=True, get_by_list=True)

    def construct(self, x, y):

        gradient_function = self.grad_op(self.net, self.params)

        return gradient_function(x, y)

model = Net()

x = Tensor([[0.8, 0.6, 0.2], [1.8, 1.3, 1.1]], dtype=mstype.float32)

y = Tensor([[0.11, 3.3, 1.1], [1.1, 0.2, 1.4], [1.1, 2.2, 0.3]], dtype=mstype.float32)

output = GradNetWrtX(model)(x, y)

print(len(output))

print('='*30)

print(output[0])

print('='*30)

print(output[1])
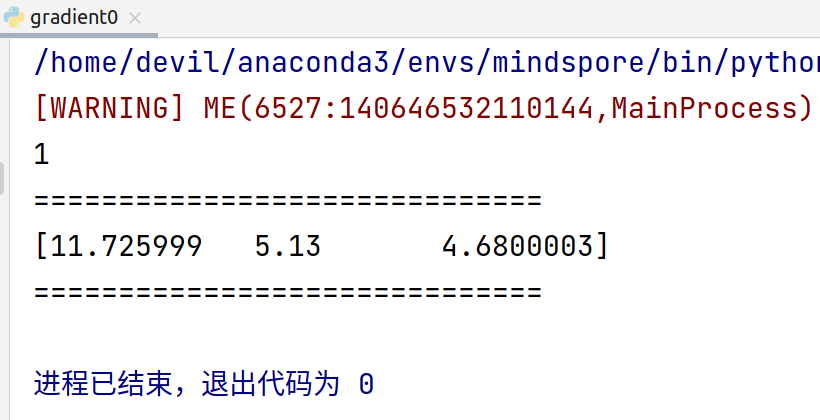
运行结果:
[WARNING] ME(6838:140435163703104,MainProcess):2021-07-06-16:56:49.250.395 [mindspore/_check_version.py:109] Cuda version file version.txt is not found, please confirm that the correct cuda version has been installed, you can refer to the installation guidelines: https://www.mindspore.cn/install
2
==============================
(Tensor(shape=[2, 3], dtype=Float32, value=
[[ 4.50999975e+00, 2.70000005e+00, 3.60000014e+00],
[ 4.50999975e+00, 2.70000005e+00, 3.60000014e+00]]), Tensor(shape=[3, 3], dtype=Float32, value=
[[ 2.59999990e+00, 2.59999990e+00, 2.59999990e+00],
[ 1.89999998e+00, 1.89999998e+00, 1.89999998e+00],
[ 1.30000007e+00, 1.30000007e+00, 1.30000007e+00]]))
==============================
(Tensor(shape=[3], dtype=Float32, value= [ 1.17259989e+01, 5.13000011e+00, 4.68000031e+00]),)
进程已结束,退出代码为 0
MindSpore 自动微分的更多相关文章
- MindSpore:自动微分
MindSpore:自动微分 作为一款「全场景 AI 框架」,MindSpore 是人工智能解决方案的重要组成部分,与 TensorFlow.PyTorch.PaddlePaddle 等流行深度学习框 ...
- MindSpore多元自动微分
技术背景 当前主流的深度学习框架,除了能够便捷高效的搭建机器学习的模型之外,其自动并行和自动微分等功能还为其他领域的科学计算带来了模式的变革.本文我们将探索如何用MindSpore去实现一个多维的自动 ...
- 附录D——自动微分(Autodiff)
本文介绍了五种微分方式,最后两种才是自动微分. 前两种方法求出了原函数对应的导函数,后三种方法只是求出了某一点的导数. 假设原函数是$f(x,y) = x^2y + y +2$,需要求其偏导数$\fr ...
- pytorch学习-AUTOGRAD: AUTOMATIC DIFFERENTIATION自动微分
参考:https://pytorch.org/tutorials/beginner/blitz/autograd_tutorial.html#sphx-glr-beginner-blitz-autog ...
- 自动微分(AD)学习笔记
1.自动微分(AD) 作者:李济深链接:https://www.zhihu.com/question/48356514/answer/125175491来源:知乎著作权归作者所有.商业转载请联系作者获 ...
- <转>如何用C++实现自动微分
作者:李瞬生转摘链接:https://www.zhihu.com/question/48356514/answer/123290631来源:知乎著作权归作者所有. 实现 AD 有两种方式,函数重载与代 ...
- (转)自动微分(Automatic Differentiation)简介——tensorflow核心原理
现代深度学习系统中(比如MXNet, TensorFlow等)都用到了一种技术——自动微分.在此之前,机器学习社区中很少发挥这个利器,一般都是用Backpropagation进行梯度求解,然后进行SG ...
- PyTorch自动微分基本原理
序言:在训练一个神经网络时,梯度的计算是一个关键的步骤,它为神经网络的优化提供了关键数据.但是在面临复杂神经网络的时候导数的计算就成为一个难题,要求人们解出复杂.高维的方程是不现实的.这就是自动微分出 ...
- 【tensorflow2.0】自动微分机制
神经网络通常依赖反向传播求梯度来更新网络参数,求梯度过程通常是一件非常复杂而容易出错的事情. 而深度学习框架可以帮助我们自动地完成这种求梯度运算. Tensorflow一般使用梯度磁带tf.Gradi ...
- PyTorch 自动微分示例
PyTorch 自动微分示例 autograd 包是 PyTorch 中所有神经网络的核心.首先简要地介绍,然后训练第一个神经网络.autograd 软件包为 Tensors 上的所有算子提供自动微分 ...
随机推荐
- post请求 restTemplate.postForObject restTemplate.postForEntity java.lang.ClassCastException: com.google.gson.internal.LinkedTreeMap cannot be cast to xxx POSTpost请求
1.restTemplate调用的两种方式及获取字符串转换对象model的处理,统一按接收字符串,然后gson转换为对象的方式. ResponseData对象包含的属性private String r ...
- 在Xcode编写我们的quick help
程序环境 Xcode 13.2.1 "写代码要经常写注释."虽然很多人不以为然,但是在使用Xcode的时候,我们在写注释的时候稍微注意一下格式的话,Xcode会给我们带来额外的正反 ...
- java基础-匿名类/对象
最近有同事问我,以下这个语句是什么意思? MqMessge<MqMessgeThink> mm= JSON.parseObject(message.toString(),new TypeR ...
- 03-CSS初步介绍
01 CSS编写规则 1.1 内联样式 <!DOCTYPE html> <html lang="en"> <head> <meta cha ...
- .NET 日志系统-3 结构化日志和集中日志服务
.NET 日志系统-3 结构化日志和集中日志服务 系列文章 认识.NET 日志系统 https://www.cnblogs.com/ZYPLJ/p/17663487.html .NET 认识日志系统- ...
- Java 把多个音频拼接成一个
在Java中,将多个音频文件拼接成一个通常需要使用一些专门的音频处理库,因为Java标准库并不直接支持音频文件的合并.一个常用的库是JAVE2(Java Audio Video Encoder)或JL ...
- 全国产T3+FPGA的SPI与I2C通信方案分享
近年来,随着中国新基建.中国制造2025规划的持续推进,单ARM处理器越来越难胜任工业现场的功能要求,特别是如今能源电力.工业控制.智慧医疗等行业,往往更需要ARM + FPGA架构的处理器平台来实现 ...
- 光伏储能电厂设备连接iec61850平台解决方案
在当今日益发展的电力系统中,光伏储能技术以其独特的优势逐渐崭露头角,成为可再生能源领域的重要组成部分.而在光伏储能系统的运行与监控中,通信协议的选择与实现则显得至关重要.本文将重点介绍光伏储能系统中的 ...
- windows中运行nicegui官网内容
内容受到bilibili视频nicegui官网访问不了?教你本地部署文档,我写python终于有界面启发,其余部分由chatgpt协助生成. 1. 在本地新建目录如 nicegui_web 2. 从g ...
- Dotnet算法与数据结构:Hashset, List对比
哈希集A 是存储唯一元素的集合.它通过在内部使用哈希表来实现这一点,该哈希表为基本操作(如添加.删除和包含)提供恒定时间平均复杂度 (O(1)).此外,不允许重复元素,使其成为唯一性至关重要的场景的理 ...