lamp平台构建
lamp平台构建
环境说明:
| 系统平台 | IP | 需要安装的服务 |
|---|---|---|
| centos7,redhat7 | 172.16.12.128 | httpd-2.4,mysql-5.7,php,php-mysql |
lamp平台软件安装次序:
httpd --> mysql --> php
注意:php要求httpd使用prefork MPM
安装httpd
删除本地仓库

[root@localhost ~]# cd /etc/yum.repos.d/

[root@localhost yum.repos.d]# rm -rf myrepo.repo

在阿里云镜像下载centos8

[root@localhost ~]# curl -o /etc/yum.repos.d/CentOS-Base.repo https://mirrors.aliyun.com/repo/Centos-vault-8.5.2111.repo

[root@localhost ~]# sed -i -e '/mirrors.cloud.aliyuncs.com/d' -e '/mirrors.aliyuncs.com/d' /etc/yum.repos.d/CentOS-Base.repo

[root@localhost ~]# ls /etc/yum.repos.d/

CentOS-Base.repo

安装开发工具包

[root@localhost yum.repos.d]# yum groups mark install 'Development Tools'

创建apache服务的用户和组

[root@localhost ~]# useradd -r -M -s /sbin/nologin apache

[root@localhost ~]# id apache

uid=994(apache) gid=991(apache) groups=991(apache)

安装依赖包

[root@localhost ~]# yum -y install openssl-devel pcre-devel expat-devel libtool gcc gcc-c++

下载和安装apr以及apr-util

[root@localhost ~]# yum -y install bzip2

[root@localhost ~]# ls

anaconda-ks.cfg  apr-1.6.5.tar.bz2  apr-util-1.6.1.tar.bz2  httpd-2.4.54.tar.bz2

解压apr-1.6.5.tar.bz2

[root@localhost ~]# tar xf apr-1.6.5.tar.bz2

[root@localhost ~]# cd apr-1.6.5

[root@localhost apr-1.6.5]# vim configure

 # $RM "$cfgfile"        //将此行加上注释,或者删除此行

[root@localhost apr-1.6.5]# ./configure --prefix=/usr/local/apr

[root@localhost apr-1.6.5]# make && make install

解压apr-util-1.6.1.tar.bz2

[root@localhost ~]# ls

anaconda-ks.cfg  apr-1.6.5.tar.bz2       httpd-2.4.54.tar.bz2

apr-1.6.5        apr-util-1.6.1.tar.bz2

[root@localhost ~]# tar xf apr-util-1.6.1.tar.bz2

[root@localhost ~]# cd apr-util-1.6.1

[root@localhost apr-util-1.6.1]# ./configure --prefix=/usr/local/apr-util --with-apr=/usr/local/apr

[root@localhost apr-util-1.6.1]# ./configure --prefix=/usr/local/apr-util --with-apr=/usr/local/apr

[root@localhost apr-util-1.6.1]# make && make install

解压httpd-2.4.54.tar.bz2

[root@localhost ~]# ls

anaconda-ks.cfg  apr-1.6.5.tar.bz2  apr-util-1.6.1.tar.bz2

apr-1.6.5        apr-util-1.6.1     httpd-2.4.54.tar.bz2

[root@localhost ~]# tar xf httpd-2.4.54.tar.bz2

 [root@localhost httpd-2.4.54]# ./configure --prefix=/usr/local/apache \

--sysconfdir=/etc/httpd24 \

--enable-so \

--enable-ssl \

--enable-cgi \

--enable-rewrite \

--with-zlib \

--with-pcre \

--with-apr=/usr/local/apr \

--with-apr-util=/usr/local/apr-util/ \

--enable-modules=most \

--enable-mpms-shared=all \

--with-mpm=prefork

[root@localhost httpd-2.4.54]# make && make install

安装后配置

[root@localhost ~]# echo 'export PATH=$PATH:/usr/local/apache/bin' > /etc/profile.d/httpd.sh

[root@localhost ~]# source /etc/profile.d/httpd.sh

[root@localhost ~]# which httpd

/usr/local/apache/bin/httpd

[root@localhost ~]# ln -s /usr/local/apache/include/ /usr/include/httpd

[root@localhost ~]# vim /etc/man_db.conf

MANDATORY_MANPATH                       /usr/local/apache/man

[root@localhost ~]# vim /etc/httpd24/httpd.conf

ServerName www.example.com:80 去掉前面的#或删除整行

启动apache

[root@localhost ~]# which apachectl

/usr/local/apache/bin/apachectl

[root@localhost ~]# cd /usr/lib/systemd/system

[root@localhost system]# cp sshd.service  httpd.service

[root@localhost system]# vim httpd.service

[Unit]

Description=httpd server daemon

After=network.target sshd-keygen.target

[Service]

Type=forking

ExecStart=/usr/local/apache/bin/apachectl  start

ExecStop=/usr/local/apache/bin/apachectl stop

ExecReload=/bin/kill -HUP $MAINPID

[Install]

WantedBy=multi-user.target

[root@localhost system]# systemctl daemon-reload

[root@localhost system]# systemctl status httpd

● httpd.service - OpenSSH server daemon

   Loaded: loaded (/usr/lib/systemd/system/httpd.service; disabled; vendor preset: >

   Active: inactive (dead)

[root@localhost system]# systemctl  stop firewalld

[root@localhost system]# systemctl disable firewalld

安装mysql
创建用户和组

[root@localhost ~]# useradd -r -M -s /sbin/nologin mysql

[root@localhost ~]# id mysql

uid=993(mysql) gid=990(mysql) groups=990(mysql)

下载二进制格式的mysql软件包

[root@localhost ~]# cd /usr/src/

[root@localhost src]# ls

debug  kernels  mysql-5.7.37-linux-glibc2.12-x86_64.tar.gz

解压软件至/usr/local/

[root@localhost src]# tar xf mysql-5.7.37-linux-glibc2.12-x86_64.tar.gz  -C /usr/local/

做一个软链接

[root@localhost src]# cd /usr/local/

[root@localhost local]# ln -s mysql-5.7.37-linux-glibc2.12-x86_64/ mysql

[root@localhost local]# chown -R mysql.mysql mysql*

配置环境变量

[root@localhost local]# cd mysql

[root@localhost mysql]# ls

bin  docs  include  lib  LICENSE  man  README  share  support-files

[root@localhost mysql]# pwd

/usr/local/mysql

[root@localhost mysql]# echo 'export PATH=$PATH:/usr/local/mysql/bin' > /etc/profile.d/mysql.sh

[root@localhost mysql]# source /etc/profile.d/mysql.sh

[root@localhost mysql]# which mysql

添加配置include

[root@localhost mysql]# ln -s /usr/local/mysql/include/  /usr/include/mysql

添加配置lib

[root@localhost mysql]# echo '/usr/local/mysql/lib/' > /etc/ld.so.conf.d/mysql.conf

[root@localhost mysql]# ldconfig

添加配置man

[root@localhost mysql]# vim /etc/man_db.conf

MANDATORY_MANPATH                       /usr/local/mysql/man

建立数据存放目录

[root@localhost mysql]# mkdir /opt/data

[root@localhost mysql]# chown -R mysql.mysql /opt/data/

[root@localhost mysql]# ll /opt/

total 0

drwxr-xr-x. 2 mysql mysql 6 Aug  2 16:19 data

初始化数据库

[root@localhost ~]# mysqld --initialize --user mysql --datadir /opt/data/

2022-08-02T08:21:05.817290Z 1 [Note] A temporary password is generated for root@localhost: y-reJSy8abGj

[root@localhost ~]# echo 'y-reJSy8abGj' > password

[root@localhost ~]# cat password

y-reJSy8abGj

生成配置文件

[root@localhost ~]# vim /etc/my.cnf.d/my.cnf

[mysqld]

basedir = /usr/local/mysql

datadir = /opt/data

socket = /tmp/mysql.sock

port = 3306

pid-file = /opt/data/mysql.pid

user = mysql

skip-name-resolve

配置服务启动脚本

[root@localhost ~]# vim /etc/init.d/mysqld

basedir=/usr/local/mysql/

datadir=/opt/data/

启动mysql

[root@localhost ~]# service mysqld start

Starting MySQL.. SUCCESS!

[root@localhost ~]# ss -antl

State    Recv-Q   Send-Q     Local Address:Port       Peer Address:Port   Process

LISTEN   0        128              0.0.0.0:22              0.0.0.0:*

LISTEN   0        128                 [::]:22                 [::]:*

LISTEN   0        80                     *:3306                  *:*

LISTEN   0        128                    *:80                    *:*

使用临时密码登录

[root@localhost ~]# vim /etc/init.d/mysqld

[root@localhost ~]# mysql -uroot -p'y-reJSy8abGj'

mysql: [Warning] Using a password on the command line interface can be insecure.

Welcome to the MySQL monitor.  Commands end with ; or \g.

Your MySQL connection id is 3

Server version: 5.7.37

Copyright (c) 2000, 2022, Oracle and/or its affiliates.

Oracle is a registered trademark of Oracle Corporation and/or its

affiliates. Other names may be trademarks of their respective

owners.

Type 'help;' or '\h' for help. Type '\c' to clear the current input statement.

mysql>

设置新密码

mysql> set password=password('123456');

Query OK, 0 rows affected, 1 warning (0.00 sec)

[root@localhost ~]# mysql -uroot -p123456

mysql: [Warning] Using a password on the command line interface can be insecure.

Welcome to the MySQL monitor.  Commands end with ; or \g.

Your MySQL connection id is 4

Server version: 5.7.37 MySQL Community Server (GPL)

Copyright (c) 2000, 2022, Oracle and/or its affiliates.

Oracle is a registered trademark of Oracle Corporation and/or its

affiliates. Other names may be trademarks of their respective

owners.

Type 'help;' or '\h' for help. Type '\c' to clear the current input statement.

mysql>
安装php
下载epel镜像

[root@localhost src]# yum install -y https://mirrors.aliyun.com/epel/epel-release-latest-8.noarch.rpm

安装依赖包

[root@localhost src]# yum -y install libxml2 libxml2-devel openssl openssl-devel bzip2 bzip2-devel libcurl libcurl-devel libicu-devel libjpeg libjpeg-devel libpng libpng-devel openldap-devel  pcre-devel freetype freetype-devel gmp gmp-devel libmcrypt libmcrypt-devel readline readline-devel libxslt libxslt-devel mhash mhash-devel --allowerasing --nobest

下载php

[root@localhost src]# ls

debug    mysql-5.7.37-linux-glibc2.12-x86_64.tar.gz  php-7.4.30.tar.gz

kernels  php-7.4.30

编译安装php

[root@localhost src]#./configure --prefix=/usr/local/php7  \

--with-config-file-path=/etc \

--enable-fpm \

--enable-inline-optimization \

--disable-debug \

--disable-rpath \

--enable-shared \

--enable-soap \

--with-openssl \

--enable-bcmath \

--with-iconv \

--with-bz2 \

--enable-calendar \

--with-curl \

--enable-exif  \

--enable-ftp \

--enable-gd \

--with-jpeg \

--with-zlib-dir \

--with-freetype \

--with-gettext \

--enable-json \

--enable-mbstring \

--enable-pdo \

--with-mysqli=mysqlnd \

--with-pdo-mysql=mysqlnd \

--with-readline \

--enable-shmop \

--enable-simplexml \

--enable-sockets \

--with-zip \

--enable-mysqlnd-compression-support \

--with-pear \

--enable-pcntl \

--enable-posix

+--------------------------------------------------------------------+

| License:                                                           |

| This software is subject to the PHP License, available in this     |

| distribution in the file LICENSE. By continuing this installation  |

| process, you are bound by the terms of this license agreement.     |

| If you do not agree with the terms of this license, you must abort |

| the installation process at this point.                            |

+--------------------------------------------------------------------+

Thank you for using PHP.

[root@localhost src]#make && make install
出现错误
configure: error: Package requirements (libxml-2.0 >= 2.7.6) were not met:No package 'libxml-2.0' found 解决办法:yum install -y libxml2-devel
configure: error: Package requirements (sqlite3 > 3.7.4) were not met:No package 'sqlite3' found 解决办法:yum install libsqlite3x-devel -y
configure: error: Package requirements (libcurl >= 7.15.5) were not met:
解决方法:yum install -y libcurl-devel.x86_64
configure: error: Package requirements (libjpeg) were not met: 解决方法:yum -y install libjpeg-devel
安装后配置
[root@localhost php-7.4.30]# echo 'export PATH=/usr/local/php7/bin:$PATH' > /etc/profile.d/php7.sh

[root@localhost php-7.4.30]# source /etc/profile.d/php7.sh

[root@localhost php-7.4.30]# which php

/usr/local/php7/bin/php

[root@localhost php-7.4.30]# php -v

PHP 7.4.30 (cli) (built: Aug  2 2022 23:06:10) ( NTS )

Copyright (c) The PHP Group

Zend Engine v3.4.0, Copyright (c) Zend Technologies
配置php-fpm
[root@localhost php-7.4.30]# cp php.ini-production  /etc/php.ini

cp: overwrite '/etc/php.ini'? y

[root@localhost php-7.4.30]# cp sapi/fpm/init.d.php-fpm /etc/init.d/php-fpm

[root@localhost php-7.4.30]# chmod +x /etc/rc.d/init.d/php-fpm

[root@localhost php-7.4.30]# cp /usr/local/php7/etc/php-fpm.conf.default  /usr/local/php7/etc/php-fpm.conf

[root@localhost php-7.4.30]# cp /usr/local/php7/etc/php-fpm.d/www.conf.default /usr/local/php7/etc/php-fpm.d/www.conf
//启动php-fpm
[root@localhost ~]# cd /usr/lib/systemd/system

[root@localhost system]# cp sshd.service php-fpm.service

[root@localhost system]# vim php-fpm.service

https://blog.csdn.net/qq_65441164/article/details/126131525

[Unit]

Description=php-fpm server daemon

After=network.target sshd-keygen.target

[Service]

Type=forking

ExecStart=/etc/init.d/php-fpm start

ExecStop=/etc/init.d/php-fpm stop

ExecReload=/bin/kill -HUP $MAINPID

[Install]

WantedBy=multi-user.target

[root@localhost system]# systemctl daemon-reload

[root@localhost php-7.4.30]# systemctl start php-fpm

[root@localhost php-7.4.30]# ss -anlt

State    Recv-Q   Send-Q     Local Address:Port     Peer Address:Port  Process

LISTEN   0        128            127.0.0.1:9000          0.0.0.0:*

LISTEN   0        128              0.0.0.0:22            0.0.0.0:*

LISTEN   0        80                     *:3306                *:*

LISTEN   0        128                    *:80                  *:*

LISTEN   0        128                 [::]:22               [::]:*

[root@localhost php-7.4.30]# systemctl stop firewalld

[root@localhost php-7.4.30]# setenforce 0

[root@localhost php-7.4.30]# systemctl enable php-fpm

Synchronizing state of php-fpm.service with SysV service script with /usr/lib/systemd/systemd-sysv-install.

Executing: /usr/lib/systemd/systemd-sysv-install enable php-fpm

Created symlink /etc/systemd/system/multi-user.target.wants/php-fpm.service → /usr/lib/systemd/system/php-fpm.service.
配置apache
启用代理模块
在apache httpd 2.4以后已经专门有一个模块针对FastCGI的实现,此模块为mod_proxy_fcgi.so,它其实是作为mod_proxy.so模块的扩展,因此,这两个模块都要加载,编辑httpd.conf文件,取消以下两行内容的注释:
- LoadModule proxy_module modules/mod_proxy.so
- LoadModule proxy_fcgi_module modules/mod_proxy_fcgi.so
启用httpd的相关模块
[root@localhost ~]# vim /etc/httpd24/httpd.conf

119 LoadModule proxy_module modules/mod_proxy.so

123 LoadModule proxy_fcgi_module modules/mod_proxy_fcgi.so
配置虚拟主机
启用代理模块
在需要使用fcgi的虚拟主机中添加类似如下两行:
ProxyRequests Off //关闭正向代理
ProxyPassMatch^/(.*.php)$fcgi://127.0.0.1:9000/PATH/TO/DOCUMENT_ROOT/$1
例如
ProxyPassMatch ^/(.*.php)$ fcgi://127.0.0.1:9000/var/www/html/idfsoft.com/$1
以上设置表示把以.php结尾的文件请求发送到php-fpm进程,php-fpm至少需要知道运行的目录和URI,所以这里直接在fcgi://127.0.0.1:9000后指明了这两个参数,其它参数的传递已经被mod_proxy_fcgi.so进行了封装,不需要手动指定。
注意:
这里写的/var/www/html/是yum源安装方式生成的网页存放目录,这里必须改成你编译安装指定的网页存放路径,禁止直接复制我这里的路径
这里的idfsoft.com是域名,你必须改成你所使用的域名,禁止直接复制此处的域名
这里的$1表示匹配所有以.php结尾的http请求
创建虚拟主机目录并生成php测试页面
[root@localhost php-7.4.30]# cd /usr/local/apache/htdocs/

[root@localhost htdocs]# rm -rf index.html

[root@localhost htdocs]# mkdir laji

[root@localhost htdocs]# vim /usr/local/apache/htdocs/laji/index.php

[root@localhost ~]# chown -R apache.apache /usr/local/apache/htdocs/

[root@localhost ~]# ll -d /usr/local/apache/htdocs/

drwxr-xr-x. 3 apache apache 18 Aug  2 23:54 /usr/local/apache/htdocs/

[root@localhost ~]# vim /etc/httpd24/extra/httpd-vhosts.conf

<VirtualHost *:80>

    DocumentRoot "/usr/local/apache/htdocs/laji"

    ServerName www.ljl.com

    ProxyRequests Off

    ProxyPassMatch ^/(.*\.php)$ fcgi://127.0.0.1:9000/usr/local/apache/htdocs/laji/$1

    <Directory "/usr/local/apache/htdocs/laji">

        Options none

        AllowOverride none

        Require all granted

    </Directory>

    ErrorLog "logs/dummy-host.example.com-error_log"

    CustomLog "logs/dummy-host.example.com-access_log" common

</VirtualHost>

[root@localhost ~]# vim /etc/httpd24/httpd.conf

  搜索AddType

    AddType application/x-compress .Z

    AddType application/x-gzip .gz .tgz

    AddType application/x-httpd-php .php  添加这行

    AddType application/x-httpd-php-source .phps  添加这行

Include /etc/httpd24/extra/proxy-html.conf 删除前面的#

Include /etc/httpd24/extra/httpd-vhosts.conf 删除前面的#

[root@localhost ~]# sed -i '/    DirectoryIndex/s/index.html/index.php index.html/g' /etc/httpd24/httpd.conf
重启apache服务
[root@localhost ~]# systemctl restart httpd

[root@localhost ~]# ss -antl

State    Recv-Q   Send-Q     Local Address:Port       Peer Address:Port   Process

LISTEN   0        128            127.0.0.1:9000            0.0.0.0:*

LISTEN   0        128              0.0.0.0:22              0.0.0.0:*

LISTEN   0        80                     *:3306                  *:*

LISTEN   0        128                    *:80                    *:*

LISTEN   0        128                 [::]:22                 [::]:*
验证
修改/etc/hosts文件,添加域名与IP的映射
在c盘下的c:/Windows/system32/drivers/etc/hosts添加以下数据
192.168.203.137 www.ljl.com
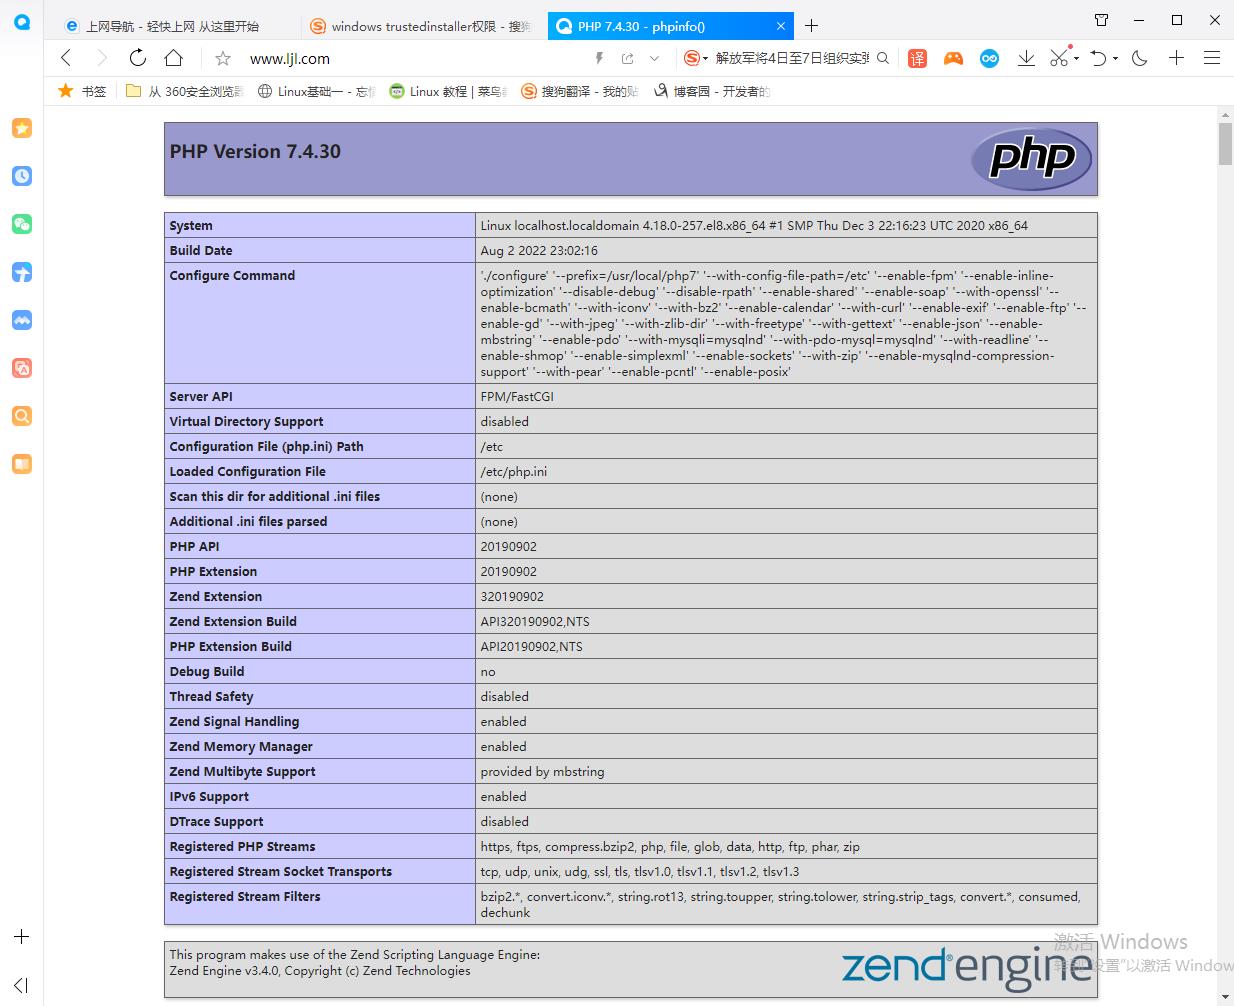
浏览器上使用域名访问,若看到以下界面则表示lamp架构搭建成功,否则请检查你的操作
lamp平台构建的更多相关文章
- LAMP平台部署及应用
环境:http://www.cnblogs.com/zzzhfo/p/5925786.html http://www.cnblogs.com/zzzhfo/p/5934630.html 1.LAMP ...
- 基于LAMP平台的网站架构(或Web系统架构)
1.网站架构的前提(或者说需求) 我们公司是一电子商务的网站,因为线下家具建材项目的推广需求,从而有了我们公司的这个线上网站,在这里我贴一张公司的网站架构图. 总体来说网站规模不是太大,注册人数在15 ...
- LAMP平台部署(转)
LAMP平台的概述 LAMP环境脚本部署:https://github.com/spdir/ShellScripts/tree/master/lamp LAMP的介绍:百度百科 LAMP平台的构成组件 ...
- LAMP平台部署
LAMP平台的概述 LAMP环境脚本部署:https://github.com/spdir/ShellScripts/tree/master/lamp LAMP的介绍:百度百科 LAMP平台的构成组件 ...
- Centos7下搭建LAMP平台环境 (转载)
1.启用Apache(httpd) Centos7默认已经安装httpd服务,只是没有启动.如果你需要全新安装,可以yum install -y httpd 启动服务:systemctl start ...
- LAMP平台搭建菜鸟入门级实验
LAMP平台搭建(菜鸟入门级) mysql 安装: (1)二进制安装 二进制安装 ,执行解压配置即可.无须执行三布安装. (2)源码编译安装 安装准备工作: (1)查看系统配置:#uname -a/ ...
- Unity跨平台C/CPP动态库编译---可靠UDP网络库kcp基于CMake的各平台构建实践
1.为什么需要动态库 a)提供原生代码(native code)的支持,也叫原生插件,但是我实践的是c/cpp跨平台动态库,这里不具体涉及安卓平台java库和ios平台的objectc库构建. b)某 ...
- 我发起了一个 用 物理服务器 和 .Net 平台 构建云平台 的 .Net 开源项目
大家好 , 我发起了一个 用 物理服务器 和 .Net 平台 构建云平台 的 .Net 开源项目 . 对 , 用 物理服务器 和 .Net 平台 构建 云平台 . 通过 .Net 构建 分布式 计算集 ...
- SharpGL学习笔记(一) 平台构建与Opengl的hello World
(一)平台构建与Opengl的hello World OpenGL就是3d绘图的API,微软针和它竞争推出D3D,也就是玩游戏时最常见的DirectorX组件中的3d功能. 所以不要指望windows ...
随机推荐
- 4.0 vue绑定dom属性和函数的方法
<!DOCTYPE html> <html> <head> <meta charset="UTF-8"> <title> ...
- curl-URL请求
模拟HTTP请求,通过访问URL获取HTTP响应. 语法 curl [选项] 访问URL 选项 --connect-timeout SECONDS 设置最大请求时间. -C, --continue-a ...
- python基础数据类型1
python基础数据类型1 part1: ''' ''': 三个单引号用于换行的字符串 字符串可以相加(拼接)相乘(重复) 在Python中没有一个专门的语法代表常量,程序员约定俗成用变量名全部大写代 ...
- 《Unix 网络编程》11:名字和地址转换
名字和地址转换 系列文章导航:<Unix 网络编程>笔记 域名系统 简介 域名系统主要用于主机名字和 IP 地址之间的映射.主机名可以是: 简单名字,如:centos01 全限定域名(FQ ...
- 即时通讯IM,是时代进步的逆流?看看JNPF怎么说
JNPF快速开发平台所包含的第四个重要的开发框架是即时通讯沟通工具.即时沟通工具的目的是让各大企事业单位在各种业务工作流程环境下实现实时无缝协同办公,打破信息数据孤岛,形成高效的层级流转审批和各流程环 ...
- 【clickhouse专栏】基础数据类型说明
本文是clickhouse专栏第五篇,更多内容请关注本号历史文章! 一.数据类型表 clickhouse内置了很多的column数据类型,可以通过查询system.data_type_families ...
- 基于开源流程引擎开发BPM或OA有哪些难点
前言 如何基于开源流程引擎开发OA系统?开源流程引擎哪个好?把它整合到自己的产品里难不难,有没有啥风险?这是大家经常遇到的问题.笔者从2006年开始参与流程引擎开发,经历了三代流程引擎研发,支 ...
- Flex & Bison 开始
Flex 与 Bison 是为编译器和解释器的编程人员特别设计的工具: Flex 用于词法分析(lexical analysis,或称 scanning),把输入分割成一个个有意义的词块,称为记号(t ...
- C#中的 Attribute 与 Python/TypeScript 中的装饰器是同个东西吗
前言 最近成功把「前端带师」带入C#的坑(实际是前端带师开始从cocos转unity游戏开发了) 某天,「前端带师」看到这段代码后问了个问题:[这个是装饰器]? [HttpGet] public Re ...
- OpenSSF安全计划:SBOM将驱动软件供应链安全
在 软件成分分析(SCA)一文中,我们简单提到软件物料清单(SBOM)在安全实践中的价值. 本期文章将带你深入了解 "SBOM 无处不在"计划是什么,以及 SBOM 对未来软件供应 ...