在 raspberry pi pico 上体验 MicroPython
raspberry pi pico 官方提供 2 种开发方式,其中一种是使用 python3 开发,树莓派提供了 MicroPython 固件,把这个固件烧录进去,就可以 在 pico 上跑 python3 脚本。
1、MicroPython 相关资源
用 python 开发,官网能找到的资源有:
1、MicroPython 固件
已经编译好的固件:getting-started这里可以下载到
源码:micropython‘s github,micropython已经对 RP2040 进行支持

2、文档
3、MicroPython 例程
raspberrypi 官方 github 上有相关例程:pico-micropython-examples
2、下载、烧录 MicroPython 固件
树莓派官网提供了编译好的 MicroPython 固件,也可以自己编译, Raspberry Pi Pico Python SDK 给出了编译教程。
这里直接使用官方编译好的固件,下载下来是这样的:
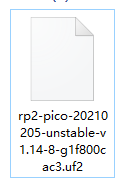
先按住板子上的按键,然后连上电脑,等电脑出现名字为 RPI-RP2的磁盘时,把下载到的固件拷贝到该磁盘,等拷贝完成就烧录好了,烧录完,设备会自动重新启动,然后我的电脑上出现了这个:
设备管理器中多了个 COM 口:

PC上可以使用串口终端通过该 COM 口操作 pico。
3、使用 MobaXterm 操作 pico
我是用的串口终端是 MobaXterm,MobaXterm 什么?MobaXterm 官网的描述是:
Enhanced terminal for Windows with X11 server, tabbed SSH client, network tools and much more
可以创建SSH、Telnet 、串口终端等等,功能释放强大,有免费版、也有收费的,免费的够用了。
创建一个串口终端连接跑 MicroPython 的 pico,选择对应的 COM 口,波特率115200,如下:
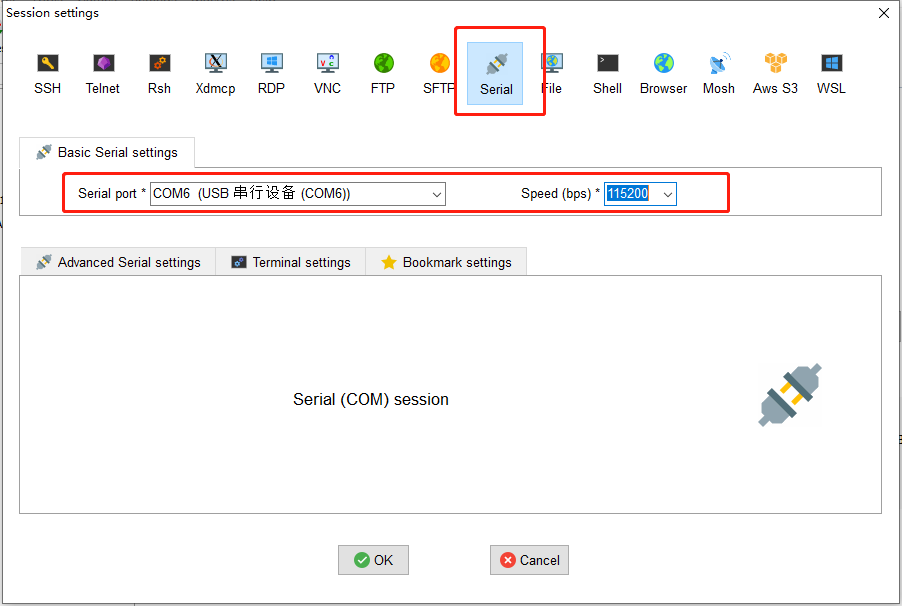
点击 OK 后,界面乌漆嘛黑,什么都没有,需要按下回车,然后就可以进行操作了,如下:

4、点灯
点下灯,从原理图看,是 GPIO25 控制 LED:

在MobaXterm 执行一下 python 代码,就可以点亮板子上的 LED 了:
from machine import Pin

led = Pin(25, Pin.OUT)

led.value(1)
5、附上 pico 跑 MicroPython 是 USB 相关信息
[Port2]  :  USB Composite Device

          ---===>Device Information<===---

English product name: "Board in FS mode"

ConnectionStatus:

Current Config Value:              0x01  -> Device Bus Speed: Full

Device Address:                    0x15

Open Pipes:                           3

          ===>Endpoint Descriptor<===

bLength:                           0x07

bDescriptorType:                   0x05

bEndpointAddress:                  0x81  -> Direction: IN - EndpointID: 1

bmAttributes:                      0x03  -> Interrupt Transfer Type

wMaxPacketSize:                  0x0008 = 0x08 bytes

bInterval:                         0x10

          ===>Endpoint Descriptor<===

bLength:                           0x07

bDescriptorType:                   0x05

bEndpointAddress:                  0x02  -> Direction: OUT - EndpointID: 2

bmAttributes:                      0x02  -> Bulk Transfer Type

wMaxPacketSize:                  0x0040 = 0x40 bytes

bInterval:                         0x00

          ===>Endpoint Descriptor<===

bLength:                           0x07

bDescriptorType:                   0x05

bEndpointAddress:                  0x82  -> Direction: IN - EndpointID: 2

bmAttributes:                      0x02  -> Bulk Transfer Type

wMaxPacketSize:                  0x0040 = 0x40 bytes

bInterval:                         0x00

          ===>Device Descriptor<===

bLength:                           0x12

bDescriptorType:                   0x01

bcdUSB:                          0x0200

bDeviceClass:                      0xEF  -> This is a Multi-interface Function Code Device

bDeviceSubClass:                   0x02  -> This is the Common Class Sub Class

bDeviceProtocol:                   0x01  -> This is the Interface Association Descriptor protocol

bMaxPacketSize0:                   0x40 = (64) Bytes

idVendor:                        0x2E8A = Vendor ID not listed with USB.org as of 03-19-2008

idProduct:                       0x0005

bcdDevice:                       0x0100

iManufacturer:                     0x01

     English (United States)  "MicroPython"

iProduct:                          0x02

     English (United States)  "Board in FS mode"

iSerialNumber:                     0x03

     English (United States)  "000000000000"

bNumConfigurations:                0x01

          ===>Configuration Descriptor<===

bLength:                           0x09

bDescriptorType:                   0x02

wTotalLength:                    0x004B  -> Validated

bNumInterfaces:                    0x02

bConfigurationValue:               0x01

iConfiguration:                    0x00

bmAttributes:                      0xA0  -> Bus Powered

MaxPower:                          0x7D = 250 mA

          ===>IAD Descriptor<===

bLength:                           0x08

bDescriptorType:                   0x0B

bFirstInterface:                   0x00

bInterfaceCount:                   0x02

bFunctionClass:                    0x02  -> This is Communications (CDC Control) USB Device Interface Class

bFunctionSubClass:                 0x02

bFunctionProtocol:                 0x00

iFunction:                         0x00

          ===>Interface Descriptor<===

bLength:                           0x09

bDescriptorType:                   0x04

bInterfaceNumber:                  0x00

bAlternateSetting:                 0x00

bNumEndpoints:                     0x01

bInterfaceClass:                   0x02  -> This is Communications (CDC Control) USB Device Interface Class

bInterfaceSubClass:                0x02

bInterfaceProtocol:                0x00

CAUTION:  This may be an invalid bInterfaceProtocol

iInterface:                        0x04

     English (United States)  "Board CDC"

  -> This is a Communications (CDC Control) USB Device Interface Class

          ===>Descriptor Hex Dump<===

bLength:                           0x05

bDescriptorType:                   0x24

05 24 00 20 01

  -> This is a Communications (CDC Control) USB Device Interface Class

          ===>Descriptor Hex Dump<===

bLength:                           0x05

bDescriptorType:                   0x24

05 24 01 00 01

  -> This is a Communications (CDC Control) USB Device Interface Class

          ===>Descriptor Hex Dump<===

bLength:                           0x04

bDescriptorType:                   0x24

04 24 02 02

  -> This is a Communications (CDC Control) USB Device Interface Class

          ===>Descriptor Hex Dump<===

bLength:                           0x05

bDescriptorType:                   0x24

05 24 06 00 01

          ===>Endpoint Descriptor<===

bLength:                           0x07

bDescriptorType:                   0x05

bEndpointAddress:                  0x81  -> Direction: IN - EndpointID: 1

bmAttributes:                      0x03  -> Interrupt Transfer Type

wMaxPacketSize:                  0x0008 = 0x08 bytes

bInterval:                         0x10

          ===>Interface Descriptor<===

bLength:                           0x09

bDescriptorType:                   0x04

bInterfaceNumber:                  0x01

bAlternateSetting:                 0x00

bNumEndpoints:                     0x02

bInterfaceClass:                   0x0A  -> This is a CDC Data USB Device Interface Class

bInterfaceSubClass:                0x00

bInterfaceProtocol:                0x00

CAUTION:  This may be an invalid bInterfaceProtocol

iInterface:                        0x00

          ===>Endpoint Descriptor<===

bLength:                           0x07

bDescriptorType:                   0x05

bEndpointAddress:                  0x02  -> Direction: OUT - EndpointID: 2

bmAttributes:                      0x02  -> Bulk Transfer Type

wMaxPacketSize:                  0x0040 = 0x40 bytes

bInterval:                         0x00

          ===>Endpoint Descriptor<===

bLength:                           0x07

bDescriptorType:                   0x05

bEndpointAddress:                  0x82  -> Direction: IN - EndpointID: 2

bmAttributes:                      0x02  -> Bulk Transfer Type

wMaxPacketSize:                  0x0040 = 0x40 bytes

bInterval:                         0x00
在 raspberry pi pico 上体验 MicroPython的更多相关文章
- 上手 Raspberry Pi Pico
什么是 PICO Raspberry Pi Pico 是树莓派推出的一块基于 Arm Cortex-M0+ 内核的 MCU 的开发板,使用的 MCU 是树莓派自己研发的 Arm Cortex-M0+ ...
- Raspberry PI 2上的802.11ac网卡驱动编译
Raspberry PI 2上的802.11ac网卡驱动编译 最近在树莓派2上折腾视频,用来做FPV,但是发现2.4G的控会严重干扰2.4G WIFI,在开控的时候我的台式机+外置USB网卡都频频掉线 ...
- 在Raspberry Pi 3B+上安装Windows 10 IoT
下载 进入树莓派下载页面,当前网址https://www.raspberrypi.org/downloads/ 选择Windows 10 IoT Core,当前网址https://docs.micro ...
- 树莓派PICO刷入MicroPython内核的两种方式
一.MicroPython简介 MicroPython 是 Python 3编程语言的精简高效实现,其中包括 Python 标准库的一小部分,并且经过优化,可在微控制器和受限环境中运行. 可以在 25 ...
- Raspberry Pi 学习笔记之一
记录几个搭建服务器教程: [教程] 将树莓派变成网络打印机服务器(更新PC和手机端设置)!http://www.eeboard.com/bbs/thread-8818-1-1.html[心得] [分享 ...
- 用树莓派Raspberry Pi和Micro:bit做一个自拍器
在这个项目中,我们将使用Python来构建一个由Micro:bit触发树莓派Raspberry Pi和相机模块的自拍器.这是开始使用硬件和简单文本编程的好方法. 我们将学习: 如何设置Raspberr ...
- (0)开始 Raspberry Pi 项目前需要知道的 10 件事
https://www.digikey.cn/zh/articles/techzone/2017/feb/10-things-to-know-before-starting-a-raspberry-p ...
- 2016 最新的 树莓派3 Raspberry Pi 3 上手评测 图解教程 新手必看!(VNC 安装,启动,关闭)
1.png . 官方教程: INSTALLING OPERATING SYSTEM IMAGES: https://www.raspberrypi.org/documentation/installa ...
- 【树莓派】【转】将树莓派Raspberry Pi设置为无线路由器(WiFi热点AP,RTL8188CUS芯片)
下文为转载,文章转自:http://wangye.org/blog/archives/845/,仅供本次学习实践参考. 最近又开始折腾起Raspberry Pi来了,因为某处上网需要锐捷拨号,于是我就 ...
随机推荐
- redis的数据结构、使用场景、持久化方式以及常见面试问题
一.redis中的数据结构 1.字符串(String) SET key value //存入字符串键值对 MSET key value[key value...] //批量存储字符串键值对 SETNX ...
- H5性能分析
一.所有的浏览器都会支持一个W3C的标准 具体标准可以查看:https://www.w3.org/TR/navigation-timing/ 资源加载指标分析: Prompt for unload:访 ...
- JMM——Java内存模型抽象|八种同步操作|操作规则
JMM 调用栈&本地变量在线程栈上 对象整体在堆上(包括其本地变量,不论类型),栈有其引用即可访问, 线程调用同一个对象时,是访问该对象的私有拷贝 每个CPU有自己的高速缓存 高速缓存存在意义 ...
- [Java] Solr & Elasticsearch
背景 实现网站自带的搜索功能,如淘宝中的商品搜索 全文搜索 数据分类 结构化数据:固定格式或长度有限的数据,如数据库.元数据等 非结构化数据:不定长或无固定格式的数据,如邮件.word文档等 搜索分类 ...
- echo "This is line $LINENO"返回行号
echo "This is line $LINENO"返回行号 LINENO 变量LINENO返回它在脚本里面的行号. #!/bin/bash echo "This is ...
- n/a或N/A是英语“不适用”(Not applicable)
n/a或N/A是英语"不适用"(Not applicable)等类似单词的缩写,常可在各种表格中看到. N/A比较多用在填写表格的时候,表示"本栏目(对我)不适用&quo ...
- stm32 向W25Q256FLASH中通过 FATFS文件系统写入数据 写多了之后出现错误,之前存储的全都找不到了
stm32 像W25Q256FLASH中通过 FATFS文件系统写入数据 写多了之后出现错误,之前存储的全都找不到了 http://firebbs.cn/thread-23490-1-1.html ...
- linux进阶之gitlab仓库搭建及免密使用
一.Gitlab简介 GitLab 是一个用于仓库管理系统的开源项目,使用Git作为代码管理工具,并在此基础上搭建起来的web服务. 可通过Web界面进行访问公开的或者私人项目.它拥有与Github类 ...
- 【备忘】ffmpeg推流命令
1 组播推流 ffmpeg -re -i "D:\\OTT\\adghg2323.mp4" -vcodec libx264 -vprofile baseline -level 30 ...
- 《Matlab实用案例》系列Matlab从入门到精通实用100例案例教程目录(持续更新)
目录 1. 专栏简介 2. 专栏地址 3. 专栏目录 1. 专栏简介 2. 专栏地址 「 刘一哥与GIS的故事 」之<Matlab使用案例> 3. 专栏目录 [MATLAB统计分析与应用1 ...