在 raspberry pi pico 上体验 MicroPython
raspberry pi pico 官方提供 2 种开发方式,其中一种是使用 python3 开发,树莓派提供了 MicroPython 固件,把这个固件烧录进去,就可以 在 pico 上跑 python3 脚本。
1、MicroPython 相关资源
用 python 开发,官网能找到的资源有:
1、MicroPython 固件
已经编译好的固件:getting-started这里可以下载到
源码:micropython‘s github,micropython已经对 RP2040 进行支持

2、文档
3、MicroPython 例程
raspberrypi 官方 github 上有相关例程:pico-micropython-examples
2、下载、烧录 MicroPython 固件
树莓派官网提供了编译好的 MicroPython 固件,也可以自己编译, Raspberry Pi Pico Python SDK 给出了编译教程。
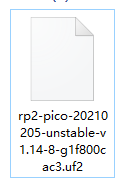
这里直接使用官方编译好的固件,下载下来是这样的:
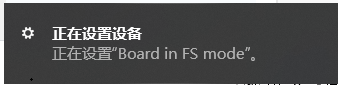
先按住板子上的按键,然后连上电脑,等电脑出现名字为 RPI-RP2的磁盘时,把下载到的固件拷贝到该磁盘,等拷贝完成就烧录好了,烧录完,设备会自动重新启动,然后我的电脑上出现了这个:
设备管理器中多了个 COM 口:

PC上可以使用串口终端通过该 COM 口操作 pico。
3、使用 MobaXterm 操作 pico
我是用的串口终端是 MobaXterm,MobaXterm 什么?MobaXterm 官网的描述是:
Enhanced terminal for Windows with X11 server, tabbed SSH client, network tools and much more
可以创建SSH、Telnet 、串口终端等等,功能释放强大,有免费版、也有收费的,免费的够用了。
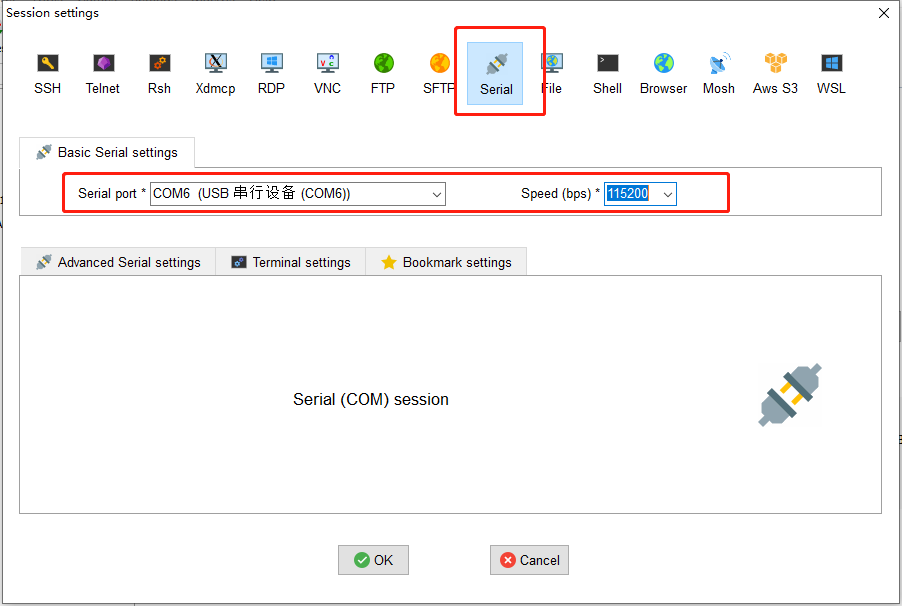
创建一个串口终端连接跑 MicroPython 的 pico,选择对应的 COM 口,波特率115200,如下:
点击 OK 后,界面乌漆嘛黑,什么都没有,需要按下回车,然后就可以进行操作了,如下:

4、点灯
点下灯,从原理图看,是 GPIO25 控制 LED:

在MobaXterm 执行一下 python 代码,就可以点亮板子上的 LED 了:
from machine import Pin

led = Pin(25, Pin.OUT)

led.value(1)
5、附上 pico 跑 MicroPython 是 USB 相关信息
[Port2]  :  USB Composite Device

          ---===>Device Information<===---

English product name: "Board in FS mode"

ConnectionStatus:

Current Config Value:              0x01  -> Device Bus Speed: Full

Device Address:                    0x15

Open Pipes:                           3

          ===>Endpoint Descriptor<===

bLength:                           0x07

bDescriptorType:                   0x05

bEndpointAddress:                  0x81  -> Direction: IN - EndpointID: 1

bmAttributes:                      0x03  -> Interrupt Transfer Type

wMaxPacketSize:                  0x0008 = 0x08 bytes

bInterval:                         0x10

          ===>Endpoint Descriptor<===

bLength:                           0x07

bDescriptorType:                   0x05

bEndpointAddress:                  0x02  -> Direction: OUT - EndpointID: 2

bmAttributes:                      0x02  -> Bulk Transfer Type

wMaxPacketSize:                  0x0040 = 0x40 bytes

bInterval:                         0x00

          ===>Endpoint Descriptor<===

bLength:                           0x07

bDescriptorType:                   0x05

bEndpointAddress:                  0x82  -> Direction: IN - EndpointID: 2

bmAttributes:                      0x02  -> Bulk Transfer Type

wMaxPacketSize:                  0x0040 = 0x40 bytes

bInterval:                         0x00

          ===>Device Descriptor<===

bLength:                           0x12

bDescriptorType:                   0x01

bcdUSB:                          0x0200

bDeviceClass:                      0xEF  -> This is a Multi-interface Function Code Device

bDeviceSubClass:                   0x02  -> This is the Common Class Sub Class

bDeviceProtocol:                   0x01  -> This is the Interface Association Descriptor protocol

bMaxPacketSize0:                   0x40 = (64) Bytes

idVendor:                        0x2E8A = Vendor ID not listed with USB.org as of 03-19-2008

idProduct:                       0x0005

bcdDevice:                       0x0100

iManufacturer:                     0x01

     English (United States)  "MicroPython"

iProduct:                          0x02

     English (United States)  "Board in FS mode"

iSerialNumber:                     0x03

     English (United States)  "000000000000"

bNumConfigurations:                0x01

          ===>Configuration Descriptor<===

bLength:                           0x09

bDescriptorType:                   0x02

wTotalLength:                    0x004B  -> Validated

bNumInterfaces:                    0x02

bConfigurationValue:               0x01

iConfiguration:                    0x00

bmAttributes:                      0xA0  -> Bus Powered

MaxPower:                          0x7D = 250 mA

          ===>IAD Descriptor<===

bLength:                           0x08

bDescriptorType:                   0x0B

bFirstInterface:                   0x00

bInterfaceCount:                   0x02

bFunctionClass:                    0x02  -> This is Communications (CDC Control) USB Device Interface Class

bFunctionSubClass:                 0x02

bFunctionProtocol:                 0x00

iFunction:                         0x00

          ===>Interface Descriptor<===

bLength:                           0x09

bDescriptorType:                   0x04

bInterfaceNumber:                  0x00

bAlternateSetting:                 0x00

bNumEndpoints:                     0x01

bInterfaceClass:                   0x02  -> This is Communications (CDC Control) USB Device Interface Class

bInterfaceSubClass:                0x02

bInterfaceProtocol:                0x00

CAUTION:  This may be an invalid bInterfaceProtocol

iInterface:                        0x04

     English (United States)  "Board CDC"

  -> This is a Communications (CDC Control) USB Device Interface Class

          ===>Descriptor Hex Dump<===

bLength:                           0x05

bDescriptorType:                   0x24

05 24 00 20 01

  -> This is a Communications (CDC Control) USB Device Interface Class

          ===>Descriptor Hex Dump<===

bLength:                           0x05

bDescriptorType:                   0x24

05 24 01 00 01

  -> This is a Communications (CDC Control) USB Device Interface Class

          ===>Descriptor Hex Dump<===

bLength:                           0x04

bDescriptorType:                   0x24

04 24 02 02

  -> This is a Communications (CDC Control) USB Device Interface Class

          ===>Descriptor Hex Dump<===

bLength:                           0x05

bDescriptorType:                   0x24

05 24 06 00 01

          ===>Endpoint Descriptor<===

bLength:                           0x07

bDescriptorType:                   0x05

bEndpointAddress:                  0x81  -> Direction: IN - EndpointID: 1

bmAttributes:                      0x03  -> Interrupt Transfer Type

wMaxPacketSize:                  0x0008 = 0x08 bytes

bInterval:                         0x10

          ===>Interface Descriptor<===

bLength:                           0x09

bDescriptorType:                   0x04

bInterfaceNumber:                  0x01

bAlternateSetting:                 0x00

bNumEndpoints:                     0x02

bInterfaceClass:                   0x0A  -> This is a CDC Data USB Device Interface Class

bInterfaceSubClass:                0x00

bInterfaceProtocol:                0x00

CAUTION:  This may be an invalid bInterfaceProtocol

iInterface:                        0x00

          ===>Endpoint Descriptor<===

bLength:                           0x07

bDescriptorType:                   0x05

bEndpointAddress:                  0x02  -> Direction: OUT - EndpointID: 2

bmAttributes:                      0x02  -> Bulk Transfer Type

wMaxPacketSize:                  0x0040 = 0x40 bytes

bInterval:                         0x00

          ===>Endpoint Descriptor<===

bLength:                           0x07

bDescriptorType:                   0x05

bEndpointAddress:                  0x82  -> Direction: IN - EndpointID: 2

bmAttributes:                      0x02  -> Bulk Transfer Type

wMaxPacketSize:                  0x0040 = 0x40 bytes

bInterval:                         0x00
在 raspberry pi pico 上体验 MicroPython的更多相关文章
- 上手 Raspberry Pi Pico
什么是 PICO Raspberry Pi Pico 是树莓派推出的一块基于 Arm Cortex-M0+ 内核的 MCU 的开发板,使用的 MCU 是树莓派自己研发的 Arm Cortex-M0+ ...
- Raspberry PI 2上的802.11ac网卡驱动编译
Raspberry PI 2上的802.11ac网卡驱动编译 最近在树莓派2上折腾视频,用来做FPV,但是发现2.4G的控会严重干扰2.4G WIFI,在开控的时候我的台式机+外置USB网卡都频频掉线 ...
- 在Raspberry Pi 3B+上安装Windows 10 IoT
下载 进入树莓派下载页面,当前网址https://www.raspberrypi.org/downloads/ 选择Windows 10 IoT Core,当前网址https://docs.micro ...
- 树莓派PICO刷入MicroPython内核的两种方式
一.MicroPython简介 MicroPython 是 Python 3编程语言的精简高效实现,其中包括 Python 标准库的一小部分,并且经过优化,可在微控制器和受限环境中运行. 可以在 25 ...
- Raspberry Pi 学习笔记之一
记录几个搭建服务器教程: [教程] 将树莓派变成网络打印机服务器(更新PC和手机端设置)!http://www.eeboard.com/bbs/thread-8818-1-1.html[心得] [分享 ...
- 用树莓派Raspberry Pi和Micro:bit做一个自拍器
在这个项目中,我们将使用Python来构建一个由Micro:bit触发树莓派Raspberry Pi和相机模块的自拍器.这是开始使用硬件和简单文本编程的好方法. 我们将学习: 如何设置Raspberr ...
- (0)开始 Raspberry Pi 项目前需要知道的 10 件事
https://www.digikey.cn/zh/articles/techzone/2017/feb/10-things-to-know-before-starting-a-raspberry-p ...
- 2016 最新的 树莓派3 Raspberry Pi 3 上手评测 图解教程 新手必看!(VNC 安装,启动,关闭)
1.png . 官方教程: INSTALLING OPERATING SYSTEM IMAGES: https://www.raspberrypi.org/documentation/installa ...
- 【树莓派】【转】将树莓派Raspberry Pi设置为无线路由器(WiFi热点AP,RTL8188CUS芯片)
下文为转载,文章转自:http://wangye.org/blog/archives/845/,仅供本次学习实践参考. 最近又开始折腾起Raspberry Pi来了,因为某处上网需要锐捷拨号,于是我就 ...
随机推荐
- Mac OSX系统homebrew update Fetching failed问题解决方案
1. brew update error (i) 问题出现及现象描述 昨天换了台电脑,有些软件需要重新安装或更新一下,遇到了下面的问题 cv@xys-MacBook-Pro ~ % brew upda ...
- ssh-的搭建和使用
ssh的作用 : 可实现远程客户端登录服务器并对服务器的文件进行操作 ssh服务器的安装 farsight@ubuntu:~$ sudo apt-get install openssh-server ...
- C#基础之==(双等于号)与equals()区别
C#中Equals和= =比较 这两种方式也是大家在日常编码工作当中用的比较多的判断方式.之前在使用的时候也没太关注两者在比较不同类型的时候存在哪些区别. 今天就和大家一起深入了解一下其中区别 一.值 ...
- UltraISO制作启动盘安装CentOS7
UltraISO制作启动盘安装CentOS7 发表于 2020-03-10 | 分类于 DevOps | 没有评论 简单几个步骤即可完成启动盘的制作,非常便利 准备工具 准备8G优盘(启动盘制 ...
- 2.socket编程
套接字:进行网络通信的一种手段socket 1.流式套接字(SOCK_STREAM):传输层基于tcp协议进行通信 2.数据报套接字(SOCK_DGRAM):传输层基于udp协议进行通信 3.原始套接 ...
- Linux shell用sed批量更改文件名的相关内容
示例 去除特定字符 目标:将指定目录下文件名中sprint替换为dev 方法: [root@Skip-ftp test]# for i in `ls` > do > name=`echo ...
- java 集合梳理
使用 processOn 画的java 集合图谱,应付面试应该可以了
- Qt开发笔记:OpenSSL库介绍、windows上mingw32版本的OpenSSL编译模块化
前言 Windows上mingw32版本的openssl的编译是属于比较棘手的,OpenSSL本身不提供支持.. OpenSSL 介绍 OpenSSL是一个开放源代码的软件库包,应用程序可 ...
- Spring框架两大核心机制(IoC、AOP)
IoC(控制反转)/ DI(依赖注入) AOP(面向切面编程) Spring 是一个企业级开发框架,是软件设计层面的框架,优势在于可以将应用程序进行分层,开发者可以自主选择组件. MVC:Struts ...
- MongoDB学习笔记:快速入门
MongoDB学习笔记:快速入门 一.MongoDB 简介 MongoDB 是由C++语言编写的,是一个基于分布式文件存储的开源数据库系统.在高负载的情况下,添加更多的节点,可以保证服务器性能.M ...