Android 布局学习之——Layout(布局)具体解释二(常见布局和布局參数)
[Android布局学习系列]
1.Android 布局学习之——Layout(布局)具体解释一
2.Android 布局学习之——Layout(布局)具体解释二(常见布局和布局參数)
3.Android 布局学习之——LinearLayout的layout_weight属性
4.Android 布局学习之——LinearLayout属性baselineAligned的作用及baseline
Layout Parameters(布局參数):
在XML文件里,我们常常看到类似与layout_width这种布局属性(layout attributes),这些属性用来定义
View的布局參数,为了让它适合于ViewGroup。
每一个ViewGroup类都实现了一个继承自ViewGroup.LayoutParams的嵌套类。
子类包括定义每一个子View大小和位置的属性类型,为了适应于ViewGroup。
以下通过官方文档的一张图片以及一个XML文件来学习一下:

 1 <!-- activity的根布局是LinearLayout 也就是线性布局 -->

 2 <LinearLayout xmlns:android="http://schemas.android.com/apk/res/android"

 3     xmlns:tools="http://schemas.android.com/tools"

 4     android:layout_width="match_parent"

 5     android:layout_height="wrap_content"

 6     android:background="#0f0"

 7     android:orientation="vertical" >

 8     <!-- LinearLayout有个子View是RelativeLayout -->

 9     <RelativeLayout

10       android:layout_width="wrap_content"

11       android:layout_height="wrap_content"

12       android:background="#f00"

13       >

14       <TextView

15           android:id="@+id/textView1InRL"

16           android:background="#fff"

17           android:layout_width="wrap_content"

18           android:layout_height="wrap_content"

19           android:text="TextView" />

20

21     <TextView

22         android:id="@+id/textView2InRL"

23         android:background="#fff"

24         android:layout_width="wrap_content"

25         android:layout_height="wrap_content"

26         android:text="TextView2"

27         android:layout_toRightOf="@id/textView1InRL"

28          />

29      <TextView

30         android:background="#fff"

31         android:layout_width="wrap_content"

32         android:layout_height="wrap_content"

33         android:text="TextView3"

34         android:layout_below="@id/textView2InRL"

35          />

36       </RelativeLayout>

37       <Button

38           android:text="Button1InLinearLayout"

39           android:layout_width="wrap_content"

40           android:layout_height="wrap_content"

41           />

42       <Button

43           android:text="Button2InLinearLayout"

44           android:layout_width="wrap_content"

45           android:layout_height="wrap_content"

46           />

47 </LinearLayout>
从上,我们能够看出。布局中的子元素都必须定义使他合适于它的父布局的布局參数,虽然它可能为它的子元素定义不同的布局參数。比方上图中的RelativeLayout,它受父Layout:LinearLayout影响,然后它的布局參数则影响到了它的子元素:三个TextView。
常见的布局(Common Layouts):
以下介绍Android中经常使用的布局:
1.线性布局(Linear Layout)
将子元素按垂直方向或水平方向线性排列。(假设窗体的长度超过了屏幕的长度,则能够生成一个滚动栏)
窗体长度超过屏幕长度,生成滚动栏(srollbar)的方法:
用ScrollView包裹线性布局:
 1 <LinearLayout

 2        android:layout_width="fill_parent"

 3        android:layout_height="fill_parent"

 4        xmlns:android="http://schemas.android.com/apk/res/android">

 5        <ScrollView

 6             android:layout_width="fill_parent"

 7             android:layout_height="wrap_content">

 8             <LinearLayout

 9                   android:layout_width="wrap_content"

10                   android:layout_height="wrap_content"

11                   android:orientation="vertical">

12                   <!-- 这里放线性布局中的内容 -->

13             </LinearLayout>

14       </ScrollView>

15  </LinearLayout>
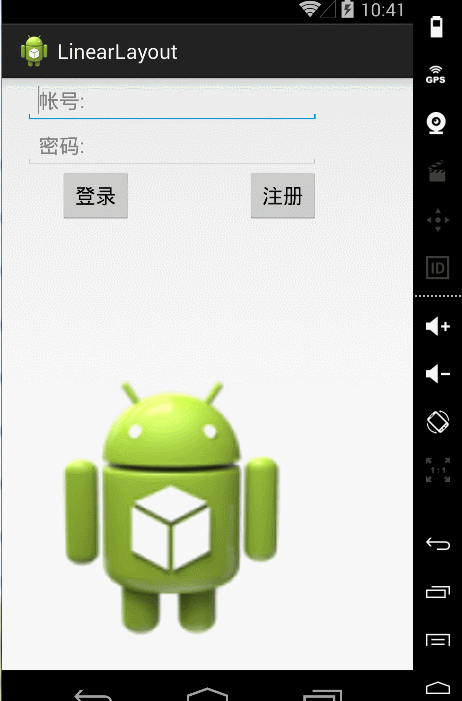
通过一个样例来深入学习一下线性布局:
 1 <LinearLayout xmlns:android="http://schemas.android.com/apk/res/android"

 2     xmlns:tools="http://schemas.android.com/tools"

 3     android:layout_width="match_parent"

 4     android:layout_height="wrap_content"

 5     android:paddingLeft="20dp"

 6     android:paddingRight="20dp"

 7     android:orientation="vertical" >

 8     <ScrollView

 9         android:layout_width="fill_parent"

10         android:layout_height="wrap_content"

11         >

12         <LinearLayout

13             android:layout_width="wrap_content"

14             android:layout_height="wrap_content"

15             android:orientation="vertical"

16             >

17     <EditText

18         android:layout_width="match_parent"

19         android:layout_height="wrap_content"

20         android:hint="帐号:" />

21     <EditText

22         android:layout_width="match_parent"

23         android:layout_height="wrap_content"

24         android:hint="password:" />

25     <LinearLayout

26         android:layout_width="wrap_content"

27         android:layout_height="wrap_content"

28         android:orientation="horizontal"

29         >

30         <Button

31            android:layout_width="wrap_content"

32            android:layout_height="wrap_content"

33            android:layout_marginLeft="30dp"

34            android:text="登录"

35             />

36           <Button

37            android:layout_width="wrap_content"

38            android:layout_height="wrap_content"

39            android:layout_marginLeft="100dp"

40            android:text="注冊"

41             />

42     </LinearLayout>

43     <ImageView

44         android:layout_width="match_parent"

45         android:layout_height="500dp"

46         android:src="@drawable/ic_launcher"

47         />

48     <TextView

49         android:layout_width="match_parent"

50         android:layout_height="wrap_content"

51         android:text="LinearLayout大小超过屏幕大小的測试"

52         />

53     </LinearLayout>

54     </ScrollView>

55 </LinearLayout>
2.相关布局(Relative Layout)
正如其名,相关布局。我们能够通过让子元素互相相关(比方Button A在TextView B的以下)或与父母相关来指定
它们的位置。
默认地,全部的子View都被放置在布局的左上方(top-left)。
设置子View之间和子View与父母之间关系的參数例如以下图所看到的:
相同通过一个样例来学习一下相关布局:
 1 <RelativeLayout xmlns:android="http://schemas.android.com/apk/res/android"

 2     xmlns:tools="http://schemas.android.com/tools"

 3     android:layout_width="match_parent"

 4     android:layout_height="match_parent"

 5     tools:context=".MainActivity" >

 6

 7     <!--android:layout_centerHorizontal 设置TextView在水平中心-->

 8         <TextView

 9             android:id="@+id/login"

10             android:layout_width="wrap_content"

11             android:layout_height="wrap_content"

12             android:layout_centerHorizontal="true"

13             android:textSize="20sp"

14             android:text="登录界面" />

15      <!--android:layout_marginTop="24dp" 设置了EditText的顶部上面的空暇空间是24dp -->

16     <EditText

17         android:id="@+id/editText1"

18         android:layout_width="wrap_content"

19         android:layout_height="wrap_content"

20         android:layout_below="@id/login"

21         android:layout_centerHorizontal="true"

22         android:layout_marginTop="24dp"

23         android:hint="username"

24         android:ems="10" >

25

26         <requestFocus />

27     </EditText>

28     <!-- android:layout_below="@+id/editText1"editText2在editText1以下 -->

29     <EditText

30         android:id="@+id/editText2"

31         android:layout_width="wrap_content"

32         android:layout_height="wrap_content"

33         android:layout_below="@+id/editText1"

34         android:layout_centerHorizontal="true"

35         android:layout_marginTop="27dp"

36         android:ems="10"

37         android:hint="password"

38         android:inputType="textPassword" />

39       <!--  android:layout_alignRight="@id/editText2"设置cancelButton与

40          editText2的右边缘对齐-->

41     <Button

42         android:id="@+id/cancelButton"

43         android:layout_width="wrap_content"

44         android:layout_height="wrap_content"

45         android:layout_below="@id/editText2"

46         android:layout_alignRight="@id/editText2"

47         android:text="取消"

48         />

49        <!--  android:layout_toLeftOf="@id/cancelButton"设置确定button在取消button的左边 -->

50         <Button

51         android:id="@+id/confirmButton"

52         android:layout_width="wrap_content"

53         android:layout_height="wrap_content"

54         android:layout_below="@id/editText2"

55         android:layout_toLeftOf="@id/cancelButton"

56         android:text="确定"

57         />

58

59 </RelativeLayout>
希望这篇文章对大家的学习有所帮助,假设你喜欢,请推荐一下,谢谢~
假设转载,请在文章开头处注明本博客地址:http:www.cnblogs.com/JohnTsai
欢迎讨论交流,邮箱:JohnTsai.Work@gmail.com :)
Android 布局学习之——Layout(布局)具体解释二(常见布局和布局參数)的更多相关文章
- Android 布局学习之——Layout(布局)详解二(常见布局和布局参数)
[Android布局学习系列] 1.Android 布局学习之——Layout(布局)详解一 2.Android 布局学习之——Layout(布局)详解二(常见布局和布局参数) 3.And ...
- Android 布局学习之——Layout(布局)详解一
layout(布局)定义了用户界面的可视化结构(visual structure),如Activity的UI,应用窗口的UI. 有两种方式声明layout: 1.在xml文件中声明UI组件. 2.在运 ...
- android选择图片或拍照图片上传到server(包含上传參数)
在9ria论坛看到的.还没測试,先Mark与大家分享一下. 近期要搞一个项目,须要上传相冊和拍照的图片.不负所望,最终完毕了! 只是须要说明一下,事实上网上非常多教程拍照的图片.都是缩略图不是非常清晰 ...
- Swift自适应布局(Adaptive Layout)教程(二)
给TextContainer中添加内容 打开 Main.storyboard ,从组件库(Object Library)中拖拽两个 Label 组件到TextContainer中,位置可以随意摆放: ...
- Android开发学习之TabView选项卡具体解释 -- 基于Android4.4
版权声明:本文为博主原创文章,未经博主同意不得转载. https://blog.csdn.net/he90227/article/details/24474197 直接上代码 -- 基于Android ...
- Android布局学习——android:gravity和android:layout_gravity的区别
[Android布局学习系列] 1.Android 布局学习之——Layout(布局)详解一 2.Android 布局学习之——Layout(布局)详解二(常见布局和布局参数) 3.And ...
- Android签名机制之---签名验证过程具体解释
一.前言 今天是元旦,也是Single Dog的嚎叫之日,仅仅能写博客来祛除寂寞了,今天我们继续来看一下Android中的签名机制的姊妹篇:Android中是怎样验证一个Apk的签名. 在前一篇文章中 ...
- 14.Android之Layout布局学习
Android布局主要有5种,接下来学习总结下. 1) 最常见的线性布局 LinearLayout 线性布局是Android布局中最简单的布局,也是最常用,最实用的布局. android:orient ...
- Android Animation学习(五) ApiDemos解析:容器布局动画 LayoutTransition
Android Animation学习(五) ApiDemos解析:容器布局动画 LayoutTransition Property animation系统还提供了对ViewGroup中的View改变 ...
随机推荐
- Json的反序列化 .net Newtonsoft.Json
项目中有个.json文件. { "instances": [ { "name": "baidu", "url": &qu ...
- eclipse git 一个错误:the current branch is not configured for pull No value for key branch.xxx.merge found
eclipse git 一个错误:the current branch is not configured for pull No value for key branch.xxx.merge fou ...
- poj 1384 Piggy-Bank(全然背包)
http://poj.org/problem?id=1384 Piggy-Bank Time Limit: 1000MS Memory Limit: 10000K Total Submissions: ...
- iOS 9 新特性
这篇文章介绍了iOS9开发相关的简介,现在发布的设备都会搭载iOS9.这篇文章也列出了详细描述新特性的文章. iPad多线程增强 iOS9使用Slider Over, Split View, Pict ...
- 科技股晴间多云 阿里京东IPO或受影响
微博的时间长达一个月的时间才上市.科技股一直笼罩. Facebook一个月股价下跌21.55%:特斯拉跌幅21.69%:亚马逊的股价相比,1一个月27日高点下跌22.13%. 以前的明星股票都已进入华 ...
- 【Shell剧本练习】得出的结论是当前用户
推断是否当前用户root.假设是暗示root用户,假设而不是提示对于普通用户 #!/bin/bash #title: testus.sh #author: orangleliu #date: 2014 ...
- SqlServer中存储过程中将Exec的执行结果赋值给变量输出
原文 SqlServer中存储过程中将Exec的执行结果赋值给变量输出 背景: 遇到这样一种情况:动态向存储过程中传入表名和表的某些属性(这里用到的是主键ID),然后利用这两个变量查出一条数据的某些字 ...
- 2014年度辛星全然解读html第七节
经过前面六节的学习,我们大致清楚了HTML教程中的基础内容,那么接下来我们開始继续向后推进,能够说,以下我们介绍一下HTML中的区块. ***************区块*************** ...
- 参加persist.sys物业写权限的方法
1.于AndroidManifest.xml manifest添加属性android:sharedUserId="android.uid.system" 2.假设AndroidMa ...
- TextView于getCompoundDrawables()使用演示样本的方法
MainActivity例如下列: package cc.testcompounddrawables; import android.app.Activity; import android.grap ...