常用spaceclaim脚本(三)
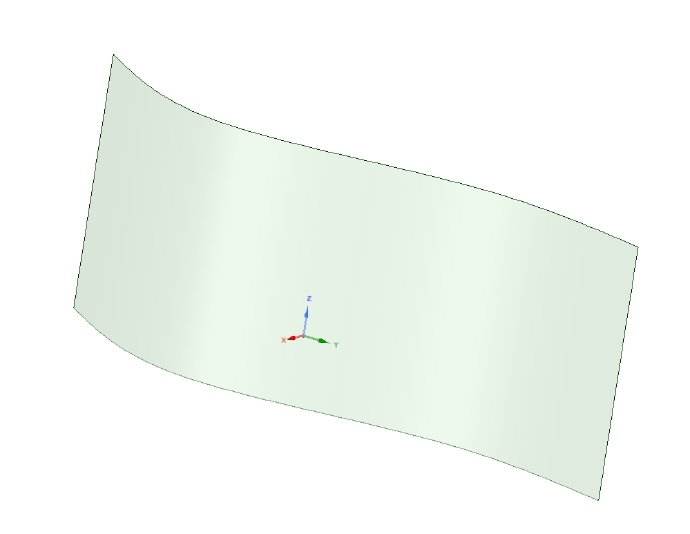
拉伸曲线
ptList=List[Point]() #定义一个点的列表
ptList.Add(Point.Create(MM(11),MM(-14),MM(0))) #创建点,并放入列表当中
ptList.Add(Point.Create(MM(22),MM(2),MM(0))) #创建点,并放入列表当中
ptList.Add(Point.Create(MM(20), MM(25),MM(0))) #创建点,并放入列表当中
ptList.Add(Point.Create(MM(24), MM(41),MM(0))) #创建点,并放入列表当中
ncurve = NurbsCurve.CreateThroughPoints(False, ptList, 0.0001) #创建一个样条曲线穿过所有创建的点
curveSegment = CurveSegment.Create(ncurve) #创建一个有限线段对象
designCurve = DesignCurve.Create(GetRootPart(),curveSegment) #创建DesignCurve对象
selection = Selection.Create(designCurve) #将DesignCurve对象选入
options = ExtrudeEdgeOptions() #定义一个拉伸曲线的选项,后面传入拉伸选项当中
options.PullSymmetric = False #是否双向拉伸
options.Copy = False #是否拷贝拉伸的曲线到最终位置
options.ExtrudeType = ExtrudeType.None #拉伸的类型
result = ExtrudeEdges.Execute(selection, Point.Create(MM(0), MM(0), MM(0)), Direction.Create(0, 0, 1), MM(20), options) #拉伸,该函数一共有两个重载函数
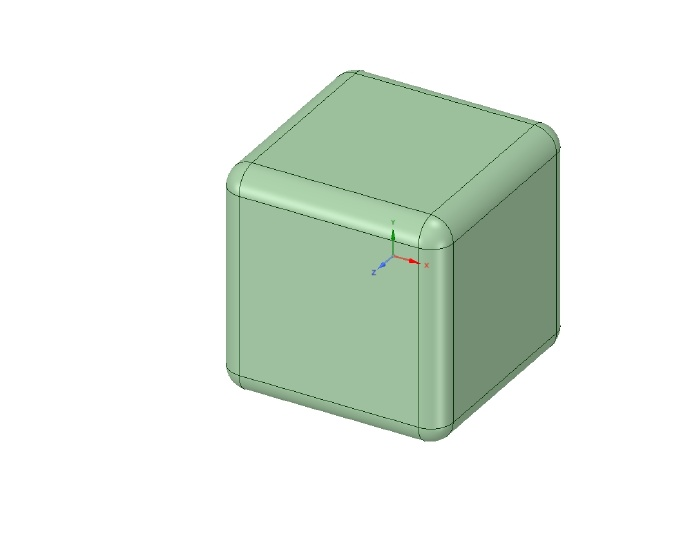
导圆角(导直角还无法实现)
result=BlockBody.Create(Point.Create(MM(-10), MM(-10), MM(-10)), Point.Create(MM(10), MM(10), MM(10))) #创建一个正方体
selection = Selection.Create(result.CreatedBody.Edges) #选中正方体的所有边
result = ConstantRound.Execute(selection, MM(2)) #倒角,该函数一共有两个重载函数,这里用到的函数,第一个参数为倒角的边,第二个参数为倒角的半径,第三个参数为默认参数,默认参数为null
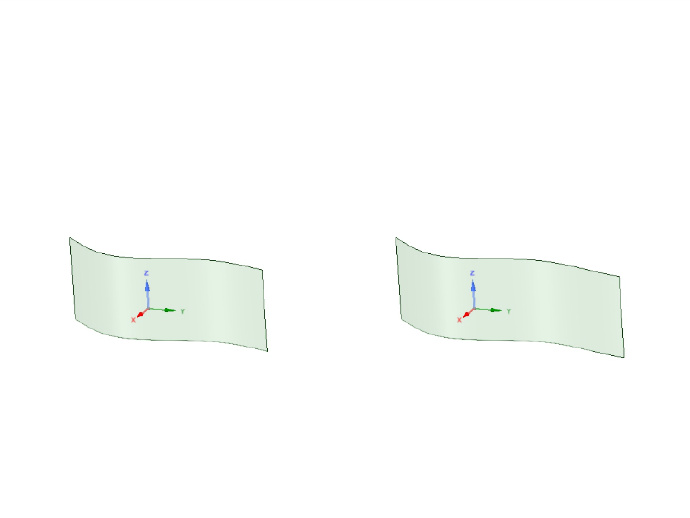
偏移边
ptList=List[Point]() #定义一个点的列表
ptList.Add(Point.Create(MM(11),MM(-14),MM(0))) #创建点,并放入列表当中
ptList.Add(Point.Create(MM(22),MM(2),MM(0))) #创建点,并放入列表当中
ptList.Add(Point.Create(MM(20), MM(25),MM(0))) #创建点,并放入列表当中
ptList.Add(Point.Create(MM(24), MM(41),MM(0))) #创建点,并放入列表当中
ncurve = NurbsCurve.CreateThroughPoints(False, ptList, 0.0001) #创建一个样条曲线穿过所有创建的点
curveSegment = CurveSegment.Create(ncurve) #创建一个有限线段对象
designCurve = DesignCurve.Create(GetRootPart(),curveSegment) #创建DesignCurve对象
selection = Selection.Create(designCurve) #将DesignCurve对象选入
options = ExtrudeEdgeOptions() #定义一个拉伸曲线的选项,后面传入拉伸选项当中
options.PullSymmetric = False #是否双向拉伸
options.Copy = False #是否拷贝拉伸的曲线到最终位置
options.ExtrudeType = ExtrudeType.None #拉伸的类型
result = ExtrudeEdges.Execute(selection, Point.Create(MM(0), MM(0), MM(0)), Direction.Create(0, 0, 1), MM(20), options) #拉伸,该函数一共有两个重载函数
selection = Selection.Create(GetRootPart().Bodies[0].Faces[0].Edges[3])
result = OffsetEdges.Execute(selection, MM(-9.82))
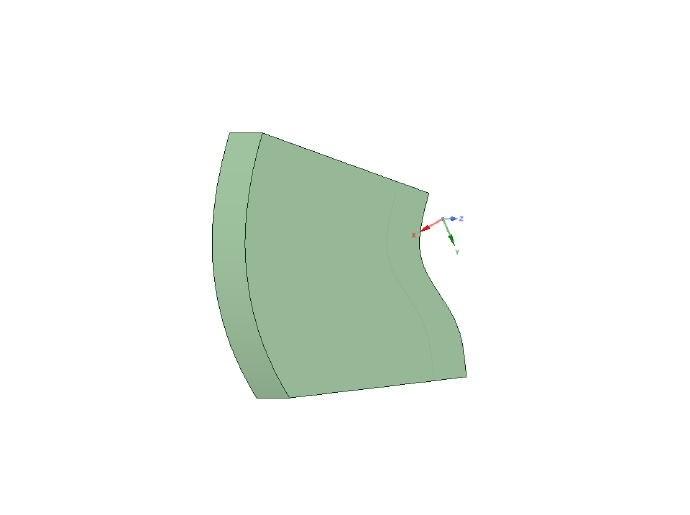
拉伸一个面
ptList=List[Point]() #定义一个点的列表
ptList.Add(Point.Create(MM(11),MM(-14),MM(0))) #创建点,并放入列表当中
ptList.Add(Point.Create(MM(22),MM(2),MM(0))) #创建点,并放入列表当中
ptList.Add(Point.Create(MM(20), MM(25),MM(0))) #创建点,并放入列表当中
ptList.Add(Point.Create(MM(24), MM(41),MM(0))) #创建点,并放入列表当中
ncurve = NurbsCurve.CreateThroughPoints(False, ptList, 0.0001) #创建一个样条曲线穿过所有创建的点
curveSegment = CurveSegment.Create(ncurve) #创建一个有限线段对象
designCurve = DesignCurve.Create(GetRootPart(),curveSegment) #创建DesignCurve对象
selection_curve = Selection.Create(designCurve) #将DesignCurve对象选入
option_one = ExtrudeEdgeOptions() #定义一个拉伸曲线的选项,后面传入拉伸选项当中
option_one.PullSymmetric = False #是否双向拉伸
option_one.Copy = False #是否拷贝拉伸的曲线到最终位置
option_one.ExtrudeType = ExtrudeType.None #拉伸的类型
ExtrudeEdges.Execute(selection_curve, Point.Create(MM(0), MM(0), MM(0)), Direction.Create(0, 0, 1), MM(20), option_one) #拉伸,该函数一共有两个重载函数
selection_face = Selection.Create(GetRootPart().Bodies[0].Faces[0]) #选中对应的面
ThickenFaces.Execute(selection_face, Direction.Create(1, 1, 0), MM(60), ThickenFaceOptions()) #拉伸,第一个参数为拉伸的面,第二个参数为拉伸的方向,第三个参数为拉伸的长度,第四个参数为拉伸的相关设置,如果需要更进一步设置拉伸的相关参数,需要更详细的设置第四个参数
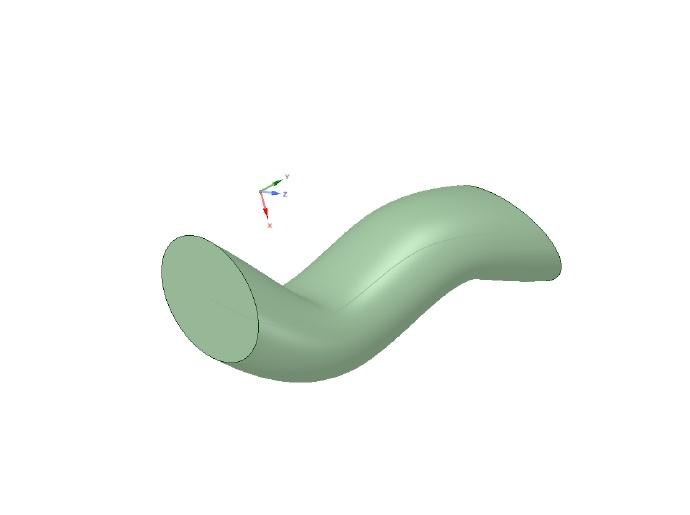
沿路径扫掠
CircularSurface.Create(MM(10), Direction.Create(0, 1, 0),Point.Create(MM(11),MM(-14),MM(0)))
selection=Selection.Create(GetRootPart().Bodies[0].Faces[0])
ptList=List[Point]() #定义一个点的列表
ptList.Add(Point.Create(MM(11),MM(-14),MM(0))) #创建点,并放入列表当中
ptList.Add(Point.Create(MM(22),MM(2),MM(0))) #创建点,并放入列表当中
ptList.Add(Point.Create(MM(20), MM(25),MM(0))) #创建点,并放入列表当中
ptList.Add(Point.Create(MM(24), MM(41),MM(0))) #创建点,并放入列表当中
ncurve = NurbsCurve.CreateThroughPoints(False, ptList, 0.0001) #创建一个样条曲线穿过所有创建的点
curveSegment = CurveSegment.Create(ncurve) #创建一个有限线段对象
curve_lenghth=curveSegment.Length
designCurve = DesignCurve.Create(GetRootPart(),curveSegment) #创建DesignCurve对象
pathselection=Selection.Create(designCurve) #将DesignCurve对象选入
options = SweepFaceCommandOptions()
options.KeepMirror = True
options.KeepLayoutSurfaces = False
options.KeepCompositeFaceRelationships = True
options.ExtrudeType = ExtrudeType.Add
options.KeepLayoutSurfaces = False
result = SweepFaces.Execute(selection, pathselection,curve_lenghth, options)
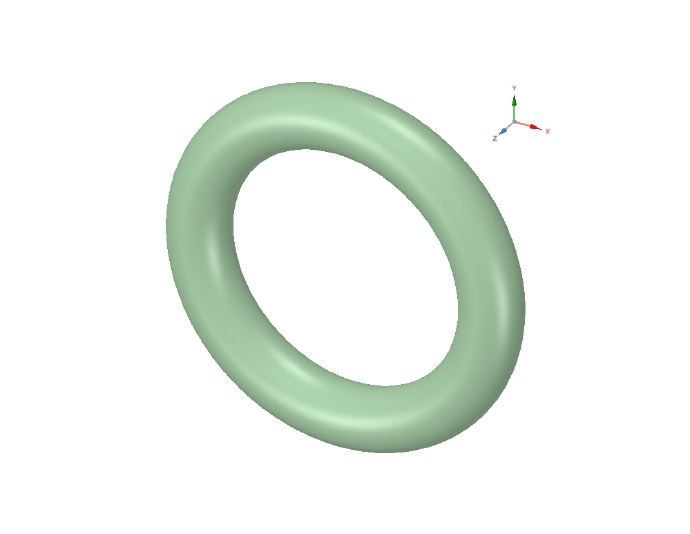
生成一个圆环
circle = CircularSurface.Create(MM(2), Direction.DirY, Point.Create(MM(10), MM(0), MM(20))) #首先创建一个圆面
selection = Selection.Create(circle.CreatedBody.Faces[0]) #选中圆面
RevolveFaces.Execute(selection, Line.Create(Point.Origin, Direction.DirZ), DEG(360), RevolveFaceOptions()) #旋转函数有两个函数,这里应用的函数,第一个参数为旋转的面,第二个为旋转轴,这里通过原点和z轴确定,注意Line是矢量,第三个参数为旋转的角度,第四个参数为更进一步设置旋转的参数选项
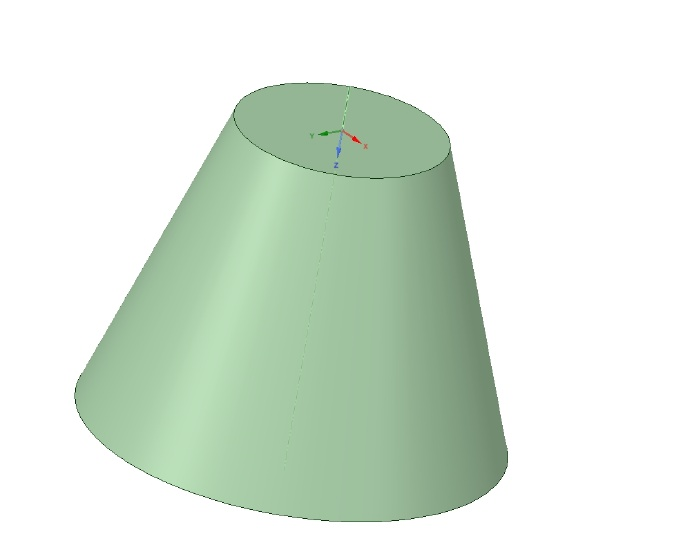
放样
loft_face=List[DesignFace]() #创建一个DesignFace的列表
CircularSurface.Create(MM(10), Direction.Create(0, 0, 1)) #创建第一个圆面
loft_face.Add(GetRootPart().Bodies[0].Faces[0]) #将第一个圆面添加到列表当中
CircularSurface.Create(MM(20), Direction.Create(0, 0, 1),Point.Create(MM(0),MM(0),MM(30))) #创建第二个圆面
loft_face.Add(GetRootPart().Bodies[1].Faces[0]) #将第二个圆面添加到列表当中
selection = Selection.Create(loft_face) #通过列表,选中圆面
result = Loft.Create(selection) #放样
更加详细的设置可参考下面的设置:
loft_face=List[DesignFace]() #创建一个DesignFace的列表
CircularSurface.Create(MM(10), Direction.Create(0, 0, 1)) #创建第一个圆面
loft_face.Add(GetRootPart().Bodies[0].Faces[0]) #将第一个圆面添加到列表当中
CircularSurface.Create(MM(20), Direction.Create(0, 0, 1),Point.Create(MM(0),MM(0),MM(30))) #创建第二个圆面
loft_face.Add(GetRootPart().Bodies[1].Faces[0]) #将第二个圆面添加到列表当中
selection = Selection.Create(loft_face) #通过列表,选中圆面
options = LoftOptions() #创建一个放样选项类的对象
options.GeometryCommandOptions = GeometryCommandOptions() #设置放样的几何
options.GeometryCommandOptions.KeepMirror = True options.GeometryCommandOptions.KeepLayoutSurfaces = True
options.GeometryCommandOptions.KeepCompositeFaceRelationships = True
options.GeometryCommandOptions.Select = True
options.PeriodicBlend = False #是否是一个闭合的放样
options.RotationalBlend = False #是否是一个旋转的放样
options.SheetMetalBlend = False #是否是金属面板混合
options.ClockIt = False
options.IsRuled = False
options.IsLocalGuide = False #是否使用本地导轨
options.ExtrudeType = ExtrudeType.Add #放样的方式为增加材料
result = Loft.Create(selection, None, options) #放样,本函数有三个参数,第一个参数选择放样的对象;第二个参数为可选参数,导轨的选择,默认为null;第三个参数也是可选参数,对放样的相关设置,默认为null
抽壳
#创建一个正方体
result = BlockBody.Create(Point.Create(MM(-10), MM(-10), MM(-10)), Point.Create(MM(10), MM(10), MM(10)))
selection = Selection.Create(result.CreatedBody) #选中生成的正方体
Shell.ShellBodies(selection, MM(-1)) #抽壳,该函数第一个参数为抽壳的对象,第二个参数为抽壳偏移的厚度

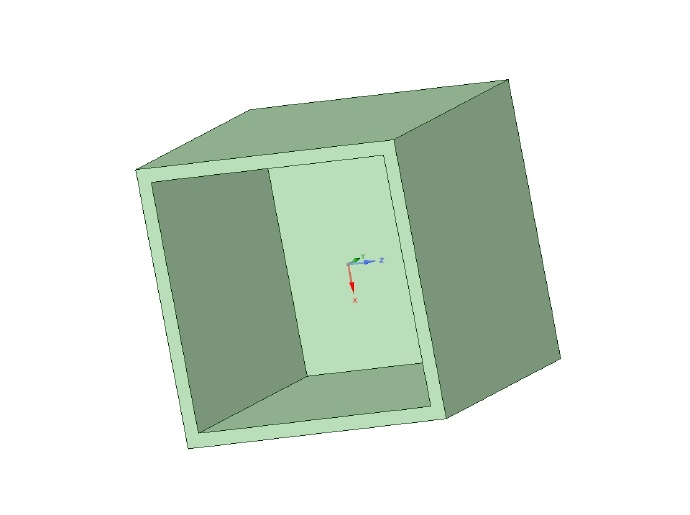
抽壳去掉某一面
result = BlockBody.Create(Point.Create(MM(-10), MM(-10), MM(-10)), Point.Create(MM(10), MM(10), MM(10))) #创建一个正方体
remove_face=result.CreatedBody.Faces[0] #选中删除的面
selection = Selection.Create(remove_face) #创建一个删除面的选择对象
result = Shell.RemoveFaces(selection, MM(-1)) #抽壳删除面,第一个参数为删除的面,第二个参数为抽壳偏移的厚度
常用spaceclaim脚本(三)的更多相关文章
- 常用spaceclaim脚本(二)
#创建一个草图 #第一个参数传入一个Frame对象 #通过一个点和两个向量创建Frame #Frame的类成员函数Create被重载 #重载函数1:Frame.Create(Point, Direct ...
- 常用spaceclaim脚本
#创建一个长方体,通过两点来确定一个立方体 #MM表示的是以毫米作为单位 #返回的是一个BlockBody的对象 #本函数还有第三个参数可选,分别代表增加材料,切除材料等等 #默认值为增加材料 注:第 ...
- jQuery中的常用内容总结(三)
jQuery中的常用内容总结(三) 转载请注明地址:http://www.cnblogs.com/funnyzpc/p/7571998.html 内容提要 选择器(第一节) 选择器的扩展方法(第一节) ...
- linux 常用命令(三)ssh
linux 常用命令(三)SSH 一.SSH 安装及免密登陆 (1) SSH 安装并配置 CentOS 默认已安装了 SSH client.SSH server,打开终端执行如下命令进行检验 rpm ...
- 8个DBA最常用的监控Oracle数据库的常用shell脚本
本文介绍了8个常用的监控数据shell脚本.首先回顾了一些DBA常用的Unix命令,以及解释了如何通过Unix Cron来定时执行DBA脚本.网上也有好多类似的文章,但基本上都不能正常运行,花点时间重 ...
- 常用shell脚本命令
常用shell脚本命令 1.显示包含文字aaa的下一行的内容: sed -n '/aaa/{n;p;}' filename 2.删除当前行与下一行的内容: sed -i '/aaa/{N;d;}' f ...
- Linux常用Shell脚本珍藏【转载】
我们在运维中,尤其是linux运维,都知道脚本的重要性,脚本会让我们的 运维事半功倍,所以学会写脚本是我们每个linux运维必须学会的一门功课,这里收藏linux运维常用的脚本.如何学好脚本,最关键的 ...
- Python学习 :常用模块(三)----- 日志记录
常用模块(三) 七.logging模块 日志中包含的信息应有正常的程序访问日志,还可能有错误.警告等信息输出 python的 logging 模块提供了标准的日志接口,你可以通过它存储各种格式的日志, ...
- windows常用bat脚本
windows常用bat脚本 https://blog.csdn.net/longyan_csc/article/details/78737722 Windows_批处理+任务计划实现文件夹定时备份 ...
随机推荐
- 页面 ajax
function ajax({ url, success, data = { }, type= "GET", async = true}){ let xhr; if(XMLHttp ...
- influxdb系列:一、influxdb概念
根据influxdb的官方文档介绍,它是一个时间序列数据库,但是仅仅从名字却不知道它跟已有的关系型数据库有什么区别? 当学习一个新的东西的时候,我的习惯往往是想知道它和我已掌握的知识的对比关系,这样子 ...
- Winserver-FailoverCluster验证异常
Q:新建的2台物理机,组成一个集群,第一遍没有问题,建成后,我想重建所以就destroy掉了,但是在重建时报 错误,尝试了各种清除集群指令和重新安装failover等方法都无效. 以后不在使用Dest ...
- Android笔记(六十一)动态添加组件
想要一个功能,点击按钮,可以在已有的布局上,新添加一组组件. 动态的创建组件,本质上还是创建组件,只不过是在程序中根据逻辑来创建.大致步骤是找到要创建控件的位置,然后将要创建的组件添加进去. 看代码: ...
- ISM无需授权使用的无线频率
- win10 64下anaconda4.2.0(python3.5)
python环境:win10 64下anaconda4.2.0(python3.5).安装tensorflow过程是在Anaconda Prompt中进行安装 1:打开Anaconda Prompt ...
- 让 Python 代码更易维护的七种武器——代码风格(pylint、Flake8、Isort、Autopep8、Yapf、Black)测试覆盖率(Coverage)CI(JK)
让 Python 代码更易维护的七种武器 2018/09/29 · 基础知识 · 武器 原文出处: Jeff Triplett 译文出处:linux中国-Hank Chow 检查你的代码的质 ...
- linux网络编程之socket编程(一)
今天开始,继续来学习linux编程,这次主要是研究下linux下的网络编程,而网络编程中最基本的需从socket编程开始,下面正式开始学习: 什么是socket: 在学习套接口之前,先要回顾一下Tcp ...
- Null ModelAndView returned to DispatcherServlet with name 'dispatcherServlet': assuming HandlerAdapter completed request handling
Null ModelAndView returned to DispatcherServlet with name 'dispatcherServlet': assuming HandlerAdapt ...
- dt开发之-自定义函数获取分类名称
需要在api/extend.func.php 文件中加入的函数 获取分类名称 cat_name($catid) 传入分类id function cat_name($catid) { global $d ...