thinkphp5 列表页数据分页查询-带搜索条件
一、控制器部分
<?php namespace app\user\controller; use app\user\model\HelpCenterManual as HelpCenterManualModel;
use org\Response;
use app\index\logic\Upload;
use think\Controller;
use think\Request;
use org\Ucenter;
use think\Db; /**
* 帮助中心使用手册控制器
* Class Manual
* @package app\user\controller
* @author fgf <2018-05-11>
*/
class Manual extends Controller
{
/**
* 列表数据
* @return array
*/
public function index(Request $request)
{
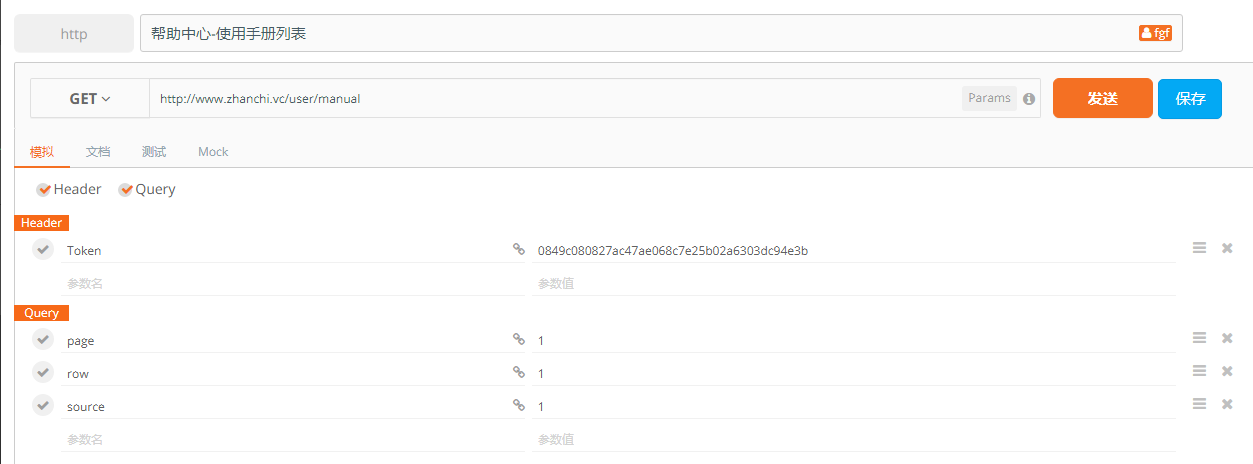
$page = $request->get('page', 1);//页数
$row = $request->get('row', 2);//每页数据
$source = $request->get('source', '');//版本 0-用户端 1-企业端
//查询模型取数据
$manual = new HelpCenterManualModel();
$manual->getList($page, $row, $source);
//提取模型查询的数据
$total = $manual->total;
$pages = $manual->pages;
$list = $manual->list;
$data = [
'total' => $total,//总的数据量
'page' => $page,//当前页
'pages' => $pages,//总页数
'trainlist' => $list,//每条数据详情
];
return Response::response(0, $data);
} public function create()
{
//
} public function save(Request $request)
{
//
} /**
* 详情页数据
* @param $id
* @table qj_help_center_manual 使用手册表
* @return array
*/
public function read($id)
{
$info = Db::table('qj_help_center_manual')->where('id',$id)->find();
if (empty($info)) return Response::response(1,[],'数据为空');
//图片路径转oss路径
if (!empty($info['img'])) {
$info['oss_img'] = get_image_url($info['img']);
}else{
$info['oss_img'] = '';
} return Response::response(0,$info);
} public function edit($id)
{ } public function update($id)
{
//
} public function delete($id)
{
//
}
}
二、模型代码
<?php

namespace app\user\model;

use think\Model;

use think\Request;

use think\Db;

/**

 * 帮助中心常见问题模型

 * Class HelpCenterManual

 * @package app\user\model

 * @author fgf <2018-05-11>

 */

class HelpCenterManual extends Model

{

    /**

     * @param $page 页数

     * @param $row 每页数据

     * @param $source 版本 0-用户端 1-企业端

     */

    public function getList($page, $row, $source)

    {

        $offset = ($page - 1) * $row;

        $where = [];

        //0用户端,1企业端

        $where['source'] = $source?$source:0;

        //统计总数

        $total = Db::table('qj_help_center_manual')->where($where)->count();

        //查询列表信息

        $list = Db::table('qj_help_center_manual')->where($where)->order('id asc')->limit($offset, $row)->select();

        //处理状态和图片路径处理

        foreach ($list as $key => &$val) {

            //图片path路径转oss路径

            if ($val['img'] !='') {

                $list[$key]['img']=get_image_url($val['img']);

            }

        }

        $this->pages = ceil($total / $row);

        $this->list = $list;

        $this->total = $total;

    }

}
三、路由定义-此处定义的是资源路由(根据实际情况自己定义)
return [

    '__pattern__' => [

        'name' => '\w+',

    ],

    '/error' => 'index/error/index',//错误页面

    '__rest__' => [

        'user/manual'=>'user/manual',//帮助中心-使用手册

    ]

];
四、请求数据参考如下
{
"code": 0,
"message": "success",
-"data": {
"total": 2,
"page": "1",
"pages": 2,
-"trainlist": [
-{
"id": 4,
"title": "React的平凡之路",
"guide_read": "React的平凡之路,或许我们才刚刚上路",
"content": "<h1 style=\"font-size: 2.5rem;margin: 0.67em 0px;line-height: 1.5;color: rgb(51, 51, 51);font-family: -apple-system, 'PingFang SC', 'Hiragino Sans GB', 'Microsoft YaHei', 'Helvetica Neue', Arial, sans-serif;white-space: normal;background-color: rgb(255, 255, 255)\">React的平凡之路,或许我们才刚刚上路</h1><h2 style=\"line-height: 1.5;margin-top: 35px;margin-bottom: 10px;padding-bottom: 12px;font-size: 24px;border-bottom: 1px solid rgb(236, 236, 236)\">大家一起来</h2><p style=\"line-height: inherit;margin-top: 22px;margin-bottom: 22px\">React是一个用于构建用户界面的JS库,核心专注于视图,目的实现组件化开发</p><p style=\"line-height: inherit;margin-top: 22px;margin-bottom: 22px\">所谓组件化开发,其实就像堆积木一样,每个组件都包含了自己的逻辑和样式,然后再组合到一起完成一个复杂的页面</p><p style=\"line-height: inherit;margin-top: 22px;margin-bottom: 22px\">组件化的主要特点就是:<span style=\"font-weight: 700\">可组合、可复用、可维护</span></p><p style=\"line-height: inherit;margin-top: 22px;margin-bottom: 22px\">那么废话不多说,让我们直接进入今天的主题,运用官方推荐的脚手架来搭建一个react项目开始学习吧</p><h2 style=\"line-height: 1.5;margin-top: 35px;margin-bottom: 10px;padding-bottom: 12px;font-size: 24px;border-bottom: 1px solid rgb(236, 236, 236)\">create-react-app启动react项目</h2><p style=\"line-height: inherit;margin-top: 22px;margin-bottom: 22px\">第一步:<span style=\"font-weight: 700\">全局安装create-react-app</span>脚手架</p><pre style=\"font-family: Menlo, Monaco, Consolas, 'Courier New', monospace;font-size: 1em;line-height: 1.75;overflow: auto;position: relative\">npm i create-react-app -g</pre><p style=\"line-height: inherit;margin-top: 22px;margin-bottom: 22px\">第二步:创建react项目</p><pre style=\"font-family: Menlo, Monaco, Consolas, 'Courier New', monospace;font-size: 1em;line-height: 1.75;overflow: auto;position: relative\">create-react-app 项目名 // 如:create-react-app react123</pre><p style=\"line-height: inherit;margin-top: 22px;margin-bottom: 22px\"><br/></p><p><img class=\"lazyload inited loaded\" src=\"https://user-gold-cdn.xitu.io/2018/5/9/163407dd81313cce?imageView2/0/w/1280/h/960/format/webp/ignore-error/1\"/>通过以上操作就会自动创建一个名为react123的react项目了,在创建的过程中,脚手架会自动为你安好react的核心包,<span style=\"font-weight: 700\">react和react-dom</span>,在此过程完成后即可进入第三步了</p><p style=\"line-height: inherit;margin-top: 22px;margin-bottom: 22px\"><br/></p><p style=\"line-height: inherit;margin-top: 22px;margin-bottom: 22px\">第三步:进入项目并启动服务</p><pre style=\"font-family: Menlo, Monaco, Consolas, 'Courier New', monospace;font-size: 1em;line-height: 1.75;overflow: auto;position: relative\">cd react123 && npm start</pre><p style=\"line-height: inherit;margin-top: 22px;margin-bottom: 22px\"><br/></p><p><img class=\"lazyload inited loaded\" src=\"https://user-gold-cdn.xitu.io/2018/5/9/16340810d2abf3e1?imageView2/0/w/1280/h/960/format/webp/ignore-error/1\"/>通过上面的三步曲,就会自动弹出浏览器访问一个<span style=\"font-weight: 700\">localhost:3000</span>(默认为3000端口)的react页面了</p><p style=\"line-height: inherit;margin-top: 22px;margin-bottom: 22px\"><br/></p><p style=\"line-height: inherit;margin-top: 22px;margin-bottom: 22px\">现在,让我们通过进入创建好的react项目中,先去看一下搭建好的结构是什么样的?</p><p style=\"line-height: inherit;margin-top: 22px;margin-bottom: 22px\">下面就为大家展示一番:</p><p><img class=\"lazyload inited loaded\" src=\"https://user-gold-cdn.xitu.io/2018/5/9/163408396ca911f1?imageView2/0/w/1280/h/960/format/webp/ignore-error/1\"/>根据上图画圈所示,public目录下的index.html表示的是项目的主静态文件(包含依赖的节点),打开后发现一大堆内容,其实都可以删掉,只需要留一个root即可</p><p style=\"line-height: inherit;margin-top: 22px;margin-bottom: 22px\"><br/></p><pre style=\"font-family: Menlo, Monaco, Consolas, 'Courier New', monospace;font-size: 1em;line-height: 1.75;overflow: auto;position: relative\"><!DOCTYPE html> <html lang="en"> <head> <meta charset="utf-8"> <meta name="viewport" content="width=device-width, initial-scale=1, shrink-to-fit=no"> <meta name="theme-color" content="#000000"> <link rel="manifest" href="%PUBLIC_URL%/manifest.json"> <link rel="shortcut icon" href="%PUBLIC_URL%/favicon.ico"> <title>React App</title> </head> <body> <div id="root"></div> </body> </html></pre><p style=\"line-height: inherit;margin-top: 22px;margin-bottom: 22px\">说完public后,再说一下src目录,这里面的文件也都可以删掉(除了<span style=\"font-weight: 700\">index.js</span>主入口文件),这里就和webpack4里默认的入口文件比较类似了</p><p><br/></p>",
"img": null,
"addtime": "2018-05-14 17:57:12",
"user_id": null,
"username": "admin",
"source": 1
}
]
}
}
thinkphp5 列表页数据分页查询-带搜索条件的更多相关文章
- thinkphp5 列表页数据分页查询3-带搜索条件
先加载模板然后在前端HTML页面请求数据 /** * 加载列表页模板 * @author 冯广福 */ public function index() { LogWriteService::write ...
- thinkphp5 列表页数据分页查询2-带搜索条件
一.控制器部分 <?php namespace app\user\controller; use app\index\controller\Common; use app\user\model\ ...
- python实现列表页数据的批量抓取练手练手的
python实现列表页数据的批量抓取,练手的,下回带分页的 #!/usr/bin/env python # coding=utf-8 import requests from bs4 import B ...
- Oracle、MySql、SQLServer 数据分页查询
最近简单的对oracle,mysql,sqlserver2005的数据分页查询作了研究,把各自的查询的语句贴出来供大家学习..... (一). mysql的分页查询 mysql的分页查询是最简单的,借 ...
- 织梦仿站列表页pagelist分页显示竖排,如何修改成横排?
织梦仿站列表页pagelist分页显示竖排,如何修改成横排? 织梦列表页的分页标签是采用pagelist来进行调用的,但是很多人在调用之后会出现一个列表竖着排列的问题(横排美观度好一些),还是非常不美 ...
- 转Oracle、MySql、SQLServer 数据分页查询
最近简单的对oracle,mysql,sqlserver2005的数据分页查询作了研究,把各自的查询的语句贴出来供大家学习..... (一). mysql的分页查询 mysql的分页查询是最简单的,借 ...
- Oracle、MySql、SQLServer数据分页查询
看过此博文后Oracle.MySql.SQLServer 数据分页查询,在根据公司的RegionRes表格做出了 SQLserver的分页查询语句: 别名.字段 FROM( SELECT row_nu ...
- [.NET] SQL数据分页查询
[.NET] SQL数据分页查询 程序下载 范例下载:点此下载 原始码下载:点此下载 NuGet封装:点此下载 数据查询 开发系统时,使用C#执行SQL查询指令,就可以从SQL数据库里查询所需数据. ...
- Django自定义分页并保存搜索条件
Django自定义分页并保存搜索条件 1.自定义分页组件pagination.py import copy class Pagination: def __init__(self, current_p ...
随机推荐
- Unity项目中的资源管理
这是我在2017金山技术开放日分享的部分内容.从贴图资源格式配置的介绍开始,引申出资源配置工具,最后再谈谈一整套项目资源管理方案.在GitHub上可以获取到资源配置工具的代码,是基于下面理念的一份简单 ...
- C# 连接EXCEL 和 ACCESS
97-2003版本 EXCEL Provider=Microsoft.Jet.OLEDB.4.0;Data Source=文件位置;Extended Properties=Excel 8.0;HDR= ...
- ChinaCock界面控件介绍-CCGridPictureEditor
CCGridPictureEditor如其名,网格图片编辑控件,实现利用一个网格来显示多张图片的缩略图,这是一个非常实用的控件,实现类似微信朋友圈中发布多张图片的功能. 在没有这个控件之前,我都是用D ...
- 【转】Delphi 10.3关于相机该注意的细节
感谢移动信息化专家提供的方法,他的ChinaCock组件是相当的专业,感兴趣可以加入qq群223717588.
- springboot (spring mvc)集成swagger
最近用springboot构建rest接口,考虑到最方便的验证接口,想到了引入swagger. 基本的步骤大致如下: 1.pom中引入swagger依赖: <dependency> < ...
- hbuilder注意事项
App开发注意事项App开发注意事项 单个页面由多个webView组成注意事项. 有两种不同的加载方式. 1.在加载主webView时,初始化Init()时就加载子页面, 此时为异步加载! 2.在主w ...
- CentOS安装JDK9
1.使用XShell将下载好的jdk-9.0.1_linux-x64_bin.tar.gz包上传到/opt/下 2.解压文件 $ tar -zxvf jdk-9.0.1_linux-x64_bin.t ...
- rem问题
rem为单位时,根元素html的font-size 必须>=12px,否则 默认为font-size:12px. 为啥 html 设置成 62.5%,或者 10px 时,这种换算无效了呢?经过研 ...
- Spring Boot 揭秘与实战(一) 快速上手
文章目录 1. 简介 1.1. 什么是Spring Boot 1.2. 为什么选择Spring Boot 2. 相关知识 2.1. Spring Boot的spring-boot-starter 2. ...
- 【PPT】 Least squares temporal difference learning
最小二次方时序差分学习 原文地址: https://www.google.com/url?sa=t&rct=j&q=&esrc=s&source=web&cd= ...