微信小程序之组件的集合(五)
这个是学习复杂的组件的封装的,在课程中,主要实现的是书单上方的搜索功能组件的开发,这个应该是较之前的组件是有一定难度的,但是现在学到现在,感觉前端的内容和后端的内容比较起来,还是比较容易的,而且好多内容,其实在后端的开发中是很成熟的,所以学起来并不是很难以理解,这也是我们的一个优势吧,毕竟选择后端的同学应该是不错的啊,哈哈哈!这种组件其实是有一个特别的名字的,那就是高阶组件,来,把这个东西尽快学习掌握!
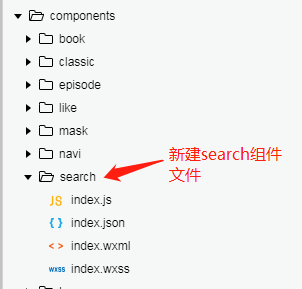
一、新建search组件
首先还是新建search组件的各个文件,这里微信开发者工具的功能很好用,直接就新建一个search目录,然后在目录中新建一个名字为index的component组件,这样就建好了四个与组件相关的文件
二、search组件开发
1、基础的结构搭建
(1)样式文件的代码index.wxml文件
 <view class="container">

   <view class="header">

     <view class="search-container">

       <image class="icon" src="data:images/search.png"></image>

       <input placeholder-class="in-bar" placeholder="书籍名" class="bar" auto-focus="true"></input>

       <image class="cancel-img" src="data:images/cancel.png"></image>

     </view>

     <view class="cancel" bindtap="onCancel">取消</view>

   </view>

   <view>

     <view class="history">

       <view class="title">

         <view class="chunk"></view>

         <text>历史搜索</text>

       </view>

     </view>

     <view class="history hot-search">

       <view class="title">

         <view class="chunk"></view>

         <text>热门搜索</text>

       </view>

     </view>

   </view>

 </view>
(2)样式文件 index.wxss代码
 .container {

   display: flex;

   flex-direction: column;

   align-items: center;

   width: 100%;

   /* padding-left:15px; *//* padding-right:15px; */

 }

 .history {

   width: 690rpx;

   margin: 40rpx 0 20rpx 0;

   display: flex;

   font-size: 14px;

   margin-top:160rpx;

   flex-direction: column;

 }

 .hot-search{

   margin-top:70rpx;

 }

 .title {

   line-height: 15px;

   display: flex;

   flex-direction: row;

   align-items: center;

   /* margin-left:100px; */

 }

 .search-container {

   display: inline-flex;

   flex-direction: row;

   align-items: center;

   background-color: #f5f5f5;

   border-radius: 50px;

   margin-left: 20rpx;

   /* margin-left: */

 }

 .books-container book-cmp {

   margin-bottom: 25rpx;

 }

 .cancel-img {

   width: 14px;

   height: 14px;

   margin-right: 10px;

 }

 .books-container {

   width: 570rpx;

   margin-top:100rpx;

   display: flex;

   flex-direction: row;

   flex-wrap: wrap;

   padding: 0 90rpx 0 90rpx;

   justify-content: space-between;

 }

 .loading {

   margin: 50rpx 0 50rpx 0;

 }

 .loading-center {

   position: absolute;

   top: 50%;

   left: 50%;

 }

 .empty-tip {

   display: inline-block;

   width: 100%;

   text-align: center;

   position: absolute;

   top: 50%;

   /* left: 275rpx; */

 }

 .icon {

   width: 14px;

   height: 14px;

   margin-left: 12px;

   margin-right: 8px;

 }

 .in-bar {

   color: #999;

 }

 .cancel {

   line-height: 34px;

   width: 60px;

   /* margin-left:10px; */

   text-align: center;

   display: inline-block;

   border: none;

 }

 .chunk {

   height: 15px;

   width: 5px;

   background-color: #000;

   display: inline-block;

   margin-right: 10px;

 }

 .tags {

   /* padding-left:15px; */

   display: flex;

   flex-direction: row;

   flex-wrap: wrap;

   /* justify-content: flex-start;  */

   margin-top: 24rpx;

   padding-left: 15px;

   width: 630rpx;

 }

 .tags tag-cmp {

   margin-right: 10px;

   margin-bottom: 10px;

   /* padding-bottom: 10px; *//* margin-right:6px; */

 }

 .header {

   background-color: #ffffff;

   position:fixed;

   height: 100rpx;

   border-top: 1px solid #f5f5f5;

   border-bottom: 1px solid #f5f5f5;

   display: flex;

   flex-direction: row;

   width: 750rpx;

   align-items: center;

   z-index:;

   /* padding-left:15px;  *//* padding-right:5px; */

 }

 .bar {

   border-top-right-radius: 15px;

   border-bottom-right-radius: 15px;

   display: inline-block;

   height: 34px;

   /* width:100%; */

   width: 500rpx;

   font-size: 14px;

 }

 .test {

   background-color: #000;

 }
(3)基础的业务逻辑处理 index.js
这个主要是将取消操作交给page中页面进行处理,将组件中的取消事件传递给page页面中
   /**

    * 组件的方法列表

    */

   methods: {

     // 搜索取消事件

     onCancel(event){

         this.triggerEvent('cancel',{},{});

     }

   }
page中book页面进行组件的展示以及业务逻辑处理的代码:
book.wxml文件中添加事件以及显示代码
 <view class="container" wx:if="{{!searching}}">

   <view class="header">

     <view class="box" bindtap="onSearching">

       <image src="/images/icon/search.png"></image>

       <text>搜索书籍</text>

     </view>

   </view>

   <view class="sub-container">

     <image src="/images/book/quality.png" class="head-img"></image>

     <view class="books-container">

       <block wx:key="id" wx:for="{{books}}">

         <v-book book="{{item}}" />

       </block>

     </view>

   </view>

 </view>

 <!-- search组件的使用 -->

 <v-search bind:cancel="onCancel" wx:if="{{searching}}"></v-search>
book.js中添加部分处理方法
 // 添加searching属性

 data: {

     // 服务器请求的数据 book的集合

     books:[],

     searching:false

   },

   // 搜索框的点击事件

   onSearching(event){

     this.setData({

       searching:true

     })

   },

   // 搜索框取消事件

   onCancel(event){

     this.setData({

       searching:false

     })

   },
2、组件中的业务代码
现在不知道从哪里开始写起了,昨天自己动手写了一下,简单的实现了搜索的功能,把前两天学习的内容简单的记录一下。
(1)搜索记录的标签显示
这个是分为两种搜索标签的,一种是历史搜索,一种是热门搜索,这两种实现方式是不同的,历史搜索是从缓存中加载保存的用户搜索记录,这个是有总数限制的,很值得学习一下这种方案的处理思路,热门搜索就是从服务器加载热门搜索记录,这个就有灰色空间了,如果数据量非常大的时候,这个时候会用到排序算法了,之前学习过,具体怎么实现,现在也是没有记住,总体的思路还是在大脑中有点的,看看这两种的实现:
   <view wx:if="{{!searching}}">

     <view class="history">

       <view class="title">

         <view class="chunk"></view>

         <text>历史搜索</text>

       </view>

       <view class="tags">

         <block wx:for="{{historyWords}}" wx:key="">

           <v-tag text="{{item}}" bind:tapping="onConfirm" />

         </block>

       </view>

     </view>

     <view class="history hot-search">

       <view class="title">

         <view class="chunk"></view>

         <text>热门搜索</text>

       </view>

       <view class="tags">

         <block wx:for="{{hotWords}}" wx:key="">

           <v-tag text="{{item}}" bind:tapping="onConfirm" />

         </block>

       </view>

     </view>

   </view>
上面是页面展示的实现,下面看一下具体的逻辑实现:
这个是新建的keyword.js文件,在models文件夹下面,主要是有几个相关的方法,重点是关注一下addToHistroy方法的
 import {HTTP} from '../util/http-p.js'

 class KeywordModel extends HTTP{

   key = "q"; // 缓存中的key

   maxLength = 10; // 历史搜索展示的条数

   // 获取历史搜索方法

   getHistory(){

     const words =  wx.getStorageSync(this.key);

     if(!words){

       return [];

     }

     return words;

   }

   // 获取热门的方法

   getHot(){

     return this.request({

       url:'/book/hot_keyword'

     })

   }

   // 将搜索关键字写入缓存中

   addToHistory(keyword){

     // 注意缓存中是一组数据

     let words = this.getHistory(this.key);

     const has = words.includes(keyword);

     if(!has){

       const length = words.length;

       // 删除末尾的Word

       if(length >= this.maxLength){

         words.pop();

       }

       words.unshift(keyword);

       wx.setStorageSync(this.key, words);

     }

   }

 }

 export { KeywordModel }
下面是search组件中的index.js文件中的具体逻辑实现,主要就是在search组件加载的时候,初始化这个历史搜索与热门搜索的标签,这个是在attached函数中,这个attached方法是小程序中的默认的组件加载时执行的方法
   /**

    * 组件的初始数据

    */

   data: {

     historyWords:[],

     hotWords:[],

     dataArray:[],

     searching:false,

     q:""

   },

 // 组件初始化时候调用的方法

   attached(){

     this.setData({

       historyWords: keywordModel.getHistory()

     })

     keywordModel.getHot().then(res => {

       this.setData({

         hotWords:res.hot

       })

     })

   },
(2)书籍信息的显示
这个现在只是实现了书籍信息的简单展示,没有实现分页的操作,后续的会实现这个功能
   <!-- 书籍展示 -->

   <view class="books-container" wx:if="{{searching}}">

     <block wx:for="{{dataArray}}" wx:key="{{item.id}}">

       <v-book book="{{item}}" class="book"></v-book>

     </block>

   </view>
这个页面展示的代码就比较简单了,我们只是复用了一下book组件,所以这里实现起来就比较简单了,下面是逻辑代码,主要就是调用接口加载数据,还有就是对数据的一些处理,以及一些具体细节的处理,这个细节的处理很容易被忽视的,但是这些东西才是体现一个项目的好坏,一个开发者好坏的真正的东西
     // 用户搜索的方法

     onConfirm(event){

       this.setData({

         searching:true

       })

       const word = event.detail.value || event.detail.text;

       bookModel.search(0, word).then(res => {

         console.log(res);

         this.setData({

           dataArray:res.books,

           q: word

         })

         keywordModel.addToHistory(word);

       })

     },
(3)搜索结果的分页加载
这个业务场景是当用户搜索结果展示出来的时候,之前只是展示若干条数据,无法全部显示搜索结果,这种做法当然无可厚非,但是我们要进一步完善这个功能,那就有必要来实现分页功能了,当用户下滑到底部的时候,如果还有数据,那么我们需要加载出来,那么这个如何实现,哈哈
具体思路:
(1)在page中小程序是有事件来实现这个下拉触发动作的,那就是onReachBottom事件,如何将这个动作的通知传递到组件中,让组件接收到这个通知,实现具体的逻辑
(2)可以通过组件的properties属性来传递这个通知,属性中监听函数observer来实现处理逻辑,这里observer监听 函数只有当属性值改变的时候才会触发,所以,我们的解决办法是每次传递一个随机数给属性,让每一次通知都能被组件接收
(3)剩下的就是具体的逻辑处理了,这里面有好多细节需要处理的,具体看代码
首先,看一下page中 book.wxml以及book.js中的代码
 // wxml中代码 简写省略其他

 <!-- search组件的使用 -->

 <v-search more="{{more}}" bind:cancel="onCancel" wx:if="{{searching}}"></v-search>

 // js中代码

   data: {

     // 服务器请求的数据 book的集合

     books:[],

     searching:false,

     more:'' // 是否加载更多数据

   },

   onReachBottom: function() {

     // console.log("aaaa");

     // 加载更多数据

     this.setData({

       more:random(16)

     })

   },
这里有一个产生随机数的方法,random(16) 产生16位的随机数,很简单,不贴代码了
看一下search组件中的相关代码,主要是增加了一个属性,增加了loading ,这个充当的是锁的角色,这个方法还有待优化,
说一下这里面的细节处理:
loading这个锁的引入,防止用户下拉触发事件过于频繁,向服务器发送过多请求,导致的信息加载出现重叠的问题,影响服务器的性能,引入loading锁之后,只有一个请求发送完毕之后,接下来的请求才能继续发送,这个锁的概念在多线程中应用的很广泛,作为后端开发,这个问题很容易理解!
   properties: {

     more:{

       type:String,

       observer:'_load_more'

     }

   },

   data: {

     loading:false

   },

     // 加载更多数据

     _load_more(){

       console.log(123123);

       if(!this.data.q){

         return;

       }

       // loading在这里扮演的是锁的角色

       if(this.data.loading){

         return;

       }

       const length = this.data.dataArray.length;

       this.data.loading = true

       bookModel.search(length,this.data.q).then(res => {

         const tempArray = this.data.dataArray.concat(res.books);

         this.setData({

           dataArray:tempArray

         })

         this.data.loading = false

       })

     },
(4)搜索代码的优化
这个优化主要是设计到两方面,一方面是代码的抽离,一方面是代码的可读性
先看看代码的抽离如何来优化,主要是将分页的相关的代码抽离成behavior行为,然后直接在组件中引用behavior中的方法,新建一个behaviors文件夹,创建一个pagination.js文件
看一下pagination.js中的代码:
 const paginationBev = Behavior({

   data: {

     dataArray: [], // 分页数据

     total: null

   },

   methods: {

     setMoreData(dataArray) {

       const tempArray = this.data.dataArray.concat(dataArray);

       this.setData({

         dataArray: tempArray

       })

     },

     // 获取当前开始的index值

     getCurrentStart() {

       return this.data.dataArray.length;

     },

     setTotal(total) {

       this.data.total = total;

     },

     // 是否还有数据需要加载

     hasMore() {

       if (this.data.dataArray.length >= this.data.total) {

         return false;

       } else {

         return true;

       }

     },

     initialize(){

       this.data.dataArray = [];

       this.data.total = null;

     }

   }

 })

 export {

   paginationBev

 }
看一下在组件中如何使用:
 import {

   KeywordModel

 } from '../../models/keyword.js'

 import {

   BookModel

 } from '../../models/book.js'

 import {

   paginationBev

 } from '../behaviors/pagination.js'

 Component({

   // 引入 组件中behaviors属性

   behaviors: [paginationBev],

   /**

    * 组件的属性列表

    */

   properties: {

     more: {

       type: String,

       observer: 'loadMore'

     }

   },

   /**

    * 组件的方法列表

    */

   methods: {

     // 加载更多数据

     loadMore() {

       if (!this.data.q) {

         return;

       }

       // loading在这里扮演的是锁的角色

       if (this._isLocked()) {

         return;

       }

       if (this.hasMore()){

         this._locked();

         bookModel.search(this.getCurrentStart(), this.data.q).then(res => {

           this.setMoreData(res.books);

           this._unLocked();

         },()=>{

           // 避免死锁 在请求失败的时候也需要释放锁

           this._unLocked();

         })

       }

     },

     // 搜索取消事件

     onCancel(event) {

       this.triggerEvent('cancel', {}, {});

     },

     // 用户搜索的方法

     onConfirm(event) {

       // 控制搜索结果的显示

       this._showResult();

       // 初始化behavior中的数据

       this.initialize();

       const word = event.detail.value || event.detail.text;

       bookModel.search(0, word).then(res => {

         this.setMoreData(res.books);

         this.setTotal(res.total);

         this.setData({

           q: word

         })

         keywordModel.addToHistory(word);

       })

     },

     // X的图标取消事件

     onDelete(event) {

       this._closeResult();

     },

     // 显示搜索结果

     _showResult(){

       this.setData({

         searching: true

       })

     },

     // 隐藏搜索结果

     _closeResult(){

       this.setData({

         searching: false

       })

     },

     // 判断是否有锁

     _isLocked(){

       this.data.loading?true:false;

     },

     // 加锁

     _locked(){

       this.data.loading = true;

     },

     // 释放锁

     _unLocked(){

       this.data.loading = false;

     }

   },

 })
注意:带有下划线的方法是理论上的私有方法,姑且这么说吧,其实本质上和其他方法是一致的,这些方法的优化是增加代码的可读性,使得代码更加容易让人理解,这里其实由很多细节需要注意的,包括锁,为了避免死锁,需要在请求失败的时候同时将锁释放,以及confirm方法中主要将之前的数据清空,否则会造成dataArray中数据是重复数据,还有就是在加锁的时候需要在判断是否还有更多数据之后进行,如果在这之前进行,那么会造成数据不会加载的情况,等等,之后会完善一下加载图标,哈哈,感觉越来越完美
(5)loading组件的开发与应用
这个就直接从网上找一个loading图标的样式就行,看看loading组件的代码
 // index.wxml代码

 <view class="spinner">

   <view class="double-bounce1"></view>

   <view class="double-bounce2"></view>

 </view>

 // 样式代码 index.wxss

 .spinner {

   width: 40rpx;

   height: 40rpx;

   position: relative;

   /* margin: 100px auto; */

 }

 .double-bounce1, .double-bounce2 {

   width: 100%;

   height: 100%;

   border-radius: 50%;

   background-color: #3063b2;

   opacity: 0.6;

   position: absolute;

   top: 0;

   left: 0;

   -webkit-animation: bounce 2.0s infinite ease-in-out;

   animation: bounce 2.0s infinite ease-in-out;

 }

 .double-bounce2 {

   -webkit-animation-delay: -1.0s;

   animation-delay: -1.0s;

 }

 @-webkit-keyframes bounce {

   0%, 100% { -webkit-transform: scale(0.0) }

   50% { -webkit-transform: scale(1.0) }

 }

 @keyframes bounce {

   0%, 100% {

     transform: scale(0.0);

     -webkit-transform: scale(0.0);

   } 50% {

     transform: scale(1.0);

     -webkit-transform: scale(1.0);

   }

 }
看一下loading组件的应用:
主要是在搜索结果展示之前,以及加载更多的时候进行loading组件的显示,在其他时候是无需显示的
   <!-- loading图标显示 -->

   <v-loading class="loading-center" wx:if="{{loadingCenter}}" />

   <v-loading class="loading" wx:if="{{loading}}" />
看一下如何控制显示隐藏的
loadingCenter主要是在onConfirm方法中进行控制的,这个不多说,看一下loading的控制,就是在加锁和释放锁的时候进行控制就行了
     // 加锁

     locked() {

       // this.data.loading = true;

       this.setData({

         loading: true

       })

     },

     // 释放锁

     unLocked() {

       // this.data.loading = false;

       this.setData({

         loading: false

       })

     }
这里还有代码的优化,以及在没有搜索结果的时候进行友好的提示,以及在没有更多的数据的时候进行友好的提示,以及在取消的时候进行数据的初始化操作,很多细节的东西,这里就不想写了,很琐碎的东西,但是在我看来是很值得付出时间去完善的一部分,细节决定成败,大家同样是一个功能,最能看出一个人水平的是谁能把细节注意到,并且能够做好,在以后的工作中,这是自己需要提升的一个领域,专注细节,布局整个系统
微信小程序之组件的集合(五)的更多相关文章
- 微信小程序之组件的集合(四)
这个主要是来开发book的这个大模块的,看看如何优雅的开发出booked模块! 一.book模块的创建 这个就很简单了,创建一个大的框架是很简单的 二.组件的编写 (1)wxml组件页面的编码 首先是 ...
- 微信小程序之组件的集合(六)
这个将是最后一篇关于小程序的记录了,课程接近尾声,最后一个是关于用户的page页面,看看这个页面中有哪些值得学习的地方! 一.page中my开发 这个主要是展示用户喜欢的杂志,以及用户的信息,需要创建 ...
- 微信小程序之组件的集合(三)
看看音乐播放组件是如何实现完成的音乐的播放的!!! 一.音乐music组件的开发 1.页面以及页面样式的开发 // music组件页面开发 <view hidden="{{hidden ...
- 微信小程序之组件的集合(二)
继续微信小程序开发的学习,继续跟着老师的讲课思路来学习,继续开发项目中所用到的组件 一.导航栏navi组件的开发 1.新建组件的文件结构 这个就是先新建目录navi.然后在navi文件夹中新建comp ...
- 微信小程序之组件的集合(一)
小程序中是很强调组件中开发的,我们看到的页面是由许多组件组成的,但是这些组件是如何组合在一起的呢?来学习一下! 一.组件中数据的获取 接着上一篇文章,继续来优化代码,如何把从服务器上获取的数据显示到 ...
- 微信小程序把玩(二十五)loading组件
原文:微信小程序把玩(二十五)loading组件 loading通常使用在请求网络数据时的一种方式,通过hidden属性设置显示与否 主要属性: wxml <!----> <butt ...
- 微信小程序把玩(三十五)Video API
原文:微信小程序把玩(三十五)Video API 电脑端不能测试拍摄功能只能测试选择视频功能,好像只支持mp4格式,值得注意的是成功之后返回的临时文件路径是个列表tempFilePaths而不是tem ...
- 微信小程序_(组件)scroll-view可滚动视图
微信小程序scroll-view组件官方文档 传送门 提前准备:使用<view>组件制作五条撑满的横向区域 <!--index.wxml--> Cynical丶Gary < ...
- 微信小程序image组件binderror使用例子(对应html、js中的onerror)
官方文档 binderror HandleEvent 当错误发生时,发布到 AppService 的事件名,事件对象event.detail = {errMsg: 'something wrong' ...
随机推荐
- jQuery实现的文字逐行向上间歇滚动效果示例
<!doctype html> <html> <head> <meta charset="utf-8"> <title> ...
- js字符串去重复
var str="fdafdasfdasfdsfdseeeu"; function te(str){ var hash=[]; var arr=new Array(); var s ...
- scrpy--分布式爬虫
原来的scrapy中的Scheduler维护的是当前机器中的任务队列(存放着Request对象以及回调函数等信息) + 当前的去重队列(存放访问过的url地址) 实现分布式的关键就是需要找一台专门的主 ...
- 一个简单的基于Tornado二手房信息统计项目的开发实现
Purpose 最近因为要买房子,扫过了各种信息,貌似lianjia上的数据还是靠点谱的(最起码房源图片没有太大的出入),心血来潮想着做几个图表来显示下房屋的数据信息,顺便练练手. 需求分析 1从li ...
- spring-data-JPA repository自定义方法规则
一.自定义方法的规则 Spring Data JPA框架在进行方法名解析时,会先把方法名多余的前缀截取掉,比如find,findBy,read,readBy,get,getBy,然后对剩下的部分进行解 ...
- linux sudo命令失败 提示sudo:/usr/bin/sudo 必须属于用户 ID 0(的用户)并且设置 setuid 位
sudo:/usr/bin/sudo 必须属于用户 ID 0(的用户)并且设置 setuid 位 一.前言 这是一个神奇的错误,缘由是因为有人将/usr/bin/sudo的权限改为777或其他. 解决 ...
- Caffe系列2——Windows10制作LMDB数据详细过程(手把手教你制作LMDB)
Windows10制作LMDB详细教程 原创不易,转载请注明出处:https://www.cnblogs.com/xiaoboge/p/10678658.html 摘要: 当我们在使用Caffe做深度 ...
- 记mysql 启动不了了的解决方法
系统: centos7 本地的环境,mysql启动不了,查看 /var/log/mysqld.log 有以下内容 2018-12-24T08:05:38.090527Z 0 [Warning] TIM ...
- js把时间转化为 ‘2019-07-01’ 格式
将new Date()数据转化为‘2019-07-01’格式 //时间 function formatDate(date) { var y = date.getFullYear(); ; m = m ...
- DataTime 和 时间转化
如果知道tostring 的字符串格式那么可以根据字符串格式转化成 DateTime string timeText = DateTime.Now.ToString("yy/MM/dd HH ...