iOS:CYLTabBarController的具体使用实例:实现新浪微博的主流框架
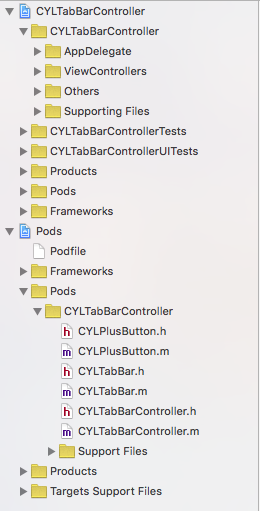
使用CocoaPods或者手动集成将CYLTabBarController这个第三方框架导入项目后,截图如下:
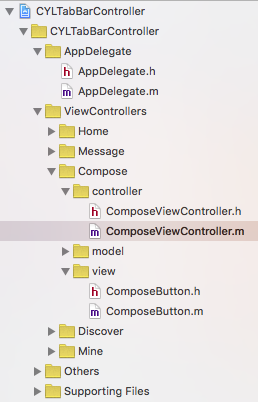
在AppDelegate.m类中实现的代码如下:

//  AppDelegate.m

//  CYLTabBarController

//

//  Created by mac on 16/1/28.

//  Copyright © 2016年 mac. All rights reserved.

//

#import "AppDelegate.h"

#import <CYLTabBarController.h>

#import <CYLTabBar.h>

#import "HomeViewController.h"

#import "MessageViewController.h"

#import "ComposeViewController.h"

#import "DiscoverViewController.h"

#import "MineViewController.h"

@interface AppDelegate ()

@end

@implementation AppDelegate

- (BOOL)application:(UIApplication *)application didFinishLaunchingWithOptions:(NSDictionary *)launchOptions {

    //创建CYLTabBarController的对象

    CYLTabBarController *CYLtabVC = [[CYLTabBarController alloc]init];

    //设置CYLTabBarController对象的标签栏属性按钮

    CYLtabVC.tabBarItemsAttributes = [self createTabBarItemsAttributes];

    //设置CYLTabBarController对象的标签栏子控制器数组

    CYLtabVC.viewControllers = [self createTabBarViewControllers];

    //设置tabbar按钮的文字颜色

    [self customizeInterface];

    //设置添加按钮的事件,模态出发布控制器

    if (CYLExternPushlishButton) {

        [CYLExternPushlishButton addTarget:self action:@selector(composeButtonClcked:) forControlEvents:UIControlEventTouchUpInside];

    }

    //设置CYLTabBarController的对象的根控制器

    [self.window setRootViewController:CYLtabVC];

    return YES;

}

#pragma mark - 模态出发布控制器

-(void)composeButtonClcked:(id)sender{

    ComposeViewController *composeVC = [[ComposeViewController alloc]init];

    [self.window.rootViewController presentViewController:composeVC animated:YES completion:nil];

}

#pragma mark - 创建标签栏子控制器数组

-(NSArray *)createTabBarViewControllers{

    //主页

    HomeViewController *homeVC = [[HomeViewController alloc] init];

    UINavigationController *homeNaV = [[UINavigationController alloc]initWithRootViewController:homeVC];

    //消息

    MessageViewController *messageVC = [[MessageViewController alloc] init];

    UINavigationController *messageNaV = [[UINavigationController alloc]initWithRootViewController:messageVC];

    //发现

    DiscoverViewController *foundVC = [[DiscoverViewController alloc]init];

    UINavigationController *foundNaV = [[UINavigationController alloc]initWithRootViewController:foundVC];

    //我的

    MineViewController *mineVC = [[MineViewController alloc]init];

    UINavigationController *mineNaV = [[UINavigationController alloc]initWithRootViewController:mineVC];

    return @[homeNaV,messageNaV,foundNaV,mineNaV];

}

#pragma mark - 创建标签栏按钮item数组

-(NSArray *)createTabBarItemsAttributes{

    NSDictionary *dict1 = @{

                            CYLTabBarItemTitle : @"首页",

                            CYLTabBarItemImage : @"tabbar_home",

                            CYLTabBarItemSelectedImage : @"tabbar_home_selected",

                            };

    NSDictionary *dict2 = @{

                            CYLTabBarItemTitle : @"消息",

                            CYLTabBarItemImage : @"tabbar_message_center",

                            CYLTabBarItemSelectedImage : @"tabbar_message_center_selected",

                            };

    NSDictionary *dict3 = @{

                            CYLTabBarItemTitle : @"发现",

                            CYLTabBarItemImage : @"tabbar_discover",

                            CYLTabBarItemSelectedImage : @"tabbar_discover_selected",

                            };

    NSDictionary *dict4 = @{

                            CYLTabBarItemTitle : @"我的",

                            CYLTabBarItemImage : @"tabbar_profile",

                            CYLTabBarItemSelectedImage : @"tabbar_profile_selected",

                            };

    return @[ dict1, dict2, dict3, dict4];

}

#pragma mark - 设置tabbar按钮的文字颜色

- (void)customizeInterface {

    // 普通状态下的文字属性

    NSMutableDictionary *normalAttrs = [NSMutableDictionary dictionary];

    normalAttrs[NSForegroundColorAttributeName] = [UIColor grayColor];

    // 选中状态下的文字属性

    NSMutableDictionary *selectedAttrs = [NSMutableDictionary dictionary];

    selectedAttrs[NSForegroundColorAttributeName] = [UIColor orangeColor];

    // 设置文字属性

    UITabBarItem *tabBar = [UITabBarItem appearance];

    [tabBar setTitleTextAttributes:normalAttrs forState:UIControlStateNormal];

    [tabBar setTitleTextAttributes:selectedAttrs forState:UIControlStateSelected];

    // 设置背景图片

    UITabBar *tabBarAppearance = [UITabBar appearance];

    [tabBarAppearance setBackgroundImage:[UIImage imageNamed:@"tabbar_background"]];

}

@end
在需要添加的按钮类ComposeButton类中,实现的代码如下:
ComposeButton.h文件:
//  ComposeButton.h

//  CYLTabBarController

//

//  Created by mac on 16/1/28.

//  Copyright © 2016年 mac. All rights reserved.

//

#import <CYLPlusButton.h>

@interface ComposeButton : CYLPlusButton<CYLPlusButtonSubclassing>

@end
ComposeButton.h文件:
//  ComposeButton.m

//  CYLTabBarController

//

//  Created by mac on 16/1/28.

//  Copyright © 2016年 mac. All rights reserved.

//

#import "ComposeButton.h"

@implementation ComposeButton

+(void)load{

    [super registerSubclass];

}

+(instancetype)plusButton{

    ComposeButton *composeButton = [[ComposeButton alloc]initWithFrame:CGRectMake(, , , )];

    //设置背景

    [composeButton setBackgroundImage:[UIImage imageNamed:@"tabbar_compose_button"] forState:UIControlStateNormal];

    [composeButton setBackgroundImage:[UIImage imageNamed:@"tabbar_compose_button_highlighted"] forState:UIControlStateHighlighted];

    //设置按钮

    [composeButton setImage:[UIImage imageNamed:@"tabbar_compose_icon_add"] forState:UIControlStateNormal];

    [composeButton setImage:[UIImage imageNamed:@"tabbar_compose_icon_add_highlighted"] forState:UIControlStateSelected];

    return composeButton;

}

//返回插入位置,因为是奇数,所以不用指定安放的位置,它会自动调整位置

//+ (NSUInteger)indexOfPlusButtonInTabBar{

//

//    return 2;

//}

@end
在发布控制器中实现的是代码:ComposeViewController.m
//  ComposeViewController.m

//  CYLTabBarController

//

//  Created by mac on 16/1/28.

//  Copyright © 2016年 mac. All rights reserved.

//

#import "ComposeViewController.h"

@interface ComposeViewController ()

@property (strong,nonatomic)UIToolbar *topToolBar;

@end

#define SCREEN_WIDTH  [UIScreen mainScreen].bounds.size.width

#define SCREEN_HEIGHT [UIScreen mainScreen].bounds.size.height

@implementation ComposeViewController

/**

 *  设置工具栏

*/

-(void)viewWillAppear:(BOOL)animated{

    [[UIToolbar appearance]setTintColor:[UIColor brownColor]];

    self.topToolBar = [[UIToolbar alloc]initWithFrame:CGRectMake(, , SCREEN_WIDTH, )];

    UIBarButtonItem *leftItem = [[UIBarButtonItem alloc]initWithTitle:@"返回" style:UIBarButtonItemStylePlain target:self action:@selector(leftItemBack:)];

    UIBarButtonItem *flexItem = [[UIBarButtonItem alloc]initWithBarButtonSystemItem:UIBarButtonSystemItemFlexibleSpace target:nil action:nil];

    UIBarButtonItem *midItem = [[UIBarButtonItem alloc]initWithTitle:@"发布新微薄" style:UIBarButtonItemStylePlain target:nil action:nil];

    [midItem setTitleTextAttributes:@{NSForegroundColorAttributeName:[UIColor blackColor]} forState:UIControlStateNormal];

    [midItem setEnabled:NO];

    UIBarButtonItem *rightItem = [[UIBarButtonItem alloc]initWithTitle:@"发送" style:UIBarButtonItemStylePlain target:self action:@selector(rightItemSend:)];

    self.topToolBar.items = @[leftItem,flexItem,midItem,flexItem,rightItem];

    [self.view addSubview:self.topToolBar];

}

- (void)viewDidLoad {

    [super viewDidLoad];

    self.title = @"发布";

    self.view.backgroundColor = [UIColor lightGrayColor];

}

#pragma mark - 返回按钮事件,关闭模态的发布控制器

-(void)leftItemBack:(UIBarButtonItem *)sender{

    [self.view.window.rootViewController dismissViewControllerAnimated:YES completion:nil];

}

#pragma mark - 发布按钮事件,发布新的微博

-(void)rightItemSend:(UIBarButtonItem *)sender{

    NSLog(@"%s",__func__);

}

@end
演示截图如下: 点击发布按钮时:


iOS:CYLTabBarController的具体使用实例:实现新浪微博的主流框架的更多相关文章
- iOS之UI--涂鸦画板实例
iOS之UI--涂鸦画板实例 首先是搭建框架 其他的略过,直接展示效果: 然后接下来上传搭建好两个控制器框架的源码百度云下载链接: http://pan.baidu.com/s/1skjpDox ...
- 实例演示使用RDIFramework.NET 框架的工作流组件进行业务流程的定义—请假申请流程-Web
实例演示使用RDIFramework.NET 框架的工作流组件 进行业务流程的定义—请假申请流程-Web 参考文章: RDIFramework.NET — 基于.NET的快速信息化系统开发框架 — 系 ...
- Windows 8实例教程系列 - 理解应用框架
原文:Windows 8实例教程系列 - 理解应用框架 Windows 操作系统之所以风靡世界,是因为其“易学易用”,从用户的角度出发,让数以万计的非IT人员使用计算机实现娱乐,工作等目的.Windo ...
- iOS开发- UICollectionView详解+实例
本章通过先总体介绍UICollectionView及其常用方法,再结合一个实例,了解如何使用UICollectionView. UICollectionView 和 UICollectionViewC ...
- Delphi xe7 FireMonkey / Mobile (Android, iOS)生成 QR Code完整实例
这个实例在windows.OS X.IOS和Android等平台运行正常.本文参考这个网站提供的方法:http://zarko-gajic.iz.hr/firemonkey-mobile-androi ...
- [转] iOS开发- UICollectionView详解+实例
本章通过先总体介绍UICollectionView及其常用方法,再结合一个实例,了解如何使用UICollectionView. UICollectionView 和 UICollectionViewC ...
- iOS 新浪微博-1.1框架升级
在iOS 新浪微博-1.0框架搭建 中,使用的是xcode5.1.1开发.现在把重整了一下框架 改为xcode7.0开发 使用cocoaPad管理第三方库 程序将托管到github上 在改为xcode ...
- iOS中的成员变量,实例变量,属性变量
在ios第一版中: 我们为输出口同时声明了属性和底层实例变量,那时,属性是oc语言的一个新的机制,并且要求你必须声明与之对应的实例变量,例如: 注意:(这个是以前的用法) @interface MyV ...
- iOS仿京东分类菜单实例实现
在APP开发过程中此功能还是比较常见的模块,左边为菜单展示,右边为菜单下数据的展示,选择不同的菜单右边的数据源进行更新,此实例主要运用到UITableView,UICollectionView,OC谓 ...
随机推荐
- 5:django 常用函数
用django写view函数的时候,我们常常用到django.shortcuts里面的很多常用函数, 这节我们来看看这些函数的具体用法吧 render render(request, template ...
- DEADBEEF
“DEADBEEF”是什么?可能很多人都没有听说过.DEADBEEF不是“死牛肉”的意思,而是一个十六进制数字,即0xDEADBEEF.最初使用它的是IBM的RS/6000系统.在该系统中,已分配但还 ...
- Template Mode 'HTML5' is deprecated与UnsatisfiedDependencyException
org.thymeleaf.templatemode.TemplateMode : [THYMELEAF][main] Template Mode 'HTML5' is deprecated. Usi ...
- Ubuntu 下配置 SSH服务全过程及问题解决
Windows下做Linux开发,装虚拟机里,怎么可以不用SSH呢.有人说,“做Linux开发,还不直接装机器上跑起来了,还挂虚拟机,开SSH……闲的蛋疼了吧”,不管怎样,我接触Linux算是3年了, ...
- socket编程的网络协议
"我们在传输数据时,可以只使用(传输层)TCP/IP协议,但是那样的话,如果没有应用层,便无法识别数据内容" TCP/IP只是一个协议栈,就像程序运行一样,必须要实现运行,同时还要 ...
- Python:使用正则去除HTML标签(转)
利用正则式处理,不知道会不会有性能问题,没有经过太多测试. 目前我有很多还是使用BeautifulSoup进行这种处理. HTML实体处理的只是用于处理一些常用的实体. # -*- coding: u ...
- 正对开源工作的源码管理web (ssh协议管理) 本地如何使用SourceTree 管理
入口: 如何产生公钥与私钥 ,以及开源中国 gitweb sshkey 的管理web 地址: 点击 “头像” ,然后再头像下面的列表选择 “ SSH Key Settings” . 接下来,完成跟着步 ...
- Structs2 校验框架
代码结构: 使用Struts校验框架,保证输入学生的基本信息:学号.姓名.性别.出生年月.专业.总学分等,要求输入满足以下条件:(1) 学号前两位大于“13”并且后面4位必须为数字:(2) 出生年月必 ...
- 链式前向星实现的堆优化dij求最短路模板
#include<cstdio> #include<string> #include<cstdlib> #include<cmath> #include ...
- Linux命令之useradd
useradd [选项] LOGIN(登录名) useradd –D useradd –D [选项] 创建一个新用户或更新默认新用户信息.useradd和adduser命令相同,adduser是use ...