Spring Boot + Spring Cloud 构建微服务系统(十):配置中心(Spring Cloud Bus)
技术背景
我们在上一篇讲到,Spring Boot程序只在启动的时候加载配置文件信息,这样在GIT仓库配置修改之后,虽然配置中心服务器能够读取最新的提交信息,但是配置中心客户端却不会重新读取,以至于不能及时的读取更新后的配置信息。这个时候就需要一种通知刷新机制来支持了。
Refresh机制
refresh机制是Spring Cloud Config提供的一种刷新机制,它允许客户端通过POST方法触发各自的/refresh,只要依赖spring-boot-starter-actuator包就拥有了/refresh的功能,下面我们为我们的客户端加上刷新功能,以支持更新配置的读取。
添加依赖
修改 spring-cloud-conifg-client,添加监控依赖,监控依赖包里携带了 /refresh 的功能。
<dependency>

  <groupId>org.springframework.boot</groupId>

  <artifactId>spring-boot-starter-actuator</artifactId>

</dependency>
开启更新机制
在使用配置属性的类型加上 @RefreshScope 注解,这样在客户端执行 /refresh 的时候就会刷新此类下面的配置属性了。
package com.louis.spring.cloud.config.client.controller;

import org.springframework.beans.factory.annotation.Value;

import org.springframework.cloud.context.config.annotation.RefreshScope;

import org.springframework.web.bind.annotation.RequestMapping;

import org.springframework.web.bind.annotation.RestController;

@RefreshScope

@RestController

class HelloController {

    @Value("${spring.config.hello}")

    private String hello;

    @RequestMapping("/hello")

    public String from() {

        return this.hello;

    }

}
修改配置
修改配置文件添加以下内容,开放refresh的相关接口。
bootstrap.yml
management:

  endpoints:

    web:

      exposure:

        include: "*"
这样,以后以post请求的方式访问 http://localhost:8552/actuator/refresh 时,就会更新修改后的配置文件了。
特别注意:
这里存在着版本大坑,1.x跟2.x的配置不太一样,我们用的是2.0+版本,务必注意。
1.安全配置变更
新版本
management.endpoints.web.exposure.include="*"
老版本
management.security.enabled=false
2.访问地址变更
新版本
http://localhost:8552/actuator/refresh
老版本
http://localhost:8552/refresh
这里还是解释一下上面这个配置起到了什么具体作用,其实actuator是一个健康检查包,它提供了一些健康检查数据接口,refresh功能也是其中的一个接口,但是为了安全起见,它默认只开放了health和info接口(启动信息会包含如下图所示信息),而上面的配置就是设置要开放哪些接口, 我们设置成 “*”,是开放所有接口。你也可以指定开发几个,比如: health,info,refresh,而这里因为我们需要用的refresh功能,所以需要把refresh接口开放出来。

设置成 “*” 后,启动信息会包含以下信息,而这个叫refresh的post方法,就是我们需要的,上面说的接口地址变更从这里也可以看得出来。

测试效果
访问 http://localhost:8552/hello,返回结果如下。
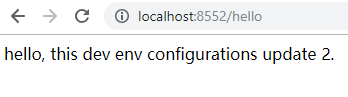
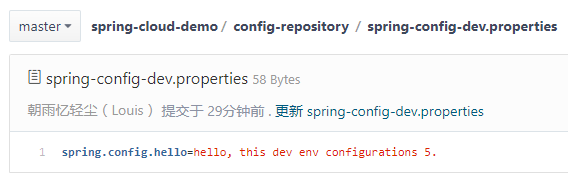
修改仓库配置内容,把数字2改成5,如下图所示。
再次访问 http://localhost:8552/hello,如我们所料,结果并没有更新,因为我们还没有调refresh方法。
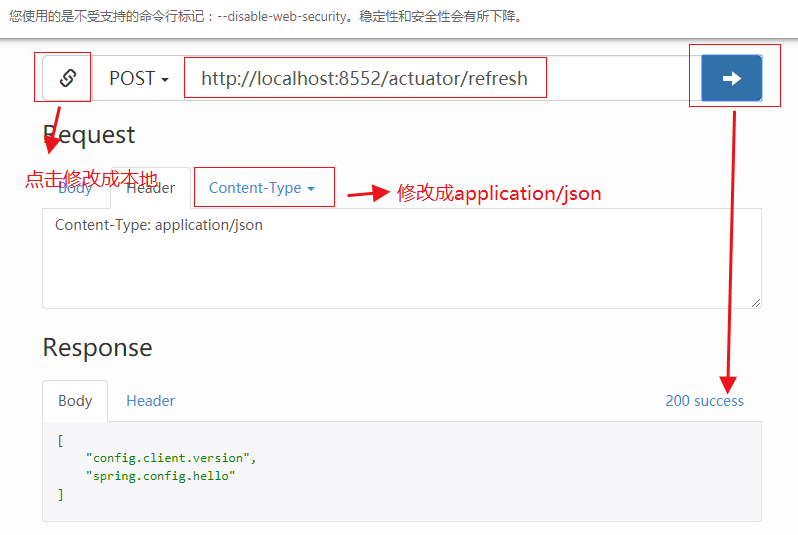
通过工具或自写代码发送post请求 http://localhost:8552/actuator/refresh,刷新配置。
这里通过在线测试网站发送,地址:https://getman.cn/Mo2FX 。
注意:先让你的Chrome支持跨域。设置方法:在快捷方式的target后加上 --disable-web-security --user-data-dir,重启即可。
刷新之后,再次访问 http://localhost:8552/hello,返回结果如下。

查看返回结果,刷新之后已经可以获取最新提交的配置内容,但是每次都需要手动刷新客户端还是很麻烦,如果客户端数量一多就简直难以忍受了,有没有什么比较好的办法来解决这个问题呢,那是当然的,答案就是:Spring Cloud Bus。
Spring Cloud Bus
Spring Cloud Bus,被大家称为消息总线,它通过轻量级的消息代理来连接各个分布的节点,可以利用像消息队列的广播机制在分布式系统中进行消息传播,通过消息总线可以实现很多业务功能,其中对于配置中心客户端刷新,就是一个非常典型的使用场景。
下面这张图可以很好的解释消息总线的作用流程(图片描述来源:纯洁的微笑:配置中心博文)。
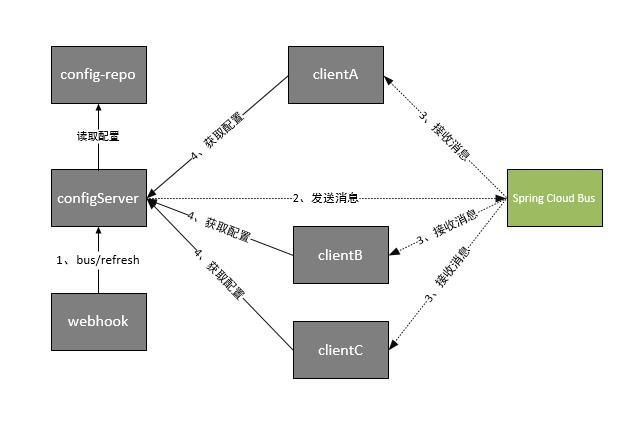
Spring Cloud Bus 进行配置更新步骤如下:
1、提交代码触发post请求给/actuator/bus-refresh
2、server端接收到请求并发送给Spring Cloud Bus
3、Spring Cloud bus接到消息并通知给其它客户端
4、其它客户端接收到通知,请求Server端获取最新配置
5、全部客户端均获取到最新的配置
安装RabbitMQ
因为我们需要用到消息队列,我们这里选择RabbitMQ,使用Docker进行安装。
拉取镜像
执行以下命令,拉取镜像。
docker pull rabbitmq:management
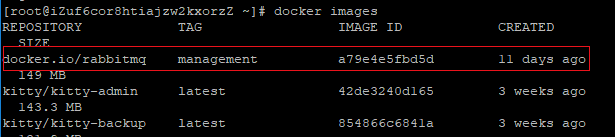
完成之后执行以下命令查看下载镜像。
docker images
创建容器
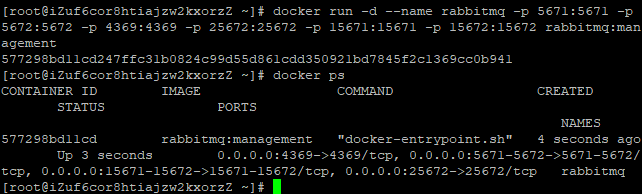
执行以下命令,创建docker容器。
docker run -d --name rabbitmq -p : -p : -p : -p : -p : -p : rabbitmq:management
启动成功之后,可以执行以下命令查看启动容器。
docker ps
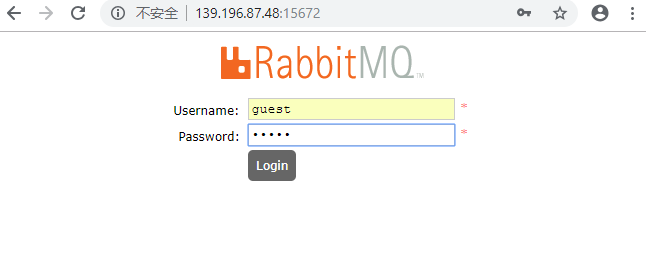
登录界面
容器启动之后就可以访问web管理界面了,访问 http://宿主机IP:15672。
系统提供了默认账号。 用户名:guest 密码: guest
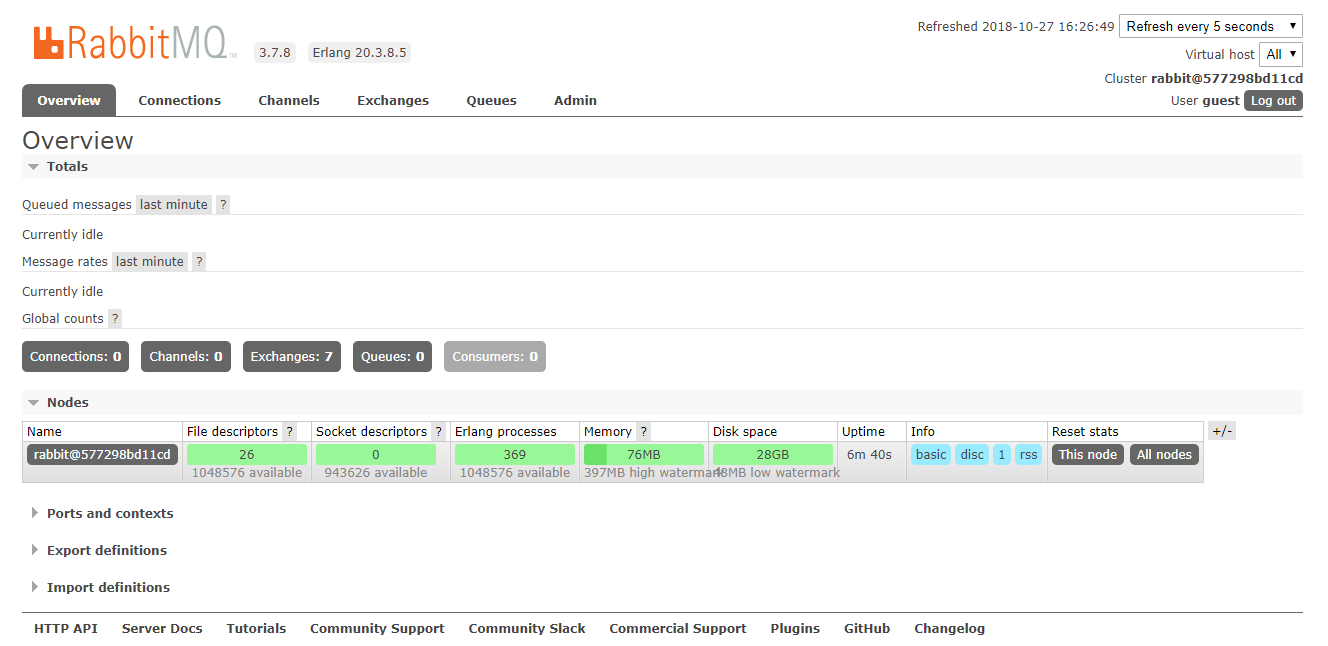
管理界面
客户端实现
添加依赖
打开客户端 spring-cloud-conifg-client,添加相关依赖。
pom.xml
<dependency>

    <groupId>org.springframework.cloud</groupId>

    <artifactId>spring-cloud-starter-bus-amqp</artifactId>

</dependency>
修改配置
修改配置,添加RebbitMq的相关配置,这样客户端代码就改造完成了。
bootstrap.yml
spring:

  application:

    name: spring-cloud-config-client

  cloud:

    consul:

      host: localhost

      port:

      discovery:

        serviceName: ${spring.application.name}    # 注册到consul的服务名称

    config:

      discovery:

        enabled: true

        serviceId: spring-cloud-config-server # 配置中心服务名称

      name: spring-config  # 对应{application}部分

      profile: dev  # 对应{profile}部分

      label: master  # 对应git的分支,如果配置中心使用的是本地存储,则该参数无用

  rabbitmq:

    host: localhost

    port:

    username: guest

    password: guest

management:

  endpoints:

    web:

      exposure:

        include: "*"
服务端实现
添加依赖
修改 spring-cloud-conifg-server,添加相关依赖。
pom.xml
<dependency>

    <groupId>org.springframework.boot</groupId>

    <artifactId>spring-boot-starter-actuator</artifactId>

</dependency>

<dependency>

    <groupId>org.springframework.cloud</groupId>

    <artifactId>spring-cloud-starter-bus-amqp</artifactId>

</dependency>
修改配置,添加RebbitMq的和接口开放相关配置,这样服务端代码也改造完成了。
application.yml
server:

  port:

spring:

  application:

    name: spring-cloud-config-server

  cloud:

    consul:

      host: localhost

      port:

      discovery:

        serviceName: ${spring.application.name}    # 注册到consul的服务名称

    config:

      server:

        git:

          uri: https://gitee.com/liuge1988/spring-cloud-demo/     # 配置git仓库的地址

          search-paths: config-repository                             # git仓库地址下的相对地址,可以配置多个,用,分割。

          username: username                                             # git仓库的账号

          password: password                                             # git仓库的密码

  rabbitmq:

    host: localhost

    port:

    username: guest

    password: guest

management:

  endpoints:

    web:

      exposure:

        include: "*"
测试效果
1.启动服务端,成功集成消息总线后,启动信息中可以看到如下图中的信息。

2.启动客户端,发现居然报错了,网上也找不到相关资料,也没见其他人提过相关问题。猜测是网上教程多是使用Euraka,而这里用的时Consul,瞎鼓捣了好久,反正是不想换回Euraka,2.0停止开发消息出来以后,将来还不定什么情况,只能硬着头皮解决了。
org.springframework.beans.factory.NoSuchBeanDefinitionException: No bean named 'configServerRetryInterceptor' available

    at org.springframework.beans.factory.support.DefaultListableBeanFactory.getBeanDefinition(DefaultListableBeanFactory.java:) ~[spring-beans-5.0..RELEASE.jar:5.0..RELEASE]

    at org.springframework.beans.factory.support.AbstractBeanFactory.getMergedLocalBeanDefinition(AbstractBeanFactory.java:) ~[spring-beans-5.0..RELEASE.jar:5.0..RELEASE]

    at org.springframework.beans.factory.support.AbstractBeanFactory.doGetBean(AbstractBeanFactory.java:) ~[spring-beans-5.0..RELEASE.jar:5.0..RELEASE]

    at org.springframework.beans.factory.support.AbstractBeanFactory.getBean(AbstractBeanFactory.java:) ~[spring-beans-5.0..RELEASE.jar:5.0..RELEASE]

    at org.springframework.retry.annotation.AnnotationAwareRetryOperationsInterceptor.getDelegate(AnnotationAwareRetryOperationsInterceptor.java:) ~[spring-retry-1.2..RELEASE.jar:na]

    at org.springframework.retry.annotation.AnnotationAwareRetryOperationsInterceptor.invoke(AnnotationAwareRetryOperationsInterceptor.java:) ~[spring-retry-1.2..RELEASE.jar:na]

    at org.springframework.aop.framework.ReflectiveMethodInvocation.proceed(ReflectiveMethodInvocation.java:) ~[spring-aop-5.0..RELEASE.jar:5.0..RELEASE]

    at org.springframework.aop.framework.CglibAopProxy$DynamicAdvisedInterceptor.intercept(CglibAopProxy.java:) ~[spring-aop-5.0..RELEASE.jar:5.0..RELEASE]

    at org.springframework.cloud.config.client.ConfigServerInstanceProvider$$EnhancerBySpringCGLIB$$dd44720b.getConfigServerInstances(<generated>) ~[spring-cloud-config-client-2.0..RELEASE.jar:2.0..RELEASE]

    at org.springframework.cloud.config.client.DiscoveryClientConfigServiceBootstrapConfiguration.refresh(DiscoveryClientConfigServiceBootstrapConfiguration.java:) [spring-cloud-config-client-2.0..RELEASE.jar:2.0..RELEASE]

    at org.springframework.cloud.config.client.DiscoveryClientConfigServiceBootstrapConfiguration.startup(DiscoveryClientConfigServiceBootstrapConfiguration.java:) [spring-cloud-config-client-2.0..RELEASE.jar:2.0..RELEASE]

    at sun.reflect.NativeMethodAccessorImpl.invoke0(Native Method) ~[na:1.8.0_131]

    at sun.reflect.NativeMethodAccessorImpl.invoke(NativeMethodAccessorImpl.java:) ~[na:1.8.0_131]

    at sun.reflect.DelegatingMethodAccessorImpl.invoke(DelegatingMethodAccessorImpl.java:) ~[na:1.8.0_131]

    at java.lang.reflect.Method.invoke(Method.java:) ~[na:1.8.0_131]
然后就跟踪代码,发现是在下图中的位置找不到相应的Bean,那么答案就比较明显了,要么是程序有BUG,不过可能性不大,那应该是就是缺包了,在缺失的包里有这个Bean。但是这个Bean是在哪个包?排查了半天也没找到,网上也没有想过资料,对比了一下网上消息总线的配置,依赖也没有少加什么。
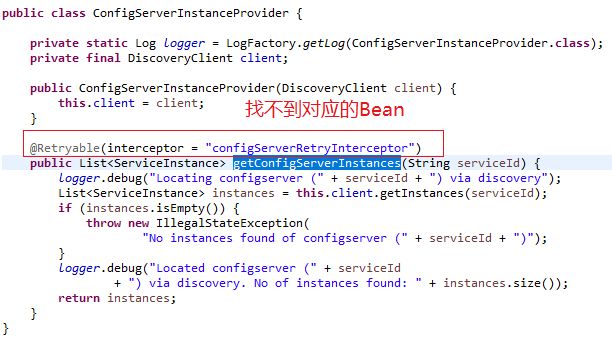
没有办法,最后只能自己上手了,不就是在刷新的时候缺少一个拦截器吗,自己给他弄一个试试呗。
使用就加了一个配置类,并在resources下新建了META-INF目录和一个spring。factories文件。

RetryConfiguration.java
package com.louis.spring.cloud.config.client;

import org.springframework.boot.autoconfigure.condition.ConditionalOnMissingBean;

import org.springframework.context.annotation.Bean;

import org.springframework.retry.interceptor.RetryInterceptorBuilder;

import org.springframework.retry.interceptor.RetryOperationsInterceptor;

public class RetryConfiguration {

    @Bean

    @ConditionalOnMissingBean(name = "configServerRetryInterceptor")

    public RetryOperationsInterceptor configServerRetryInterceptor() {

        return RetryInterceptorBuilder.stateless().backOffOptions(, 1.2, ).maxAttempts().build();

    }

}
spring.factories
org.springframework.cloud.bootstrap.BootstrapConfiguration=com.louis.spring.cloud.config.client.RetryConfiguration
在这里指定新建的拦截器,这样系统初始化时会加载这个Bean。
然后重启启动,果然没有报错了,还是先别高兴,看看能不能用先。
4.先访问一下 http://localhost:8552/hello,效果如下图所示。

5.修改仓库配置文件,把数字5改成15,修改完成提交。

再次访问发现还是旧信息。
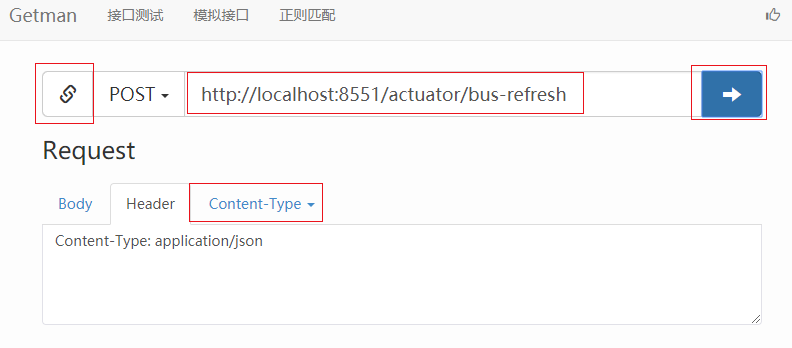
6.再用工具发送post请求 http://localhost:8551/actuator/bus-refresh 。
注意这次是向注册中心服务端发送请求,发送成功之后服务端会通过消息总线通知所有的客户端进行刷新。
另外开启消息总线后的请求地址是 /actuator/bus-refresh,不再是refresh了。
7.给服务端发送刷新请求之后,再次访问 http://localhost:8552/hello,结果如下。

我们愉快的发现客户端已经能够通过消息总线获取最新配置了,真是可喜可贺。
源码下载
码云:https://gitee.com/liuge1988/spring-cloud-demo.git
作者:朝雨忆轻尘
出处:https://www.cnblogs.com/xifengxiaoma/
版权所有,欢迎转载,转载请注明原文作者及出处。
Spring Boot + Spring Cloud 构建微服务系统(十):配置中心(Spring Cloud Bus)的更多相关文章
- Spring boot学习1 构建微服务:Spring boot 入门篇
Spring boot学习1 构建微服务:Spring boot 入门篇 Spring Boot是由Pivotal团队提供的全新框架,其设计目的是用来简化新Spring应用的初始搭建以及开发过程.该框 ...
- Spring Boot + Spring Cloud 构建微服务系统(九):配置中心(Spring Cloud Config)
技术背景 如今微服务架构盛行,在分布式系统中,项目日益庞大,子项目日益增多,每个项目都散落着各种配置文件,且随着服务的增加而不断增多.此时,往往某一个基础服务信息变更,都会导致一系列服务的更新和重启, ...
- Spring Boot + Spring Cloud 构建微服务系统(七):API服务网关(Zuul)
技术背景 前面我们通过Ribbon或Feign实现了微服务之间的调用和负载均衡,那我们的各种微服务又要如何提供给外部应用调用呢. 当然,因为是REST API接口,外部客户端直接调用各个微服务是没有问 ...
- Spring Boot + Spring Cloud 构建微服务系统(八):分布式链路追踪(Sleuth、Zipkin)
技术背景 在微服务架构中,随着业务发展,系统拆分导致系统调用链路愈发复杂,一个看似简单的前端请求可能最终需要调用很多次后端服务才能完成,那么当整个请求出现问题时,我们很难得知到底是哪个服务出了问题导致 ...
- Spring Boot + Spring Cloud 构建微服务系统(四):容错机制和熔断(Hystrix)
雪崩效应 在微服务架构中,由于服务众多,通常会涉及多个服务层级的调用,而一旦基础服务发生故障,很可能会导致级联故障,进而造成整个系统不可用,这种现象被称为服务雪崩效应.服务雪崩效应是一种因“服务提供者 ...
- Spring Boot + Spring Cloud 构建微服务系统(六):熔断监控集群(Turbine)
Spring Cloud Turbine 上一章我们集成了Hystrix Dashboard,使用Hystrix Dashboard可以看到单个应用内的服务信息,显然这是不够的,我们还需要一个工具能让 ...
- Spring Boot + Spring Cloud 构建微服务系统(五):熔断监控面板(Hystrix Dashboard)
Hystrix Dashboard Hystrix-dashboard是一款针对Hystrix进行实时监控的工具,通过Hystrix Dashboard我们可以在直观地看到各Hystrix Comma ...
- Spring Boot + Spring Cloud 构建微服务系统(一):服务注册和发现(Consul)
使用Consul提供注册和发现服务 什么是 Consul Consul 是 HashiCorp 公司推出的开源工具,用于实现分布式系统的服务发现与配置.与其它分布式服务注册与发现的方案,Consul ...
- Spring Boot + Spring Cloud 构建微服务系统(三):服务消费和负载(Feign)
Spring Cloud Feign Spring Cloud Feign是一套基于Netflix Feign实现的声明式服务调用客户端.它使得编写Web服务客户端变得更加简单.我们只需要通过创建接口 ...
随机推荐
- ubuntu系统安装微信小程序开发工具
在ubuntu系统中安装微信小程序开发工具之前,先要安装wine与git 一.安装wine 1.如果您的系统是64位,启用32位架构(如果您还没有) sudo dpkg --add-architect ...
- Python开发——数据类型【运算符】
算数运算符 比较运算符 赋值运算符 逻辑运算符 成员运算符
- android studio 关闭SVN关联
<?xml version="1.0" encoding="UTF-8"?> <project version="4"&g ...
- print('{:15}|{:^9}|{:^9}'.format('', 'lat.', 'long.'))是什么意思?
平台:win10 x64+Python3.7.0 先了解下——Python3 字符串格式化 Python字符串的格式化方法分为两种,分别为占位符(%)和format方式. 占位符方式在Python2. ...
- 公司git服务器记录
gitolite:server/web/AmomeWebApp.git gitolite:server/web/AmomeBackendManage.git git@192.168.1.183 === ...
- fortran77读写文本文档
PROGRAM WRITETEXT IMPLICIT NONE INTEGER,PARAMETER :: NE=!fortran90 语法定义变量 DOUBLE PRECISION A(,),B(,) ...
- python闭包和延迟绑定
一.什么是闭包: 1.函数内定义函数. 2.外函数的返回时内函数的引用. 3.内函数使用外函数的局部变量(至少一个). 1 def outfunc(): 2 for num in range(4): ...
- springBoot基础
开始之前最基础的东东here 官网:http://projects.spring.io/spring-boot/ 基础快速构建:http://start.spring.io/ 松哥的博客:http:/ ...
- php SQL 防注入的一些经验
产生原因 一方面自己没这方面的意识,有些数据没有经过严格的验证,然后直接拼接 SQL 去查询.导致漏洞产生,比如: $id = $_GET['id']; $sql = "SELECT nam ...
- redis知识点杂记
最近梳理了一下redis的基本知识.本文会从redis的简单使用.redis的数据类型.redis持久化三个方面做简单阐述和总结. 一.Redis基本操作 1.key的规则 不能使用\n空格.其他都可 ...