配置 AEM CQ6 (author + publish + apache dispatcher + ubuntu )
AEM CQ系列是Adobe下的企业内容管理系统,现在已知的一些企业比如 Deloitte,Ford Racing,这里就不多做基本的介绍了,明白的看!
今天在Docker配置一下author instance, publish instance, apache dispatcher
文件构架
Author
-cq-author-4505.jar
-license.properties
Publish
-cq-author-4503.jar
-license.properties
Author Instance
FROM ubuntu:14.04

RUN mkdir /opt/aem/

RUN apt-get install -y software-properties-common

RUN add-apt-repository ppa:webupd8team/java

RUN apt-get update

# automatically accept oracle license

RUN echo oracle-java7-installer shared/accepted-oracle-license-v1-1 select true | /usr/bin/debconf-set-selections

# and install java 7 oracle jdk

RUN apt-get -y install oracle-java7-installer && apt-get clean

RUN update-alternatives --display java

ENV JAVA_HOME /usr/lib/jvm/java-7-oracle

WORKDIR /opt/aem/

ADD cq-author-4505.jar /opt/aem/cq-author-4505.jar

ADD license.properties /opt/aem/license.properties

RUN java -jar cq-author-4505.jar -unpack -v
运行author instance
docker run -i –t –d -p 4505:4505 <yourName>/aem-auth:6.0 /bin/bash
我们手动的启动AEM instance
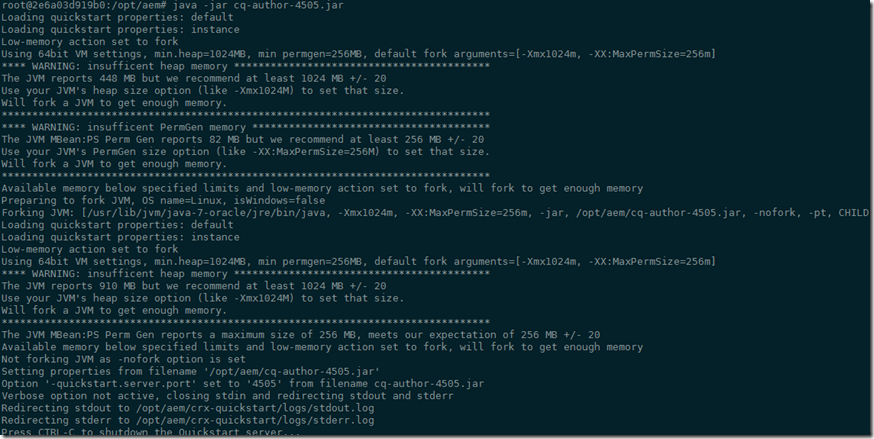
java -jar cq-author-4505.jar
运行 http://192.168.59.103:4505 之后呢,我们来手动升级一下Service Pack (之后我们会修改Docker让他自动升级Service Pack)
Publish Instance
这里设置publish instance跟author instance非常相似,只是运行
docker run -i –t –d -p 4503:4503 <yourName>/aem-pub:6.0 /bin/bash
和
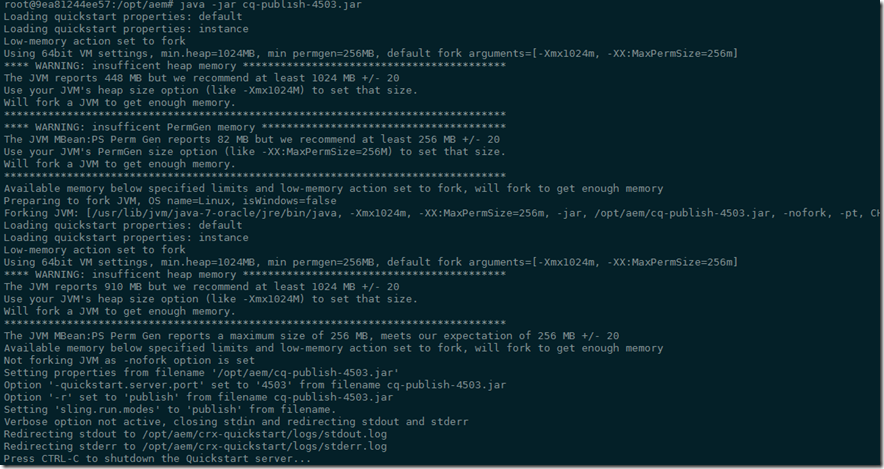
java -jar cq-author-4503.jar
运行 http://192.168.59.103:4503 同样,我们要升级Service Pack
Dispatcher
这里面我们使用ubuntu:14.04的镜像,在这里我们开一个端口8888来映射内部的80端口
docker run -i -t –d -p 8888:80 --name aem-dispatcher ubuntu:14.04
进入到Dispatcher的instance
docker exec -i -t aem-dispatcher /bin/bash
安装apache2
apt-get update

apt-get install -y apache2
这里apache默认的root文件夹是/var/www
第1步 (步骤有点多,分开写)
- 下载AEM Dispatcher的config,下载并解压缩 wget https://www.adobeaemcloud.com/content/companies/public/adobe/dispatcher/dispatcher/_jcr_content/top/download_6/file.res/dispatcher-apache2.4-linux-x86-64-4.1.8.tar.gz
下载后如图

- 在/etc/apache2的目录下创建一个conf的文件夹,并把刚才解压缩后的dispatcher.any文件拷贝过去 cp dispatcher.any /etc/apache2/conf

- 拷贝dispatcher-apache2.4-4.1.8.so 到/usr/lib/apache2/modules (这里名字就不做修改了,如果是production,建议修改成apache标准的命名例如mod_aem.so)

第2步 (修改/etc/apache2/apache2.conf 文件)
粘贴下面的到这个 apache2.conf 最下面,请保证红色注释的文件名可以在系统内存在
LoadModule dispatcher_module /usr/lib/apache2/modules/dispatcher-apache2.4-4.1.8.so

<IfModule disp_apache2.c>

# location of the configuration file. eg: 'conf/dispatcher.any'

DispatcherConfig  /etc/apache2/conf/dispatcher.any

# location of the dispatcher log file. eg: 'logs/dispatcher.log'

DispatcherLog /var/log/apache2/dispatcher.log

# log level for the dispatcher log

# 0 Errors

# 1 Warnings

# 2 Infos

# 3 Debug

DispatcherLogLevel 3

# if turned to 1, the dispatcher looks like a normal module

DispatcherNoServerHeader 0

# if turned to 1, request to / are not handled by the dispatcher

# use the mod_alias then for the correct mapping

DispatcherDeclineRoot 0

# if turned to 1, the dispatcher uses the URL already processed

# by handlers preceeding the dispatcher (i.e. mod_rewrite)

# instead of the original one passed to the web server.

DispatcherUseProcessedURL 0

# if turned to 1, the dispatcher does not spool an error

# response to the client (where the status code is greater

# or equal than 400), but passes the status code to

# Apache, which e.g. allows an ErrorDocument directive

# to process such a status code.

DispatcherPassError 0

</IfModule>

<Directory />

<IfModule disp_apache2.c>

# enable dispatcher for ALL request. if this is too restrictive,

# move it to another location

SetHandler dispatcher-handler

</IfModule>

Options FollowSymLinks

AllowOverride None

</Directory>

第3步 (修改/etc/apache2/conf/dispatcher.any 文件/renders
{
/rend01
{
/hostname "192.168.59.103"
[2]--> /port "4503"
}
}和/cache
{ # The docroot must be equal to the document root of the webserver. The
# dispatcher will store files relative to this directory and subsequent
# requests may be "declined" by the dispatcher, allowing the webserver
# to deliver them just like static files.
/docroot "/var/www"
和
/allowAuthorized "1"
第4步,开始apache2 服务
这就没什么说的了 ,如果有错,请仔细检查
service apache2 start
配置Author里面的publisher的指向
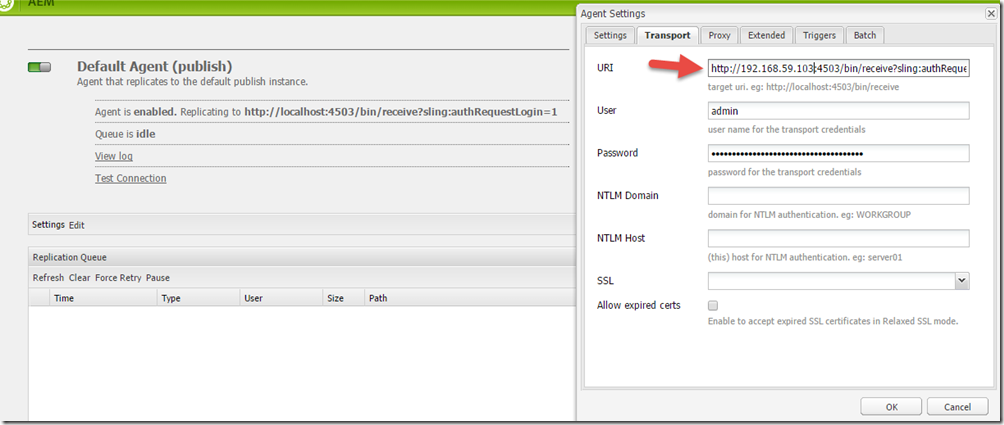
在Author上配置publisher,
http://192.168.59.103:4505/etc/replication/agents.author/publish.html
默认其实是不用修改的,但是我使用的是windows下的docker,所以需要修改一下IP,
好了,基本上大功告成了,现在就是测试我们是否配置正确了。我们就用geometrixx来做个例子。
在author的instance上,加入我们有这个Page http://192.168.59.103:4505/cf#/content/geometrixx/en.html,当发布后,
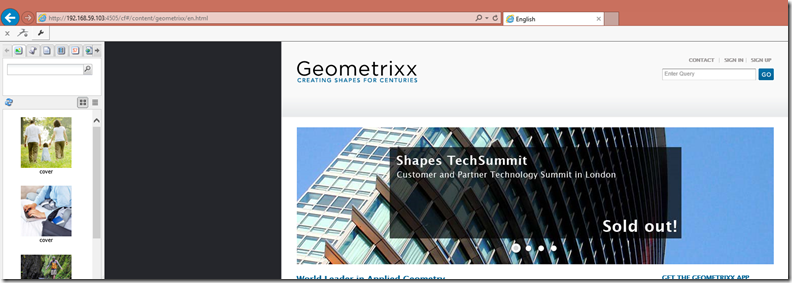
在publisher的instance上,我们来检查这个Page http://192.168.59.103:4503/content/geometrixx/en.html

然后我们来检查dispatcher是不是工作,http://192.168.59.103:8888/content/geometrixx/en.html

好了,最后一件事,我们要检查一下dispatcher是不是已经cache住这些页面了吗?我们要去/var/www去看,内容并没有被cache住,这是为什么呢?

我们要检查一下apache的LOG, Log写的很清楚,因为没有权限写入/var/www,好吧,我们来给他加个权限
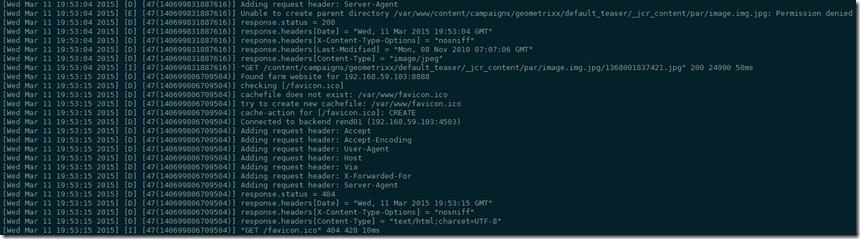
chown -R www-data:www-data /var/www
在检查/var/www

大功告成。有机会的话会向大家介绍AEM开发。
Best Regards
Rui
配置 AEM CQ6 (author + publish + apache dispatcher + ubuntu )的更多相关文章
- windows下配置lamp环境(1)---安装Apache服务器2.2.25
window下lamp成为wamp; 安装wamp环境的第一步是安装Apache服务器.下面开始安装步骤图文并茂. 一.双击安装包点“next”进行下一步,然后同意协议(这张图没有截):
- git+gitolite+cgit+apache on Ubuntu
git+gitolite+cgit+apache on Ubuntu Just record, do *NOT* copy-paste. git+gitolite sudo apt-get insta ...
- 配置 Visual Studio Tools for Apache Cordova
原文:配置 Visual Studio Tools for Apache Cordova 1.连接地址 https://msdn.microsoft.com/zh-cn/library/vs/alm/ ...
- ZH奶酪:Ubuntu 14.04配置LAMP(Linux、Apache、MySQL、PHP)
ZH奶酪:Ubuntu 14.04安装LAMP(Linux,Apache,MySQL,PHP) 之前已经介绍过LAMP的安装,这边文章主要讲解一下LAMP的配置. 1.配置Apache (1)调整Ke ...
- activate mod_rewrite How To Set Up mod_rewrite for Apache on Ubuntu 14.04 Apache Rewrite url重定向功能的简单配置
https://www.digitalocean.com/community/tutorials/how-to-set-up-mod_rewrite-for-apache-on-ubuntu-14-0 ...
- 【转】Eclipse配置Struts2问题:ClassNotFoundException: org...dispatcher.ng.filter.StrutsPrepareAndExecuteFilter
我的解决方案 一开始,我是依照某本教材,配置了User Libraries(名为struts-2.2.3, 可供多个项目多次使用), 然后直接把struts-2.2.3引入过来(这个包不会真正的放在项 ...
- Eclipse配置Struts2问题:ClassNotFoundException: org...dispatcher.ng.filter.StrutsPrepareAndExecuteFilter
我的解决方案 一开始,我是依照某本教材,配置了User Libraries(名为struts-2.2.3, 可供多个项目多次使用), 然后直接把struts-2.2.3引入过来(这个包不会真正的放在项 ...
- IDEA13中配置struts错误:ClassNotFoundException: org...dispatcher.ng.filter.StrutsPrepareAndExecuteFilter +找不到java程序包 解决办法
问题一:ClassNotFoundException: org...dispatcher.ng.filter.StrutsPrepareAndExecuteFilter解决办法 1.确保所有strut ...
- 【开发软件】 在Mac下配置php开发环境:Apache+php+MySql
本文地址 原文地址 本文提纲: 1. 启动Apache 2. 运行PHP 3. 配置Mysql 4. 使用PHPMyAdmin 5. 附录 有问题请先 看最后的附录 摘要: 系统OS X ...
随机推荐
- [python拾遗]列表
python列表拾遗 1.列表可以修改,使用 ‘+’ 将一个新列表附加在原列表的尾部: >>> a = [1,'a'] >>> b = a + [2,'b'] &g ...
- Linux 安装 Nginx
1. nginx的安装: 开始学习如何安装nginx,首先安装必要的软件: # yum install libtool # yum install -y gcc-c++ # yum install z ...
- 【原创】.NET Core应用类型(Portable apps & Self-contained apps)
介绍 有许多种方式可以用来考虑构建应用的类型,通常类型用来描述一个特定的执行模型或者基于此的应用.举例说:控制台应用(Console Application).Web应用(Web Applicatio ...
- 原型 prototype
原型 prototype js 的对象比较 由于 js 是解释执行的语言, 那么再代码中出现函数与对象如果重复执行, 会创建多个副本 在代码中重复执行的代码容易出现重复的对象 创建一个 Person ...
- mac下用ruby安装sass && webstorm下给scss文件添加watch
1.安装rvm 先安装 [Xcode](http://developer.apple.com/xcode/) 开发工具,它将帮你安装好 Unix 环境需要的开发包 sudo curl -L https ...
- DevExpress GridControl使用方法总结
一.如何解决单击记录整行选中的问题 View->OptionsBehavior->EditorShowMode 设置为:Click 二.如何新增一条记录 (1).gridView.AddN ...
- bootstrap 学习笔记
bootstrap作为当下的流行框架不知道它怎么能行呢? 之前也看过好多bootstrap的网上教程,可是发现光看真的记不住,说起来也真是忧桑~重点还是要自己做才是真正的印象深刻.后来我发现解析模板是 ...
- iOS 视频播放 - YVideoPlayer - UIView
这是一个使用简便的视频播放框架,它基于UIView,它可以是一个小窗口,也可以是一个全屏的窗口 简单的方式加载Video框架: 一行代码加载! 一行代码更新! 下载链接 : https://githu ...
- 安卓第十三天笔记-服务(Service)
安卓第十三天笔记-服务(Service) Servcie服务 1.服务概念 服务 windows 服务没有界面,一直运行在后台, 运行在独立的一个进程里面 android 服务没有界面,一直运行在后台 ...
- 调用iframe中父页面/子页面中的JavaScript方法
今天做公司的内部流程系统,发现一问题.怎么调用iframe外面的方法呢?于是百度了一下,呵呵,把搜索结果摘抄下来. 转自:http://hi.baidu.com/zh_m_zhou/blog/item ...