用python & bat写软件安装脚本 + HM NIS Edit自动生成软件安装脚本
2019-03-11更新:原来NSIS脚本也可以禁用64位文件操作重定向的!
1、在安装脚本的开始处定义 LIBRARY_X64。
!include "MUI.nsh"
!include "Library.nsh"
;如果做32位安装包就把下句注释。
!define LIBRARY_X64
2、在调用涉及目标机器上系统目录(即$SYSDIR)的函数前用 ${DisableX64FSRedirection}。
在安装包的第一个Section中调用一次即可。
!ifdef LIBRARY_X64
${DisableX64FSRedirection}
!endif
之前问题主要在于64位重定向问题,所以自己用python写了个脚本。找到了NSIS禁用重定向方法就可以无论32位还是64位都可以使用NSIS来写脚本了。
原文:
前些天自己做了一年多的软件成功交付客户,客户提出些完善意见,其中一条就是要一个软件安装脚本。
这个之前也尝试python做过,只不过当时有更紧急的任务,最后就没深入尝试。
这次我就捡起了之前的python工程,继续做做。
整个过程很简单:
1,把软件解压到客户选择的目录
2,把一个dll程序复制到windows\system32目录
3,创建一个桌面快捷方式
因为就这么几步,所以我以为很容易搞,就选择了久违的python自己写,而没有选择一些成熟的自动生成脚本工具。
首先肯定要有个界面吧,主要是要用户选择安装目录。我用Tkinter写了个简陋的界面,这个不多说。
解压压缩包的话,python有很好的库zipfile:
def unzip(zipFilePath, destDir):

    zfile = zipfile.ZipFile(zipFilePath)

    for name in zfile.namelist():

        (dirName, fileName) = os.path.split(name)

        if fileName == '':

            # directory

            newDir = destDir + '/' + dirName

            if not os.path.exists(newDir):

                os.mkdir(newDir)

        else:

            # file

            fd = open(destDir + '/' + name, 'wb')

            fd.write(zfile.read(name))

            fd.close()

    zfile.close()
创建桌面快捷方式python肯定也有库,但我最后选择了使用bat脚本。
set Program=这里要写快捷方式对应的程序目录,且必须是绝对路径。
在python里将这个路径填写上,然后程序里运行bat脚本即可。
@ echo off

set Program=

set LnkName=manager software

set WorkDir=

set Desc=soft

if not defined WorkDir call:GetWorkDir "%Program%"

(echo Set WshShell=CreateObject("WScript.Shell"^)

echo strDesKtop=WshShell.SpecialFolders("DesKtop"^)

echo Set oShellLink=WshShell.CreateShortcut(strDesKtop^&"\%LnkName%.lnk"^)

echo oShellLink.TargetPath="%Program%"

echo oShellLink.WorkingDirectory="%WorkDir%"

echo oShellLink.WindowStyle=

echo oShellLink.Description="%Desc%"

echo oShellLink.Save)>makelnk.vbs

echo SUCCESS

makelnk.vbs

del /f /q makelnk.vbs

exit

goto :eof

:GetWorkDir

set WorkDir=%~dp1

set WorkDir=%WorkDir:~,-%

goto :eof
上面都算顺利,最后竟然在本以为很简单的复制文件到系统目录上出了问题。
不管怎样努力,都没法将文件复制到windows\system32目录下。
一开始本以为是权限问题。
在程序开始前加入这样的代码:
def is_admin():

    try:

        return ctypes.windll.shell32.IsUserAnAdmin()

    except:

        return False

if is_admin():

    #主程序代码

else:

    # Re-run the program with admin rights

    ctypes.windll.shell32.ShellExecuteW(None, u"runas", unicode(sys.executable), unicode(__file__), None, 1)
这样在运行前就会弹窗要求获取管理员权限。
按道理这样程序就已经有了管理员权限了,可还是没有复制到system32目录下。
后来在同事帮我看这个问题,他弄了一会,发现其实是64位系统下,系统自动重定向到C:\Windows\SysWOW64目录下了!
所以一定要在复制操作前,禁止重定向。
    with disable_file_system_redirection():

        shutil.copy2('sdfp_lib.dll',os.getenv("SystemDrive")+'\\windows\\system32')
上述,便是用python写我的软件自动安装脚本的全过程,后面会附上我的全部代码。
我先再讲下要实现这种软件自动安装脚本需求 最常用最合适的实现方法。
其实用工具自动生成就好了!
这个HM NIS Edit工具。
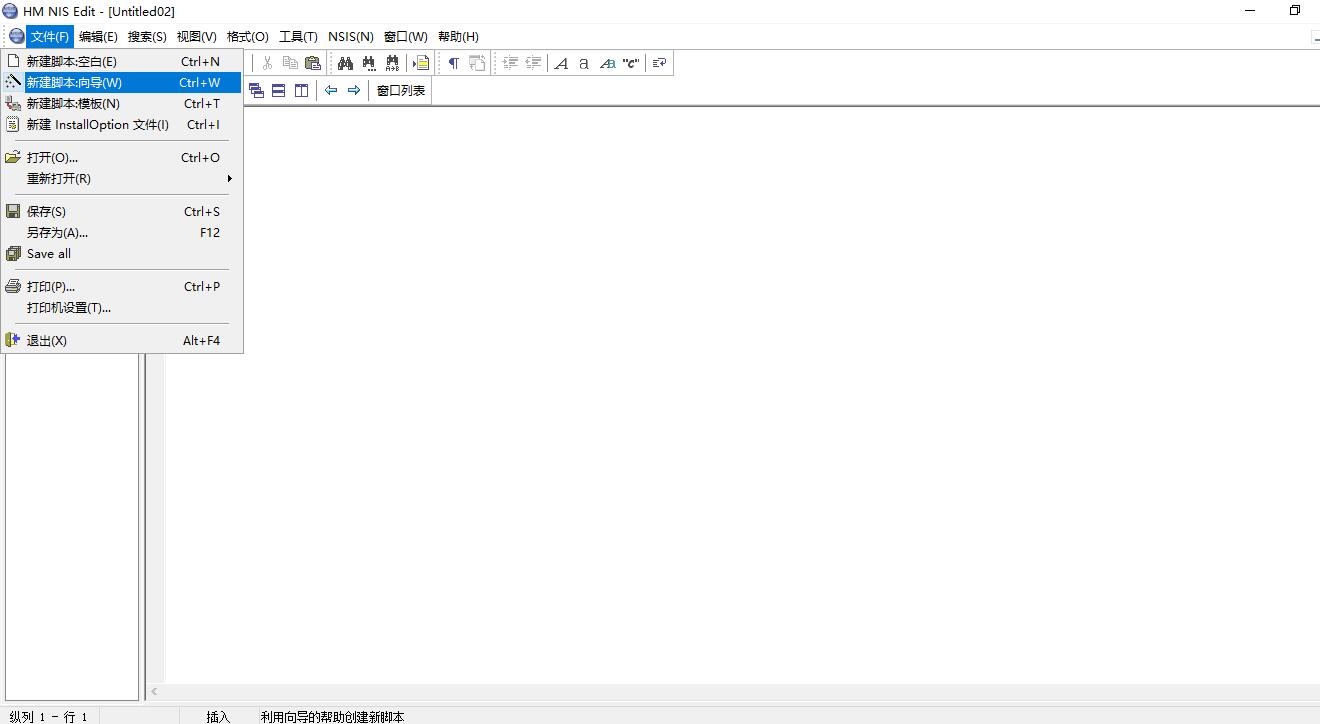
点击文件,选择新建脚本向导。
然后按照向导一般的安装,基本的安装需求都可以简单实现。
重点是这一步:
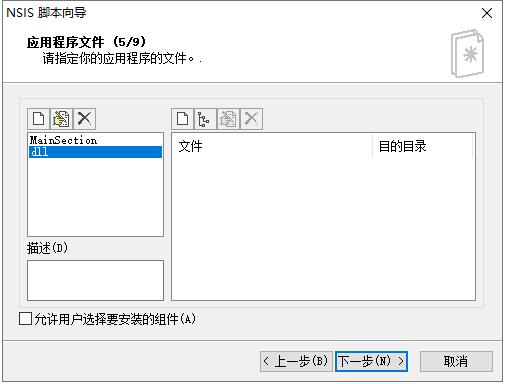
左边可以添加分组,右边可以给每个分组添加安装指令,可以给组添加单独的文件,也可以给组添加主程序目录。每个组再配置安装目标目录。这个目标目录有很多选择,包括系统目录、用户选择目录…………不赘述。
这个工具编译好脚本,就生成了一个Setup.exe文件。这就是安装程序。要安装的软件文件都包含在这个exe里了,很厉害。
按道理,只要用这个工具就可以完成我的需求了,但在64位系统还有些问题,那就是依然会有系统重定向现象。本来要复制到system32目录下的dll还是会被复制到C:\Windows\SysWOW64下。
最后我就决定,做两个版本。
32位的安装程序用HM NIS Edit工具自动生成。
64位我自己用python写。
另外,python转化成exe文件的写法,之前文章介绍过:
https://www.cnblogs.com/rixiang/p/7274026.html
附上py完整代码:
# -*- coding: utf-8 -*-

from __future__ import print_function

from Tkinter import *

import os

import sys

import subprocess

import shutil

reload(sys)

defaultencoding = 'utf-8'

import ctypes

import tkFileDialog as filedialog

import zipfile

from shutil import copyfile

class disable_file_system_redirection:

    _disable = ctypes.windll.kernel32.Wow64DisableWow64FsRedirection

    _revert = ctypes.windll.kernel32.Wow64RevertWow64FsRedirection

    def __enter__(self):

        self.old_value = ctypes.c_long()

        self.success = self._disable(ctypes.byref(self.old_value))

    def __exit__(self, type, value, traceback):

        if self.success:

            self._revert(self.old_value)

def unzip(zipFilePath, destDir):

    zfile = zipfile.ZipFile(zipFilePath)

    for name in zfile.namelist():

        (dirName, fileName) = os.path.split(name)

        if fileName == '':

            # directory

            newDir = destDir + '/' + dirName

            if not os.path.exists(newDir):

                os.mkdir(newDir)

        else:

            # file

            fd = open(destDir + '/' + name, 'wb')

            fd.write(zfile.read(name))

            fd.close()

    zfile.close()

def choose_directory():

    global dir_choosen

    global dir_choosen2

    dir_choosen = filedialog.askdirectory(initialdir='C:')

    # unzip my program to directory choosen

    dir_choosen2 = dir_choosen

    dir_choosen = dir_choosen + '/tgsoft'

    if not os.path.exists(dir_choosen):

        os.makedirs(dir_choosen)

    entryText.set(dir_choosen)

def install():

    if dir_choosen2.strip()=='' or dir_choosen.strip()=='':

        return -1

    unzip('tgsoft.zip',dir_choosen)

    with disable_file_system_redirection():

        shutil.copy2('sdfp_lib.dll',os.getenv("SystemDrive")+'\\windows\\system32')

    str_bat = ''

    f = open('CREATE_SHORTCUT.bat', 'r')

    line = f.readline()

    while line:

        str_bat+=line

        line = f.readline()

    f.close()

    nPos=str_bat.index('=')+1

    str_bat = str_bat[:nPos]+dir_choosen2+"\\tgsoft\\ManagerSoftware.exe"+str_bat[nPos:]

    f = open('CREATE_SHORTCUT2.bat', 'w') # 若是'wb'就表示写二进制文件

    f.write(str_bat)

    f.close()

    child = subprocess.Popen('CREATE_SHORTCUT2.bat',shell=False)

    # reset the window

    file_label.destroy()

    file_entry.destroy()

    file_btn.destroy()

    b2.destroy()

    w = Label(master, text="安装成功\n感谢使用")

    w.grid(row=0)

def is_admin():

    try:

        return ctypes.windll.shell32.IsUserAnAdmin()

    except:

        return False

if is_admin():

    global master

    master = Tk()

    master.title('指静脉注册软件安装程序')

    master.geometry('400x100')

    global file_label

    file_label = Label(master, text="选择软件安装路径")

    file_label.grid(row=0)

    global entryText

    entryText = StringVar()

    global file_entry

    file_entry = Entry(master,textvariable=entryText)

    file_entry.grid(row=0, column=1)

    global file_btn

    file_btn = Button(master, text='点击选择路径', command=choose_directory)

    file_btn.grid(row=0,column=2)

    global b1

    b1 = Button(master, text='  退 出  ', command=master.quit)

    b1.grid(row=1,column=0)

    global b2

    b2 = Button(master, text='  确 定  ', command=install)

    b2.grid(row=1,column=1)

    mainloop()

else:

    # Re-run the program with admin rights

    ctypes.windll.shell32.ShellExecuteW(None, u"runas", unicode(sys.executable), unicode(__file__), None, 1)
用python & bat写软件安装脚本 + HM NIS Edit自动生成软件安装脚本的更多相关文章
- [python] [转]如何自动生成和安装requirements.txt依赖
[转]如何自动生成和安装requirements.txt依赖 在查看别人的Python项目时,经常会看到一个requirements.txt文件,里面记录了当前程序的所有依赖包及其精确版本号.这个文件 ...
- HM NIS Edit 2.0.3 Win32 Error. Code:740.请求的操作需要提升
使用NSIS安装向导,生成脚本后,按F9后,居然提示:HM NIS Edit 2.0.3 Win32 Error. Code:740.请求的操作需要提升 一开始就出错了,还真不顺. 在网上搜索了一下, ...
- 如何利用pip自动生成和安装requirements.txt依赖
在查看别人的Python项目时,经常会看到一个requirements.txt文件,里面记录了当前程序的所有依赖包及其精确版本号.这个文件有点类似与Rails的Gemfile.其作用是用来在另一台PC ...
- 如何自动生成和安装requirements.txt依赖
在查看别人的Python项目时,经常会看到一个requirements.txt文件,里面记录了当前程序的所有依赖包及其精确版本号.这个文件有点类似与Rails的Gemfile.其作用是用来在另一台PC ...
- 自动生成和安装requirements.txt依赖
在查看别人的Python项目时,经常会看到一个requirements.txt文件,里面记录了当前程序的所有依赖包及其精确版本号.这个文件有点类似与Rails的Gemfile.其作用是用来在另一台PC ...
- atitit.自动生成数据库结构脚本,或者更换数据库,基于hibernate4
atitit.自动生成数据库结构脚本,或者更换数据库,基于hibernate4 目前近况:: 更换数据库,但是是使用spring集成的. <!-- hibernate配置文件路径 --> ...
- 使用pip命令自动生成项目安装依赖清单
Python项目中经常会带requirements.txt文件,里面是项目所依赖的包的列表,也就是依赖关系清单,这个清单也可以使用pip命令自动生成. pip命令: 1 pip freeze > ...
- Matlab中使用脚本和xml文件自动生成bus模块
帮一个老师写的小工具 在一个大工程中需要很多bus来组织信号,而为了规范接口,需要定义很多BusObject,用Matlab语言手写这些BusObject比较费工夫 所以用xml配置文件来写,也便于更 ...
- CSS雪碧图自动生成软件
下载地址 http://www.99css.com/1524/ 包含详细的下载地址.下载步骤以及使用教程 亮点:自动合成雪碧图+自动生成雪碧图background-position代码 简单过程 下载 ...
随机推荐
- C# TimeSpan 时间计算
原文:C# TimeSpan 时间计算 本文告诉大家简单的方法进行时间计算. 实际上使用 TimeSpan 可以做到让代码比较好懂,而代码很简单. 例如我使用下面的代码表示 5 秒 const int ...
- dp_Pku1887
<span style="color:#000099;">/* A - 单纯dp 示例 Time Limit:1000MS Memory Limit:30000KB 6 ...
- Android, iOS, 各种软件汇总
Android: 长截图:软件叫PPIICC的可以截图之后拼接:有些手机自带截图,比如小米,华为,三星等. 视频:全格式的Kodi XBMC, 一般的:moboplayer, VLC, F蔷:***, ...
- 【转】解决yum安装软件报Couldn't resolve host 'mirrorlist.centos.org问题
转自:http://blog.51cto.com/oldcat1981/1719825 今天在linux环境通过yum安装软件报了以下错误: [root@multi-mysql yum.rep ...
- 各个 C# 版本的主要特性、发布日期和发布方式(C# 1.0 - 7.3)
原文 各个 C# 版本的主要特性.发布日期和发布方式(C# 1.0 - 7.3) 本文收集各个 C# 版本的主要特性.发布日期和发布方式. C# 8.0 尚在预览版本 C# 7.3 2018 年 5 ...
- ASP.NET Core 路由 - ASP.NET Core 基础教程 - 简单教程,简单编程
原文:ASP.NET Core 路由 - ASP.NET Core 基础教程 - 简单教程,简单编程 ASP.NET Core 路由 前两章节中,我们提到 ASP.NET Core 支持 MVC 开发 ...
- kendo ui gird温馨提示(使用本地数据) 一个
加入js引用 <link href="http://cdn.kendostatic.com/2014.2.716/styles/kendo.common.min.css" r ...
- 编写可移植C/C++程序的要点(12条)
1.分层设计,隔离平台相关的代码.就像可测试性一样,可移植性也要从设计抓起.一般来说,最上层和最下层都不具有良好的可移植性.最上层是GUI,大多数GUI都不是跨平台的,如Win32 SDK和MFC.最 ...
- 从零开始学习 asp.net core 2.1 web api 后端api基础框架(二)-创建项目
原文:从零开始学习 asp.net core 2.1 web api 后端api基础框架(二)-创建项目 版权声明:本文为博主原创文章,未经博主允许不得转载. https://blog.csdn.ne ...
- .net中模拟键盘和鼠标操作
原文:.net中模拟键盘和鼠标操作 周银辉 其实SendKeys类提供的方法蛮好用的,可惜的是WPF中不能用了,说是WPF的消息循环方式改成了Dispatcher,所以直接调用System.Windo ...