ssm框架整合
1.1 整合的思路
1.1.1 Dao层
使用mybatis框架。创建SqlMapConfig.xml。(可以是任意名字)
创建一个applicationContext-dao.xml (通过spring bean管理dao层的配置)
1、配置数据源
2、需要让spring容器管理SqlsessionFactory,单例存在。
3、把mapper的代理对象放到spring容器中。使用扫描包的方式加载mapper的代理对象。
1.1.2 Service层
1、事务管理
2、需要把service实现类对象放到spring容器中管理。
1.1.3 表现层
1、配置注解驱动
2、配置视图解析器
3、需要扫描controller
1.1.4 Web.xml
1、spring容器的配置
2、Springmvc前端控制器的配置
3、Post乱码过滤器
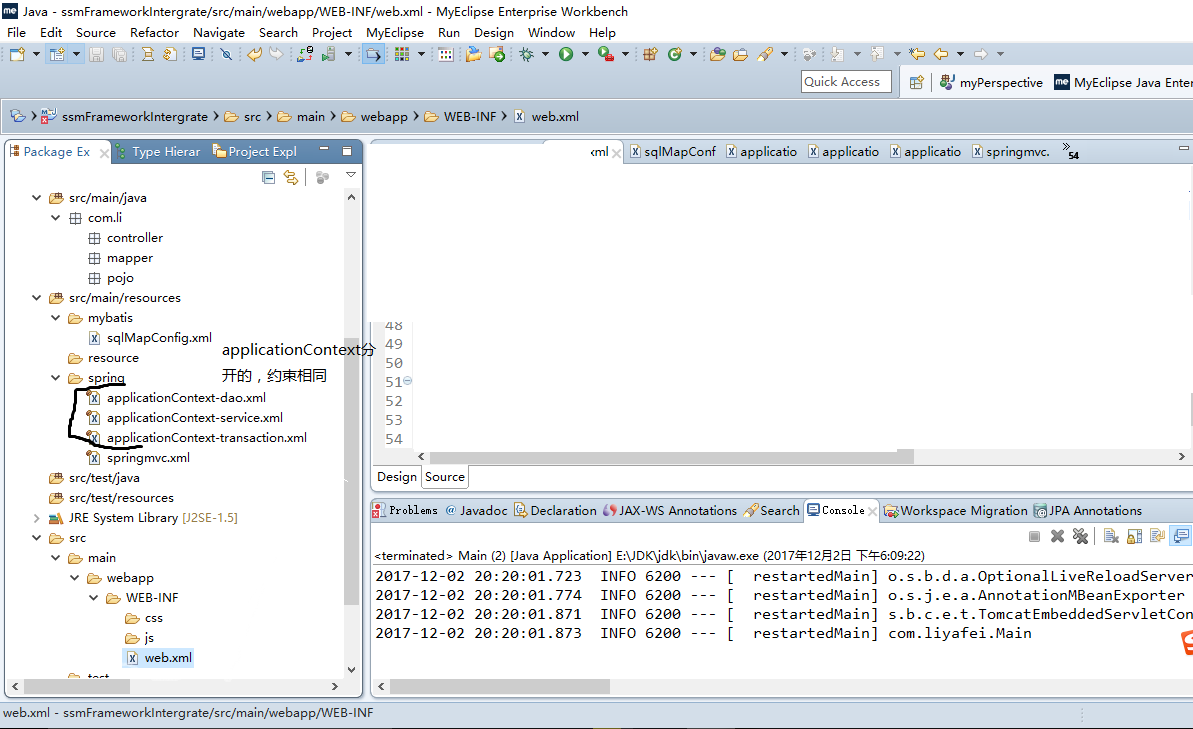
2 需要把配置文件放到web工程下。因为此工程为war工程,其他的工程只是一个jar包。结构目录
applicationContext-dao.xml,applicationContext-transaction.xml,applicationContext-service.xml可以在一个文件applicationContext.xml中。
方便管理,可以将其分开了
3在mybatis目录下创建sqlMapConfig.xml,必须要有,如下。
<?xml version="1.0" encoding="UTF-8" ?>

<!DOCTYPE configuration

        PUBLIC "-//mybatis.org//DTD Config 3.0//EN"

        "http://mybatis.org/dtd/mybatis-3-config.dtd">

<configuration>

    //可以配置别名等,也可以为空,这里直接为空就可以了

</configuration>
4:创建applicationContext-dao.xml,用spring 管理dao层,配置如下
db.properties
jdbc.url=jdbc:mysql://localhost:3306/ssm

jdbc.driver=com.mysql.jdbc.Driver

jdbc.username=root

jdbc.password=root
applicationContext-dao.xml
<?xml version="1.0" encoding="UTF-8"?>

<beans xmlns="http://www.springframework.org/schema/beans"

    xmlns:context="http://www.springframework.org/schema/context" xmlns:p="http://www.springframework.org/schema/p"

    xmlns:aop="http://www.springframework.org/schema/aop" xmlns:tx="http://www.springframework.org/schema/tx"

    xmlns:xsi="http://www.w3.org/2001/XMLSchema-instance"

    xsi:schemaLocation="http://www.springframework.org/schema/beans http://www.springframework.org/schema/beans/spring-beans-4.0.xsd

    http://www.springframework.org/schema/context http://www.springframework.org/schema/context/spring-context-4.0.xsd

    http://www.springframework.org/schema/aop http://www.springframework.org/schema/aop/spring-aop-4.0.xsd http://www.springframework.org/schema/tx http://www.springframework.org/schema/tx/spring-tx-4.0.xsd

    http://www.springframework.org/schema/util http://www.springframework.org/schema/util/spring-util-4.0.xsd">

    <!-- 数据库连接池 -->

    <!-- 加载配置文件 db.properties-->

    <context:property-placeholder location="classpath:resource/db.properties" />

    <!-- 数据库连接池 -->

    <bean id="dataSource" class="com.alibaba.druid.pool.DruidDataSource"

        destroy-method="close">

        <property name="url" value="${jdbc.url}" />

        <property name="username" value="${jdbc.username}" />

        <property name="password" value="${jdbc.password}" />

        <property name="driverClassName" value="${jdbc.driver}" />

        <property name="maxActive" value="10" />

        <property name="minIdle" value="5" />

    </bean>

    <!-- 配置sqlsessionFactory ,配置两个属性configLocation,dataSource。-->

    <bean id="sqlSessionFactory" class="org.mybatis.spring.SqlSessionFactoryBean">
      <!--configLocation 为sqlMapConfig.xml-->

        <property name="configLocation" value="classpath:mybatis/SqlMapConfig.xml"></property>
        <!--数据源-->

        <property name="dataSource" ref="dataSource"></property>

    </bean>

    <!-- 配置扫描包,加载mapper代理对象,使用类MapperScannerConfigurer扫描 -->

    <bean class="org.mybatis.spring.mapper.MapperScannerConfigurer">

        <property name="basePackage" value="com.li.mapper"></property>  <!--mapper定义增删该查方法-->

    </bean>

</beans>
5:配置applicationContext-service.xml,扫描 service层注解,将注解类扫描成为bean
<?xml version="1.0" encoding="UTF-8"?>

<beans xmlns="http://www.springframework.org/schema/beans"

    xmlns:context="http://www.springframework.org/schema/context" xmlns:p="http://www.springframework.org/schema/p"

    xmlns:aop="http://www.springframework.org/schema/aop" xmlns:tx="http://www.springframework.org/schema/tx"

    xmlns:xsi="http://www.w3.org/2001/XMLSchema-instance"

    xsi:schemaLocation="http://www.springframework.org/schema/beans http://www.springframework.org/schema/beans/spring-beans-4.0.xsd

    http://www.springframework.org/schema/context http://www.springframework.org/schema/context/spring-context-4.0.xsd

    http://www.springframework.org/schema/aop http://www.springframework.org/schema/aop/spring-aop-4.0.xsd http://www.springframework.org/schema/tx http://www.springframework.org/schema/tx/spring-tx-4.0.xsd

    http://www.springframework.org/schema/util http://www.springframework.org/schema/util/spring-util-4.0.xsd">

    <!-- 扫描包加载Service实现类 ,使用属性context:component-scan扫描-->

    <context:component-scan base-package="com.li.service"></context:component-scan>

</beans>
6:配置applicationContext-transacation.xml ,配置事务,
<?xml version="1.0" encoding="UTF-8"?>

<beans xmlns="http://www.springframework.org/schema/beans"

    xmlns:context="http://www.springframework.org/schema/context" xmlns:p="http://www.springframework.org/schema/p"

    xmlns:aop="http://www.springframework.org/schema/aop" xmlns:tx="http://www.springframework.org/schema/tx"

    xmlns:xsi="http://www.w3.org/2001/XMLSchema-instance"

    xsi:schemaLocation="http://www.springframework.org/schema/beans http://www.springframework.org/schema/beans/spring-beans-4.0.xsd

    http://www.springframework.org/schema/context http://www.springframework.org/schema/context/spring-context-4.0.xsd

    http://www.springframework.org/schema/aop http://www.springframework.org/schema/aop/spring-aop-4.0.xsd http://www.springframework.org/schema/tx http://www.springframework.org/schema/tx/spring-tx-4.0.xsd

    http://www.springframework.org/schema/util http://www.springframework.org/schema/util/spring-util-4.0.xsd">

    <!-- 事务管理器 -->

    <bean id="transactionManager" class="org.springframework.jdbc.datasource.DataSourceTransactionManager">

        <!-- 数据源 -->

        <property name="dataSource" ref="dataSource" />   <!--引用applicationContext-dao.xml配置的数据源-->

    </bean>


<!-- 通知 -->

    <tx:advice id="txAdvice" transaction-manager="transactionManager">

        <tx:attributes>

            <!-- 传播行为 -->

            <tx:method name="save*" propagation="REQUIRED" />  <!--REQUIRED表示,当方法以save开头时,如果有事务,就用原来的 事务,如果没有事务,就开启一个事务。-->

            <tx:method name="insert*" propagation="REQUIRED" />

            <tx:method name="add*" propagation="REQUIRED" />

            <tx:method name="create*" propagation="REQUIRED" />

            <tx:method name="delete*" propagation="REQUIRED" />

            <tx:method name="update*" propagation="REQUIRED" />

            <tx:method name="find*" propagation="SUPPORTS" read-only="true" />   <!--SUPPORTS表示,当方法以find开头时,如果有事务,就用原来的 事务,如果没有事务,不开启一个事务。-->

            <tx:method name="select*" propagation="SUPPORTS" read-only="true" />

            <tx:method name="get*" propagation="SUPPORTS" read-only="true" />

        </tx:attributes>

    </tx:advice>

    <!-- 切面 -->
    * com.taotao.service.*.*(..))  第一*代表任意返回值,com.taotao.service包下的任意方法都会被检查,是否符合上面事务的方法。

    <aop:config>

        <aop:advisor advice-ref="txAdvice"

            pointcut="execution(* com.li.service.*.*(..))" />

    </aop:config>

</beans>
7:配置springmvc.xml, 主要用于表现层,扫描controller,视图解析,jsp等
<?xml version="1.0" encoding="UTF-8"?>

<beans xmlns="http://www.springframework.org/schema/beans"

    xmlns:xsi="http://www.w3.org/2001/XMLSchema-instance" xmlns:p="http://www.springframework.org/schema/p"

    xmlns:context="http://www.springframework.org/schema/context"

    xmlns:mvc="http://www.springframework.org/schema/mvc"

    xsi:schemaLocation="http://www.springframework.org/schema/beans http://www.springframework.org/schema/beans/spring-beans.xsd

        http://www.springframework.org/schema/mvc http://www.springframework.org/schema/mvc/spring-mvc-4.0.xsd

        http://www.springframework.org/schema/context http://www.springframework.org/schema/context/spring-context.xsd">

    <!-- 配置表现层(controller)扫描包 -->

    <context:component-scan base-package="com.li.controller" />

    <!-- 配置注解驱动 -->

    <mvc:annotation-driven />

    <!-- 配置视图解析器(返回modelandview的name。将会寻找相应的jsp文件) -->

    <bean

        class="org.springframework.web.servlet.view.InternalResourceViewResolver">

        <property name="prefix" value="/WEB-INF/jsp/" />

        <property name="suffix" value=".jsp" />

    </bean>
 <!-- 资源映射 ,web.xml拦截所有的请求,包括静态资源,-->
 <!-- 当拦截了/css/**"/,就映射到工程中/WEB-INF/css/ 这个位置 -->
 <mvc:resources location="/WEB-INF/css/" mapping="/css/**"/>
 <mvc:resources location="/WEB-INF/js/" mapping="/js/**"/>

</beans>
8:配置web.xml,当工程启动时,将会首先加载web.xml
<?xml version="1.0" encoding="UTF-8"?>

<web-app xmlns:xsi="http://www.w3.org/2001/XMLSchema-instance"

    xmlns="http://java.sun.com/xml/ns/javaee" xmlns:web="http://java.sun.com/xml/ns/javaee/web-app_2_5.xsd"

    xsi:schemaLocation="http://java.sun.com/xml/ns/javaee http://java.sun.com/xml/ns/javaee/web-app_2_5.xsd"

    id="taotao" version="2.5">

    <display-name>taotao-manager</display-name>

    <welcome-file-list>

        <welcome-file>index.html</welcome-file>

        <welcome-file>index.htm</welcome-file>

        <welcome-file>index.jsp</welcome-file>

        <welcome-file>default.html</welcome-file>

        <welcome-file>default.htm</welcome-file>

        <welcome-file>default.jsp</welcome-file>

    </welcome-file-list>

    <!-- 加载spring容器 -->

    <context-param>

        <param-name>contextConfigLocation</param-name>

        <param-value>classpath:spring/applicationContext-*.xml</param-value>  <!-- spring中配置的applicationContext-*.xml文件将会被加载 -->

    </context-param>

    <listener>

        <listener-class>org.springframework.web.context.ContextLoaderListener</listener-class>

    </listener>

    <!-- 解决post乱码 -->

    <filter>

        <filter-name>CharacterEncodingFilter</filter-name>

        <filter-class>org.springframework.web.filter.CharacterEncodingFilter</filter-class>

        <init-param>

            <param-name>encoding</param-name>

            <param-value>utf-8</param-value>

        </init-param>

    </filter>

    <filter-mapping>

        <filter-name>CharacterEncodingFilter</filter-name>

        <url-pattern>/*</url-pattern>

    </filter-mapping>

    <!-- springmvc的前端控制器 -->

    <servlet>

        <servlet-name>taotao-manager</servlet-name>

        <servlet-class>org.springframework.web.servlet.DispatcherServlet</servlet-class>

        <!-- contextConfigLocation不是必须的, 如果不配置contextConfigLocation, springmvc的配置文件默认在:WEB-INF/servlet的name+"-servlet.xml" -->

        <!-- 加载springmvc.xml文件 -->

        <init-param>

            <param-name>contextConfigLocation</param-name>

            <param-value>classpath:spring/springmvc.xml</param-value>

        </init-param>

        <load-on-startup>1</load-on-startup>

    </servlet>

    <!-- /拦截所有的请求路径(包括静态资源), 请求路径将经过springmvc.xml,需要做静态资源映射-->

    <servlet-mapping>

        <servlet-name>taotao-manager</servlet-name>

        <url-pattern>/</url-pattern>

    </servlet-mapping>

</web-app>
<!-- 资源映射 ,web.xml拦截所有的请求,包括静态资源,-->
<!-- 当拦截了/css/**"/,就映射到工程中/WEB-INF/css/ 这个位置 -->
<mvc:resources location="/WEB-INF/css/" mapping="/css/**"/>
<mvc:resources location="/WEB-INF/js/" mapping="/js/**"/>
完成
ssm框架整合的更多相关文章
- SSM框架整合项目 :租房管理系统
使用ssm框架整合,oracle数据库 框架: Spring SpringMVC MyBatis 导包: 1, spring 2, MyBatis 3, mybatis-spring 4, fastj ...
- 基于maven的ssm框架整合
基于maven的ssm框架整合 第一步:通过maven建立一个web项目. 第二步:pom文件导入jar包 (1 ...
- JavaWeb之ssm框架整合,用户角色权限管理
SSM框架整合 Spring SpringMVC MyBatis 导包: 1, spring 2, MyBatis 3, mybatis-spring 4, fastjson 5, aspectwea ...
- SSM框架整合环境构建——基于Spring4和Mybatis3
目录 环境 配置说明 所需jar包 配置db.properties 配置log4j.properties 配置spring.xml 配置mybatis-spring.xml 配置springmvc.x ...
- springmvc(二) ssm框架整合的各种配置
ssm:springmvc.spring.mybatis这三个框架的整合,有耐心一步步走. --WH 一.SSM框架整合 1.1.整合思路 从底层整合起,也就是先整合mybatis与spring,然后 ...
- SSM框架整合的其它方式
---------------------siwuxie095 SSM 框架整合的其它方式 1.主要是整合 Spring ...
- SSM框架整合过程总结
-----------------------siwuxie095 SSM 框架整合过程总结 1.导入相关 jar 包( ...
- SSM框架整合思想
-------------------siwuxie095 SSM 框架整合思想 1.SSM 框架,即 SpringMV ...
- SSM框架整合搭建教程
自己配置了一个SSM框架,打算做个小网站,这里把SSM的配置流程详细的写了出来,方便很少接触这个框架的朋友使用,文中各个资源均免费提供! 一. 创建web项目(eclipse) File-->n ...
- 使用IntelliJ IDEA创建Maven聚合工程、创建resources文件夹、ssm框架整合、项目运行一体化
一.创建一个空的项目作为存放整个项目的路径 1.选择 File——>new——>Project ——>Empty Project 2.WorkspaceforTest为项目存放文件夹 ...
随机推荐
- Unity3D Shader 高斯模糊
//Shader Shader "Hidden/GaussianBlur" { Properties { _MainTex ("Texture", 2D) = ...
- 【CF566C】Logistical Questions 点分
[CF566C]Logistical Questions 题意:给你一棵n个点的树,点有点权,边有边权,两点间的距离为两点间的边权和的$3\over 2$次方.求这棵树的带权重心. $n\le 200 ...
- xcode reset 删除重新安装
Type "rm -rf ~/Library/Application Support/Xcode" and press "Enter." This remove ...
- DB2 的代理 (agent)
DB2 的代理 (agent) 是位于 DB2 服务器中的服务于应用程序请求的一些进程或线程.当有外部应用程序连接至 DB2 实例提出访问请求时,DB2 的代理就会被激活去应答这些请求.一般 DB2 ...
- HTTP Error 400. The request hostname is invalid
HTTP Error 400. The request hostname is invalid 错误, 检查服务的iis服务得知,是因为在绑定主机和端口的那一步时也指定了相应的域名. 解决办法: 去掉 ...
- webuploader 跨域上传demo(还没有写记录一下)
webuploader 跨域上传demo(还没有写记录一下)
- 内存proc详解
Linux系统上的/proc目录是一种文件系统,即proc文件系统.与其它常见的文件系统不同的是,/proc是一种伪文件系统(也即虚拟文件系统),存储的是当前内核运行状态的一系列特殊文件,用户可以通过 ...
- CSS盒子模型(简要了解)
CSS中, Box Model叫盒子模型(或框模型),Box Model规定了元素框处理元素内容(element content).内边距(padding).边框(border) 和 外边距(marg ...
- cocos2dx 常用的构建工具
理编辑工具Physics Editing ToolsMekanimo 网址:http://www.mekanimo.net/PhysicsBench 网址:http://www.cocos2d-iph ...
- js的序列化和反序列化
(1)序列化 即js中的Object转化为字符串 1.使用toJSONString var last=obj.toJSONString(); //将JSON对象转化为JSON字符 2.使用strin ...