mysql_linux(centos7 mysql 5.7.19)
- centos7 mysql 5.7.19安装
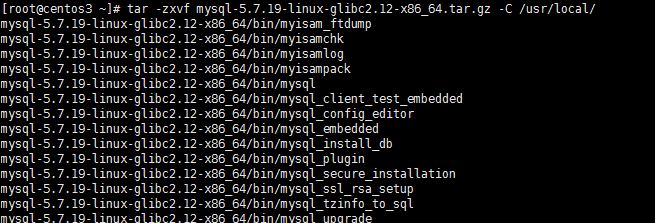
1.解压文件
[root@centos3 ~]# tar -zxvf mysql-5.7.19-linux-glibc2.12-x86_64.tar.gz -C /usr/local/
2.重命名
[root@centos3 ~]# cd /usr/local/
[root@centos3 local]# mv mysql-5.7.19-linux-glibc2.12-x86_64/ mysql

3.配置环境变量
[root@centos3 local]# vi + /etc/profile
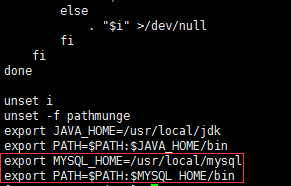
[root@centos3 local]# source /etc/profile
4.创建组和用户并授权
[root@centos3 local]# groupadd mysql
[root@centos3 local]# useradd -r -g mysql -s /bin/false mysql
[root@centos3 local]# chown -R mysql mysql/
[root@centos3 local]# chgrp -R mysql mysql/

5.初始化并记住最后的12位密码
[root@centos3 local]# /usr/local/mysql/bin/mysqld --initialize --user=mysql --basedir=/usr/local/mysql/ --datadir=/usr/local/mysql/data/ --lc_messages_dir=/usr/local/mysql/share --lc_messages=zh_CN

如果报以下错误
报错还提示找不到libaio.so.1
error while loading shared libraries: libaio.so.1: cannot open shared object file: No such file or directory
Warning
MySQL has a dependency on the libaio library. Data directory initialization and subsequent server startup steps will fail if this library is not installed locally. If necessary, install it using the appropriate package manager. For example, on
Yum-based systems:
shell> yum search libaio  # search for info

shell> yum install libaio # install library- 1
- 2
Or, on APT-based systems:
shell> apt-cache search libaio # search for info

shell> apt-get install libaio1 # install library- 1
- 2
Mysql 对 libaio library有依赖关系。
安装好libaio后
root@Fan:/data# /usr/local/mysql/bin/mysqld --initialize --defaults-file=/data/mysqldata/3306/my.cnf --datadir=/data/mysqldata/3306/data --basedir=/usr/local/mysql --user=mysql
2015-12-04T13:22:01.848446Z 0 [Warning] TIMESTAMP with implicit DEFAULT value is deprecated. Please use --explicit_defaults_for_timestamp server option (see documentation for more details).
2015-12-04T13:22:03.639997Z 0 [Warning] InnoDB: New log files created, LSN=45790
2015-12-04T13:22:04.002719Z 0 [Warning] InnoDB: Creating foreign key constraint system tables.
2015-12-04T13:22:04.167369Z 0 [ERROR] unknown variable 'defaults-file=/data/mysqldata/3306/my.cnf'
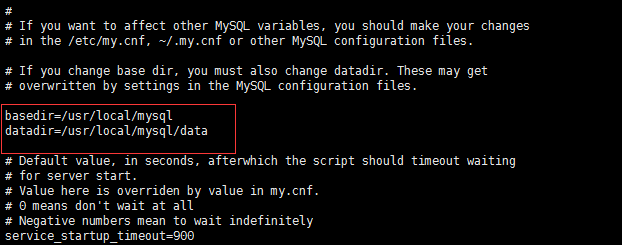
2015-12-04T13:22:04.167408Z 0 [ERROR] Aborting6.修改mysql.server.文件并复制到 /etc/init.d/目录下
[root@centos3 local]# cd /usr/local/mysql/support-files/
[root@centos3 support-files]# vi mysql.server
[root@centos3 support-files]# cp mysql.server /etc/init.d/mysqld
7.重命名my.cnf
[root@centos3 support-files]# mv /etc/my.cnf /etc/my_default.cnf
8.设置开机启动
[root@centos3 support-files]# chmod +x /etc/init.d/mysqld
[root@centos3 support-files]# chkconfig --add mysqld
[root@centos3 support-files]# chkconfig mysqld on
//查看开机启动是否成功
[root@centos3 support-files]# chkconfig --list mysqld

9.启动服务
[root@centos3 support-files]# /etc/init.d/mysqld start
[root@centos3 support-files]# service mysql start

如果 service mysql start
mysql: unrecognized service错误的
解决方案如下
[root@ctohome.com ~]# service mysql start
mysql: unrecognized service
[root@ctohome.com ~]# service mysql restart
mysql: unrecognized service
[root@ctohome.com ~]# rpm -q mysql 查询发现mysql已经正常安装
mysql-5.1.52-jason.1
rpm -q mysql 有可能查看不到,不急用 rpm -qa| grep mysql
rpm -q 服务名 的确可以查看已经安装的 mysql服务,但是服务名必须是全称才可以查到。
rpm -qa| grep mysql 查看一下系统是否已经安装了mysql,在使用rpm -q mysql-community-server-5.7.17-1.el7.x86_64 查看是否启动。
[root@ctohome.com ~]# /etc/rc.d/init.d/mysqld start 直接启动没问题
Starting mysqld: [ OK ]
[root@ctohome.com ~]# ls /etc/rc.d/init.d/mysqld -l
-rwxr-xr-x 1 root root 5509 Dec 18 02:31 /etc/rc.d/init.d/mysqld
[root@ctohome.com ~]# chkconfig mysqld on 设置mysql开机启动
[root@ctohome.com ~]# chmod 755 /etc/rc.d/init.d/mysqld 修改mysqld执行权限
[root@ctohome.com ~]# service mysqld start 搞定
Starting mysqld: [ OK ]
[root@ctohome.com ~]# service mysqld start
Starting mysqld: [ OK ]
[root@ctohome.com ~]# service mysqld status
mysqld (pid 9487) is running...
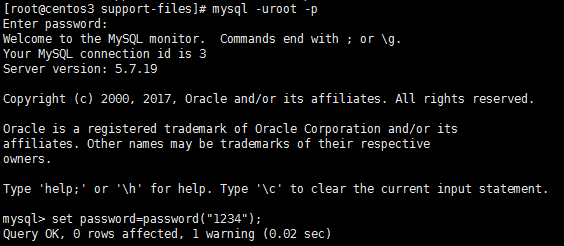
10.登录修改密码,密码就是第5步系统生成的
[root@centos3 support-files]# mysql -uroot -p
mysql> set password=password("1234");
mysql_linux(centos7 mysql 5.7.19)的更多相关文章
- Centos7 Mysql主从双机热备的实战记录
操作系统:centos7 服务器:主:172.19.242.69 从:172.19.242.70 1. 服务器 由于Mysql不同版本之间的(二进制日志)binlog格式可能会不太一样,因此最好的 ...
- WordPress 4.8 安装配置教程 (基于 centos 7.3, php 7.0, mysql 5.7.19, nginx 1.12.1)
最近想要整个 blog,记录自己工作.学习中的点滴.Wordpress 自然是首选,因为内容才是关键,所以也就不怕别人说太 low.网上大部份都是讲 wordpress 配合 apache 的安装教程 ...
- centos7安装mysql5.7.19及配置远程连接
centos7安装mysql5.7.19及配置远程连接------https://blog.csdn.net/Lh19931122/article/details/77996213
- 搭建 MySQL 5.7.19 主从复制,以及复制实现细节分析
主从复制可以使MySQL数据库主服务器的主数据库,复制到一个或多个MySQL从服务器从数据库,默认情况下,复制异步; 根据配置,可以复制数据库中的所有数据库,选定的数据库或甚至选定的表. Mysql ...
- MySQL学习之路 一 : MySQL 5.7.19 源码安装
MySQL 5.7.19 源码安装 查看系统: # cat /etc/redhat-release CentOS Linux release 7.3.1611 (Core) 安装依赖包 # yum - ...
- mysql 8.0.19 win10快速安装教程
本文教程为大家分享了mysql 8.0.19安装教程,供大家参考,具体内容如下 1.下载.zip安装文件 2.根目录存放my.ini,文件路径用“/”分割,例如: [mysqld] port=3306 ...
- linux下Mysql 8.0.19 编译安装
1 前言 linux下安装MySQL的方式有很多种,包括以仓库的方式安装(yum,apt,zypper),以包的方式安装(rpm,deb),以docker方式安装,从压缩包解压安装,从源码编译安装,这 ...
- MySQL 5.7.19 简易安装、卸载教程
前言:传统的 exe 文件安装的MySQL,安装后特别难卸载,而且一旦处理不好,就容易出错,想再安装别的版本也不容易.因为这种方式的安装,虽然是不断的下一步,但是卸载的时候需要处理很多,在本文最后,有 ...
- centos7 mysql数据库的安装与使用
一:数据库的安装 第一步 下载数据库到主机,, 第二步 通过xshell将数据库压缩包上传至centos7虚拟主机(#注意:服务器主机需下载上传工具lrzsz 命令:yun -y install ...
随机推荐
- python3内置函数练习
1. abs() abs() 函数返回数字的绝对值. print(abs(1.5236)) # 1.5236 print(abs(1.0)) # 1.0 2. all() all() 函数用于判断给定 ...
- 【Teradata】配置PE和AMP(congfig和reconfig工具、vprocmanager)
The Reconfiguration and Configuration utilities are used to define the AMPs and PEs that operate tog ...
- P1140 相似基因 这个和之前有一个题目特别像 dp
题目背景 大家都知道,基因可以看作一个碱基对序列.它包含了444种核苷酸,简记作A,C,G,TA,C,G,TA,C,G,T.生物学家正致力于寻找人类基因的功能,以利用于诊断疾病和发明药物. 在一个人类 ...
- springboot中配置了拦截器后,拦截器无效的解决方案之一
springboot的启动类xxxApplication不能扫描到拦截器配置类,可加上@ComponentScan(basePackages={"com.maya.common"} ...
- Jmeter插件安装及使用
1 安装Plugins Manager插件 1.1 下载Plugins Manager插件 插件下载官方地址:https://jmeter-plugins.org/downloads/all/ 将下载 ...
- Tomcat配置(部分知识点)
1.<Server>元素,shutdown属性表示关闭Server的指令:port属性表示Server接收shutdown指令的端口号,设为-1可以禁掉该端口 2.Connector的主要 ...
- Python 带参数的装饰器 [2] 函数参数类型检查
在Python中,不知道函数参数类型是一个很正常的事情,特别是在一个大项目里.我见过有些项目里,每一个函数体的前十几行都在检查参数类型,这实在是太麻烦了.而且一旦参数有改动,这部分也需要改动.下面我们 ...
- 「JOI 2016 Final」断层
嘟嘟嘟 今天我们模拟考这题,出的是T3.实在是没想出来,就搞了个20分暴力(还WA了几发). 这题关键在于逆向思维,就是考虑最后的\(n\)的个点刚开始在哪儿,这样就减少了很多需要维护的东西. 这就让 ...
- 【转】APK反编译
学习和开发Android应用有一段时间了,今天写一篇博客总结一下Android的apk文件反编译.我们知道,Android应用开发完成之后,我们最终都会将应用打包成一个apk文件,然后让用户通过手机或 ...
- 微信小程序PHP 微信支付接口调用
小程序端 /** * 微信支付接口 */ wxPaymoney:function (out_trade_no, true_money){ //out_trade_no 后台统一下单接口需要用 var ...