springcloud的服务提供者与服务消费者
1、说明
springcloud中由服务消费者调用服务提供者一共有两种方法rest和feign
2、feign
(1)使用feign的方式进行服务调,搭建服务提供者。
- 创建一个web项目(服务提供者)
- 修改pom文件
<dependency>

    <groupId>org.springframework.cloud</groupId>

    <artifactId>spring-cloud-starter-eureka</artifactId>

    <version>1.4.4.RELEASE</version>

</dependency>

<dependency>

    <groupId>org.springframework.boot</groupId>

    <artifactId>spring-boot-starter-web</artifactId>

</dependency> - 在项目启动类上加@EnableDiscoveryClient注解
- 添加配置文件
spring.application.name=spring-cloud-producer

server.port=9000

#将服务注册的地址
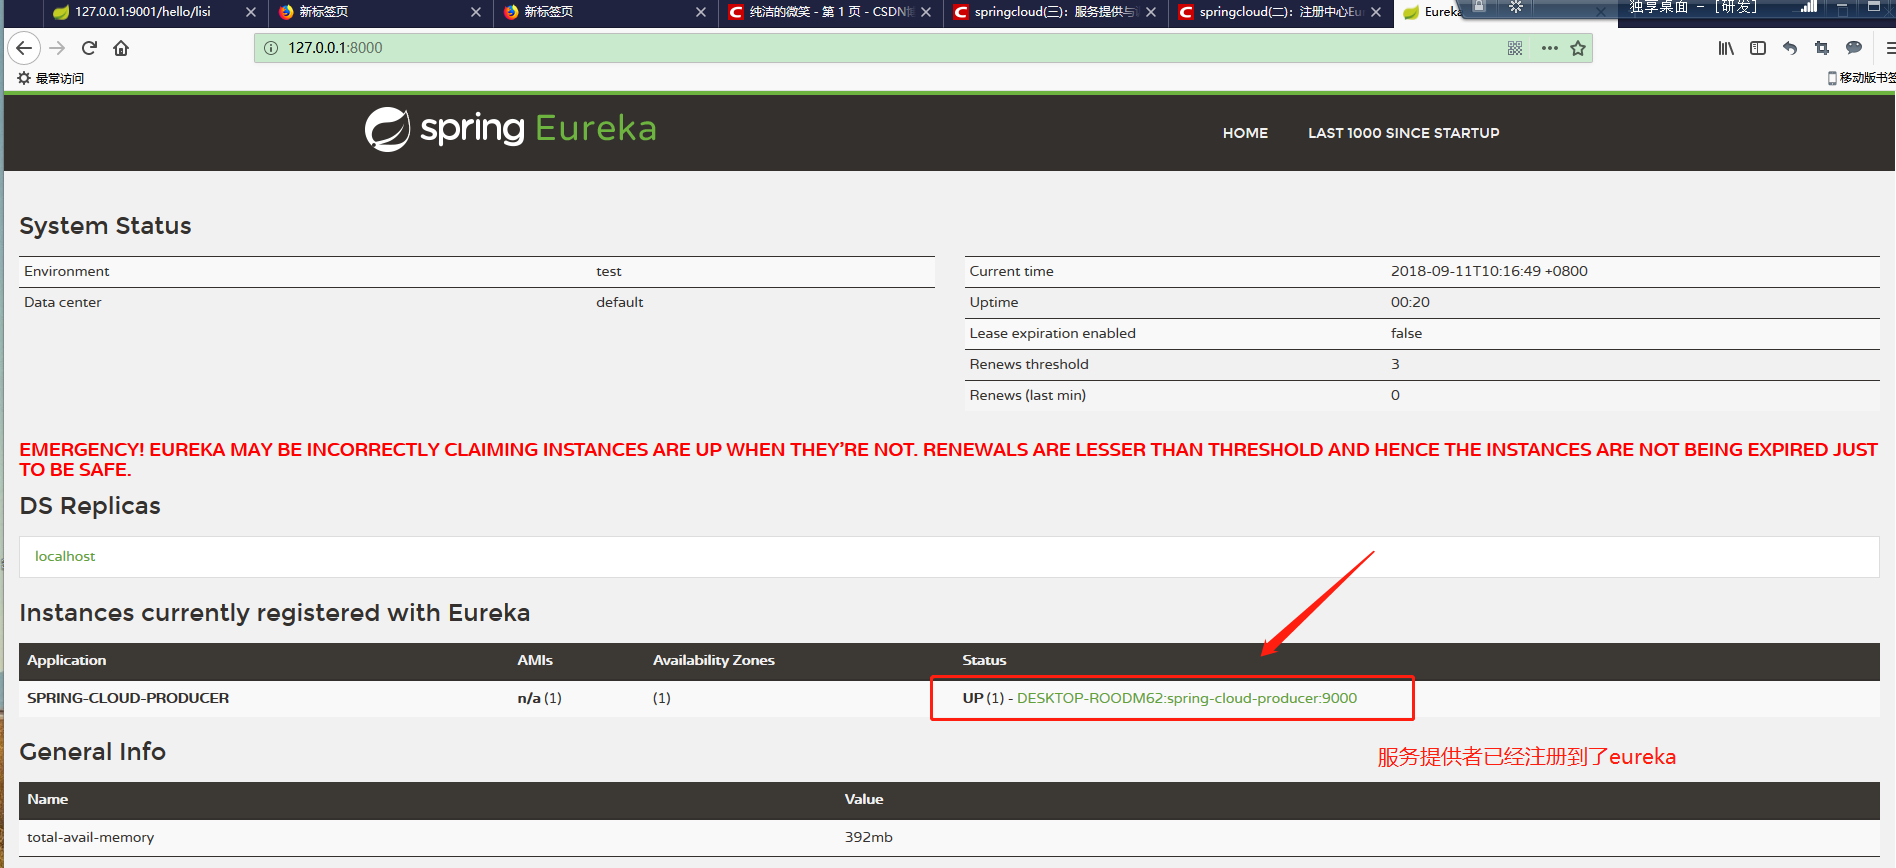
eureka.client.serviceUrl.defaultZone=http://localhost:8000/eureka/ - 编写测试代码
import org.springframework.web.bind.annotation.RequestMapping;
import org.springframework.web.bind.annotation.RequestParam;
import org.springframework.web.bind.annotation.RestController; @RestController
public class HelloController {
@RequestMapping("/hello")
public String index(@RequestParam String name) {
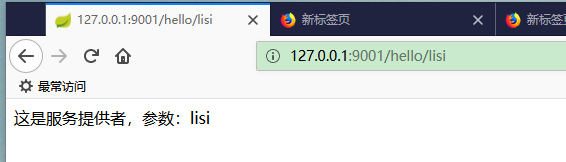
return "这是服务提供者,参数:"+name;
}
}
6、效果
(2)使用feign的方式进行服务调,搭建服务消费者。
- 创建一个web项目(服务消费者)
- 修改pom文件
<dependency>

     <groupId>org.springframework.boot</groupId>

     <artifactId>spring-boot-starter</artifactId>

</dependency>

 <dependency>

     <groupId>org.springframework.cloud</groupId>

     <artifactId>spring-cloud-starter-feign</artifactId>

     <version>1.4.4.RELEASE</version>

</dependency>

<dependency>

     <groupId>org.springframework.cloud</groupId>

     <artifactId>spring-cloud-starter-eureka</artifactId>

     <version>1.4.4.RELEASE</version>

</dependency> - 在项目启动类上加@EnableDiscoveryClient 启动服务注册和发现 @EnableFeignClients 启用feign进行远程调用 注解
- 添加配置文件
spring.application.name=spring-cloud-consumer

server.port=9001

eureka.client.serviceUrl.defaultZone=http://localhost:8000/eureka/ - 编写测试代码
5.1编写调用接口
import org.springframework.cloud.netflix.feign.FeignClient;

import org.springframework.web.bind.annotation.RequestMapping;

import org.springframework.web.bind.annotation.RequestParam;

// name的值是服务提供者的配置文件中的spring.application.name

@FeignClient(name= "spring-cloud-producer")

public interface HelloRemote {

    @RequestMapping(value = "/hello")

    String hello(@RequestParam(value = "name") String name);

}
5.2编写调用类
import com.comsuer.comsuer.Service.HelloRemote;

import org.springframework.beans.factory.annotation.Autowired;

import org.springframework.web.bind.annotation.PathVariable;

import org.springframework.web.bind.annotation.RequestMapping;

import org.springframework.web.bind.annotation.RestController;

@RestController

public class helloController {

    @Autowired

    private HelloRemote helloRemote;

    @RequestMapping("/hello/{name}")

    public String index(@PathVariable("name") String name) {

        return helloRemote.hello(name);

    }

}
6. 效果
3、rest
springcloud使用rest+ribbon实现服务调用和服务提供者的负载均衡
(1)搭建服务提供者
- 创建一个web项目
- 修改pom文件
<dependency>

    <groupId>org.springframework.cloud</groupId>

    <artifactId>spring-cloud-starter-netflix-eureka-client</artifactId>

</dependency>

<dependency>

    <groupId>org.springframework.boot</groupId>

    <artifactId>spring-boot-starter-web</artifactId>

</dependency> - 在启动类上加@EnableDiscoveryClient 注解
- 添加配置文件
spring.application.name=spring-cloud-producer

server.port=9000

eureka.client.serviceUrl.defaultZone=http://localhost:8000/eureka/ - 编写测试代码
import org.springframework.web.bind.annotation.PostMapping;
import org.springframework.web.bind.annotation.RequestBody;
import org.springframework.web.bind.annotation.ResponseBody;
import org.springframework.web.bind.annotation.RestController; @RestController
public class HelloController {
@PostMapping("/hello")
@ResponseBody
public String index(@RequestBody String name) {
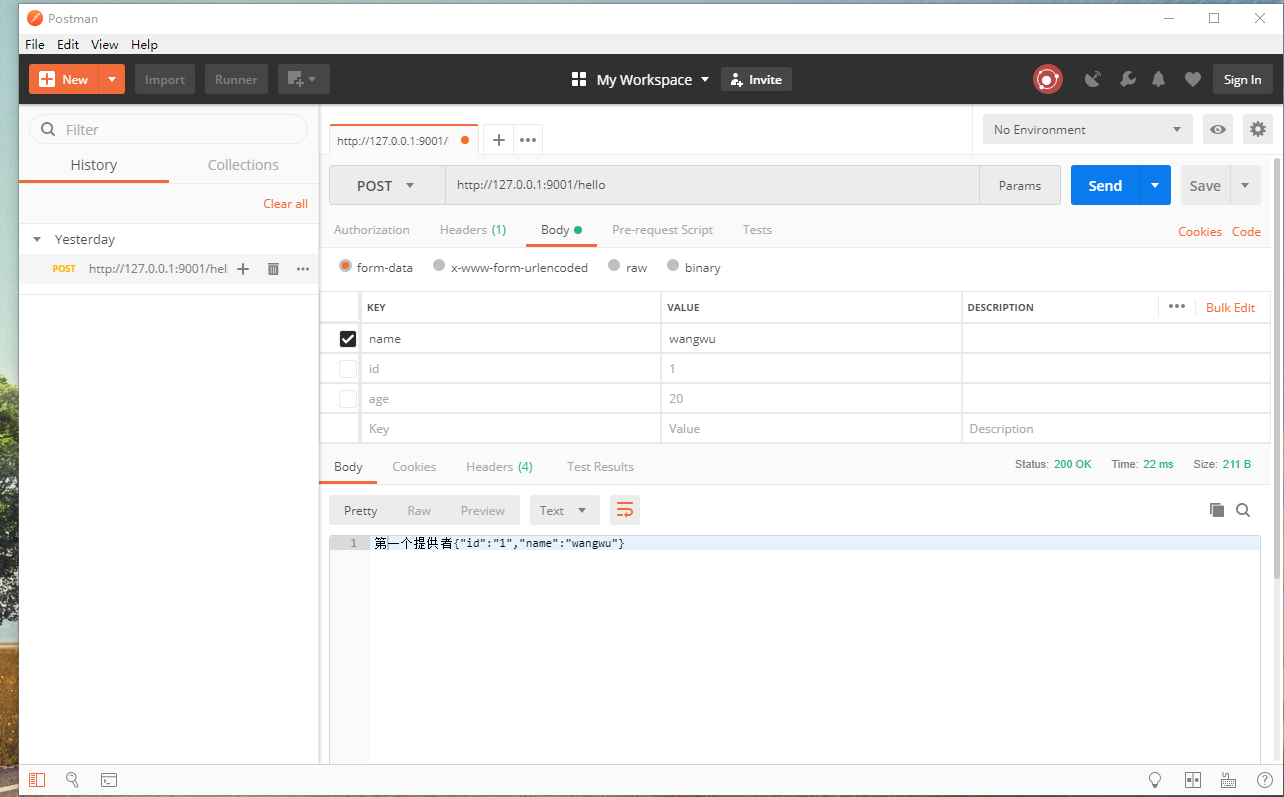
return "第一个提供者"+name;
}
} - 按照上面的五个步骤再构建一个服务提供者
(2)搭建服务消费者
- 创建一个web项目
- 修改配置文件
<dependency>

   <groupId>org.springframework.boot</groupId>

   <artifactId>spring-boot-starter-web</artifactId>

</dependency>

<dependency>

   <groupId>org.springframework.cloud</groupId>

   <artifactId>spring-cloud-starter-ribbon</artifactId>

   <version>1.4.4.RELEASE</version>

</dependency>

<dependency>

  <groupId>org.springframework.cloud</groupId>

  <artifactId>spring-cloud-starter-eureka-server</artifactId>

  <version>1.4.4.RELEASE</version>

</dependency>

<dependency>

<groupId>com.alibaba</groupId>

   <artifactId>fastjson</artifactId>

   <version>1.2.49</version>

</dependency> - 在启动类上添加@EnableDiscoveryClient 注解,并修改启动类的代码,修改如下
import org.springframework.boot.SpringApplication;

import org.springframework.boot.autoconfigure.SpringBootApplication;

import org.springframework.cloud.client.discovery.EnableDiscoveryClient;

import org.springframework.cloud.client.loadbalancer.LoadBalanced;

import org.springframework.context.annotation.Bean;

import org.springframework.web.client.RestTemplate;

@SpringBootApplication

@EnableDiscoveryClient

public class ComsuerApplication {

    public static void main(String[] args) {

        SpringApplication.run(ComsuerApplication.class, args);

    }

    // 实现负载均衡

    @Bean

    @LoadBalanced

    RestTemplate restTemplate(){

        return new RestTemplate();

    }

} - 添加配置文件
spring.application.name=spring-cloud-consumer

server.port=9001

eureka.client.serviceUrl.defaultZone=http://localhost:8000/eureka/ - 编写测试代码
import com.alibaba.fastjson.JSON;

import org.springframework.beans.factory.annotation.Autowired;

import org.springframework.web.bind.annotation.PostMapping;

import org.springframework.web.bind.annotation.ResponseBody;

import org.springframework.web.bind.annotation.RestController;

import org.springframework.web.client.RestTemplate;

@RestController

public class helloController {

    @Autowired

    private RestTemplate rest;

    @PostMapping("/hello")

    @ResponseBody

    public String hello(String name){

        System.err.println(name);

        String url = "http://spring-cloud-producer/hello";

        User user = new User();

        user.setName(name);

        user.setId("1");

        String s1 = JSON.toJSONString(user);

        String s = rest.postForObject(url, s1, String.class);

        return s;

    }

}
rest调用效果,会调一次一,调一次二
4.总结
feign方式的负载均衡和rest步骤基本一样。
springcloud的服务提供者与服务消费者的更多相关文章
- 为什么Eureca Client要分成服务提供者和服务消费者呢?
[学习笔记]转载 6)为什么Eureca Client要分成服务提供者和服务消费者呢? 通 常来讲,服务提供方是重量的耗时的,所以可能在n台机器上.而服务消费方是轻量的,通过配置ribbon和@Loa ...
- spring cloud微服务架构 服务提供者和服务消费者
服务提供者和服务消费者 下面这张表格,简单描述了服务提供者/消费者是什么: | 名词 | 概念 | | ----- | ----------------------- | | 服务提供者 | 服务 ...
- Dubbo搭建HelloWorld-搭建服务提供者与服务消费者并完成远程调用(附代码下载)
场景 Dubbo简介与基本概念: https://blog.csdn.net/BADAO_LIUMANG_QIZHI/article/details/103555224 Dubbo环境搭建-ZooKe ...
- SpringCloud系列二:硬编码实现简单的服务提供者与服务消费者
从本文开始,以一个电影售票系统为例讲解Spring Cloud 1. 版本 jdk:1.8 SpringBoot:2.0.0.RELEASE SpringCloud:Finchley.M8 2. 系统 ...
- 《springcloud 一》搭建注册中心,服务提供者,服务消费者
注册中心环境搭建 Maven依赖信息 <parent> <groupId>org.springframework.boot</groupId> <artifa ...
- SpringCloud(2)服务消费者(rest+ribbon)
1.准备工作 这一篇文章基于上一篇文章的工程.启动eureka-server 工程,端口为 8761.分别以端口 8762 和 8763 启动 service-hi 工程.访问 localhost:8 ...
- SpringCloud教程 | 第二篇: 服务消费者(rest+ribbon)
在上一篇文章,讲了服务的注册和发现.在微服务架构中,业务都会被拆分成一个独立的服务,服务与服务的通讯是基于http restful的.Spring cloud有两种服务调用方式,一种是ribbon+r ...
- SpringCloud教程 | 第二篇: 服务消费者(rest+ribbon)(Finchley版本)
在上一篇文章,讲了服务的注册和发现.在微服务架构中,业务都会被拆分成一个独立的服务,服务与服务的通讯是基于http restful的.Spring cloud有两种服务调用方式,一种是ribbon+r ...
- 史上最简单的SpringCloud教程 | 第二篇: 服务消费者(rest+ribbon)(Finchley版本)
转载请标明出处: 原文首发于:https://www.fangzhipeng.com/springcloud/2018/08/30/sc-f2-ribbon/ 本文出自方志朋的博客 在上一篇文章,讲了 ...
随机推荐
- css 图片波浪效果
参考:https://blog.csdn.net/zhichaosong/article/details/80944924#_99 效果: wave2.png html: <!DOCTYPE h ...
- js 禁止/允许页面滚动
参考:https://blog.csdn.net/huangfu_chunfeng/article/details/46429997 https://www.cnblogs.com/w ...
- 利用HttpWebRequest模拟提交图片
利用HttpWebRequest模拟提交图片 最近在做排量post工具, 以前做的都是提交文字 这次需要post图片过去,弄了半天终于弄好了: /// <summary> /// Post ...
- show master status
只有在主库上执行才能有效抵输出: 具体文档如下: # 在127.:3306主库上执行 tmp@127.0.0.1 ((none))> show variables like '%server%' ...
- apache tomcat 一个网站多域名的实现方法
因此处是进行多域名设置,所以 Apache 与 tomcat的结合没有详述,此处只是设置多域名的方法 windows下 C:\WINDOWS\system32\drivers\etc 文件夹内 hos ...
- Ubuntu16.04安装pcl库
sudo apt-get install libpcl-dev sudo apt-get install pcl-tools
- 19-11-2-M
最后一个当然要模自己辣. %%%Miemengsb ZJ一下: 三道题没有一道会的,唯一的20还是T2输出$n/2$得的 咝…… T1一看,只会暴力. T2一看,像是状压,但是我是$dpsb$,于是弃 ...
- 观察属性$watch
<!DOCTYPE html> <html lang="zh"> <head> <title></title> < ...
- FormData兼容IE10 360及DWR的异步上传原理
摘自:https://github.com/henryluki/FormData/blob/master/formdata.js if(!window.FormData) { (function(se ...
- C#窗体随意移动
//全区域移动 const int WM_NCLBUTTONDOWN = 0xA1; const int HT_CAPTION = 0x2; [DllImport("user32.dll&q ...