
( 转)WPF面板布局介绍Grid、StackPanel、DockPanel、WrapPanel
回顾
上一篇,我们介绍了基本控件及控件的重要属性和用法,我们本篇详细介绍WPF中的几种布局容器及每种布局容器的使用场景,当
然这些都是本人在实际项目中的使用经验,可能还存在错误之处,还请大家指出。
本文大纲
1、Grid
2、StackPanel
3、DockPanel
4、WrapPanel
Grid
1、Row和Column
我们下面来介绍Grid的行的用法,及我们在UI设计过程中需要注意的细节。
由于前面我们在第一章中已经介绍了基本的关于Grid的表格行和列的定义及相关属性,为了防止大家遗忘,我们这里再次介绍下:
为了加深大家对Grid布局的印象,我们这里加入控件来展示效果。
下面在每个单元格都加入子控件
上面指定了控件在Grid表格中的哪一行那一列,如果我们的某个控件跨行或者跨列如何做呢?
关于跨行和跨列一样,只不过将Grid.ColumnSpan换成Grid.RowSpan。
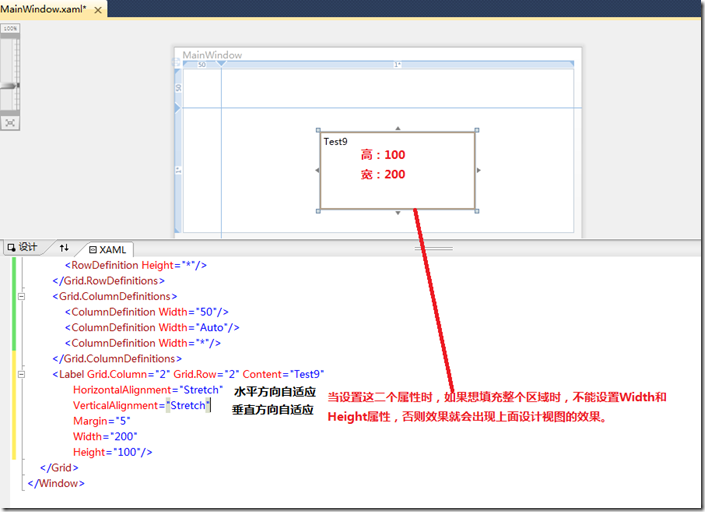
下面介绍,在Grid如何将控件设置为自适应宽度和高度,或者是固定宽度或固定高度时,应该注意的细节。
1、自适应区域:
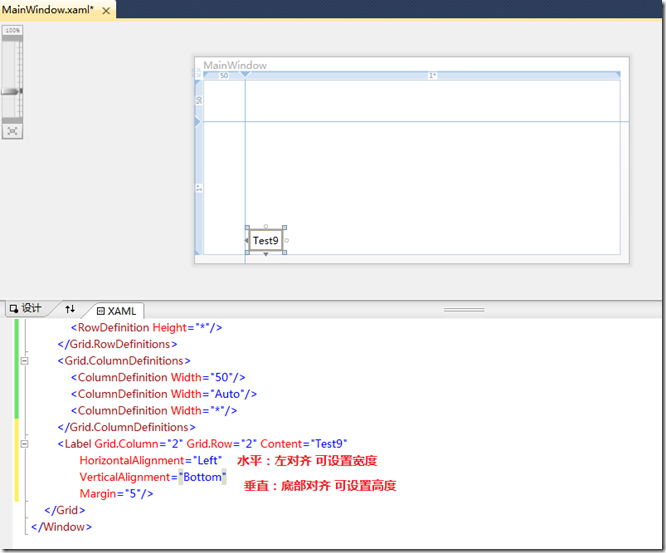
2、顶部对齐或底部对齐
对于顶部对齐和底部对齐,相对来说都一样。
3、左右对齐时:
4、下面来举个例子,我们来如何分析,根据原型来使用Grid布局来达到要求和目标:
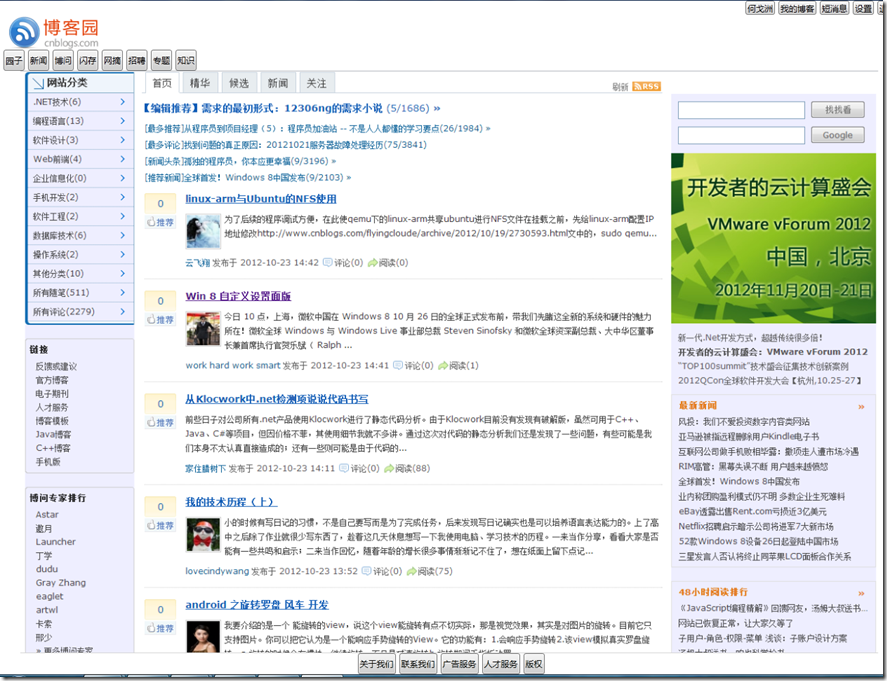
例如下图:
我们以博客园为例,可能例子不太合适,但是如果我们想做一个博客园的桌面版,保持风格一致的情况下,如果我们使用Grid布局如何来布局呢?
A、有Logo图片,上面还有设置等菜单,所以,我们可以吧这块设置为二行,这样比较容易区分页面的布局和设置
B、下面有几个二级菜单,新闻、博问等 一行
C、左侧有网站分类。必须1列
D、右侧有内容区。上面有区分首页、精华、候选、新闻、关注等、1列
E、右侧有找找看、还有最新新闻等 1列。
F、最下面,肯定还有状态栏,如果我们开发桌面系统。1行
根据上面的分析,我们的Grid表格至少5行、3列
关于其他的设计,我们通过Grid表格的组合来进行控制。
下面我们就来实现下:
先设置大体布局如下:
关于上述布局的具体实现如下:
<Window x:Class="Samples.MainWindow"
xmlns="http://schemas.microsoft.com/winfx/2006/xaml/presentation"
xmlns:x="http://schemas.microsoft.com/winfx/2006/xaml"
Title="MainWindow" Height="600" Width="800">
<Grid >
<Grid.RowDefinitions>
<RowDefinition Height="20"/>
<RowDefinition Height="50"/>
<RowDefinition Height="30"/>
<RowDefinition Height="*"/>
<RowDefinition Height="30"/>
</Grid.RowDefinitions>
<Grid.ColumnDefinitions>
<ColumnDefinition Width="150"/>
<ColumnDefinition Width="*"/>
<ColumnDefinition Width="200"/>
</Grid.ColumnDefinitions>
<Grid Grid.Column="1" Grid.ColumnSpan="2">
<StackPanel Orientation="Horizontal" HorizontalAlignment="Right">
<Button Content="何戈洲" Margin="5,0,0,0"/>
<Button Content="我的博客" Margin="5,0,0,0"/>
<Button Content="短消息" Margin="5,0,0,0"/>
<Button Content="设置" Margin="5,0,0,0"/>
<Button Content="退出" Margin="5,0,0,0"/>
</StackPanel>
</Grid>
<Grid Grid.Column="0" Grid.Row="1">
<Image Source="/Samples;Component/Images/logo_small.gif" />
</Grid>
<Grid Grid.Column="0" Grid.ColumnSpan="3" Grid.Row="2">
<StackPanel Orientation="Horizontal">
<Button Margin="5,0,0,0">园子</Button>
<Button Margin="5,0,0,0">新闻</Button>
<Button Margin="5,0,0,0">博问</Button>
<Button Margin="5,0,0,0">闪存</Button>
<Button Margin="5,0,0,0">网摘</Button>
<Button Margin="5,0,0,0">招聘</Button>
<Button Margin="5,0,0,0">专题</Button>
<Button Margin="5,0,0,0">知识</Button>
</StackPanel>
</Grid>
<Grid Grid.Column="0" Grid.ColumnSpan="3" Grid.Row="3">
<Image Source="/Samples;Component/Images/main.png" />
</Grid>
<Grid Grid.Column="0" Grid.ColumnSpan="3" Grid.Row="4">
<StackPanel Orientation="Horizontal" HorizontalAlignment="Center">
<Button Margin="5,0,0,0">关于我们</Button>
<Button Margin="5,0,0,0">联系我们</Button>
<Button Margin="5,0,0,0">广告服务</Button>
<Button Margin="5,0,0,0">人才服务</Button>
<Button Margin="5,0,0,0">版权</Button>
</StackPanel>
</Grid>
</Grid>
</Window>从上面的代码可以看出来,非常的简单,Grid特别适合软件系统的整体布局,在实际的项目中通过Grid与其他的布局控件相结合一起完成页面的整体布局。





StackPanel
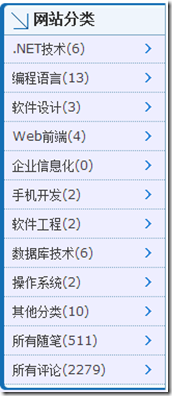
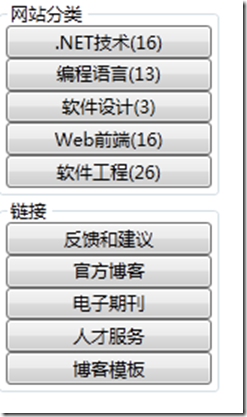
StackPanel 适合水平或者垂直方向的布局,在上面的例子中我们大量的使用该种布局方式。适合局部区域的布局。比如博客园中的如下区域就可以采用StackPanel进行布局。
对于这类的固定的区域,我们可以不适用Grid来进行布局,使用StackPanel也可以达到目标。
我们来使用StackPanel来进行布局
<StackPanel Orientation="Vertical" VerticalAlignment="Stretch">
<GroupBox Header="网站分类" Height="Auto">
<StackPanel Orientation="Vertical">
<Button Content=".NET技术(16)"/>
<Button Content="编程语言(13)"/>
<Button Content="软件设计(3)"/>
<Button Content="Web前端(16)"/>
<Button Content="软件工程(26)"/>
</StackPanel>
</GroupBox>
<GroupBox Header="链接" Height="Auto">
<StackPanel Orientation="Vertical">
<Button Content="反馈和建议"/>
<Button Content="官方博客"/>
<Button Content="电子期刊" />
<Button Content="人才服务"/>
<Button Content="博客模板"/>
</StackPanel>
</GroupBox>
</StackPanel>运行效果如下:
与预期的效果相同,对于其他的模块,我们也可以在局部,对于水平或者垂直方向要求进行布局的,我们都可以采用StackPanel来进行布局。
下面我们来看看横向布局的例子:
我们通过表格中的使用对StackPanel的停靠定位,进而通过Stackpanel对内部的子控件的停靠方向设置,我们通过如下代码实现上述效果:
<StackPanel Orientation="Horizontal" HorizontalAlignment="Right">
<Button Content="何戈洲" Margin="5,0,0,0"/>
<Button Content="我的博客" Margin="5,0,0,0"/>
<Button Content="短消息" Margin="5,0,0,0"/>
<Button Content="设置" Margin="5,0,0,0"/>
<Button Content="退出" Margin="5,0,0,0"/>
</StackPanel>StackPanel在父容器中是右对齐的。
然后再StackPanel容器中,如果也采用内容右对齐,会有什么效果呢?
<StackPanel Orientation="Horizontal" HorizontalAlignment="Right">
<Button Content="何戈洲" Margin="5,0,0,0" HorizontalAlignment="Right"/>
<Button Content="我的博客" Margin="5,0,0,0" HorizontalAlignment="Right"/>
<Button Content="短消息" Margin="5,0,0,0" HorizontalAlignment="Right"/>
<Button Content="设置" Margin="5,0,0,0" HorizontalAlignment="Right"/>
<Button Content="退出" Margin="5,0,0,0" HorizontalAlignment="Right"/>
</StackPanel>设置子控件的停靠方式时,不会起到任何作用,默认情况下,Stack的水平布局时,从左至右。
<StackPanel Orientation="Horizontal" HorizontalAlignment="Right" FlowDirection="RightToLeft">
<Button Content="何戈洲" Margin="5,0,0,0" HorizontalAlignment="Right"/>
<Button Content="我的博客" Margin="5,0,0,0" HorizontalAlignment="Right"/>
<Button Content="短消息" Margin="5,0,0,0" HorizontalAlignment="Right"/>
<Button Content="设置" Margin="5,0,0,0" HorizontalAlignment="Right"/>
<Button Content="退出" Margin="5,0,0,0" HorizontalAlignment="Right"/>
</StackPanel>修改了FlowDirection设置了StackPanel的方向后,所有的子控件,都是从右向左方向进行绘制和显示,效果如下:
所以对于StackPanel我们基本上是用上述的属性和对StackPanel的停靠方式进行设置后,即可满足布局的要求。




DockPanel
DockPanel停靠容器,专门负责自适应窗口的布局,之前我们介绍了DockPanel的布局设置,这里再回顾下:
<DockPanel>
<StackPanel DockPanel.Dock="Top" Height="0">
</StackPanel>
<StackPanel DockPanel.Dock="Left" Height="0">
</StackPanel>
<StackPanel DockPanel.Dock="Bottom" Height="0">
</StackPanel>
<StackPanel DockPanel.Dock="Right" Orientation="Vertical" Width="200">
<GroupBox Header="最新新闻" Height="160">
<StackPanel Orientation="Vertical">
<Button Content="宅急送近日宣布降价抢"/>
<Button Content="腾讯联手华为操盘四核手机"/>
<Button Content="Windows 8各版本区别与售价"/>
<Button Content="数方程将无线网络带宽提高一个数量级"/>
<Button Content="中移动:Lumia 920T将于11月上市"/>
<Button Content="Windows 8下一站:10月25日纽约"/>
</StackPanel>
</GroupBox>
<GroupBox Header="48小时阅读排行榜" Height="160">
<StackPanel Orientation="Vertical">
<Button Content="子用户-角色-权限-菜单 浅谈:子账户设计方案"/>
<Button Content="网站已恢复正常,让大家久等了"/>
<Button Content="拿什么拯救你,我的51Job简历?——UBB漏洞"/>
<Button Content="这些年我们没用过的JS"/>
<Button Content="多少钱才可让人重拾理想"/>
<Button Content="准备购买的Dell服务器的硬件配置"/>
</StackPanel>
</GroupBox>
</StackPanel>
<StackPanel ><Button Content=" 我铺满"/>
</StackPanel>
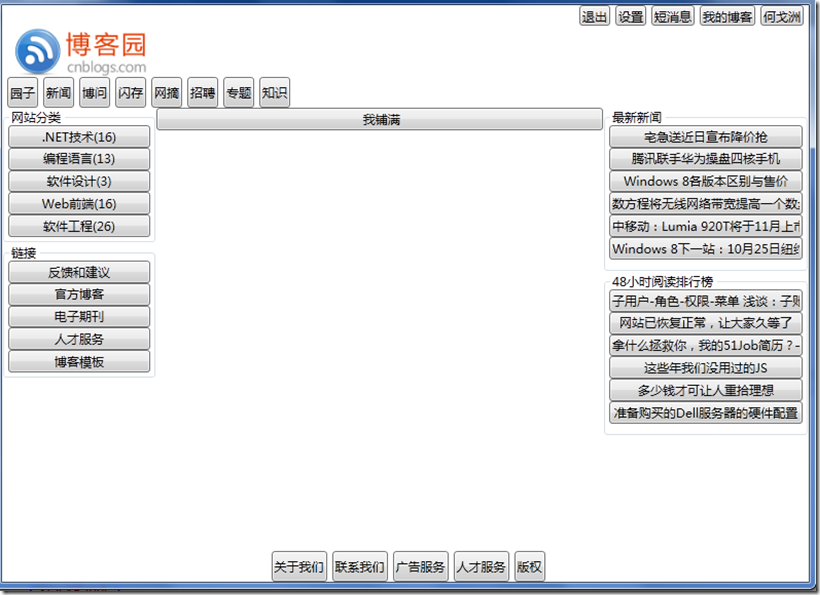
</DockPanel>上面的DockPanel在进行自适应布局时,默认最后的一个区域时默认填充,可以理解为fill。而必须制定其他的区域后,该设置才有效,所以,我们上面设置了top,left,bottom 占用的空间都是0,这样,系统会将最后的一个子区域填充。
上面设置后的效果如下。
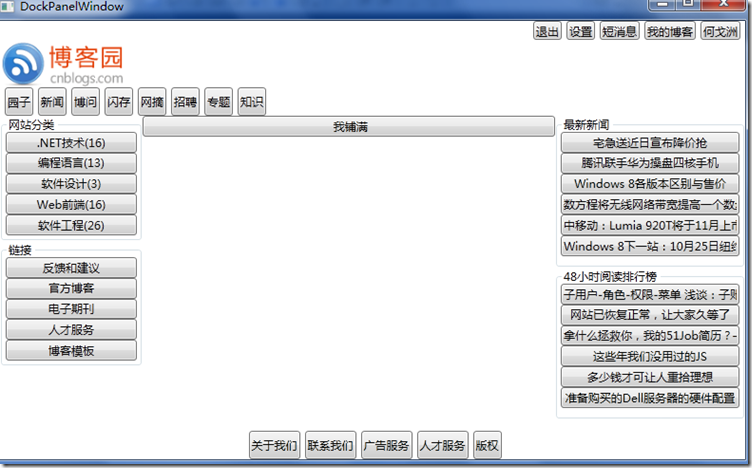
当然,这个页面的整体,我们也可以采用DockPanel进行布局,布局的效果,完全可以达到上述效果,下面我们来使用DockPanel来对整体进行布局吧。
最终的代码如下:
<DockPanel>
<StackPanel DockPanel.Dock="Top" Height="100">
<Grid>
<Grid.RowDefinitions>
<RowDefinition Height="20"/>
<RowDefinition Height="50"/>
<RowDefinition Height="30"/>
</Grid.RowDefinitions>
<Grid >
<StackPanel Orientation="Horizontal" HorizontalAlignment="Right" FlowDirection="RightToLeft">
<Button Content="何戈洲" Margin="5,0,0,0" HorizontalAlignment="Right"/>
<Button Content="我的博客" Margin="5,0,0,0" HorizontalAlignment="Right"/>
<Button Content="短消息" Margin="5,0,0,0" HorizontalAlignment="Right"/>
<Button Content="设置" Margin="5,0,0,0" HorizontalAlignment="Right"/>
<Button Content="退出" Margin="5,0,0,0" HorizontalAlignment="Right"/>
</StackPanel>
</Grid>
<Grid Grid.Row="1">
<Image Source="/Samples;Component/Images/logo_small.gif" HorizontalAlignment="Left"/>
</Grid>
<Grid Grid.Row="2">
<StackPanel Orientation="Horizontal">
<Button Margin="5,0,0,0">园子</Button>
<Button Margin="5,0,0,0">新闻</Button>
<Button Margin="5,0,0,0">博问</Button>
<Button Margin="5,0,0,0">闪存</Button>
<Button Margin="5,0,0,0">网摘</Button>
<Button Margin="5,0,0,0">招聘</Button>
<Button Margin="5,0,0,0">专题</Button>
<Button Margin="5,0,0,0">知识</Button>
</StackPanel>
</Grid>
</Grid>
</StackPanel>
<StackPanel DockPanel.Dock="Bottom" Height="30" Orientation="Horizontal" HorizontalAlignment="Center">
<Button Margin="5,0,0,0">关于我们</Button>
<Button Margin="5,0,0,0">联系我们</Button>
<Button Margin="5,0,0,0">广告服务</Button>
<Button Margin="5,0,0,0">人才服务</Button>
<Button Margin="5,0,0,0">版权</Button>
</StackPanel>
<StackPanel DockPanel.Dock="Left" Width="150">
<StackPanel Orientation="Vertical" VerticalAlignment="Stretch">
<GroupBox Header="网站分类" Height="Auto">
<StackPanel Orientation="Vertical">
<Button Content=".NET技术(16)"/>
<Button Content="编程语言(13)"/>
<Button Content="软件设计(3)"/>
<Button Content="Web前端(16)"/>
<Button Content="软件工程(26)"/>
</StackPanel>
</GroupBox>
<GroupBox Header="链接" Height="Auto">
<StackPanel Orientation="Vertical">
<Button Content="反馈和建议"/>
<Button Content="官方博客"/>
<Button Content="电子期刊" />
<Button Content="人才服务"/>
<Button Content="博客模板"/>
</StackPanel>
</GroupBox>
</StackPanel>
</StackPanel>
<StackPanel DockPanel.Dock="Right" Orientation="Vertical" Width="200">
<GroupBox Header="最新新闻" Height="160">
<StackPanel Orientation="Vertical">
<Button Content="宅急送近日宣布降价抢"/>
<Button Content="腾讯联手华为操盘四核手机"/>
<Button Content="Windows 8各版本区别与售价"/>
<Button Content="数方程将无线网络带宽提高一个数量级"/>
<Button Content="中移动:Lumia 920T将于11月上市"/>
<Button Content="Windows 8下一站:10月25日纽约"/>
</StackPanel>
</GroupBox>
<GroupBox Header="48小时阅读排行榜" Height="160">
<StackPanel Orientation="Vertical">
<Button Content="子用户-角色-权限-菜单 浅谈:子账户设计方案"/>
<Button Content="网站已恢复正常,让大家久等了"/>
<Button Content="拿什么拯救你,我的51Job简历?——UBB漏洞"/>
<Button Content="这些年我们没用过的JS"/>
<Button Content="多少钱才可让人重拾理想"/>
<Button Content="准备购买的Dell服务器的硬件配置"/>
</StackPanel>
</GroupBox>
</StackPanel>
<StackPanel >
<Button Content=" 我铺满"/>
</StackPanel>
</DockPanel>运行上述代码效果如下:
通过DockPanel完成对整体的布局,然后内部结合一些其他的布局控件,完成局部的细节的布局。
WrapPanel
WrapPanel容器我们也介绍过,该容器可以看做自动换行功能的StackPanel容器。下面我们就来分析下该容器的一般应用场景。
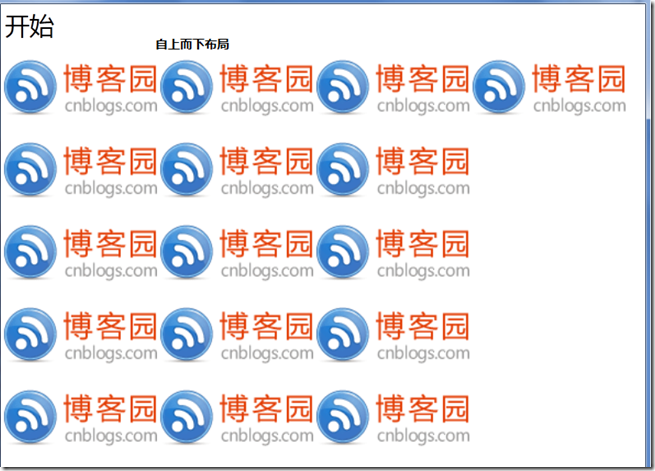
我们看到了windows8中的如下页面,如果我们仿制该页面的时候,其实我们可以采用wrappanel来实现自动的换行,下面我们来试试吧
最终代码如下:
<Window x:Class="Samples.Window8Window"
xmlns="http://schemas.microsoft.com/winfx/2006/xaml/presentation"
xmlns:x="http://schemas.microsoft.com/winfx/2006/xaml"
Title="Window8Window" Height="600" Width="800">
<Grid>
<Grid.RowDefinitions>
<RowDefinition Height="50"/>
<RowDefinition Height="*"/>
</Grid.RowDefinitions>
<Grid Grid.Row="0">
<Label Content="开始" FontFamily="微软雅黑" FontSize="30"/>
</Grid >
<Grid Grid.Row="1">
<WrapPanel Orientation="Horizontal" ItemHeight="100" ItemWidth="190">
<Image Source="/Samples;Component/Images/logo_small.gif" />
<Image Source="/Samples;Component/Images/logo_small.gif" />
<Image Source="/Samples;Component/Images/logo_small.gif" />
<Image Source="/Samples;Component/Images/logo_small.gif" />
<Image Source="/Samples;Component/Images/logo_small.gif" />
<Image Source="/Samples;Component/Images/logo_small.gif" />
<Image Source="/Samples;Component/Images/logo_small.gif" />
<Image Source="/Samples;Component/Images/logo_small.gif" />
<Image Source="/Samples;Component/Images/logo_small.gif" />
<Image Source="/Samples;Component/Images/logo_small.gif" />
<Image Source="/Samples;Component/Images/logo_small.gif" />
<Image Source="/Samples;Component/Images/logo_small.gif" />
<Image Source="/Samples;Component/Images/logo_small.gif" />
<Image Source="/Samples;Component/Images/logo_small.gif" />
<Image Source="/Samples;Component/Images/logo_small.gif" />
<Image Source="/Samples;Component/Images/logo_small.gif" />
</WrapPanel>
</Grid>
</Grid>
</Window>运行后,效果如下:
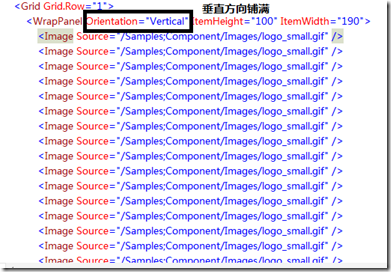
当然,我们的界面效果,还打不到美感,但是的确是自动换行。我们将水平方向,修改为垂直方向后,运行:
运行查看效果。
通过上面的简单案例,我们基本上知道了wrapPanel的用法。

总结
通过上面的介绍和demo的演示,我们知道了如何在项目中什么情况下,使用什么样的布局容器,通过实际的案例,我们更容易理解和掌握布局的模式。错误之处,还请大家反馈,我及时改正,谢谢!
参考出处:http://www.cnblogs.com/hegezhou_hot/archive/2012/10/23/2735874.html
转自:WPF面板布局介绍Grid、StackPanel、DockPanel、WrapPanel - jack_Meng - 博客园
http://www.cnblogs.com/mq0036/p/6232331.html#undefined
( 转)WPF面板布局介绍Grid、StackPanel、DockPanel、WrapPanel的更多相关文章
- WPF面板布局介绍Grid、StackPanel、DockPanel、WrapPanel
回顾 上一篇,我们介绍了基本控件及控件的重要属性和用法,我们本篇详细介绍WPF中的几种布局容器及每种布局容器的使用场景,当 然这些都是本人在实际项目中的使用经验,可能还存在错误之处,还请大家指出. 本 ...
- WPF常用布局介绍
概述:本文简要介绍了WPF中布局常用控件及布局相关的属性 1 Canvas Canvas是一个类似于坐标系的面板,所有的元素通过设置坐标来决定其在坐标系中的位置..具体表现为使用Left.Top.Ri ...
- WPF,布局,Menu,MenuItem,DockPanel,Grid,DockPanel.Dock='',ToolBar,Content,Image,Uri
布局相关: Grid as title Binding Path="", Mode= TwoWay, model should implement IPropertyChanged ...
- wpf 计算器布局练习
先看一下windows自带计算机的布局: 大概布局能看出,有菜单栏(menu),有显示框(textbox),然后剩下的6行5列的布局 先看下代码: <StackPanel> <Gri ...
- WPF-使用面板控制内容布局,比较Canvas,WrapPanel,StackPanel,Grid,ScrollViewer
WPF-使用面板控制内容布局,比较Canvas,WrapPanel,StackPanel,Grid,ScrollViewer 分类: WPF2012-04-24 09:59 660人阅读 评论(0) ...
- 1、布局容器Grid、StackPanel、GroupBox、DockPanel、WrapPanel
Grid——网格布局,其中控件或容器需指定位置 StackPanel——堆叠面板,其中的控件水平布局.竖直布局 DockPanel——停靠面板,内部控件或容器可以放置在上.下.左.右 WrapPane ...
- WPF 界面布局DockPanel stackPanel WrapPanel 元素内容以及位置控制
1 DockPanel 1) 默认充满整个窗口. 2) 最后一个出现的部分,默认充满剩余空间. 3) 非最后一个出现的部分,根据其中内容,进行分配空间s 2 StackPanel 实现居左,居右,居中 ...
- WPF Step By Step 完整布局介绍
WPF Step By Step 完整布局介绍 回顾 上一篇,我们介绍了基本控件及控件的重要属性和用法,我们本篇详细介绍WPF中的几种布局容器及每种布局容器的使用场景,当 然这些都是本人在实际项目中的 ...
- WPF入门教程系列六——布局介绍与Canvas(一)
从这篇文章开始是对WPF中的界面如何布局做一个较简单的介绍,大家都知道:UI是做好一个软件很重要的因素,如果没有一个漂亮的UI,功能做的再好也无法吸引很多用户使用,而且没有漂亮的界面,那么普通用户会感 ...
随机推荐
- share memory cache across multi web application
Single instance of a MemoryCache across multiple application pools on the same server [duplicate] Yo ...
- HTML-参考手册: HTML ISO-8859-1
ylbtech-HTML-参考手册: HTML ISO-8859-1 1.返回顶部 1. HTML ISO-8859-1 参考手册 现代的浏览器支持的字符集: ASCII 字符集 标准 ISO 字符集 ...
- 3. Node_export安装部署
首先我们要知道什么是Node_export?因为Prometheus本身不具备监控功能,我们要通过Prometheus收集数据,需要安装对应的export.如Node_export用于监控服务器状态, ...
- 力扣算法——139WordBreak【M】
Given a non-empty string s and a dictionary wordDict containing a list of non-empty words, determine ...
- java多线程学习笔记(三)
java多线程下的对象及变量的并发访问 上一节讲到,并发访问的时候,因为是多线程,变量如果不加锁的话,会出现“脏读”的现象,这个时候需要“临界区”的出现去解决多线程的安全的并发访问.(这个“脏读”的现 ...
- 爬虫(三)—— BeautifulSoup模块获取元素
目录 BeautifulSoup 一.BeautifulSoup简介 二.安装模块 三.解析器 四.Beautiful Soup的使用 五.查找元素 1.遍历文档树 2.搜索文档树 Beautiful ...
- join()和split()
一.join()方法 Python join() 方法用于将序列中的元素以指定的字符连接生成一个新的字符串. 如序列为字典,只连接字典里的键 序列里的元素也需要是字符串,如果不为字符串,则会报错 二. ...
- 利用docker搭建WordPress
步骤一 创建mysql的容器 步骤二 创建wordpress的容器并链接mysql容器的数据库 创建mysql的容器 docker run -d --name mysql -v mysql-data: ...
- 深浅拷贝, for循环小知识点 str操作 list的删除问题,类型转换
深浅拷⻉ : lst1 = ["⾦⽑狮王", "紫衫⻰王", "⽩眉鹰王", "⻘翼蝠王"] lst2 = lst1 ...
- 使用PL/SQL连接oracle数据库,并将数据进行导出备份和导入恢复
使用PL/SQL连接oracle数据库,并将数据进行导出备份和导入恢复 这种操作百度一搜一大片,今天整理以前做的项目时自己备份了一下数据库,试着将数据进行导出备份和导入恢复了一下:下面是操作过程: 1 ...