30.Scrapy 对接 Selenium
Scrapy 对接 Selenium(参考代码网址,https://github.com/Python3WebSpider/ScrapySeleniumTest)

此文就是参考书上的代码拿下来跑,作为借鉴,很多地方都不是很理解,也是我第一次使用mongodb入库数据,一直用的都是mysql对mongodb这种关系型数据库用的并不多,今天就是拿代码跑一下理解作者的整个思路有待消化。

主要核心: Downloader Middleware 的方式实现 Selenium的对接。

缺点:此方法是阻塞式的,破坏了Scrapy异步处理的逻辑,速度会影响(还给出了Scrapy 对接 Splash方法)。
taobao.py

# -*- coding: utf-8 -*-

from scrapy import Request, Spider

from urllib.parse import quote

# quote适用于单个字符

from scrapyseleniumtest.items import ProductItem

class TaobaoSpider(Spider):

    name = 'taobao'

    allowed_domains = ['www.taobao.com']

    base_url = 'https://s.taobao.com/search?q='

    def start_requests(self):

        for keyword in self.settings.get('KEYWORDS'):

            for page in range(1, self.settings.get('MAX_PAGE') + 1):

                url = self.base_url + quote(keyword)

                yield Request(url=url, callback=self.parse, meta={'page': page}, dont_filter=True)

                #分页页码page传递参数,设置dot_filter不去重

    def parse(self, response):

        products = response.xpath(

            '//div[@id="mainsrp-itemlist"]//div[@class="items"][1]//div[contains(@class, "item")]')

        for product in products:

            item = ProductItem()

            item['price'] = ''.join(product.xpath('.//div[contains(@class, "price")]//text()').extract()).strip()

            item['title'] = ''.join(product.xpath('.//div[contains(@class, "title")]//text()').extract()).strip()

            item['shop'] = ''.join(product.xpath('.//div[contains(@class, "shop")]//text()').extract()).strip()

            item['image'] = ''.join(product.xpath('.//div[@class="pic"]//img[contains(@class, "img")]/@data-src').extract()).strip()

            item['deal'] = product.xpath('.//div[contains(@class, "deal-cnt")]//text()').extract_first()

            item['location'] = product.xpath('.//div[contains(@class, "location")]//text()').extract_first()

            yield item
items.py

# -*- coding: utf-8 -*-

# Define here the models for your scraped items

#

# See documentation in:

# http://doc.scrapy.org/en/latest/topics/items.html

from scrapy import Item, Field

class ProductItem(Item):

    collection = 'products'

    image = Field()

    price = Field()

    deal = Field()

    title = Field()

    shop = Field()

    location = Field()
midddlewares.py (对接关键点)

# -*- coding: utf-8 -*-

from selenium import webdriver

from selenium.common.exceptions import TimeoutException

from selenium.webdriver.common.by import By

from selenium.webdriver.support.ui import WebDriverWait

from selenium.webdriver.support import expected_conditions as EC

from scrapy.http import HtmlResponse

from logging import getLogger

class SeleniumMiddleware():

    def __init__(self, timeout=None, service_args=[]):

        self.logger = getLogger(__name__)

        self.timeout = timeout

        self.browser = webdriver.PhantomJS(service_args=service_args)

        self.browser.set_window_size(1400, 700)

        self.browser.set_page_load_timeout(self.timeout)

        self.wait = WebDriverWait(self.browser, self.timeout)

    def __del__(self):

        self.browser.close()

    def process_request(self, request, spider):

        """

        用PhantomJS抓取页面

        :param request: Request对象

        :param spider: Spider对象

        :return: HtmlResponse

        """

        self.logger.debug('PhantomJS is Starting')

        page = request.meta.get('page', 1)

        try:

            self.browser.get(request.url)

            if page > 1:

                input = self.wait.until(

                    EC.presence_of_element_located((By.CSS_SELECTOR, '#mainsrp-pager div.form > input')))

                submit = self.wait.until(

                    EC.element_to_be_clickable((By.CSS_SELECTOR, '#mainsrp-pager div.form > span.btn.J_Submit')))

                input.clear()

                input.send_keys(page)

                submit.click()

            self.wait.until(

                EC.text_to_be_present_in_element((By.CSS_SELECTOR, '#mainsrp-pager li.item.active > span'), str(page)))

            self.wait.until(EC.presence_of_element_located((By.CSS_SELECTOR, '.m-itemlist .items .item')))

            return HtmlResponse(url=request.url, body=self.browser.page_source, request=request, encoding='utf-8',

                                status=200)

        except TimeoutException:

            return HtmlResponse(url=request.url, status=500, request=request)

    @classmethod

    def from_crawler(cls, crawler):

        return cls(timeout=crawler.settings.get('SELENIUM_TIMEOUT'),

                   service_args=crawler.settings.get('PHANTOMJS_SERVICE_ARGS'))
piplines.py

# -*- coding: utf-8 -*-

# Define your item pipelines here

#

# Don't forget to add your pipeline to the ITEM_PIPELINES setting

# See: http://doc.scrapy.org/en/latest/topics/item-pipeline.html

import pymongo

class MongoPipeline(object):

    def __init__(self, mongo_uri, mongo_db):

        self.mongo_uri = mongo_uri

        self.mongo_db = mongo_db

    @classmethod

    def from_crawler(cls, crawler):

        return cls(mongo_uri=crawler.settings.get('MONGO_URI'), mongo_db=crawler.settings.get('MONGO_DB'))

    def open_spider(self, spider):

        self.client = pymongo.MongoClient(self.mongo_uri)

        self.db = self.client[self.mongo_db]

    def process_item(self, item, spider):

        self.db[item.collection].insert(dict(item))

        return item

    def close_spider(self, spider):

        self.client.close()
setting.py

# -*- coding: utf-8 -*-

# Scrapy settings for scrapyseleniumtest project

#

# For simplicity, this file contains only settings considered important or

# commonly used. You can find more settings consulting the documentation:

#

#     http://doc.scrapy.org/en/latest/topics/settings.html

#     http://scrapy.readthedocs.org/en/latest/topics/downloader-middleware.html

#     http://scrapy.readthedocs.org/en/latest/topics/spider-middleware.html

BOT_NAME = 'scrapyseleniumtest'

SPIDER_MODULES = ['scrapyseleniumtest.spiders']

NEWSPIDER_MODULE = 'scrapyseleniumtest.spiders'

# Crawl responsibly by identifying yourself (and your website) on the user-agent

# USER_AGENT = 'scrapyseleniumtest (+http://www.yourdomain.com)'

# Obey robots.txt rules

ROBOTSTXT_OBEY = False

# Configure maximum concurrent requests performed by Scrapy (default: 16)

# CONCURRENT_REQUESTS = 32

# Configure a delay for requests for the same website (default: 0)

# See http://scrapy.readthedocs.org/en/latest/topics/settings.html#download-delay

# See also autothrottle settings and docs

# DOWNLOAD_DELAY = 3

# The download delay setting will honor only one of:

# CONCURRENT_REQUESTS_PER_DOMAIN = 16

# CONCURRENT_REQUESTS_PER_IP = 16

# Disable cookies (enabled by default)

# COOKIES_ENABLED = False

# Disable Telnet Console (enabled by default)

# TELNETCONSOLE_ENABLED = False

# Override the default request headers:

# DEFAULT_REQUEST_HEADERS = {

#   'Accept': 'text/html,application/xhtml+xml,application/xml;q=0.9,*/*;q=0.8',

#   'Accept-Language': 'en',

# }

# Enable or disable spider middlewares

# See http://scrapy.readthedocs.org/en/latest/topics/spider-middleware.html

# SPIDER_MIDDLEWARES = {

#    'scrapyseleniumtest.middlewares.ScrapyseleniumtestSpiderMiddleware': 543,

# }

# Enable or disable downloader middlewares

# See http://scrapy.readthedocs.org/en/latest/topics/downloader-middleware.html

DOWNLOADER_MIDDLEWARES = {

    'scrapyseleniumtest.middlewares.SeleniumMiddleware': 543,

}

# Enable or disable extensions

# See http://scrapy.readthedocs.org/en/latest/topics/extensions.html

# EXTENSIONS = {

#    'scrapy.extensions.telnet.TelnetConsole': None,

# }

# Configure item pipelines

# See http://scrapy.readthedocs.org/en/latest/topics/item-pipeline.html

ITEM_PIPELINES = {

    'scrapyseleniumtest.pipelines.MongoPipeline': 300,

}

# Enable and configure the AutoThrottle extension (disabled by default)

# See http://doc.scrapy.org/en/latest/topics/autothrottle.html

# AUTOTHROTTLE_ENABLED = True

# The initial download delay

# AUTOTHROTTLE_START_DELAY = 5

# The maximum download delay to be set in case of high latencies

# AUTOTHROTTLE_MAX_DELAY = 60

# The average number of requests Scrapy should be sending in parallel to

# each remote server

# AUTOTHROTTLE_TARGET_CONCURRENCY = 1.0

# Enable showing throttling stats for every response received:

# AUTOTHROTTLE_DEBUG = False

# Enable and configure HTTP caching (disabled by default)

# See http://scrapy.readthedocs.org/en/latest/topics/downloader-middleware.html#httpcache-middleware-settings

# HTTPCACHE_ENABLED = True

# HTTPCACHE_EXPIRATION_SECS = 0

# HTTPCACHE_DIR = 'httpcache'

# HTTPCACHE_IGNORE_HTTP_CODES = []

# HTTPCACHE_STORAGE = 'scrapy.extensions.httpcache.FilesystemCacheStorage'

KEYWORDS = ['iPad']

MAX_PAGE = 100

SELENIUM_TIMEOUT = 20

PHANTOMJS_SERVICE_ARGS = ['--load-images=false', '--disk-cache=true']

MONGO_URI = 'localhost'

MONGO_DB = 'taobao'
导入phantomjs的文件

from selenium import webdriver

driver=webdriver.PhantomJS(executable_path=r"E:\Soft\soft\phantomjs-2.1.1-windows\bin\phantomjs.exe")

driver.get('http://news.sohu.com/scroll/')

print(driver.find_element_by_class_name('title').text)
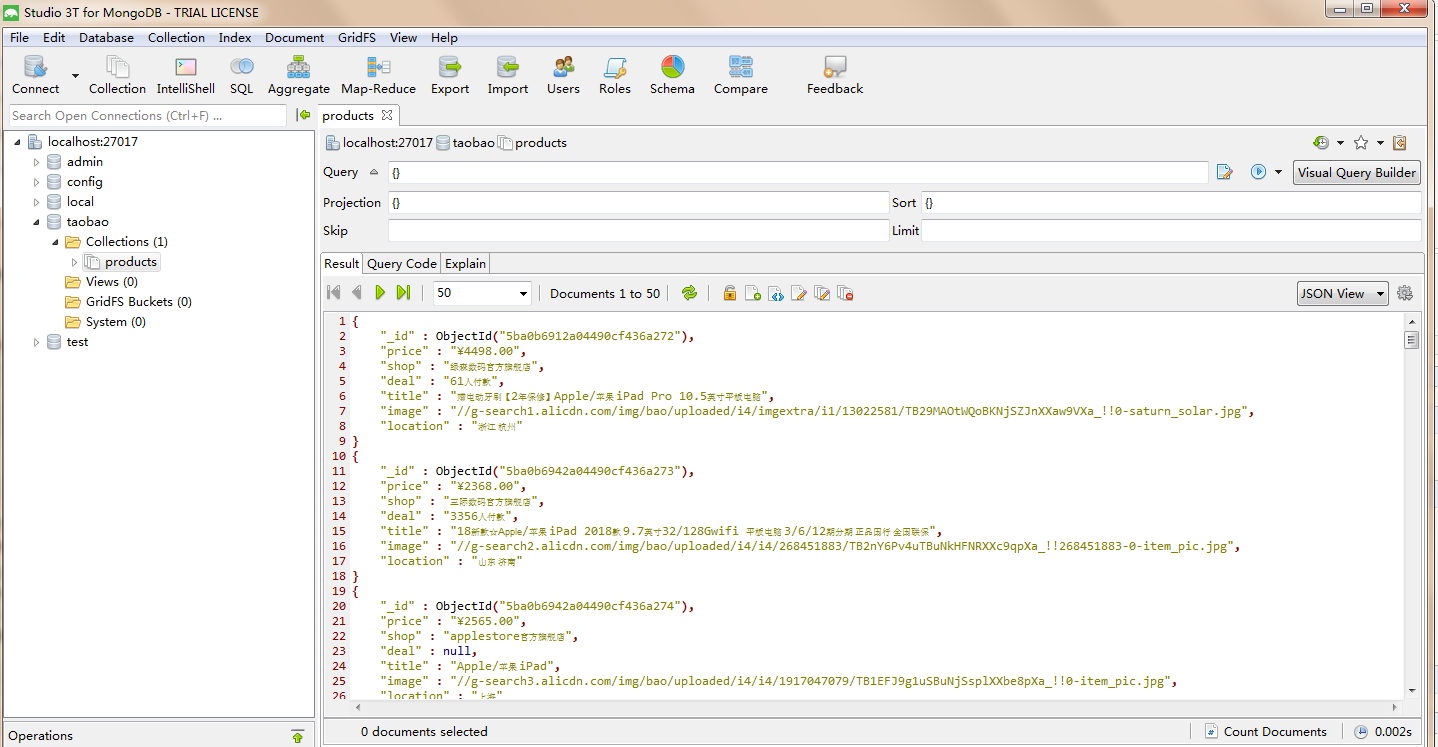
代码执行入库结果如图:
30.Scrapy 对接 Selenium的更多相关文章
- Scrapy实战篇(八)之Scrapy对接selenium爬取京东商城商品数据
本篇目标:我们以爬取京东商城商品数据为例,展示Scrapy框架对接selenium爬取京东商城商品数据. 背景: 京东商城页面为js动态加载页面,直接使用request请求,无法得到我们想要的商品数据 ...
- Scrapy对接selenium+phantomjs
1.创建项目 :Jd 2.middlewares.py中添加selenium 1.导模块 :from selenium import webdriver 2.定义中间件 class seleniumM ...
- Scrapy对接Selenium
首先pip安装selenium,然后下载浏览器驱动 WebDrive下载地址 chrome的webdriver:http://chromedriver.storage.googleapis.com/i ...
- 爬虫(十七):Scrapy框架(四) 对接selenium爬取京东商品数据
1. Scrapy对接Selenium Scrapy抓取页面的方式和requests库类似,都是直接模拟HTTP请求,而Scrapy也不能抓取JavaScript动态谊染的页面.在前面的博客中抓取Ja ...
- scrapy结合selenium抓取武汉市环保局空气质量日报
1.前言 目标网站:武汉市环境保护局(http://hbj.wuhan.gov.cn/viewAirDarlyForestWaterInfo.jspx).scrapy对接selenium模块抓取空气质 ...
- 小白学 Python 爬虫(40):爬虫框架 Scrapy 入门基础(七)对接 Selenium 实战
人生苦短,我用 Python 前文传送门: 小白学 Python 爬虫(1):开篇 小白学 Python 爬虫(2):前置准备(一)基本类库的安装 小白学 Python 爬虫(3):前置准备(二)Li ...
- Scrapy——5 下载中间件常用函数、scrapy怎么对接selenium、常用的Setting内置设置有哪些
Scrapy——5 下载中间件常用的函数 Scrapy怎样对接selenium 常用的setting内置设置 对接selenium实战 (Downloader Middleware)下载中间件常用函数 ...
- scrapy和selenium结合抓取动态网页
1.安装python (我用的是2.7版本的) 2.安装scrapy: 详情请参考 http://blog.csdn.net/wukaibo1986/article/details/8167590 ...
- 15,scrapy中selenium的应用
引入 在通过scrapy框架进行某些网站数据爬取的时候,往往会碰到页面动态数据加载的情况发生如果直接用scrapy对其url发请求,是获取不到那部分动态加载出来的数据值,但是通过观察会发现,通过浏览器 ...
随机推荐
- MHA 报错:There is no alive slave. We can't do failover
dba http://blog.csdn.net/zengxuewen2045/article/details/51524880 关于这个错误: 1 2 3 4 Mon Feb 13 10:29: ...
- Python 环境的搭建(转载)
原文来自 http://www.cnblogs.com/windinsky/archive/2012/09/20/2695520.html 1.首先访问http://www.python.org/do ...
- 黄聪:php7配置php.ini使其支持<? ?>
<? ?>这种写在php配置文件里php.ini法叫short_tags,默认是不打开的,也就是,在默认配置的php里,这样写法不被认为是php脚本的,除非设置 short_open_ta ...
- Vue--基本语法
Vue语法学习 引入:script的src中导入vue包 创建:在script中创建vue对象 双向绑定: el----选择器,锁定标签 data----定义变量,将标签内容绑定给变量 {{变量}}- ...
- Windows XP Professional产品序列号
BX6HT-MDJKW-H2J4X-BX67W-TVVFG产品密钥:FCKGW-RHQQ2-YXRKT-8TG6W-2B7Q8产品密钥:CCC64-69Q48-Y3KWW-8V9GV-TVKRM Wi ...
- C++11--20分钟了解C++11 (上)
20分钟了解C++ 11 1 初始化列表 Initializer List //C++ 03中用初始化列表初始化数组 int arr[4] = {3, 2, 4, 5}; vector<int& ...
- 【Maven】从Maven中导出项目依赖的Jar包
从SVN上下载源代码 svn export https://10.200.1.201/xxxx/PLATFORM code/ --force --username xxx --password xxx ...
- 将字符串表示的IP地址转变为整形表示
当时面试上机的想法是,直接使用uint32_t变量来存ip地址,遍历字符串带".",然后去值,利用移位来将这个值填到uint32_t对应的位置上.这样的麻烦之处在于: 1,遍历字符 ...
- go学习day3
strings和strconv使用 1.strings.HasPrefix(s string, prefix string) bool:判断字符串s是否以prefix开头 2.strings.HasS ...
- centos7 firewall-cmd 用活firewalld防火墙中的zone
原文:http://www.excelib.com/article/290/show/ firewalld中zone的含义学生前面已经给大家介绍过了,说白了一个zone就是一套规则集.可是什么时候该用 ...