
How To Install Cacti On Ubuntu 14
How To Install Cacti On Ubuntu 14.04/14.10
by anismaj
 at an interval of time and resulting in the graph format. For more information about Cacti refer the official website.
The object of this article is to guide you how to install and setup Cacti on Ubuntu 14.04.
Before installing cacti you need to make sure to install all dependencies.
1 – Lamp server
First step is to install Lamp server (Apache, Mysql, PHP)
sudo apt-get install apache2 mysql-server php5 libapache2-mod-php5
2 – RRDtools
A useful open source tool for storage and retrieval of time series data.
sudo apt-get -y install rrdtool
3 – SNMP and SNMPd
If you want to monitor the localhost where cacti is installed you need to install and configure the service snmpd.
sudo apt-get -y install snmp snmpd
Now after installing all dependencies we start the installation of cacti.
4 – Cacti and Spine
If you want a faster way to poll servers for information than the default php script cmd.php, you need to install cacti-spine.
sudo apt-get -y install cacti cacti-spine
Popup message will appear like this just select OK and move on.

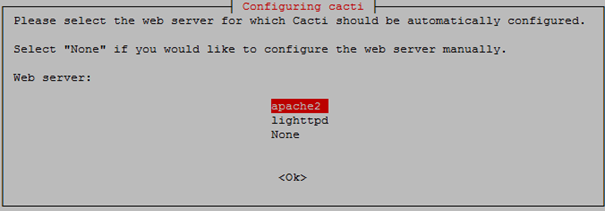
Now it will ask you for a webserver that you will use it, we choose Apache2 since that’s what we installed in the dependencies.
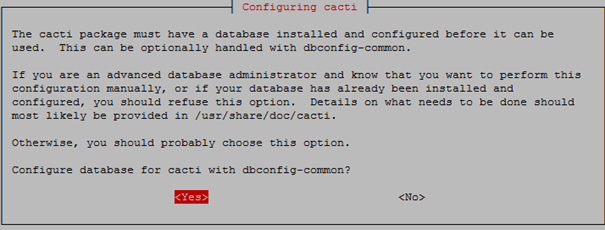
Next it will ask to configure the Cacti database, select Yes.
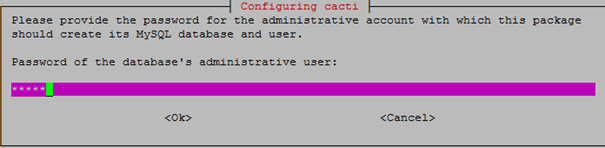
Now it will ask for your root password of MySQL database.
Before we start the web configuration part, we need to start the snmpd service.
sudo /etc/init.d/snmpd start
Now you can access http://ip-of-you-server/cacti after installation, the first login, the default account and password are “admin”.
Click Next.
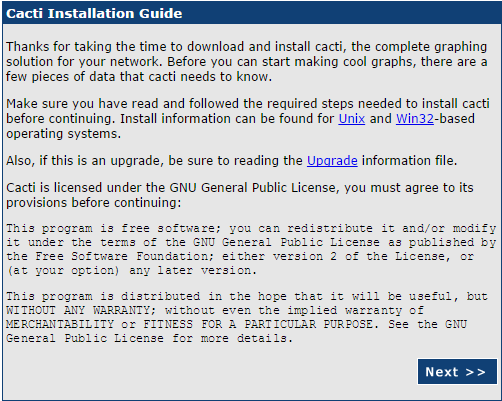
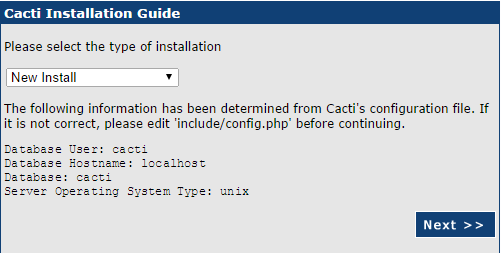
Select new install and click Next
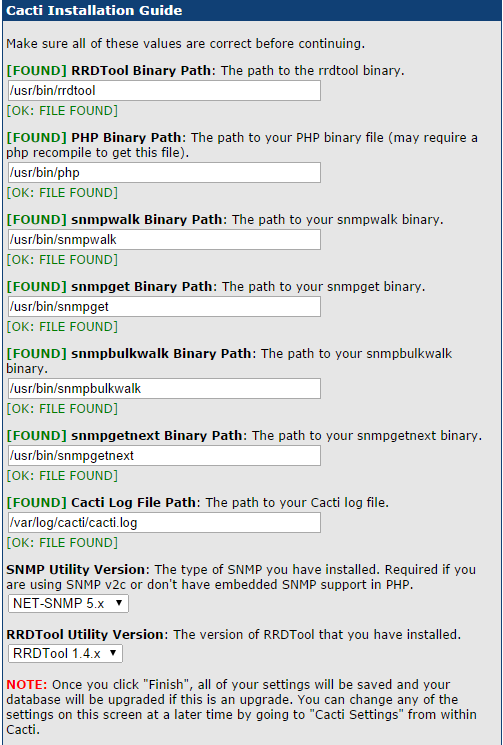
If everything is green, which it should be if you followed all the steps, click Next.
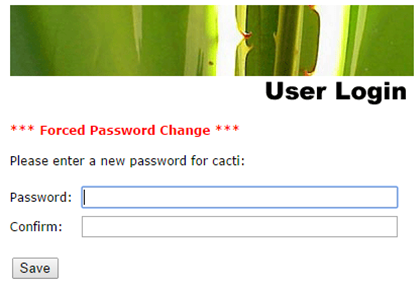
Now you need to type the login and password, the default account and password are “admin”.
Then you will be prompted to change the password.
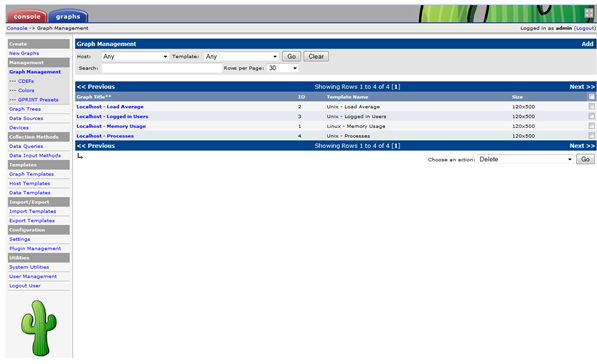
After login in to Cacti you should see similar to the following screen.
5 – Setup spine
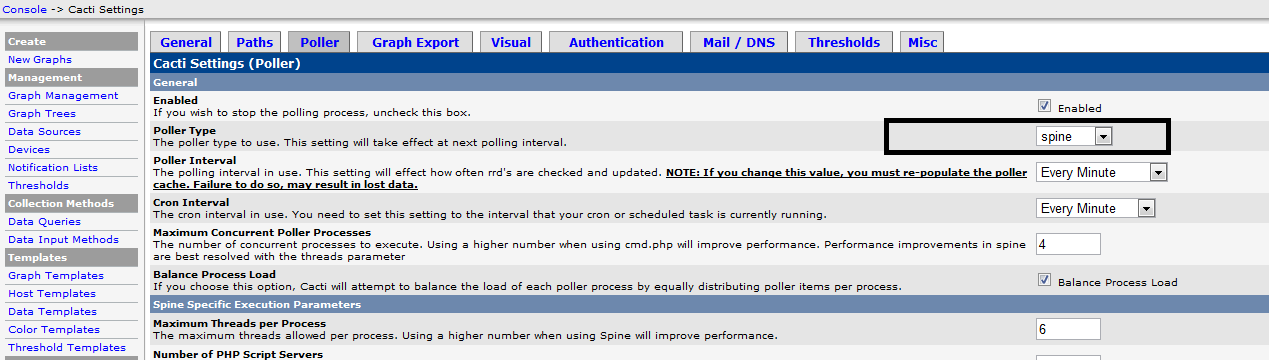
In Console -> Cacti Settings -> Poller, Change the poller Type from comd.php to spine.
6 – Rebuild Poller Cache
Whenever the Poller Interval is changed, the cache must be emptied. To do this, click “System Utilities” under the Utilities heading on the left-hand navigation panel.Click on “Rebuild Poller Cache” to empty the cache.
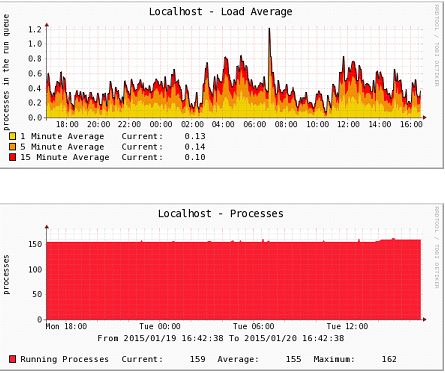
In about 5 minutes you’ll see the first graphs of localhost server start populating under the graphs tab.
Done!
How To Install Cacti On Ubuntu 14的更多相关文章
- install cinnamon on ubuntu 14.04
emotion: I feel not comfortable with ubuntu 14.04 default desktop unity,i still look for a alternati ...
- Ubuntu 14.04 – How to install xrdp in Ubuntu 14.04
http://c-nergy.be/blog/?p=5305 Hello World, Ubuntu 14.04 has been released on April 17th 2014 and we ...
- install Matlab2016b on Ubuntu 14.04
From Download Download the install file from Download MATLAB, Simulink, Stateflow, and Other MathWor ...
- [Django] Setting up Django Development Environment in Ubuntu 14.04
1. Python Of course you will need Python. Still Python 2.7 is preferred, however if you would like t ...
- Ubuntu 14.04 在桌面上双击运行shell 脚本文件
http://askubuntu.com/questions/465531/how-to-make-a-shell-file-execute-by-double-click up vote7down ...
- 开始ubuntu 14.04 的装X模式---终端模式下中文输入,听歌,上irc 开启framebuffer看电影 截图
先上图吧 卡卡的全是在tty1 下的操作,看电影,听歌,截图 ,看图 ,上irc 等等,相当适合在小白面前装屁! 需要安装的软件: 为了能正常显示中文:安装fbterm sudo apt-get i ...
- Ubuntu 14.04下java开发环境的搭建--3--Tomcat及MySQL的安装
前面两篇文章,已经说明了JDK和Eclipse 的安装方法,下面简单说一下,Tomcat及MySQL的安装方法. Tomcat的安装. 在合适的地方解压apache-tomcat-6.0.39.tar ...
- Install Google Pinyin on Ubuntu 14.04
Install Google Pinyin on Ubuntu 14.04 I've been spending more and more time on Ubuntu and I'm not us ...
- How To Install Tinc and Set Up a Basic VPN on Ubuntu 14.04
Introduction In this tutorial, we will go over how to use Tinc, an open source Virtual Private Netwo ...
随机推荐
- ReactNative 打包 APK
ReactNative打包步骤: 1.在项目的根目录执行下面这行命令: keytool -genkey -v -keystore my-release-key.keystore -alias my-k ...
- 将python的代码文件打包成可执行文件
1.使用pip install Pyinstaller 命令安装 2.使用命令 pyinstaller -F *.py打包成exe 3.在\dist文件夹下找到exe; 一.pyinstaller ...
- php 前台生成多维数组 后台批量添加
同一个地方绊倒两次,记录一下哈 1)前台表单,看 name <div class="tab-pane row " id="tab-1" > < ...
- Jenkins 插件升级时跳过 update site 的签名验证
当升级jenkins插件时,如果链接的update site用的自签名证书,可以用这个选项来启动Jenkins,来跳过签名验证: -Dhudson.model.DownloadService.noS ...
- Zynq-7000 FreeRTOS(二)中断:Timer中断
总结Zynq-7000 这款器件中的Timer定时器中断,为FreeRTOS中断做准备.在 ZYNQ 的纯 PS 里实现私有定时器中断. 每隔一秒中断一次, 在中断函数里计数加 1, 通过串口打印输出 ...
- (转)mysql数据库高可用高扩展性架构方案实施
http://shanhu.blog.51cto.com/1293405/1212605-----mysql数据库高可用高扩展性架构方案实施
- 在超链接href中实现form的提交
<form name="form1" method="post" action=""> <div class=" ...
- rails命令行命令
x.指定端口启动rails项目 ruby script/server webrick -p 3000 ------------------------------------------------- ...
- 使用PowerShell创建SSAS Role
PowerShell, SSAS, Role, DatabasePermission, Cube, Dimension, CubePermission, CubeDimensionCube 在SSAS ...
- javascript 基础知识-1
1, stringObject.charAt(index) : 返回指定位置(index)的字符 2, RegExpObject.exec(string), 用于检索字符串(string)中正则表达式 ...