
Zabbix学习之路(一)之Zabbix安装
一、Zabbix环境准备
[root@linux-node1 ~]#  cat /etc/redhat-release

CentOS Linux release 7.4. (Core)

[root@linux-node1 ~]#  uname -r

3.10.-693.5..el7.x86_64

[root@linux-node1 ~]# getenforce

Disabled

[root@linux-node1 ~]#  systemctl stop firewalld

Failed to stop firewalld.service: Unit firewalld.service not loaded.

[root@linux-node1 ~]#  ifconfig eth0|awk -F '[ :]+' 'NR==2{print $3}'

192.168.56.11

[root@linux-node1 ~]# hostname

linux-node1

[root@linux-node1 ~]# yum install -y ntpdate

[root@linux-node1 ~]# ntpdate time1.aliyun.com

[root@linux-node1 ~]# crontab -e

*/ * * * * /usr/sbin/ntpdate time1.aliyun.com &>/dev/null
二、Zabbix安装
Zabbix存储配置包以及yum配置文件

[root@linux-node1 ~]# rpm -ivh http://mirrors.aliyun.com/zabbix/zabbix/3.0/rhel/7/x86_64/zabbix-release-3.0-1.el7.noarch.rpm

[root@linux-node1 ~]# yum list |grep zabbix

Zabbix程序包安装,以及MySQL、Zabbix-agent

[root@linux-node1 ~]# yum install -y zabbix-server-mysql zabbix-web-mysql mariadb-server zabbix-agent
三、初始化数据库
创建Zabbix数据库以及用户

[root@linux-node1 ~]# systemctl start mariadb

[root@linux-node1 ~]# mysql_secure_installation

NOTE: RUNNING ALL PARTS OF THIS SCRIPT IS RECOMMENDED FOR ALL MariaDB

      SERVERS IN PRODUCTION USE!  PLEASE READ EACH STEP CAREFULLY!

In order to log into MariaDB to secure it, we'll need the current

password for the root user.  If you've just installed MariaDB, and

you haven't set the root password yet, the password will be blank,

so you should just press enter here.

Enter current password for root (enter for none):

OK, successfully used password, moving on...

Setting the root password ensures that nobody can log into the MariaDB

root user without the proper authorisation.

Set root password? [Y/n] Y

New password:

Re-enter new password:

Password updated successfully!

Reloading privilege tables..

 ... Success!

[root@linux-node1 ~]# mysql -uroot -p

Enter password:

Welcome to the MariaDB monitor.  Commands end with ; or \g.

Your MariaDB connection id is

Server version: 10.1.-MariaDB MariaDB Server

Copyright (c) , , Oracle, MariaDB Corporation Ab and others.

Type 'help;' or '\h' for help. Type '\c' to clear the current input statement.

MariaDB [(none)]> create database zabbix character set utf8 collate utf8_bin;

Query OK,  row affected (0.00 sec)

MariaDB [(none)]> grant all privileges on zabbix.* to zabbix@localhost identified by 'zabbix';

Query OK,  rows affected (0.00 sec)

MariaDB [(none)]> flush privileges;

Query OK,  rows affected (0.00 sec)

MariaDB [(none)]> quit;

Bye

导入初始模式和数据:

[root@linux-node1 ~]# zcat /usr/share/doc/zabbix-server-mysql-3.0./create.sql.gz |mysql -uzabbix -p zabbix

Enter password: zabbix

[root@linux-node1 ~]# mysql -uroot -p123456 -e "use zabbix;show tables;"

+----------------------------+

| Tables_in_zabbix           |

+----------------------------+

| acknowledges               |

| actions                    |

| alerts                     |

| application_discovery      |

| application_prototype      |

| application_template       |

| applications               |

| auditlog                   |

| auditlog_details           |

| autoreg_host               |

| conditions                 |

| config                     |

|......                     |

+----------------------------+
四、Zabbix服务器进程启动
在Zabbix_server.conf编辑数据库配置

[root@linux-node1 ~]# grep ^[a-Z] /etc/zabbix/zabbix_server.conf

LogFile=/var/log/zabbix/zabbix_server.log

LogFileSize=

PidFile=/var/run/zabbix/zabbix_server.pid

DBHost=localhost

DBName=zabbix

DBUser=zabbix

DBPassword=zabbix

SNMPTrapperFile=/var/log/snmptrap/snmptrap.log

Timeout=

AlertScriptsPath=/usr/lib/zabbix/alertscripts

ExternalScripts=/usr/lib/zabbix/externalscripts

LogSlowQueries=

启动Zabbix服务器进程

[root@linux-node1 ~]# systemctl enable zabbix-server#默认端口为10051

[root@linux-node1 ~]# systemctl start zabbix-server
五、编辑Zabbix前端PHP配置
Apache的配置文件/etc/httpd/conf.d/zabbix.conf,取消注释,设置正确的时区:Asia/Shanghai

[root@linux-node1 ~]# vim /etc/httpd/conf.d/zabbix.conf

php_value max_execution_time

php_value memory_limit 128M

php_value post_max_size 16M

php_value upload_max_filesize 2M

php_value max_input_time

php_value always_populate_raw_post_data -

php_value date.timezone Asia/Shanghai

通过改变配置文件启动Apache Web服务器

[root@linux-node1 ~]# vim /etc/httpd/conf/httpd.conf

Severname 127.0.0.1:

[root@linux-node1 ~]# systemctl enable httpd.service

Created symlink from /etc/systemd/system/multi-user.target.wants/httpd.service to /usr/lib/systemd/system/httpd.service.

[root@linux-node1 ~]# systemctl start httpd.service

[root@linux-node1 ~]# netstat -lntp

Active Internet connections (only servers)

Proto Recv-Q Send-Q Local Address           Foreign Address         State       PID/Program name

tcp               0.0.0.0:              0.0.0.0:*               LISTEN      /sshd

tcp               127.0.0.1:            0.0.0.0:*               LISTEN      /master

tcp6              :::                   :::*                    LISTEN      /httpd

tcp6              :::                   :::*                    LISTEN      /sshd

tcp6              :::                  :::*                    LISTEN      /master

tcp6              :::                 :::*                    LISTEN      /mysqld
六、Zabbix的web安装
step1:
在浏览器中,打开Zabbix URL:http:// <server_ip_or_name> / zabbix

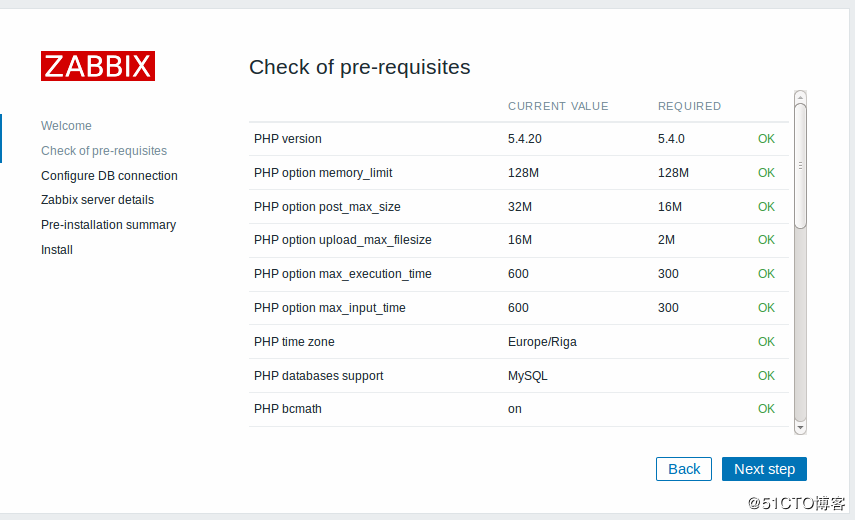
step2:
确保满足所有软件的先决条件。
step3:
输入连接到数据库的详细信息。Zabbix数据库必须已经创建。

step4:
输入Zabbix服务器的详细信息。

step5:
查看设置摘要。

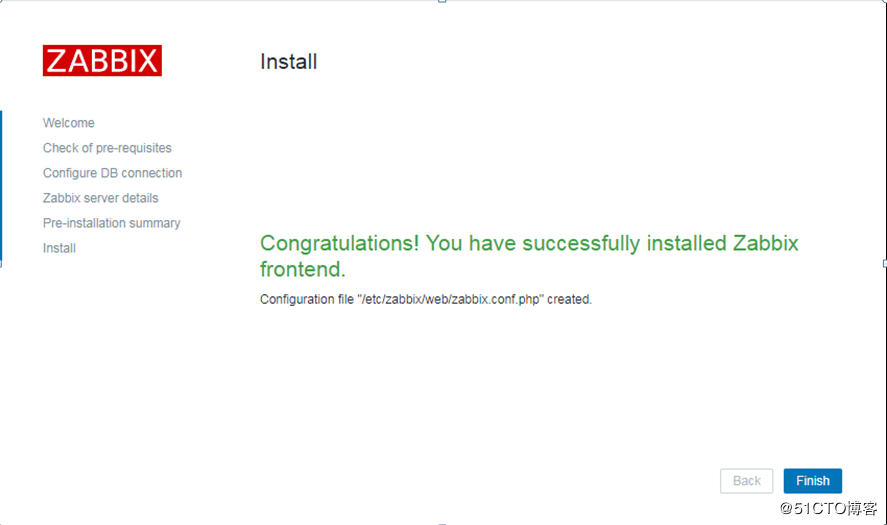
step6:
完成安装,会在/etc/zabbix/web/zabbix.conf.php生成配置文件
当数据库遇到瓶劲,在进行数据库拆分的时候,需要修改配置文件/etc/zabbix/web/zabbix.conf.php,指向新的数据库地址。

[root@linux-node1 ~]# vim /etc/zabbix/web/zabbix.conf.php

<?php

// Zabbix GUI configuration file.

global $DB;

$DB['TYPE']     = 'MYSQL';

$DB['SERVER']   = 'localhost';

$DB['PORT']     = '';

$DB['DATABASE'] = 'zabbix';

$DB['USER']     = 'zabbix';

$DB['PASSWORD'] = 'zabbix';

// Schema name. Used for IBM DB2 and PostgreSQL.

$DB['SCHEMA'] = '';

$ZBX_SERVER      = 'localhost';

$ZBX_SERVER_PORT = '';

$ZBX_SERVER_NAME = '';

$IMAGE_FORMAT_DEFAULT = IMAGE_FORMAT_PNG;
step7:
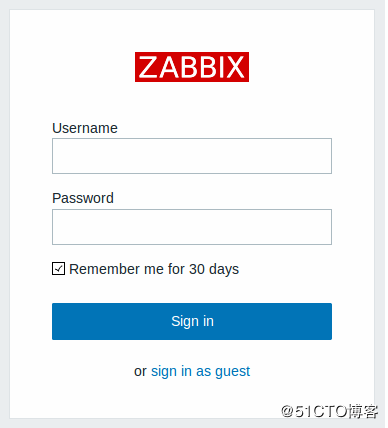
Zabbix前端准备就绪!默认的用户名是Admin,密码zabbix。
Zabbix学习之路(一)之Zabbix安装的更多相关文章
- 我的 Delphi 学习之路 —— Delphi 助手的安装
标题:我的 Delphi 学习之路 -- Delphi 助手的安装 作者:断桥烟雨旧人伤 Delphi 助手的安装 CnWizards 类似于 VS 中的番茄助手,在编写 Delphi 代码时帮助极大 ...
- [原创] zabbix学习之旅二:yum安装
对于允许连接公网的环境下,显然通过yum安装是最为简单方便的,也是官网推荐的安装方式.通过这种方式安装,会将php.apache.zabbix本身都一并安装,解决了烦人的依赖包问题. 本文将介绍如 ...
- [原创] zabbix学习之旅三:agent安装
部署完zabbix server后,自然要部署zabbix agent.在官方描述中,agent是部署在被监控的机器上,用于采集CPU.内存.磁盘等统计信息,并上报给server用于进一步处理.age ...
- Zabbix学习之路(十)之分布式监控zabbix_proxy及交换机监控
1.Zabbix分布式监控 zabbix proxy 可以代替 zabbix server 检索客户端的数据,然后把数据汇报给 zabbix server,并且在一定程度上分担了zabbix serv ...
- Zabbix学习之路(四)之Web监控
1.Zabbix监控web服务器访问性能 zabbix 对 web 性能的监控,通过它可以了解 web 站点的可用性以及性能.最终将各项指标绘制到图形中,这样我们可以了解到一个站点的下载速度.响应速度 ...
- Zabbix学习之路(九)之低级自动发现以及MySQL多实例
1.概述 Zabbix的网络发现是指zabbix server通过配置好的规则,自动添加host,group,template Zabbix的主动注册刚好和网络发现是相反的,功能基本一致.zabbix ...
- Git学习之路(2)-安装GIt和创建版本库
▓▓▓▓▓▓ 大致介绍 前面一片博客介绍了Git到底是什么东西,如果有不明白的可以移步 Git学习之路(1)-Git简介 ,这篇博客主要讲解在Windows上安装Git和创建一个版本库 ▓▓▓▓▓▓ ...
- Zabbix学习之路(七)之Nginx的状态监控
1.安装nginx [root@linux-node2 ~]# yum install -y nginx [root@linux-node2 ~]# mkdir /etc/zabbix/zabbix_ ...
- Zabbix学习之路(五)之MySQL监控
1.linux-node2节点安装数据库 [root@linux-node2 ~]# yum install -y mariadb-server [root@linux-node2 ~]# syste ...
随机推荐
- 微服务框架SpringCloud(Dalston版)学习 (一):Eureka服务注册与发现
eureka-server eureka服务端,提供服务的注册与发现,类似于zookeeper 新建spring-boot工程,pom依赖: <dependency> <groupI ...
- vector详讲(二)迭代器
先看一下代码: #include <iostream> #include <vector> int main() { std::vector<double> dou ...
- Struts2通配符
action: struts: or: 请求路径:
- 查看rpm包里面内容以及里面文件的内容
如果想查看rpm包里面的内容使用命令: rpm -qpl xxxx.rpm 如果想查看rpm包里面的内容导出,而不是安装,使用命令: rpm2cpio xxxx.rpm | cpio -ivd 就 ...
- ansible实用例子
寻找/etc/ 名为"hosts" 递归查找 ansible webserver -m find -a ' path=/etc/ file_type=any recurse=yes ...
- cocos2d-x开发: 一切应该从配置文件读取开始
想要做一款完整的游戏,应该从配置文件读取开始.cocos2d-x本身提供了UserDefault来操作xml格式的配置文件,准确的说配置这模块引擎开发者已经考虑到了.但是xml格式包含大量无关的格式信 ...
- 公司内网静态IP,外网无线动态IP 同时上网,不必再切换网卡啦 route 命令给你搞定。
一: 公司内网:192.168.55.101 255.255.255.0 192.168.55.1 网关 外网:192.168.20.101 255.255.255.0 192.16 ...
- oracle自动冷备份脚本
根据自己网上的资料和自己的需求,写的oracle冷备份脚本. 整体思路: 1.停止服务 2.文件拷贝 3.启动服务 保存以为文件为BAT格式,点击可以用下. rem ----------------- ...
- CABasicAnimation使用总结
CABasicAnimation使用总结 实例化 使用方法animationWithKeyPath:对 CABasicAnimation进行实例化,并指定Layer的属性作为关键路径进行注册. //围 ...
- Angular7教程-05-搭建项目环境
1. 本节说明 本节以及后面的内容我们将会通过搭建一个简单的博客程序来对angular进行介绍,项目使用前端框架是bootstrap.版本v3.3.7,另外需要安装jquery.关于bootstrap ...