Collectd 和 InfluxDB 的部署和使用
更新软件包
$ sudo apt-get update
$ sudo apt-get upgrade
$ sudo reboot
安装influxdb
hanwei@ubuntu-lab:~$ wget https://dl.influxdata.com/influxdb/releases/influxdb_1.2.4_amd64.deb

--2017-06-14 16:37:09--  https://dl.influxdata.com/influxdb/releases/influxdb_1.2.4_amd64.deb

Resolving dl.influxdata.com (dl.influxdata.com)... 52.84.167.167, 52.84.167.39, 52.84.167.178, ...

Connecting to dl.influxdata.com (dl.influxdata.com)|52.84.167.167|:443... connected.

HTTP request sent, awaiting response... 200 OK

Length: 17305080 (17M) [application/x-debian-package]

Saving to: ‘influxdb_1.2.4_amd64.deb’

influxdb_1.2.4_amd64.deb         100%[========================================================>]  16.50M   875KB/s    in 19s

2017-06-14 16:37:29 (874 KB/s) - ‘influxdb_1.2.4_amd64.deb’ saved [17305080/17305080]

hanwei@ubuntu-lab:~$ sudo dpkg -i influxdb_1.2.4_amd64.deb

[sudo] password for hanwei:

Selecting previously unselected package influxdb.

(Reading database ... 63342 files and directories currently installed.)

Preparing to unpack influxdb_1.2.4_amd64.deb ...

Unpacking influxdb (1.2.4-1) ...

Setting up influxdb (1.2.4-1) ...

Created symlink from /etc/systemd/system/influxd.service to /lib/systemd/system/influxdb.service.

Created symlink from /etc/systemd/system/multi-user.target.wants/influxdb.service to /lib/systemd/system/influxdb.service.

Processing triggers for man-db (2.7.5-1) ...

hanwei@ubuntu-lab:~$ service influxdb start

==== AUTHENTICATING FOR org.freedesktop.systemd1.manage-units ===

Authentication is required to start 'influxdb.service'.

Authenticating as: hanwei,,, (hanwei)

Password:

==== AUTHENTICATION COMPLETE ===

hanwei@ubuntu-lab:~$ service influxdb status

● influxdb.service - InfluxDB is an open-source, distributed, time series database

   Loaded: loaded (/lib/systemd/system/influxdb.service; enabled; vendor preset: enabled)

   Active: active (running) since Wed 2017-06-14 16:50:05 CST; 4s ago

     Docs: https://docs.influxdata.com/influxdb/

 Main PID: 2156 (influxd)

    Tasks: 7

   Memory: 4.9M

      CPU: 49ms

   CGroup: /system.slice/influxdb.service

           └─2156 /usr/bin/influxd -config /etc/influxdb/influxdb.conf
修改influxdb配置文件
hanwei@ubuntu-lab:~$ vim /etc/influxdb/influxdb.conf

[admin]

  # Determines whether the admin service is enabled.

  # enabled = false

  # The default bind address used by the admin service.

  # bind-address = ":8083"

  # Whether the admin service should use HTTPS.

  # https-enabled = false

修改成

enabled = true

bind-address = ":8083"
在infuxdb创建数据库Collectd
两种方式CLI或者web ui
http://192.168.206.144:8086/query?q=CREATE+DATABASE+%22collectd%22&db=collectd
或者用web ui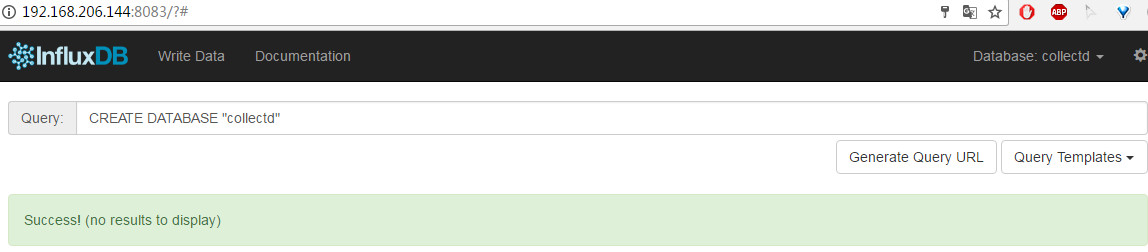
安装 Collectd
$ sudo apt-get install collectd
配置 Collectd 为客户端,收集到数据后直接发给 InfluxDB
$ sudo vi /etc/collectd/collectd.conf

...

LoadPlugin network

...

<Plugin network>

        Server "192.168.2.183" "25826"

</Plugin>

...
重启 Collectd:
$ sudo /etc/init.d/collectd restart
配置 InfluxDB 自带的 Collectd 插件
InfluxDB 自带的 Collectd 插件默认是关闭的,需要手动配置打开 enabled = true,并填上 database = “collectd” 这一行,这里的 “collectd” 就是我们上面创建的那个数据库,更改配置后记得重启 InfluxDB
$ sudo vim /etc/influxdb/shared/influxdb.conf

...

  # Configure the collectd api

  [input_plugins.collectd]

  enabled = true

  # address = "0.0.0.0" # If not set, is actually set to bind-address.

  # port = 25826

  database = "collectd"

  # types.db can be found in a collectd installation or on github:

  # https://github.com/collectd/collectd/blob/master/src/types.db

  # typesdb = "/usr/share/collectd/types.db" # The path to the collectd types.db file

...

hanwei@ubuntu-lab:~$ sudo service influxdb restart
检查一下服务器上打开的端口就会发现 influxdb 插件启动了一个 25826 端口,如果发现 InfluxDB 数据库里没有(收集到)数据,务必检查这个 25826 端口是否正常启动了
hanwei@ubuntu-lab:~$ sudo netstat -tupln

Active Internet connections (only servers)

Proto Recv-Q Send-Q Local Address           Foreign Address         State       PID/Program name

tcp        0      0 192.168.122.1:53        0.0.0.0:*               LISTEN      1649/dnsmasq

tcp        0      0 0.0.0.0:22              0.0.0.0:*               LISTEN      1308/sshd

tcp        0      0 127.0.0.1:5432          0.0.0.0:*               LISTEN      1437/postgres

tcp        0      0 127.0.0.1:6010          0.0.0.0:*               LISTEN      1740/0

tcp        0      0 127.0.0.1:6011          0.0.0.0:*               LISTEN      10471/1

tcp6       0      0 :::8083                 :::*                    LISTEN      10490/influxd

tcp6       0      0 :::8086                 :::*                    LISTEN      10490/influxd

tcp6       0      0 :::22                   :::*                    LISTEN      1308/sshd

tcp6       0      0 :::8088                 :::*                    LISTEN      10490/influxd

tcp6       0      0 ::1:5432                :::*                    LISTEN      1437/postgres

tcp6       0      0 ::1:6010                :::*                    LISTEN      1740/0

tcp6       0      0 ::1:6011                :::*                    LISTEN      10471/1

udp        0      0 0.0.0.0:53466           0.0.0.0:*                           10239/collectd

udp        0      0 192.168.122.1:53        0.0.0.0:*                           1649/dnsmasq

udp        0      0 0.0.0.0:67              0.0.0.0:*                           1649/dnsmasq

udp        0      0 0.0.0.0:68              0.0.0.0:*                           1250/dhclient

udp6       0      0 :::25826                :::*                                10490/influxd
检查InfluxDB是否有Collectd 传来的数据
InfluxDB 已经准备好接受和处理 Collectd 传来的数据了。用命令行或者 Web 管理界面验证一下数据库里是否有数据
hanwei@ubuntu-lab:~$ influx

Connected to http://localhost:8086 version 1.2.4

InfluxDB shell version: 1.2.4

> show databases;

name: databases

name

----

_internal

mydb

> use collectd

Using database collectd

> show measurements

name: measurements

name

----

cpu_value

df_value

disk_io_time

disk_read

disk_value

disk_weighted_io_time

disk_write

entropy_value

interface_rx

interface_tx

irq_value

load_longterm

load_midterm

load_shortterm

memory_value

processes_value

swap_value

users_value

> SELECT * from cpu_value

...

7435180464451600 ubuntu-lab.localdomain 0        cpu  nice          722

1497435180464452775 ubuntu-lab.localdomain 0        cpu  interrupt     0

1497435180464454083 ubuntu-lab.localdomain 0        cpu  softirq       339

1497435180464454592 ubuntu-lab.localdomain 0        cpu  steal         0

1497435180464455103 ubuntu-lab.localdomain 0        cpu  idle          592750

1497435190462593838 ubuntu-lab.localdomain 0        cpu  user          4281

1497435190462598610 ubuntu-lab.localdomain 0        cpu  system        5599

1497435190462600580 ubuntu-lab.localdomain 0        cpu  wait          7799

1497435190462602296 ubuntu-lab.localdomain 0        cpu  nice          722

1497435190462603649 ubuntu-lab.localdomain 0        cpu  interrupt     0

1497435190462604905 ubuntu-lab.localdomain 0        cpu  softirq       339

1497435190462605510 ubuntu-lab.localdomain 0        cpu  steal         0

1497435190462606004 ubuntu-lab.localdomain 0        cpu  idle          593745

1497435200463552177 ubuntu-lab.localdomain 0        cpu  user          4285

1497435200463557277 ubuntu-lab.localdomain 0        cpu  system        5608

1497435200463558626 ubuntu-lab.localdomain 0        cpu  wait          7799

1497435200463560045 ubuntu-lab.localdomain 0        cpu  nice          722

1497435200463561496 ubuntu-lab.localdomain 0        cpu  interrupt     0

1497435200463562866 ubuntu-lab.localdomain 0        cpu  softirq       339

...
或者web ui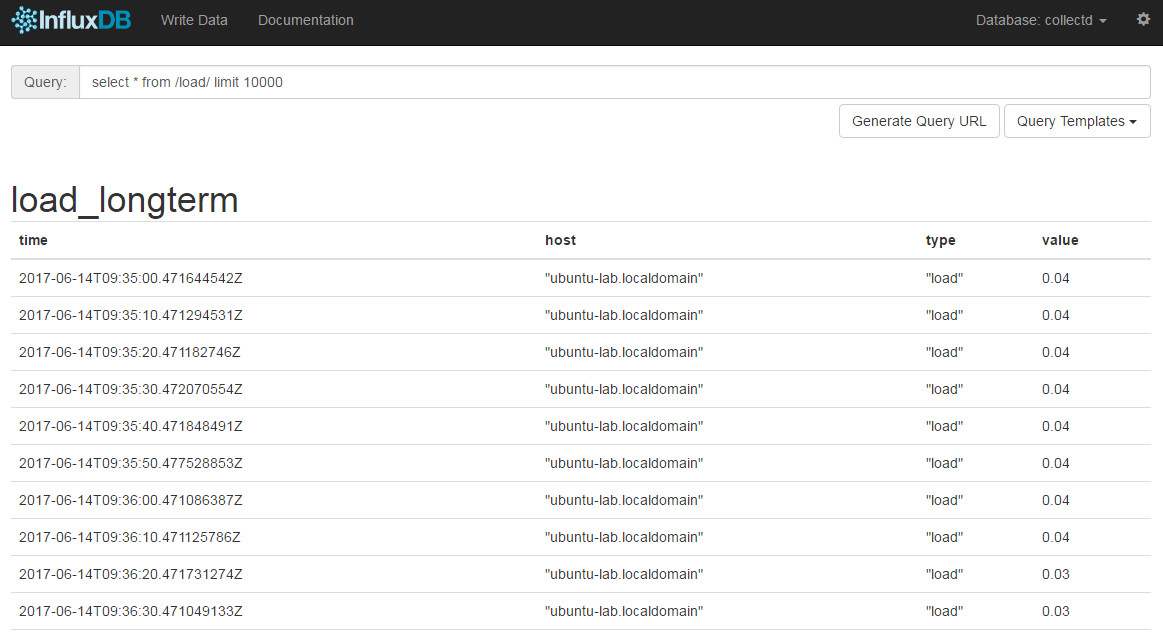
转自:https://www.backendcloud.cn/2017/06/15/collectd-influxdb/
Collectd 和 InfluxDB 的部署和使用的更多相关文章
- 使用 Grafana、collectd 和 InfluxDB 打造现代监控系统
想打造 New Relic 那样漂亮的实时监控系统我们只需要 InfluxDB/collectd/Grafana 这三个工具,这三个工具的关系是这样的: 采集数据(collectd)-> 存储数 ...
- 【监控】使用 Grafana、collectd 和 InfluxDB 打造现代监控系统
参考资料:Grafana 是 Graphite 和 InfluxDB 仪表盘和图形编辑器:http://www.oschina.net/p/grafana 使用 Grafana.collectd 和 ...
- collectd+logstash+influxdb+grafana构建windows服务器应用监控系统
一.背景介绍 本监控方案支持对Windows Server服务器集群的全面监控,方案提供丰富的图表展示, 以及对异常问题进行邮件的实时报警. 本系统由Collectd(操作系统数据搜集).logsta ...
- Influxdb安装部署
1.下载Influxdb并解压 2.下载上图中的nssm(辅助性工具) 3. 在安装目录执行cmd 输入 nssm install influxdb,其中Path选择安装文件中的influxd,Ar ...
- influxDB安装部署及入门
1.下载安装包,本文使用1.7.7版本 https://portal.influxdata.com/downloads/ 2.安装 yum localinstall influxdb-1.7.7.x8 ...
- InfluxDB、grafana、collect部署监控(centos6.8)
collect部署 1.安装 yum install collectd -y 2.配置/etc/collectd.conf LoadPlugin network <Plugin network& ...
- InfluxDB+Grafana大数据监控系列之基础环境部署(一)
一.单节点环境部署 机器节点信息及 InfluxDB.Grafana 版本选择: 节点 Linux版本 部署服务 10.223.1.198 Centos 6.8 InfluxDB 1.7.7 10.2 ...
- 使用collectd+influxdb+grafna监控进程的健康状态
一,前言 本文将介绍如何使用collectd+influxdb+grafna进行进程的监控,监控项为:进程健康状态. 思路为:使用collectd的processes插件进行程序进程的监控,储存到in ...
- Springboot2 Metrics之actuator集成influxdb, Grafana提供监控和报警
到目前为止,各种日志收集,统计监控开源组件数不胜数,即便如此还是会有很多人只是tail -f查看一下日志文件.随着容器化技术的成熟,日志和metrics度量统计已经不能仅仅靠tail -f来查看了,你 ...
随机推荐
- Ural1297 最长回文子串(后缀数组+RMQ)
/* 源程序丢失QWQ. 就不粘代码了. 大体做法是把串反转然后连接. 做一遍后缀数组. 对height做一遍rmq. 然后对于每个位置的奇偶分别判断, 记下pos. 注意求的是[l+1,r]的hei ...
- CODE FESTIVAL 2016 qual C题解
传送门 \(A\) 什么玩意儿-- const int N=105; char s[N];int n,f1,f2; int main(){ scanf("%s",s+1),n=st ...
- IIS7 伪静态 web.config 配置方法【详解】
IIS7 做伪静态比较的简单方便 1.程序方面 只需要设置web.config 就可以了. 2.服务器需要安装:URL Rewrite 下载地址:http://www.iis.net/download ...
- 如何快速关联/修改Git远程仓库地址
如何快速关联/修改Git远程仓库地址?按照如下步骤即可快速实现关联/修改Git远程仓库地址: 删除本地仓库当前关联的无效远程地址,再为本地仓库添加新的远程仓库地址 git remote -v //查看 ...
- im6q中的: pad csi
pad 管脚 pad control: 管脚控制 csi:CMOS serial interface, 即和CMOS摄像头的通信接口. imx 芯片的非常好的在线资料: https://www.dig ...
- 谷歌分析(Google Analytics) 是什么
谷歌分析(Google Analytics) 是什么 一.总结 一句话总结: 谷歌分析,即大家俗称的ga,全称google analytics,是谷歌推出的网站流量分析工具,可以说是当前业界最强大的流 ...
- 《Linux设备驱动程序》编译LDD3的scull驱动问题总结***
由于Linux内核版本更新的原因,LDD3(v2.6.10)提供的源码无法直接使用,下面是本人编译scull源码时出现的一些问题及解决方法.编译环境:Ubuntu 10.04 LTS(kernel v ...
- CMU Database Systems - Query Processing
Query Model Query处理有三种方式, 首先是Iterator model,这是最基本的model,又称为volcano,pipeline模式 他是top-down的模式,通过next函数 ...
- Intellij IDEA的Facets和Artifacts
Facets: Facets表述了在Module中使用的各种各样的框架.技术和语言.这些Facets让Intellij IDEA知道怎么对待module内容,并保证与相应的框架和语言保持一致. 使用F ...
- JS正则表达式使用
<script type="text/javascript"> function SubmitCk() { var reg = /^([a-zA-Z0-9]+[_|\_ ...