Spring之junit测试集成
简介
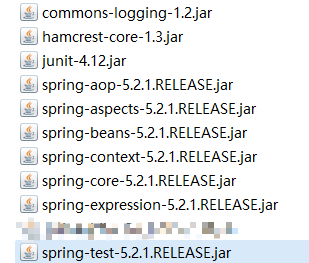
Spring提供spring-test-5.2.1.RELEASE.jar 可以整合junit。
优势:可以简化测试代码(不需要手动创建上下文,即手动创建spring容器)
使用spring和junit集成的步骤
1.导入jar包
2.创建包com.igeek.test,创建类SpringTest
通过@RunWith注解,使用junit整合spring
通过@ContextConfiguration注解,指定spring容器的位置
3.通过@Autowired注解,注入需要测试的对象
在这里注意两点:
将测试对象注入到测试用例中
测试用例不需要配置<context:component-scan base-package="com.igeek"/></context:component-scan>,因为使用测试类运行的时候,会自动启动注解的支持(仅对该测试类启用)
举例说明一下
1.第一种:在applicationContext.xml中不开启注解扫描
配置文件:
<?xml version="1.0" encoding="UTF-8"?><beans xmlns="http://www.springframework.org/schema/beans"       xmlns:xsi="http://www.w3.org/2001/XMLSchema-instance"

xmlns:context="http://www.springframework.org/schema/context"       xmlns:aop="http://www.springframework.org/schema/aop"

xsi:schemaLocation="http://www.springframework.org/schema/beans

https://www.springframework.org/schema/beans/spring-beans.xsd http://www.springframework.org/schema/context

https://www.springframework.org/schema/context/spring-context.xsd http://www.springframework.org/schema/aop

https://www.springframework.org/schema/aop/spring-aop.xsd">

    <bean id="userService" class="com.igeek.service.impl.UserServiceImpl"></bean>

</beans>
service层:
public class UserServiceImpl implements IUserService {

    @Override

    public void save() {

        System.out.println("save...");

    }

}
测试类:
@RunWith(SpringJUnit4ClassRunner.class)

@ContextConfiguration(locations = "classpath:applicationContext.xml")

public class Test01 {

    @Autowired

    private IUserService userService;

    @Test

    public void test01(){

        userService.save();

    }

}
2.第二种:在applicationContext.xml中开启注解扫描
配置文件:
<?xml version="1.0" encoding="UTF-8"?>

<beans xmlns="http://www.springframework.org/schema/beans"       xmlns:xsi="http://www.w3.org/2001/XMLSchema-instance"

xmlns:context="http://www.springframework.org/schema/context"       xmlns:aop="http://www.springframework.org/schema/aop"

xsi:schemaLocation="http://www.springframework.org/schema/beans

https://www.springframework.org/schema/beans/spring-beans.xsd http://www.springframework.org/schema/context

https://www.springframework.org/schema/context/spring-context.xsd http://www.springframework.org/schema/aop

https://www.springframework.org/schema/aop/spring-aop.xsd">

<!--开启注解扫描-->

<context:component-scan base-package="com.igeek"></context:component-scan>

</beans>
service层:
@Service("userService")

public class UserServiceImpl implements IUserService {

    @Override

    public void save() {

        System.out.println("save...");

    }

}
测试类:
@RunWith(SpringJUnit4ClassRunner.class)

@ContextConfiguration(locations = "classpath:applicationContext.xml")

public class Test01 {

    @Autowired

    private IUserService userService;

    @Test

    public void test01(){

        userService.save();

    }

}
Spring之junit测试集成的更多相关文章
- Struts2+Spring+Mybatis+Junit 测试
Struts2+Spring+Mybatis+Junit 测试 博客分类: HtmlUnit Junit Spring 测试 Mybatis package com.action.kioskmoni ...
- Spring整合junit测试
本节内容: Spring整合junit测试的意义 Spring整合junit测试 一.Spring与整合junit测试的意义 在没整合junit之前,我们在写测试方法时,需要在每个方法中手动创建容器, ...
- 原创:Spring整合junit测试框架(简易教程 基于myeclipse,不需要麻烦的导包)
我用的是myeclipse 10,之前一直想要用junit来测试含有spring注解或动态注入的类方法,可是由于在网上找的相关的jar文件进行测试,老是报这样那样的错误,今天无意中发现myeclips ...
- Spring与Junit测试整合
一.引入spring测试包:text包 二.@RunWith:指定spring对junit提供的一个运行器 @ContextConfiguration: locations指定spring配置文件位 ...
- Spring项目JUnit测试报错ClassNotFoundException解决
Eclipse项目上有红色感叹号,各包显示正常.用JUnit测试部分能运行,部分报错,报错如下: Class not found UserTestjava.lang.ClassNotFoundExce ...
- spring使用JUnit测试,@Autowired无法注入原因
在测试类上加入配置文件 代码如下 @RunWith(SpringJUnit4ClassRunner.class)// SpringJUnit支持,由此引入Spring-Test框架支持! @Cont ...
- 08Spring_Spring和junit测试集成
第一步: 在项目导入 spring-test-3.2.0.RELEASE.jar 第二步: 编写测试类
- Spring集成JUnit测试
1.程序中有Junit环境2.导入一个jar包.spring与junit整合jar包 spring-test-3.2.0.RELEASE.jar3.测试代码 @RunWith(SpringJUnit4 ...
- springboot集成junit测试与javamail测试遇到的问题
1.springboot如何集成junit测试? 导入junit的jar包 使用下面注解: @RunWith()关于这个的解释看下这两篇文章: http://www.imooc.com/qadetai ...
随机推荐
- LNMP下zabbix_server安装部署二
上一篇中搭建完成了zabbix的web端,但是虚拟机有点问题,所以转到笔记本上来写笔记本环境 server:192.168.112.9 agent:192.168.112.8 上一篇中完成了web ...
- NOIP模拟 28
果然昨天和别人合照丢的脸今天都加进RP里了 T3是用了dp快速幂(???),T1,T2考试的时候把想法都写注释了. T1: #include<cstdio> using namespace ...
- 《JS高程》-教你如何写出可维护的代码
1.前言 在平时工作开发中,大部分开发人员都花费大量的时间在维护其他人员的代码.很难从头开始开发新代码,很多情况下都是以他人成果为基础的,或者新增修改需求,自己写的代码也会被其他开发人员调用,所以 ...
- 安装cnpm遇到的问题
安装 cnpm时,用git安装时,安装好node环境后,测试版本号node -v和npm -v都没问题,可以输出版本号,但是安装cnpm时,使用淘宝镜像安装后,会出现如下警告: 这个是提醒你安装的版本 ...
- 用python实现对元素的长截图
一.目标 浏览网页的时候,看见哪个元素,就能截取哪个元素当图片,不管那个元素有多长 二.所用工具和第三方库 python ,PIL,selenium pycharm 三.代码部分 长截图整体思路: 1 ...
- 编程工具 | VScode 使用快捷键
按 Press 功能 Function Ctrl + Shift + P,F1 显示命令面板 Show Command Palette Ctrl + P 快速打开 Quick Open Ctrl + ...
- MQ应用之解耦
简介 消息队列 MQ 既可为分布式应用系统提供异步解耦和削峰填谷的能力,同时也具备互联网应用所需的海量消息堆积.高吞吐.可靠重试等特性. 应用场景 削峰填谷:诸如秒杀.抢红包.企业开门红等大型活动时皆 ...
- thinkphp 比RBAC更好的权限认证方式(Auth类认证)
Auth 类已经在ThinkPHP代码仓库中存在很久了,但是因为一直没有出过它的教程, 很少人知道它, 它其实比RBAC更方便 . RBAC是按节点进行认证的,如果要控制比节点更细的权限就有点困难了, ...
- 4. 彤哥说netty系列之Java NIO实现群聊(自己跟自己聊上瘾了)
你好,我是彤哥,本篇是netty系列的第四篇. 欢迎来我的公从号彤哥读源码系统地学习源码&架构的知识. 简介 上一章我们一起学习了Java中的BIO/NIO/AIO的故事,本章将带着大家一起使 ...
- (二)初识NumPy库(数组的操作和运算)
本章主要介绍的是ndarray数组的操作和运算! 一. ndarray数组的操作: 操作是指对数组的索引和切片.索引是指获取数组中特定位置元素的过程:切片是指获取数组中元素子集的过程. 1.一维数组的 ...