针对CCTV摄像头的扫描爆破工具 :Cameradar
针对CCTV摄像头的扫描爆破工具 :Cameradar

- 可以检测任何可访问的目标设备并扫描出开放的RTSP主机。
- 检测正在传输监控数据的设备型号。
- 内置字典自动化渗透爆破账号密码和目标流路径。
- 可以很方便的批量检测摄像头设备的弱口令。
- 可以自定义爆破的账密字典和目标流路径,可以检测的不同的摄像头设备来改变字典。
[root@localhost docker_test]# uname -a

Linux bogon 3.10.-.el7.x86_64 # SMP Fri Apr  :: UTC  x86_64 x86_64 x86_64 GNU/Linux

[root@localhost docker_test]#
[root@localhost docker_test]# yum update

Loaded plugins: fastestmirror, langpacks

Determining fastest mirrors

* base: mirrors.huaweicloud.com

* extras: mirrors.tuna.tsinghua.edu.cn

* updates: mirrors.huaweicloud.com

base                                                     | 3.6 kB     :

extras                                                   | 2.9 kB     :

updates                                                  | 2.9 kB     :

(/): base//x86_64/group_gz                              |  kB   :

(/): extras//x86_64/primary_db                          |  kB   :

(/): updates//x86_64/primary_db                         | 2.8 MB   :

(/): base//x86_64/primary_db                            | 6.0 MB   :
[root@localhost docker_test]# yum install -y yum-utils device-mapper-persistent-data lvm2

Loaded plugins: fastestmirror, langpacks

Loading mirror speeds from cached hostfile

* base: mirrors.huaweicloud.com

* extras: mirrors.tuna.tsinghua.edu.cn

* updates: mirrors.huaweicloud.com

Package yum-utils-1.1.-.el7.noarch already installed and latest version

Package device-mapper-persistent-data-0.8.-.el7.x86_64 already installed and latest version

Package :lvm2-2.02.-.el7_7..x86_64 already installed and latest version

Nothing to do
[root@localhost docker_test]# yum install docker-ce

Loaded plugins: fastestmirror, langpacks

Loading mirror speeds from cached hostfile

* base: mirrors.huaweicloud.com

* extras: mirrors.tuna.tsinghua.edu.cn

* updates: mirrors.huaweicloud.com

No package docker-ce available.

Error: Nothing to do

[root@localhost docker_test]#
在CentOS7.0上默认的源中没有docker的资源。(我这里安装的epel-release的源里也没有docker资源)
[root@localhost yum.repos.d]# pwd

/etc/yum.repos.d

[root@localhost yum.repos.d]# ls

CentOS-Base.repo       CentOS-fasttrack.repo  CentOS-Vault.repo

CentOS-CR.repo         CentOS-Media.repo      epel.repo

CentOS-Debuginfo.repo  CentOS-Sources.repo    epel-testing.repo
添加docker源。(可以看到添加docker源后,增加了一个yum源文件docker-ce.repo)
[root@localhost yum.repos.d]# yum-config-manager --add-repo https://download.docker.com/linux/centos/docker-ce.repo

Loaded plugins: fastestmirror, langpacks

adding repo from: https://download.docker.com/linux/centos/docker-ce.repo

grabbing file https://download.docker.com/linux/centos/docker-ce.repo to /etc/yum.repos.d/docker-ce.repo

repo saved to /etc/yum.repos.d/docker-ce.repo

[root@localhost yum.repos.d]# ls

CentOS-Base.repo       CentOS-fasttrack.repo  CentOS-Vault.repo  epel-testing.repo

CentOS-CR.repo         CentOS-Media.repo      docker-ce.repo

CentOS-Debuginfo.repo  CentOS-Sources.repo    epel.repo

[root@localhost yum.repos.d]#
查看仓库中所有docker版本。
[root@localhost yum.repos.d]# yum list docker-ce --showduplicates | sort -r

* updates: mirrors.huaweicloud.com

Loading mirror speeds from cached hostfile

Loaded plugins: fastestmirror, langpacks

* extras: mirrors.tuna.tsinghua.edu.cn

* epel: mirrors.tuna.tsinghua.edu.cn

docker-ce.x86_64            :19.03.-.el7                     docker-ce-stable

docker-ce.x86_64            :19.03.-.el7                     docker-ce-stable

docker-ce.x86_64            :19.03.-.el7                     docker-ce-stable

docker-ce.x86_64            :19.03.-.el7                     docker-ce-stable

.

.

.
安装docker社区免费版。
[root@localhost yum.repos.d]# yum install docker-ce

Loaded plugins: fastestmirror, langpacks

Loading mirror speeds from cached hostfile

* base: mirrors.huaweicloud.com

* epel: mirrors.tuna.tsinghua.edu.cn

* extras: mirrors.tuna.tsinghua.edu.cn

* updates: mirrors.huaweicloud.com

Resolving Dependencies

--> Running transaction check

---> Package docker-ce.x86_64 :19.03.-.el7 will be installed

--> Processing Dependency: container-selinux >= :2.74 for package: :docker-ce-19.03.-.el7.x86_64

--> Processing Dependency: containerd.io >= 1.2.- for package: :docker-ce-19.03.-.el7.x86_64

--> Processing Dependency: docker-ce-cli for package: :docker-ce-19.03.-.el7.x86_64

--> Running transaction check

---> Package container-selinux.noarch :2.107-.el7 will be installed

---> Package containerd.io.x86_64 :1.2.-3.2.el7 will be installed

---> Package docker-ce-cli.x86_64 :19.03.-.el7 will be installed

--> Finished Dependency Resolution

Dependencies Resolved

=======================================================================================

Package                Arch        Version                Repository             Size

=======================================================================================

Installing:

docker-ce              x86_64      :19.03.-.el7        docker-ce-stable        M

Installing for dependencies:

container-selinux      noarch      :2.107-.el7          extras                  k

containerd.io          x86_64      1.2.-3.2.el7         docker-ce-stable        M

docker-ce-cli          x86_64      :19.03.-.el7        docker-ce-stable        M

Transaction Summary

=======================================================================================

Install   Package (+ Dependent packages)

Total download size:  M

Installed size:  M
查看docker版本,启动docker
[root@localhost yum.repos.d]# docker version

Client: Docker Engine - Community

Version:           19.03.

API version:       1.40

Go version:        go1.12.10

Git commit:        9013bf583a

Built:             Fri Oct  ::

OS/Arch:           linux/amd64

Experimental:      false

Cannot connect to the Docker daemon at unix:///var/run/docker.sock. Is the docker daemon running?
启动docker
[root@localhost yum.repos.d]# systemctl start docker

[root@localhost yum.repos.d]# systemctl status docker

● docker.service - Docker Application Container Engine

   Loaded: loaded (/usr/lib/systemd/system/docker.service; disabled; vendor preset: disabled)

   Active: active (running) since Fri -- :: EST; 32s ago

     Docs: https://docs.docker.com

Main PID:  (dockerd)

    Tasks:

   Memory: 99.4M

   CGroup: /system.slice/docker.service

           └─ /usr/bin/dockerd -H fd:// --containerd=/run/containerd/containerd.sock

Nov  :: bogon dockerd[]: time="2019-11-08T03:31:54.384116486-05:00" level=info msg="ccResolverWrapper: s...e=grpc

Nov  :: bogon dockerd[]: time="2019-11-08T03:31:54.384130527-05:00" level=info msg="ClientConn switching...e=grpc

Nov  :: bogon dockerd[]: time="2019-11-08T03:31:54.416778226-05:00" level=info msg="[graphdriver] using ...rlay2"

Nov  :: bogon dockerd[]: time="2019-11-08T03:31:54.420853788-05:00" level=info msg="Loading containers: start."

Nov  :: bogon dockerd[]: time="2019-11-08T03:31:55.048703993-05:00" level=info msg="Default bridge (dock...dress"

Nov  :: bogon dockerd[]: time="2019-11-08T03:31:55.312303083-05:00" level=info msg="Loading containers: done."

Nov  :: bogon dockerd[]: time="2019-11-08T03:31:55.357432633-05:00" level=info msg="Docker daemon" commi...9.03.

Nov  :: bogon dockerd[]: time="2019-11-08T03:31:55.357497299-05:00" level=info msg="Daemon has completed...ation"

Nov  :: bogon dockerd[]: time="2019-11-08T03:31:55.394993466-05:00" level=info msg="API listen on /var/r....sock"

Nov  :: bogon systemd[]: Started Docker Application Container Engine.

Hint: Some lines were ellipsized, use -l to show in full.

[root@localhost yum.repos.d]#
[root@localhost yum.repos.d]# docker pull ullaakut/cameradar

Using default tag: latest

latest: Pulling from ullaakut/cameradar

9d48c3bd43c5: Pull complete

cc7766bf8751: Pull complete

a497a345880d: Pull complete

919b21ac9ea0: Pull complete

3f9aebbc778b: Pull complete

Digest: sha256:04bbc19c486584ccc12d8bca2bd07e24bb859b63c44e07c0c17e940ec8badc75

Status: Downloaded newer image for ullaakut/cameradar:latest
[root@localhost yum.repos.d]# docker images

REPOSITORY           TAG                 IMAGE ID            CREATED             SIZE

ullaakut/cameradar   latest              fe268aaf499c         weeks ago         .8MB

hello-world          latest              fce289e99eb9         months ago       .84kB

[root@localhost yum.repos.d]#
具体使用方法
用法:

docker run -t -v /my/folder/with/dictionaries:/tmp/dictionaries \

           ullaakut/cameradar \

           -r "/tmp/dictionaries/my_routes" \

           -c "/tmp/dictionaries/my_credentials.json" \

           -t 172.19.124.0/
[root@localhost ~]# docker run  ullaakut/cameradar -t192.168.64.

Loading credentials...ok

  > Loading credentials dictionary from path "/app/dictionaries/credentials.json"

  > Loaded  usernames and  passwords

Loading routes...ok

  > Loading routes dictionary from path "/app/dictionaries/routes"

  > Loaded  routes

Scanning the network...ok

  > Found  RTSP streams

✖ unable to attack empty list of targets
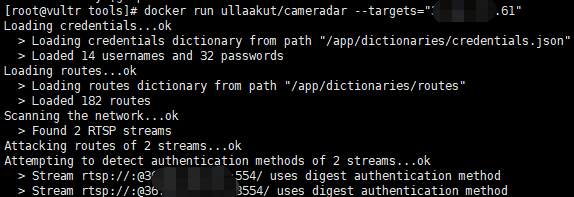
我们可以查看该工具的源文件,可以看到它的密码只有 账密字典中有14个用户名和32个密码,路径字典中有182个路径。
[root@localhost cameradar]# ls

attack.go       cmd           Dockerfile  helpers.go         LICENSE          README.md        scan_test.go

attack_test.go  curl.go       examples    helpers_test.go    loaders.go       scan.go          summary.go

cameradar.go    curl_test.go  go.mod      images             loaders_test.go  scanner.go       summary_test.go

CHANGELOG.md    dictionaries  go.sum      ISSUE_TEMPLATE.md  models.go        scanner_test.go  tools

[root@localhost cameradar]# cd dictionaries/

[root@localhost dictionaries]# ls

credentials.json  routes

[root@localhost dictionaries]# head credentials.json

{

  "usernames": [

    "",

    "",

    "",

    "Admin",

    "admin",

    "admin1",

    "administrator",

    "Administrator",

[root@localhost dictionaries]# head routes

/live/ch01_0

/:/main

/usrnm:pwd/main

/video1

.AMP

/h264major

/stream1
[root@localhost tools]# ls

my_credentials.json  my_routes

[root@localhost tools]# vim my_credentials.json

{

  "usernames": [

    "",

    "",

    "",

    "Admin",

    "admin",

    "admin1",

    "administrator",

    "Administrator",

    "aiphone",

    "Dinion",

    "root",

    "service",

    "supervisor",

    "ubnt",

    "test",

    "ciby",

    "hello"

  ],

  "passwords": [

    "",

    "",

    "",

    "",

    "",

    "",

    "",

    "",

    "",

    "",

    "",

    "admin",

    "administrator",

    "aiphone",

    "camera",

    "fliradmin",

    "hikvision",

    "hikadmin",

    "ikwd",

    "jvc",

    "meinsm",

    "pass",

    "password",

    "reolink",

    "root",

    "service",

    "supervisor",

    "system",

    "toor",

    "tp-link",

    "ubnt",

    "wbox123",

    "test.com",

    "test1.com",

    "123.com"

  ]

}

[root@localhost tools]# head my_routes

/live/ch01_0

/:/main

/usrnm:pwd/main

/video1

.AMP

/h264major

/stream1
将我们本机的字典挂在到容器中,然后使用-c -r 参数来调用自定义的字典。
[root@localhost tools]# docker run -t -v /home/docker_test/tools:/tmp ullaakut/cameradar -c "/tmp/my_credentials.json" -r "/tmp/my_routes" -t 192.168.64.128

Loading credentials...ok

  > Loading credentials dictionary from path "/tmp/my_credentials.json"

  > Loaded  usernames and  passwords

Loading routes...ok

  > Loading routes dictionary from path "/tmp/my_routes"

  > Loaded  routes

Scanning the network...ok

  > Found  RTSP streams

✖ unable to attack empty list of targets
[root@localhost tools]# docker run -t -v /home/docker_test/tools:/tmp ullaakut/cameradar -c "/tmp/my_credentials.json" -r "/tmp/my_routes" -t "/home/docker_test/tools/target.txt"

Loading credentials...ok

  > Loading credentials dictionary from path "/tmp/my_credentials.json"

  > Loaded  usernames and  passwords

Loading routes...ok

  > Loading routes dictionary from path "/tmp/my_routes"

  > Loaded  routes

Scanning the network...ko

✖ error while scanning network: Unable to split netmask from target expression: "/home/docker_test/tools/target.txt"

WARNING: No targets were specified, so  hosts scanned
(这里报错了。未能拆分网络掩码,不懂go语言暂未解决)
[root@localhost tools]# docker run -t -v /home/docker_test/tools:/tmp ullaakut/cameradar -c "/tmp/my_credentials.json" -r "/tmp/my_routes" -t 192.168.64.0/

Loading credentials...ok

  > Loading credentials dictionary from path "/tmp/my_credentials.json"

  > Loaded  usernames and  passwords

Loading routes...ok

  > Loading routes dictionary from path "/tmp/my_routes"

  > Loaded  routes

Scanning the network...
5、其他参数
* “ -h”:显示用法信息

* “ -T,--2000ms timeout ”:(默认:)设置自定义超时值,在此之后应放弃没有答案的攻击尝试。在尝试扫描不稳定和慢速的网络时,建议增加该值;在快速可靠的网络中,建议减少该值。

* “ -d,-- debug ”:启用调试日志

* “ -v,-- verbose ”:启用详细的curl日志(不推荐用于大多数用途)

“ -s,--scan-speed”:(默认:)4设置自定义nmap发现预设以提高速度或准确性。如果您尝试扫描不稳定和慢速的网络,建议降低它,如果在性能良好且可靠的网络上,则建议增加它。您可能还希望将其保持在较低水平,以使发现变得隐秘。
针对CCTV摄像头的扫描爆破工具 :Cameradar的更多相关文章
- 基于nmap扫描结果的端口爆破工具:BrutesPray
大家搞内网或者C段渗透测试的时候可能遇到很多时候需要对大批的主机进行精确爆破,这时候BruteSpray就派上用场了. BruteSpray是一款基于nmap扫描输出的gnmap/XML文件.自动 ...
- PJzhang:经典子域名爆破工具subdomainsbrute
猫宁!!! 参考链接: https://www.waitalone.cn/subdomainsbrute.html https://www.secpulse.com/archives/5900.htm ...
- [原创]内网SSH密码爆破工具sshcrack(配合Cscan批量弱口令检测)
0x000 前言 sshcrack是一个命令行下的SSH密码爆破工具,适用于内渗中SSH密码检测 当然也可用于外网SSH密码爆破,支持Windows/Linux,其它系统未测.Tip1 0x001 目 ...
- PJzhang:lijiejie的敏感目录爆破工具BBScan
猫宁!!! 参考链接: https://www.freebuf.com/sectool/85729.html https://segmentfault.com/a/1190000014539449 这 ...
- 子域名收集之DNS字典爆破工具fierce与dnsdict6的使用
子域名收集之DNS字典爆破工具fierce与dnsdict6的使用 一.fierce 0.介绍 该工具是一个域名扫描综合性工具.它可以快速获取指定域名的DNS服务器,并检查是否存在区域传输(Zone ...
- Web应用类型扫描识别工具WhatWeb
Web应用类型扫描识别工具WhatWeb WhatWeb是一款Kali Linux预安装的Web扫描工具.它使用Ruby语言编写.该工具可以扫描网站,获取该网站的各类信息,如所使用的CMS.博客平 ...
- python 写的http后台弱口令爆破工具
今天来弄一个后台破解的Python小程序,哈哈,直接上代码吧,都有注释~~ 1 2 3 4 5 6 7 8 9 10 11 12 13 14 15 16 17 18 19 20 21 22 23 24 ...
- Python开发爆破工具
上一篇讲到了如何用Python开发字典,而当我们手里有了字典 就可以进一步去做爆破的任务了,可以用现成的工具,当然也可以自己写 接下来我就要一步一步来写爆破工具! 爆破MySQL: 想要爆破MySQL ...
- 更新 是 可用的 针对 安卓 软件开发包和工具 Updates are available for android software development packages and tools
作者:韩梦飞沙 Author:han_meng_fei_sha 邮箱:313134555@qq.com E-mail: 313134555 @qq.com 更新 是 可用的 针对 安卓 软件开发包和工 ...
随机推荐
- SpringBootSecurity学习(23)前后端分离版之OAuth2.0 其它模式
密码模式 前面介绍了授权码模式和刷新令牌两种获取最新令牌的方法,下面来看一下其它模式.首先看密码模式,我们默认配置的三种模式中其实就包含密码模式的支持: 因此我们启动项目,直接使用密码模式即可,访问地 ...
- 《Windows内核分析》专题-索引目录
该篇博客整理了<Windows内核分析>专题的各篇博文,方便查找. 一.保护模式 二.进程与线程 [Windows内核分析]KPCR结构体介绍 (CPU控制区 Processor Cont ...
- hibernate 搭建框架
需要用的包 Hibernate的日志记录: * Hibernate日志记录使用了一个slf4j: * SLF4J,即简单日志门面(Simple Logging Facade for Java),不是具 ...
- 并发新构件之CyclicBarrier
CyclicBarrier:叫做循环栅栏,名字挺好听的.JDK描述:允许一组线程全部等待彼此达到共同屏障点的同步辅助. 循环阻塞在涉及固定大小的线程方的程序中很有用,这些线程必须偶尔等待彼此. 屏障被 ...
- PMP 德尔菲技术
1.德尔菲技术,必须遵守以下几个规则: 每个专家只与主持人单线联系. 专家之间完全背靠背,更不能进行讨论.为保证专家提出独立见解,甚至需要把专家分散在不同的物理地点. 专家以匿名的书面形式提出意见. ...
- 数据结构1_java---单链表的操作,约瑟夫问题
我们经常实用c++来建立链表,为了学习的方便,此处我使用java实现了对链表的增删改查功能 整个过程较为简单.仅供参考 流程: (1)通过内部类Node建立结点,内部变量作为指针域和数据域,并写下构造 ...
- 一篇文章彻底搞懂snowflake算法及百度美团的最佳实践
写在前面的话 一提到分布式ID自动生成方案,大家肯定都非常熟悉,并且立即能说出自家拿手的几种方案,确实,ID作为系统数据的重要标识,重要性不言而喻,而各种方案也是历经多代优化,请允许我用这个视角对分布 ...
- Spring 框架基础(04):AOP切面编程概念,几种实现方式演示
本文源码:GitHub·点这里 || GitEE·点这里 一.AOP基础简介 1.切面编程简介 AOP全称:Aspect Oriented Programming,面向切面编程.通过预编译方式和运行期 ...
- Spring Cloud - Eureka /actuator/info 如何显示信息
在pom.xml中添加 <!-- actuator监控信息完善 --> <dependency> <groupId>org.springframework.boot ...
- Spring MVC(2)Spring MVC 组件开发
一.控制器接收各类请求参数 代码测试环境: 接收各类参数的控制器--ParamsController package com.ssm.chapter15.controller; @Controller ...