apache ignite系列(一): 简介
apache-ignite简介(一)
1,简介
ignite是分布式内存网格的一种实现,其基于java平台,具有可持久化,分布式事务,分布式计算等特点,此外还支持丰富的键值存储以及SQL语法(基于h2引擎),可以看成是一个分布式内存数据库。
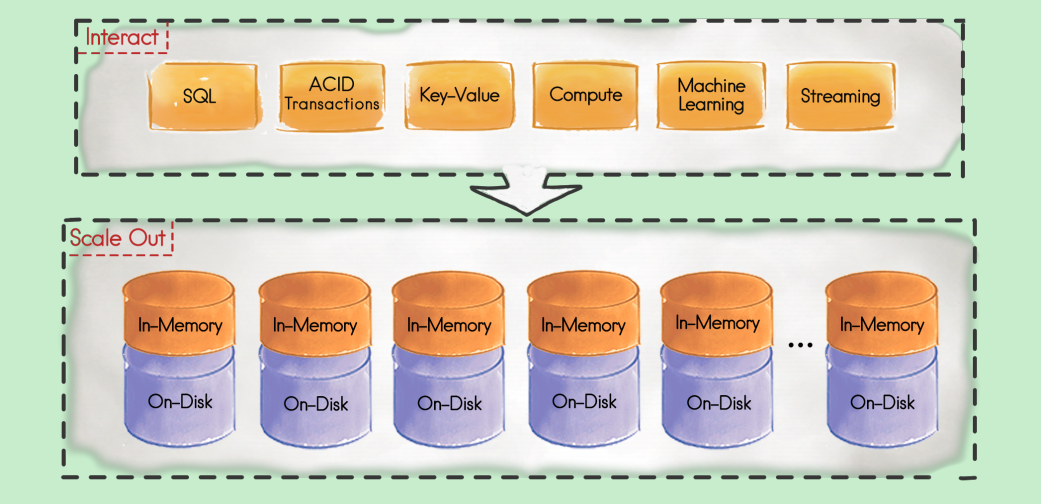
与ignite类似的产品有gemfire(12306目前正在使用),其开源版为geode。与gemfire相比,ignite对sql的支持比较完善,提供了数据并置来提升性能,还有对分布式事物的支持以及对spring的集成都比较友好,很方便进行嵌入式集成进应用服务。
2,基本使用
ignite有两种使用方式: 一种是从官网下载release版本程序,解压运行部署,另外一种是通过嵌入式集成进现有应用程序。
2.1,官网二进制release版本的使用
下载地址:https://ignite.apache.org/download.cgi
下载后得到apache-ignite-fabric-2.3.0-bin.zip压缩包,解压后进入bin路径:

主要用到两个脚本: ignite.bat 启动脚本, ignitevisorcmd.bat监控脚本
执行ignite.bat脚本即可启动一个ignite服务
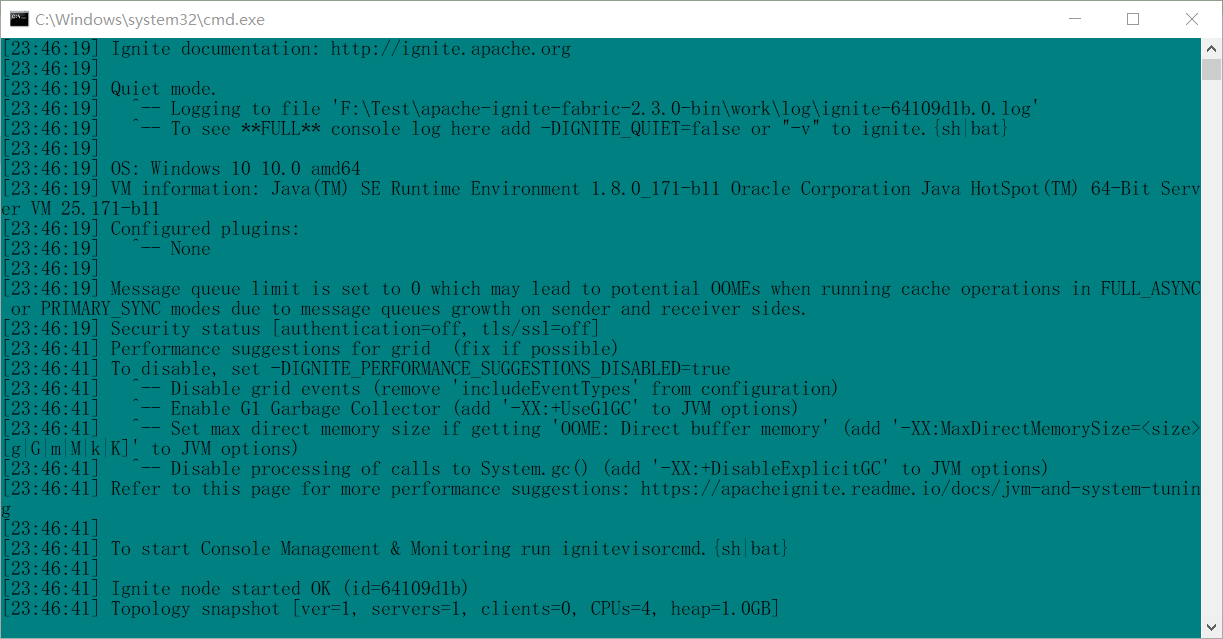
执行ignitevisorcmd.bat可以进入监控命令界面:
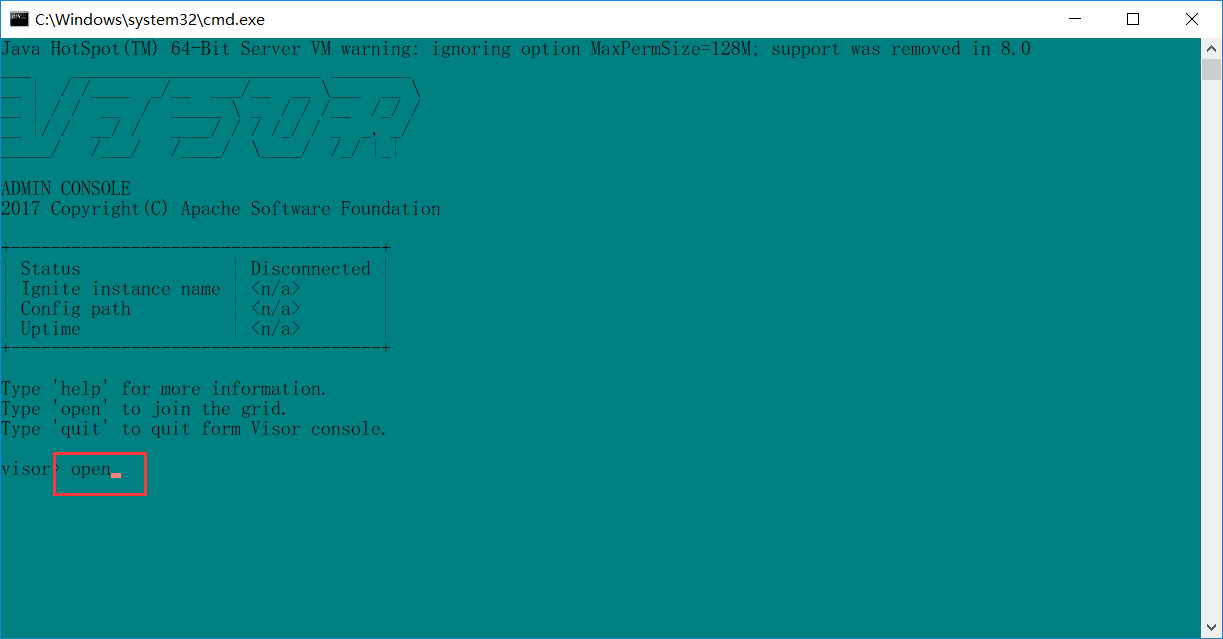
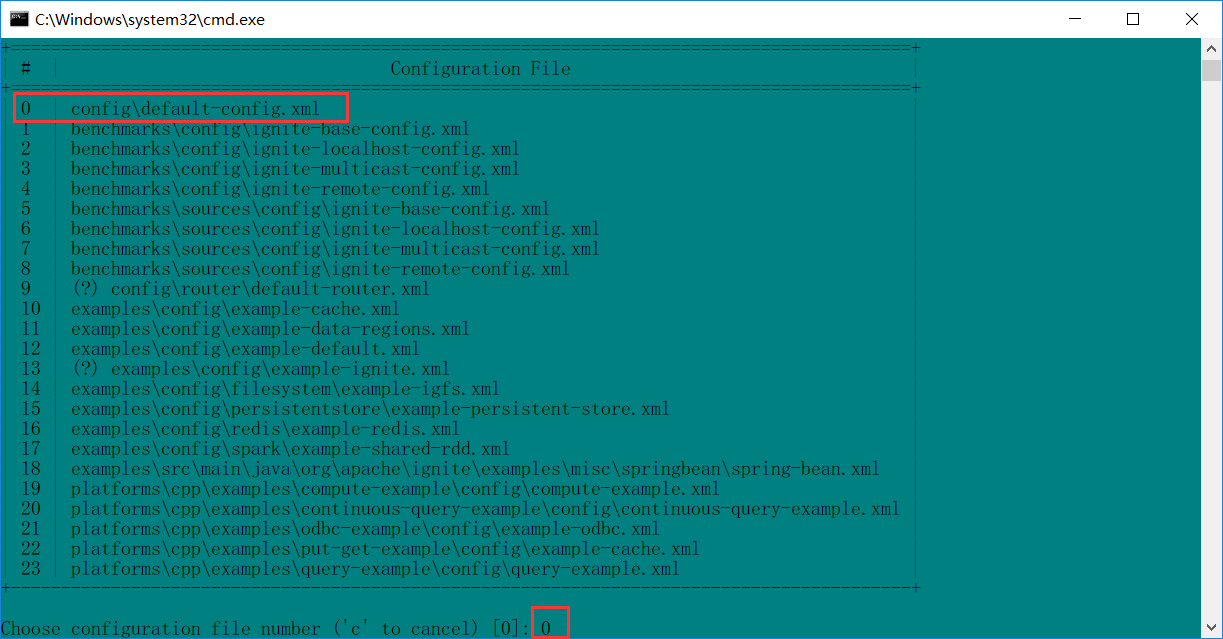
输入open命令选择配置文件,这里选择默认的0 | config\default-config.xml输入数字0即可

常用命令如下:
| 命令 | 功能 |
|---|---|
| top | 查看集群网络拓扑图 |
| cache | 查看整体缓存情况 |
| config | 查看节点配置 |
| open | 打开一个配置文件连接集群 |
| close | 关闭该连接 |
更多详细命令可以通过输入help命令查看命令帮助(输入help回车)。
2.2,java服务使用ignite客户端访问ignite集群
通过JAVA服务使用已启动的ignite集群,JAVA服务可以使用客户端模式(Client),应用端不存储数据,或者使用服务端模式(Server)变成一个节点加入现有ignite集群,则应用端会缓存部分数据。如果是使用服务端模式的话,整个集群其实都可以使用应用节点组成集群,也就是上面所说的嵌入式集成。这样可以对节点进行定制化处理,更为灵活。
这里使用Client模式演示一下简单使用:
1) 添加相关依赖
        <dependency>

            <groupId>org.apache.ignite</groupId>

            <artifactId>ignite-core</artifactId>

            <version>2.3.0</version>

        </dependency>

        <dependency>

            <groupId>org.apache.ignite</groupId>

            <artifactId>ignite-spring</artifactId>

            <version>2.3.0</version>

        </dependency>
2) 定义配置文件
default-config.xml
<beans xmlns="http://www.springframework.org/schema/beans"

       xmlns:xsi="http://www.w3.org/2001/XMLSchema-instance"

       xmlns:util="http://www.springframework.org/schema/util"

       xsi:schemaLocation="

        http://www.springframework.org/schema/beans

        http://www.springframework.org/schema/beans/spring-beans.xsd

        http://www.springframework.org/schema/util

        http://www.springframework.org/schema/util/spring-util.xsd">

	<bean id="igniteCfg" class="org.apache.ignite.configuration.IgniteConfiguration">

        <property name="clientMode" value="true"/>

	    <property name="discoverySpi">

		    <bean class="org.apache.ignite.spi.discovery.tcp.TcpDiscoverySpi">

			    <property name="localPort" value="48500"/>

				<property name="localPortRange" value="20"/>

				<property name="ipFinder">

				    <bean class="org.apache.ignite.spi.discovery.tcp.ipfinder.vm.TcpDiscoveryVmIpFinder">

					    <property name="addresses">

						    <list>

							    <value>127.0.0.1:48500..48520</value>

							</list>

						</property>

					</bean>

				</property>

			</bean>

		</property>

		<property name="communicationSpi">

		    <bean class="org.apache.ignite.spi.communication.tcp.TcpCommunicationSpi">

			    <property name="localPort" value="48100"/>

			</bean>

		</property>

	</bean>

</beans>
3) 启动ignite客户端并实现简单数据存取
ClientStartApplication.java
@SpringBootApplication

@ImportResource(locations={"classpath:default-config.xml"}) //ignite配置文件路径

public class ClientStartApplication implements CommandLineRunner {

    @Autowired

    private IgniteConfiguration igniteCfg;

    public static void main(String[] args) {

        SpringApplication.run(ClientStartApplication.class,args);

    }

    /**启动完成之后执行初始化*/

    @Override

    public void run(String... strings) {

        //启动ignite服务

        Ignite ignite = Ignition.start(igniteCfg);

        //创建cache

        IgniteCache<String, String> cache =  ignite.getOrCreateCache("test");

        //存入数据

        cache.put("cord",  "hello");

        //查询数据

        System.out.format("key[%s]->value[%s]\n", "cord", cache.get("cord"));

    }

}
执行结果如下:
[15:46:44] Ignite node started OK (id=48cfd9ce)

[15:46:44] Topology snapshot [ver=30, servers=1, clients=1, CPUs=4, heap=2.7GB]

key[cord]->value[hello]
通过ignitevisorcmd.bat查看当前集群状态与缓存情况:
visor> cache

(wrn) <visor>: No caches found.

(wrn) <visor>: Type 'help cache' to see how to use this command.
结果发现没有数据,这是因为默认的config\default-config.xml其实配置是空的,执行ignite.bat启动服务虽然也是用这个文件,但是因为有默认值,所以不影响,但是监控程序ignitevisorcmd.bat必须要根据配置文件才能连接访问集群信息,因此按如下所示修改config\default-config.xml:
(其实就是在上面的default-config.xml中去掉了<property name="clientMode" value="true"/>这一项)

<beans xmlns="http://www.springframework.org/schema/beans"

       xmlns:xsi="http://www.w3.org/2001/XMLSchema-instance"

       xsi:schemaLocation="

       http://www.springframework.org/schema/beans

       http://www.springframework.org/schema/beans/spring-beans.xsd">

	<bean id="grid.cfg" class="org.apache.ignite.configuration.IgniteConfiguration">

	    <property name="discoverySpi">

		    <bean class="org.apache.ignite.spi.discovery.tcp.TcpDiscoverySpi">

			    <property name="localPort" value="48500"/>

				<property name="localPortRange" value="20"/>

				<property name="ipFinder">

				    <bean class="org.apache.ignite.spi.discovery.tcp.ipfinder.vm.TcpDiscoveryVmIpFinder">

					    <property name="addresses">

						    <list>

							    <value>127.0.0.1:48500..48520</value>

							</list>

						</property>

					</bean>

				</property>

			</bean>

		</property>

		<property name="communicationSpi">

		    <bean class="org.apache.ignite.spi.communication.tcp.TcpCommunicationSpi">

			    <property name="localPort" value="48100"/>

			</bean>

		</property>

	</bean>

</beans>
再重新启动ignitevisorcmd.bat并open修改后的config\default-config.xml:
执行top命令,可以看到两个节点的类型是不同的:
visor> top

Hosts: 1

+=================================================

|  Int./Ext. IPs  |   Node ID8(@)    | Node Type |

+=================================================

| 0:0:0:0:0:0:0:1 | 1: 875F3FCF(@n0) | Server    |

| 10.118.144.74   | 2: 48CFD9CE(@n1) | Client    |

| 127.0.0.1       |                  |           |

+-------------------------------------------------
执行cache命令,可以看到刚代码中创建的名为test的cache的信息:
visor> cache

Time of the snapshot: 08/03/18, 16:20:35

+==============================================================

|  Name(@)  |    Mode     | Nodes | Entries (Heap / Off-heap) |

+==============================================================

| test(@c0) | PARTITIONED | 2     | min: 0 (0 / 0)            |

|           |             |       | avg: 0.50 (0.00 / 0.50)   |

|           |             |       | max: 1 (0 / 1)            |

+--------------------------------------------------------------
2.3, java服务集成ignite作为服务节点
只需将java项目中的配置文件default-config.xml中的<property name="clientMode" value="true"/>改为
<property name="clientMode" value="false"/>即变为服务节点模式,这样该节点也可以存储数据。
启动之后java服务输出如下:
[00:08:45] Topology snapshot [ver=7, servers=2, clients=0, CPUs=4, heap=2.8GB]
可见servers数量有增加,说明服务节点启动成功,至此ignite简介结束。
完整的示例代码请参考:
https://github.com/cording/ignite-example
apache ignite系列(一): 简介的更多相关文章
- apache ignite系列(六): 服务网格
简介 服务网格本质上还是远程方法调用(RPC),而在ignite中注册的服务本质体现还是以cache的形式存在,集群中的节点可以相互调用部署在其它节点上的服务,而且ignite集群会负责部署服务的 ...
- apache ignite系列(九):ignite调优
1,配置文件调优 1.1 设置页面大小(pagesize) 先查看系统pagesiz,使用PAGE_SIZE或者PAGESIZE # getconf PAGE_SIZE 4096 # getconf ...
- apache ignite系列(九):使用ddl和dml脚本初始化ignite并使用mybatis查询缓存
博客又断了一段时间,本篇将记录一下基于ignite对jdbc支持的特性在实际使用过程中的使用. 使用ddl和dml脚本初始化ignite 由于spring-boot中支持通过spring.dataso ...
- apache ignite系列(八):问题汇总
1,java.lang.ClassNotFoundException Unknown pair 1.Please try to turn on isStoreKeepBinary in cache s ...
- apache ignite系列(四):持久化
ignite持久化与固化内存 1.持久化的机制 ignite持久化的关键点如下: ignite持久化可防止内存溢出导致数据丢失的情况: 持久化可以定制化配置,按需持久化; 持久化能解决在大量缓存数据情 ...
- apache ignite系列(三):数据处理(数据加载,数据并置,数据查询)
使用ignite的一个常见思路就是将现有的关系型数据库中的数据导入到ignite中,然后直接使用ignite中的数据,相当于将ignite作为一个缓存服务,当然ignite的功能远不止于此,下面以 ...
- apache ignite系列(二):配置
ignite有两种配置方式,一种是基于XML文件的配置,一种是基于JAVA代码的配置: 这里将ignite常用的配置集中罗列出来了,一般建议使用xml配置. 1,基于XML的配置 <beans ...
- apache ignite系列(五):分布式计算
ignite分布式计算 在ignite中,有传统的MapReduce模型的分布式计算,也有基于分布式存储的并置计算,当数据分散到不同的节点上时,根据提供的并置键,计算会传播到数据所在的节点进行计算,再 ...
- Apache Ignite简介以及Ignite和Coherence、Gemfire、Redis等的比较
一.Ignite简介 Apache Ignite 内存数组组织框架是一个高性能.集成和分布式的内存计算和事务平台,用于大规模的数据集处理,比传统的基于磁盘或闪存的技术具有更高的性能,同时他还为应用和不 ...
随机推荐
- js动态添加<tr><td>
<form id="addNewsFormData" name="addNewsFormData" isCheck="true" ac ...
- Z算法
Z算法 Z算法是一种用于字符串匹配的算法.此算法的核心在于\(z\)数组以及它的求法. (以下约定字符串下标从\(1\)开始) \(\bm z\)数组和Z-box 定义\(z\)数组:\(z_{a,i ...
- Yii 三表关联 角色表、角色权限连接表、权限表
Yii 三表关联 角色表.角色权限连接表.权限表 角色表 role----------------id 唯一序号name 角色名称---------------- 角色权限连接表 lp-------- ...
- Zabbix-设置自动发现规则实例
一.前文 此篇文章,主要针对自动发现规则中使用snmpv2类型发现 zabbix官方解读,可当参考: https://www.zabbix.com/documentation/4.0/zh/man ...
- idea打开eclipse项目并部署至tomcat
前言:因为遇到了用idea打开eclipse项目并配置外置tomact的场景,经过实验也成功了,所以特地来记录一下. 导入eclipse项目 这里我们导入的eclipse下开发的maven项目,直接点 ...
- random库的使用
一.random库介绍 random库是使用随机数的Python标准库 伪随机数:采用梅森旋转算法生成的(伪)随机序列中元素 random库主要用于生成随机数 使用random库:import ran ...
- springboot中的springSession的存储和获取
利用redis进行springSession的存储: 存储: // 在session中保存用户信息 HttpSession session = httpRequest.getSession(true) ...
- Eclipse配置初始化(自用)
以上都是性能调优的配置,下面是其他常用的配置和优化 设置utf-8编码 window -> preferences -> General -> workplace中text file ...
- python聚类算法解决方案(rest接口/mpp数据库/json数据/下载图片及数据)
1. 场景描述 一直做java,因项目原因,需要封装一些经典的算法到平台上去,就一边学习python,一边网上寻找经典算法代码,今天介绍下经典的K-means聚类算法,算法原理就不介绍了,只从代码层面 ...
- .Net使用HttpClient以multipart/form-data形式post上传文件及其相关参数
前言: 本次要讲的是使用.Net HttpClient拼接multipark/form-data形式post上传文件和相关参数,并接收到上传文件成功后返回过来的结果(图片地址,和是否成功).可能有很多 ...