
Arduino + RFID 读取 IC 卡 Arduino uno中获得RFID的UID 并通过串口转发RFID卡号
RFID简介:射频识别即RFID(Radio Frequency IDentification)技术,又称无线射频识别,是一种通信技术,可通过无线电讯号识别特定目标并读写相关数据,而无需识别系统与特定目标之间建立机械或光学接触。常用的有低频(125k~134.2K)、高频(13.56Mhz)、超高频,微波等技术。RFID读写器也分移动式的和固定式的,目前RFID技术应用很广,如:图书馆,门禁系统,食品安全溯源等。
硬件准备
(基于Arduino的开发板、MFRC522读卡器模块)
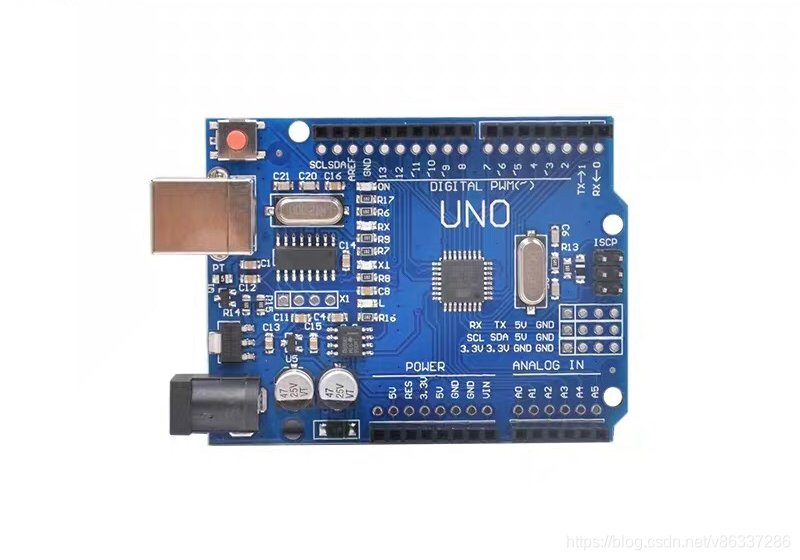
Arduino Uno * 1
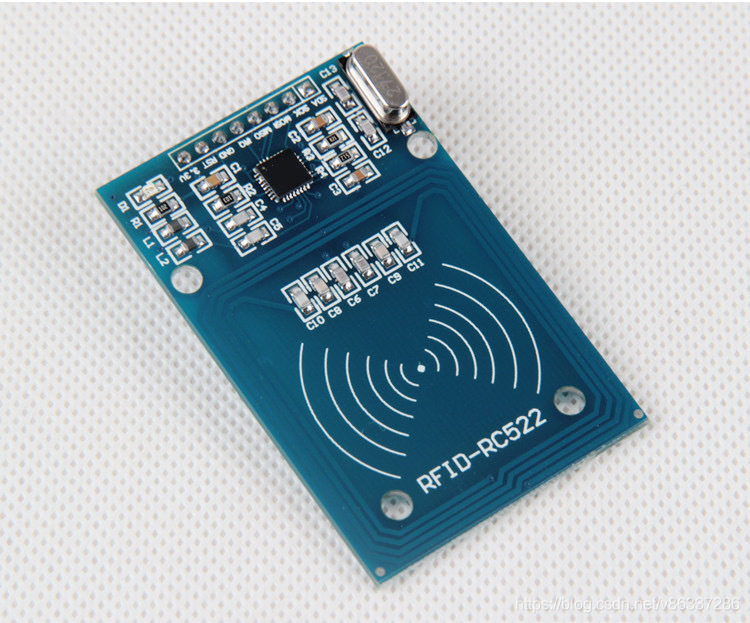
RFID-RC522 模块 * 1
IC卡 * 1-2
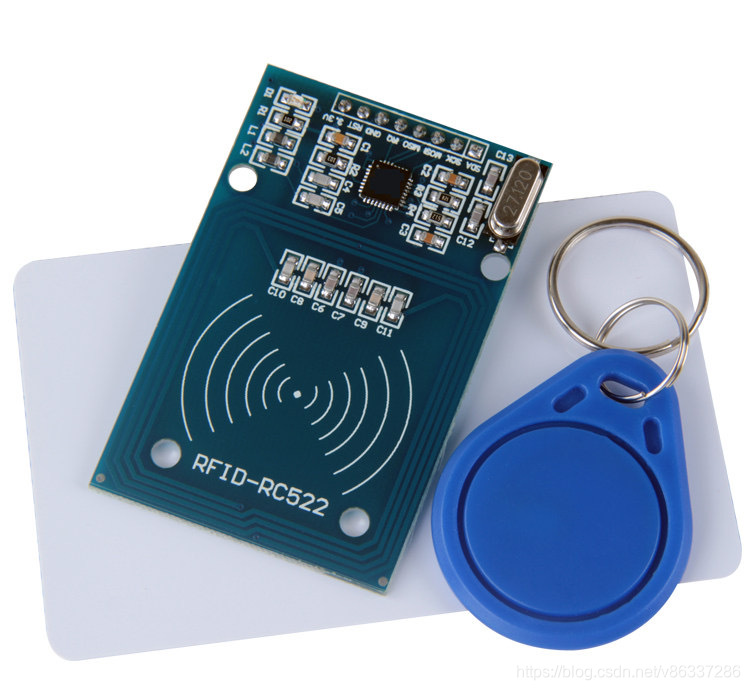
RFID技术现在都非常成熟和应用广泛,今天我们就来看看这个RFID如何实现读取里面的数据
接线
Arduino Uno <—> RFID-RC522
10 <—> SDA
13 <—> SCK
11 <—> MOSI
12 <—> MISO
null <—> IRQ
GND <—> GND
9 <—> RST
3.3V <—> 3.3V
需要用到RFID-RC522的库
法一、下载:https://github.com/miguelbalboa/rfid
下载解压到Arduino IDE的安装路径里的库文件夹libraries
https://download.csdn.net/download/v86337286/11813061
法二、点开管理库,在搜索栏里输入RC522,找到图中的库,
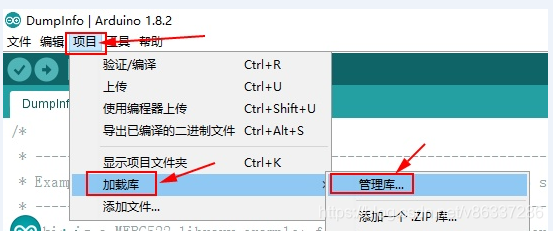
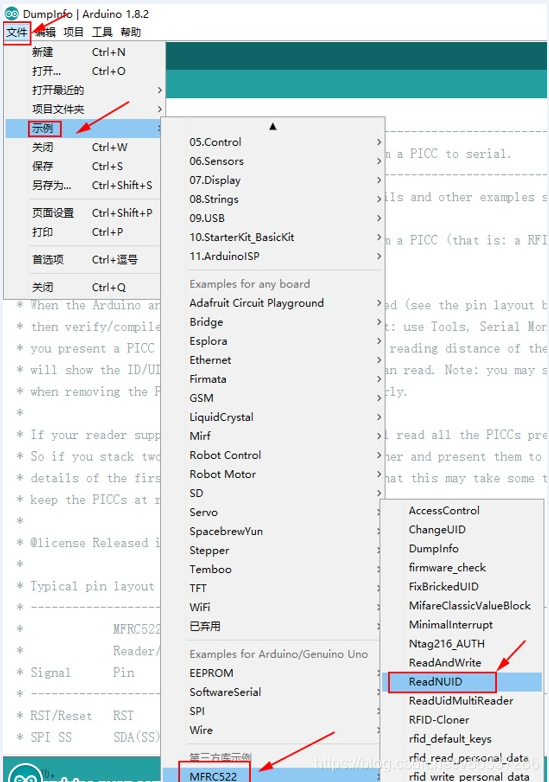
点击安装(我这图是已经安装过)
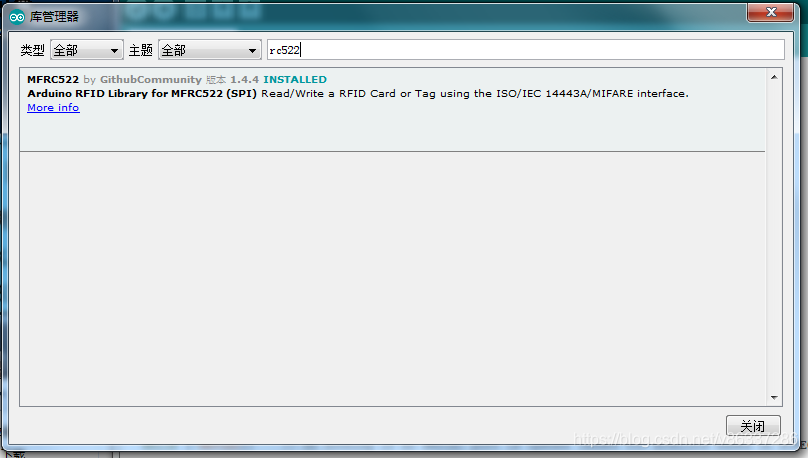
示例代码 .
Arduino + RFID 读取 IC 卡信息
读取 IC 卡信息后并通过串口将卡号及0扇区卡号数据打印出来,其他15个扇区不显示扇区内容
代码如下
/*

 * --------------------------------------------------------------------------------------------------------------------

 * Example sketch/program showing how to read data from a PICC to serial.

 * --------------------------------------------------------------------------------------------------------------------

 * This is a MFRC522 library example; for further details and other examples see: https://github.com/miguelbalboa/rfid

 *

 * Example sketch/program showing how to read data from a PICC (that is: a RFID Tag or Card) using a MFRC522 based RFID

 * Reader on the Arduino SPI interface.

 *

 * When the Arduino and the MFRC522 module are connected (see the pin layout below), load this sketch into Arduino IDE

 * then verify/compile and upload it. To see the output: use Tools, Serial Monitor of the IDE (hit Ctrl+Shft+M). When

 * you present a PICC (that is: a RFID Tag or Card) at reading distance of the MFRC522 Reader/PCD, the serial output

 * will show the ID/UID, type and any data blocks it can read. Note: you may see "Timeout in communication" messages

 * when removing the PICC from reading distance too early.

 *

 * If your reader supports it, this sketch/program will read all the PICCs presented (that is: multiple tag reading).

 * So if you stack two or more PICCs on top of each other and present them to the reader, it will first output all

 * details of the first and then the next PICC. Note that this may take some time as all data blocks are dumped, so

 * keep the PICCs at reading distance until complete.

 *

 * @license Released into the public domain.

 *

 * Typical pin layout used:

 * -----------------------------------------------------------------------------------------

 *             MFRC522      Arduino       Arduino   Arduino    Arduino          Arduino

 *             Reader/PCD   Uno/101       Mega      Nano v3    Leonardo/Micro   Pro Micro

 * Signal      Pin          Pin           Pin       Pin        Pin              Pin

 * -----------------------------------------------------------------------------------------

 * RST/Reset   RST          9             5         D9         RESET/ICSP-5     RST

 * SPI SS      SDA(SS)      10            53        D10        10               10

 * SPI MOSI    MOSI         11 / ICSP-4   51        D11        ICSP-4           16

 * SPI MISO    MISO         12 / ICSP-1   50        D12        ICSP-1           14

 * SPI SCK     SCK          13 / ICSP-3   52        D13        ICSP-3           15

 */

#include <SPI.h>

#include <MFRC522.h>

#define RST_PIN         9          // Configurable, see typical pin layout above

#define SS_PIN          10         // Configurable, see typical pin layout above

MFRC522 mfrc522(SS_PIN, RST_PIN);  // Create MFRC522 instance

void setup() {

    Serial.begin(9600);     // Initialize serial communications with the PC

    while (!Serial);        // Do nothing if no serial port is opened (added for Arduinos based on ATMEGA32U4)

    SPI.begin();            // Init SPI bus

    mfrc522.PCD_Init();     // Init MFRC522

    mfrc522.PCD_DumpVersionToSerial();  // Show details of PCD - MFRC522 Card Reader details

    Serial.println(F("Scan PICC to see UID, SAK, type, and data blocks..."));

}

void loop() {

    // Look for new cards

    if ( ! mfrc522.PICC_IsNewCardPresent()) {

        return;

    }

    // Select one of the cards

    if ( ! mfrc522.PICC_ReadCardSerial()) {

        return;

    }

    // Dump debug info about the card; PICC_HaltA() is automatically called

    mfrc522.PICC_DumpToSerial(&(mfrc522.uid));

}
运行此代码并将其中一张卡放入RFID卡时,很多信息显示在Arduino IDE的串行监视器上
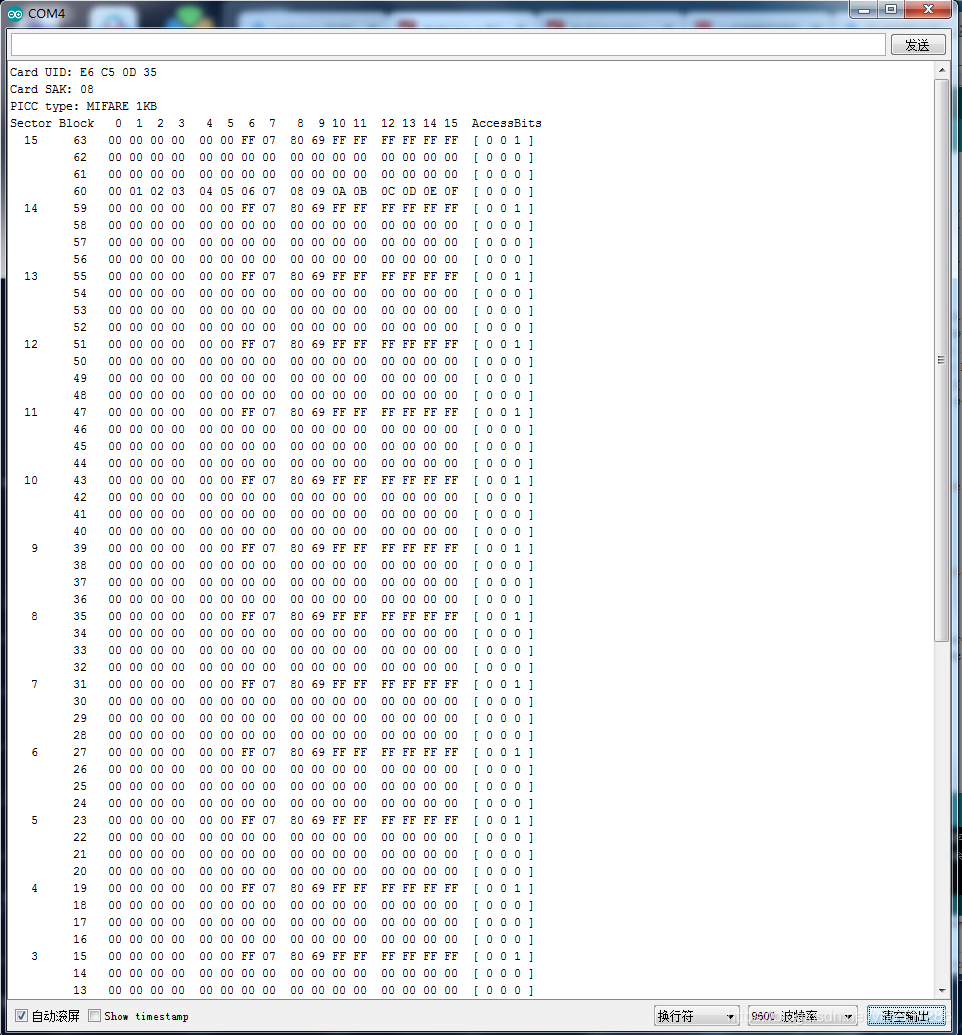
看完了上面那如何在Arduino中获得RFID的UID?
Arduino uno中只获得RFID的UID 并通过串口转发
法一
创建了另一个函数: PICC_DumpDetailsToSerialUid(Uid *uid)

函数如下
//This is just for read UID!
void MFRC522::PICC_DumpDetailsToSerialUid(Uid *uid){
Serial.print(F(“Card JUST UID :”));
for (byte i = 0; i < uid->size; i++) {
if(uid->uidByte[i] < 0x10)
Serial.print(F(" 0"));
else
Serial.print(F(" "));
Serial.print(uid->uidByte[i], HEX);
}
Serial.println();
}
可以把它放在你需要的任何地方
示例:
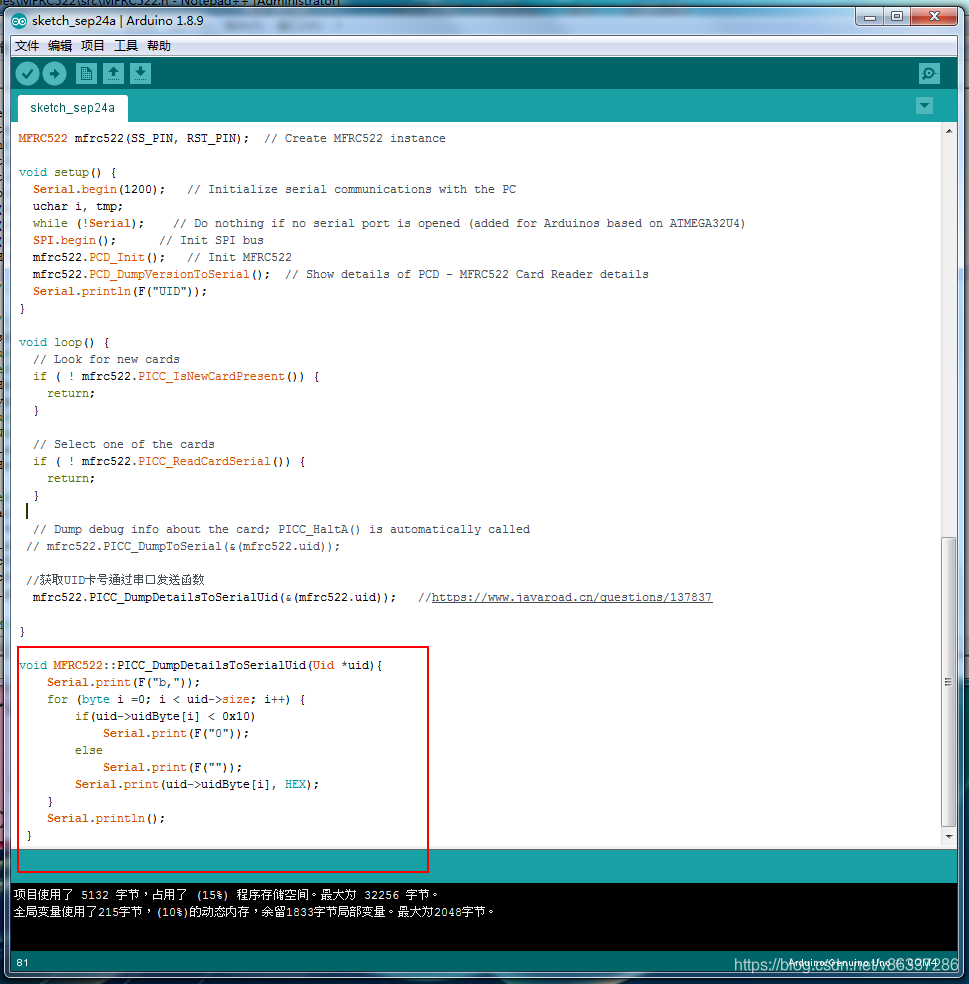
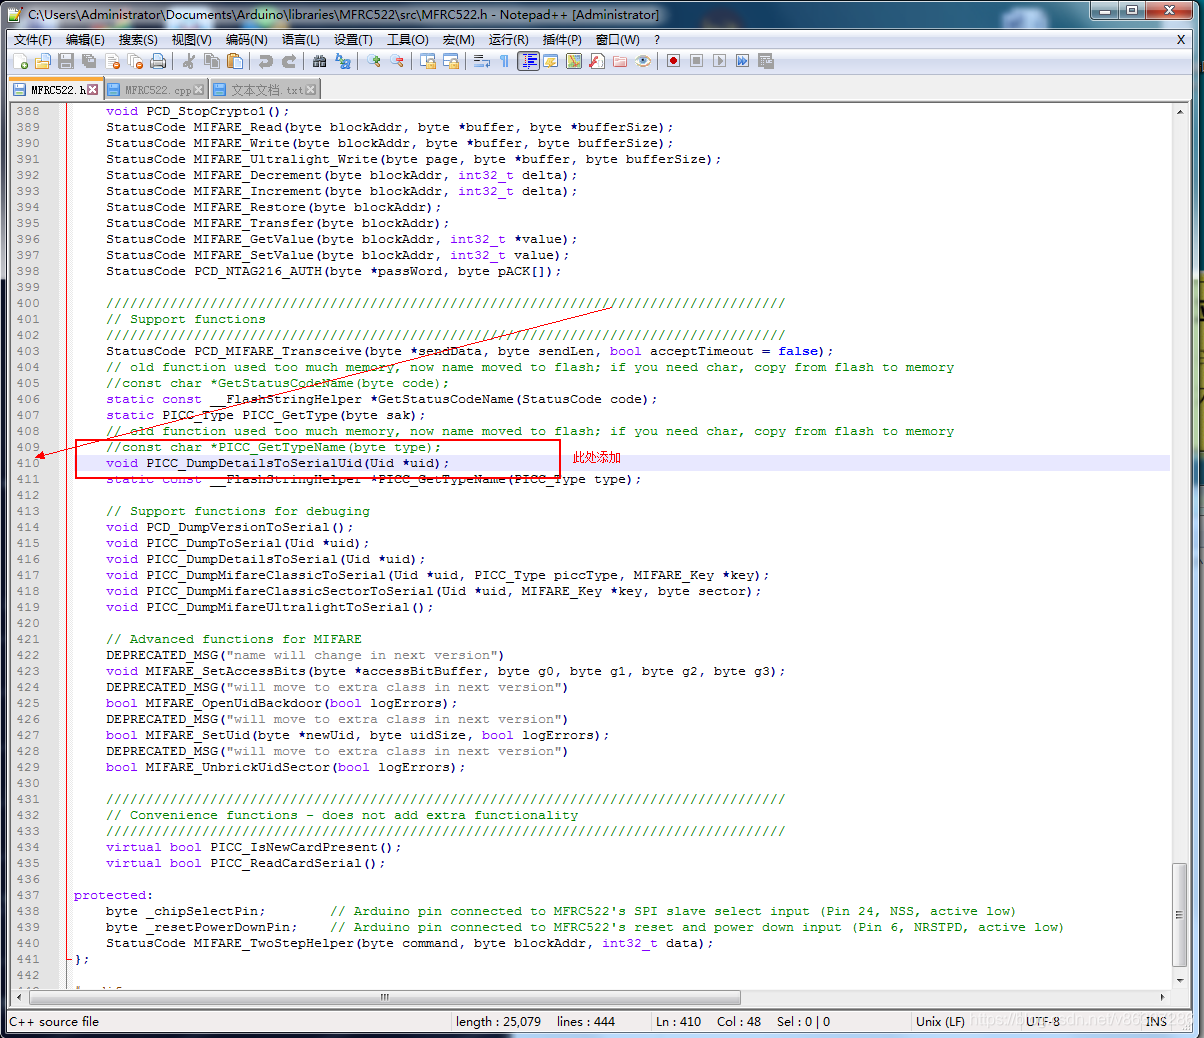
添加该功能后,您需要进入第410行的 MFRC522.h 库并添加
void PICC_DumpDetailsToSerialUid(Uid *uid);
在该库中进行了这两次编辑后,您可以在任意位置调用该函数 .
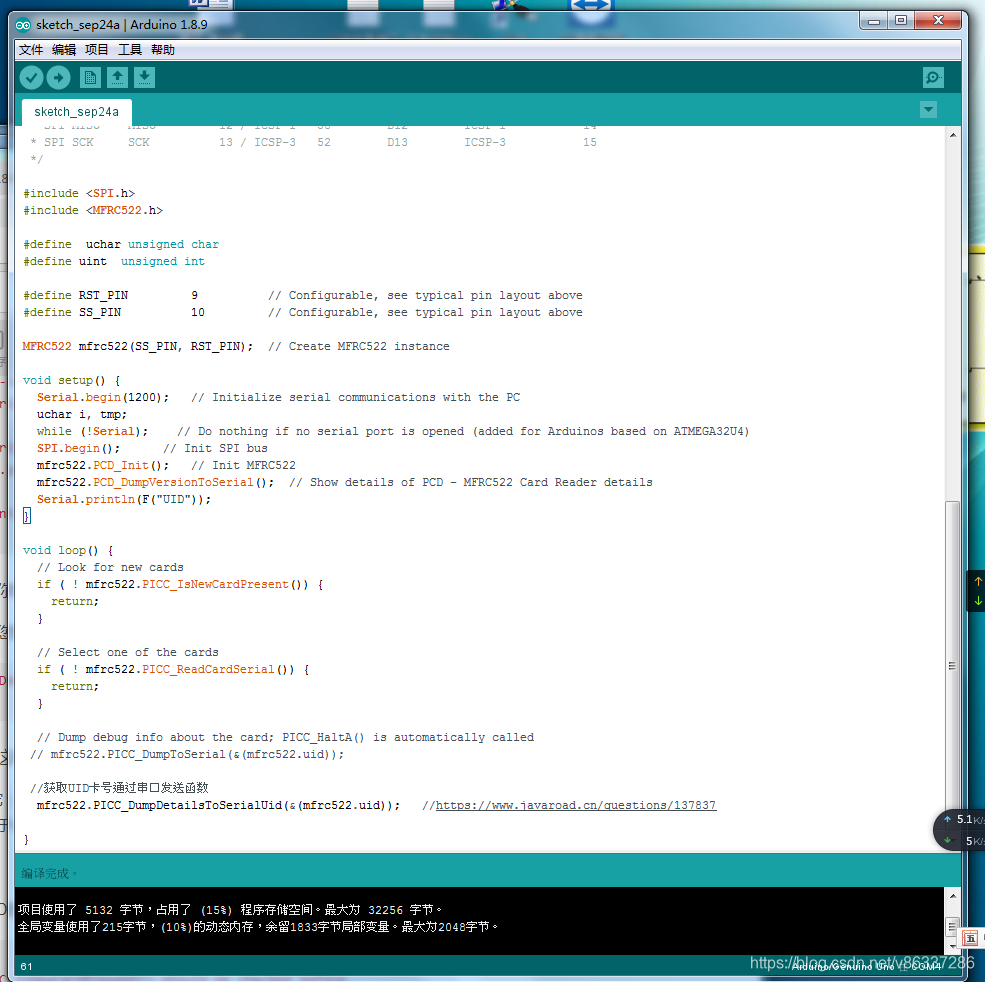
示例:
用Arduino调用它: mfrc522.PICC_DumpDetailsToSerialUid(&(mfrc522.uid)); 只仅且只有一个函数用于uid读取
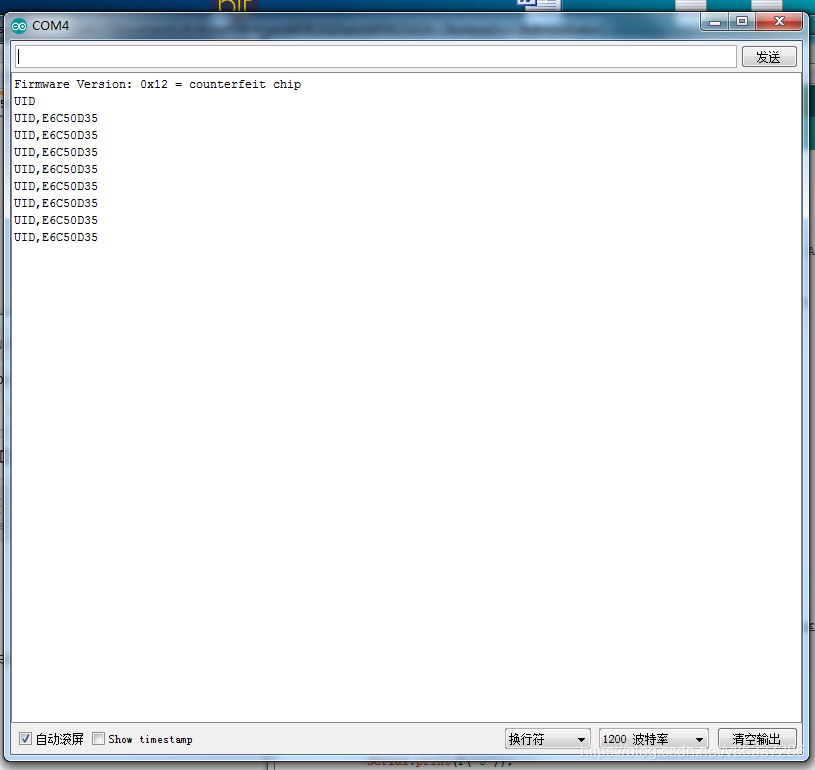
效果
法二
返回UID的函数 .
/**

 * mfrc522.PICC_IsNewCardPresent() should be checked before

 * @return the card UID

 */

unsigned long getID(){

  if ( ! mfrc522.PICC_ReadCardSerial()) { //Since a PICC placed get Serial and continue

    return -1;

  }

  unsigned long hex_num;

  hex_num =  mfrc522.uid.uidByte[0] << 24;

  hex_num += mfrc522.uid.uidByte[1] << 16;

  hex_num += mfrc522.uid.uidByte[2] <<  8;

  hex_num += mfrc522.uid.uidByte[3];

  mfrc522.PICC_HaltA(); // Stop reading

  return hex_num;

}
例如这样使用:
if(mfrc522.PICC_IsNewCardPresent()) {

  unsigned long uid = getID();

  if(uid != -1){

    Serial.print("Card detected, UID: "); Serial.println(uid);

  }

}
Arduino + RFID 读取 IC 卡 Arduino uno中获得RFID的UID 并通过串口转发RFID卡号的更多相关文章
- 基于Proteus仿真的Arduino学习(1)——Arduino Uno最小系统及LED的简单使用
一.前言: A.Arduino简介 Arduino是由一个欧洲开发团队于2005年冬季开发.其成员包括Massimo Banzi.David Cuartielles.Tom Igoe.Gianluc ...
- 控制Arduino的利器-Windows Remote Arduino
1. 概述 相信很多朋友已经在玩 Arduino了,而且一般都是使用官方的Arduino IDE来写程序控制Arduino硬件.为了能够实现更加方便的控制,微软在Windows IoT计划中推出了Wi ...
- [转] 控制Arduino的利器-Windows Remote Arduino
原文地址:控制Arduino的利器-Windows Remote Arduino 1. 概述 相信很多朋友已经在玩 Arduino了,而且一般都是使用官方的Arduino IDE来写程序控制Ardui ...
- 【Arduino】使用C#实现Arduino与电脑进行串行通讯
在给Arduino编程的时候,因为没有调试工具,经常要通过使用串口通讯的方式调用Serial.print和Serial.println输出Arduino运行过程中的相关信息,然后在电脑上用Arduin ...
- Arduino基础入门篇-进入Arduino的世界
写在前面,首先是发现有网友对Arduino做了介绍,而且介绍比较清晰到位,就引用过来了. 文章出处:https://blog.csdn.net/TonyIOT/article/details/8091 ...
- DataTable to Excel(使用NPOI、EPPlus将数据表中的数据读取到excel格式内存中)
/// <summary> /// DataTable to Excel(将数据表中的数据读取到excel格式内存中) /// </summary> /// <param ...
- excel to datatable (c#用NPOI将excel文件内容读取到datatable数据表中)
将excel文件内容读取到datatable数据表中,支持97-2003和2007两种版本的excel 1.第一种是根据excel文件路径读取excel并返回datatable /// <sum ...
- MATLAB对于文本文件(txt)数据读取的技巧总结(经典中的经典)
振动论坛原版主eight的经典贴http://www.chinavib.com/thread-45622-1-1.html MATLAB对于文本文件(txt)进行数据读取的技巧总结(经典中的经典)由于 ...
- docker内程序如何读取dockerfile和compose.yml中设置的环境变量
docker内程序如何读取dockerfile和compose.yml中设置的环境变量 背景 compose文件中配置了服务A和服务B,其中B服务调用了A服务的接口,那么B的实现代码中该如何调用A的服 ...
随机推荐
- Flow Control
Exercise-01 Max Of Two Numbers Write a function that takes two numbers and returns the maximum of th ...
- 解决You should consider upgrading via the 'python -m pip install --upgrade pip' command. (pip工具版本较低导致)
步骤1: 找到pip- 版本号 dist-info 文件夹 操作: 在python的安装目录下的Lib文件下的site-packages文件夹下找到 ip- 版本号 dist-info 文件夹 ...
- [自动化-脚本]002.cocos2dx-lua lua代码windows加密批处理
在开发软件的时候,我们都会在项目上线时候对代码进行加密,用来防止被不法分子盗走牟利.不同的语言有不同的加密方式,比较出名的有加壳,代码混淆等.在Lua开发cocos2dx的时候,框架会有提供加密的脚本 ...
- [JavaWeb基础] 024.Socket编程之简单的聊天程序
1.Socket的简介 1)什么是Socket 网络上的两个程序通过一个双向的通讯连接实现数据的交换,这个双向链路的一端称为一个Socket.Socket通常用来实现客户方和服务方的连接.Socket ...
- 非阻塞赋值(Non-blocking Assignment)是个伪需求(2)
https://mp.weixin.qq.com/s/5NWvdK3T2X4dtyRqtNrBbg 13hope: 个人理解,Verilog本身只是“建模”语言.具体到阻塞/非阻塞,只规定了两种赋 ...
- Chisel3 - model - DefWire, Reg, Memory, Prim
https://mp.weixin.qq.com/s/KkkqvekWHG6yrqwHUECRIw 介绍如何定义Wire/Reg/Memory/Prim. 1. DefWire Wire( ...
- Java实现 LeetCode 560 和为K的子数组(某著名排序大法改编)
560. 和为K的子数组 给定一个整数数组和一个整数 k,你需要找到该数组中和为 k 的连续的子数组的个数. 示例 1 : 输入:nums = [1,1,1], k = 2 输出: 2 , [1,1] ...
- Java实现 蓝桥杯VIP 算法提高 师座操作系统
算法提高 师座操作系统 时间限制:1.0s 内存限制:256.0MB 问题描述 师座这天在程序设计课上学了指针和结构体以后,觉得自己可以轻松的写出操作系统,为了打败大微软帝国,他给这个系统起了个响亮的 ...
- CSDN账号被冻结了怎么办
CSDN可能因为你的博客里有一些网站链接给你判断为恶意推广广告,冻结, 或者和我一样,在评论区刷屏被冻结, 联系客服即可,向客服提供你的绑定邮箱或绑定手机号,或博客id,客服会给你解冻 PS: 找不到 ...
- 第四届蓝桥杯JavaB组国(决)赛真题
解题代码部分来自网友,如果有不对的地方,欢迎各位大佬评论 题目1.猜灯谜 题目描述 A 村的元宵节灯会上有一迷题: 请猜谜 * 请猜谜 = 请边赏灯边猜 小明想,一定是每个汉字代表一个数字,不同的汉字 ...