Ubuntu操作系统部署zabbix agent服务
Ubuntu操作系统部署zabbix agent服务
作者:尹正杰
版权声明:原创作品,谢绝转载!否则将追究法律责任。
一.下载zabbix软件包
  博主推荐阅读:

    https://www.cnblogs.com/yinzhengjie2020/p/12305427.html
二.编译安装agent
1>.将下载的软件包上传到服务器上
[root@mysql202.yinzhengjie.org.cn ~]# cd /usr/local/src/

[root@mysql202.yinzhengjie.org.cn /usr/local/src]#

[root@mysql202.yinzhengjie.org.cn /usr/local/src]# ll

total

drwxr-xr-x   root root  Aug     ./

drwxr-xr-x  root root  Aug     ../

[root@mysql202.yinzhengjie.org.cn /usr/local/src]#

[root@mysql202.yinzhengjie.org.cn /usr/local/src]# rz

[root@mysql202.yinzhengjie.org.cn /usr/local/src]#

[root@mysql202.yinzhengjie.org.cn /usr/local/src]# ll

total

drwxr-xr-x   root root      Feb  : ./

drwxr-xr-x  root root      Aug     ../

-rw-r--r--   root root  Feb  : zabbix-4.0..tar.gz

[root@mysql202.yinzhengjie.org.cn /usr/local/src]#
2>.解压软件包
[root@mysql202.yinzhengjie.org.cn /usr/local/src]# ll

total

drwxr-xr-x   root root      Feb  : ./

drwxr-xr-x  root root      Aug     ../

-rw-r--r--   root root  Feb  : zabbix-4.0..tar.gz

[root@mysql202.yinzhengjie.org.cn /usr/local/src]#

[root@mysql202.yinzhengjie.org.cn /usr/local/src]# tar zxf zabbix-4.0..tar.gz

[root@mysql202.yinzhengjie.org.cn /usr/local/src]#

[root@mysql202.yinzhengjie.org.cn /usr/local/src]# ll

total

drwxr-xr-x   root root      Feb  : ./

drwxr-xr-x  root root      Aug     ../

drwxr-xr-x         Jan  : zabbix-4.0./

-rw-r--r--   root root  Feb  : zabbix-4.0..tar.gz

[root@mysql202.yinzhengjie.org.cn /usr/local/src]#

[root@mysql202.yinzhengjie.org.cn /usr/local/src]#
[root@mysql202.yinzhengjie.org.cn /usr/local/src]# tar zxf zabbix-4.0.17.tar.gz
3>.安装依赖环境
[root@mysql202.yinzhengjie.org.cn ~]# apt-get -y install libpcre3 libpcre3-dev gcc make
4>.配置zabbix agent的安装参数
[root@mysql202.yinzhengjie.org.cn /usr/local/src]# ll

total

drwxr-xr-x   root root      Feb  : ./

drwxr-xr-x  root root      Aug     ../

drwxr-xr-x         Jan  : zabbix-4.0./

-rw-r--r--   root root  Feb  : zabbix-4.0..tar.gz

[root@mysql202.yinzhengjie.org.cn /usr/local/src]#

[root@mysql202.yinzhengjie.org.cn /usr/local/src]# cd zabbix-4.0./

[root@mysql202.yinzhengjie.org.cn /usr/local/src/zabbix-4.0.]#

[root@mysql202.yinzhengjie.org.cn /usr/local/src/zabbix-4.0.]# ll

total

drwxr-xr-x       Jan  : ./

drwxr-xr-x   root root    Feb  : ../

-rw-r--r--       Jan  : aclocal.m4

-rw-r--r--          Jan  : AUTHORS

drwxr-xr-x        Jan  : bin/

drwxr-xr-x        Jan  : build/

-rw-r--r--      Jan  : ChangeLog

-rwxr-xr-x        Jan    compile*

drwxr-xr-x        Jan  : conf/

-rwxr-xr-x       Nov    config.guess*

-rwxr-xr-x       Nov    config.sub*

-rwxr-xr-x      Jan  : configure*

-rw-r--r--       Jan  : configure.ac

-rw-r--r--       Jan  : COPYING

drwxr-xr-x        Jan  : database/

-rwxr-xr-x       Jan    depcomp*

drwxr-xr-x        Jan  : frontends/

drwxr-xr-x        Jan  : include/

-rw-r--r--          Jan  : INSTALL

-rwxr-xr-x       Jan    install-sh*

drwxr-xr-x        Jan  : m4/

-rw-r--r--        Jan  : Makefile.am

-rw-r--r--       Jan  : Makefile.in

drwxr-xr-x        Jan  : man/

drwxr-xr-x        Jan  : misc/

-rwxr-xr-x        Jan    missing*

-rw-r--r--          Jan  : NEWS

-rw-r--r--        Jan  : README

drwxr-xr-x        Jan  : sass/

drwxr-xr-x       Jan  : src/

[root@mysql202.yinzhengjie.org.cn /usr/local/src/zabbix-4.0.]#
[root@mysql202.yinzhengjie.org.cn /usr/local/src]# cd zabbix-4.0.17/
[root@mysql202.yinzhengjie.org.cn /usr/local/src/zabbix-4.0.]# ./configure --prefix=/yinzhengjie/softwares/zabbix --enable-agent
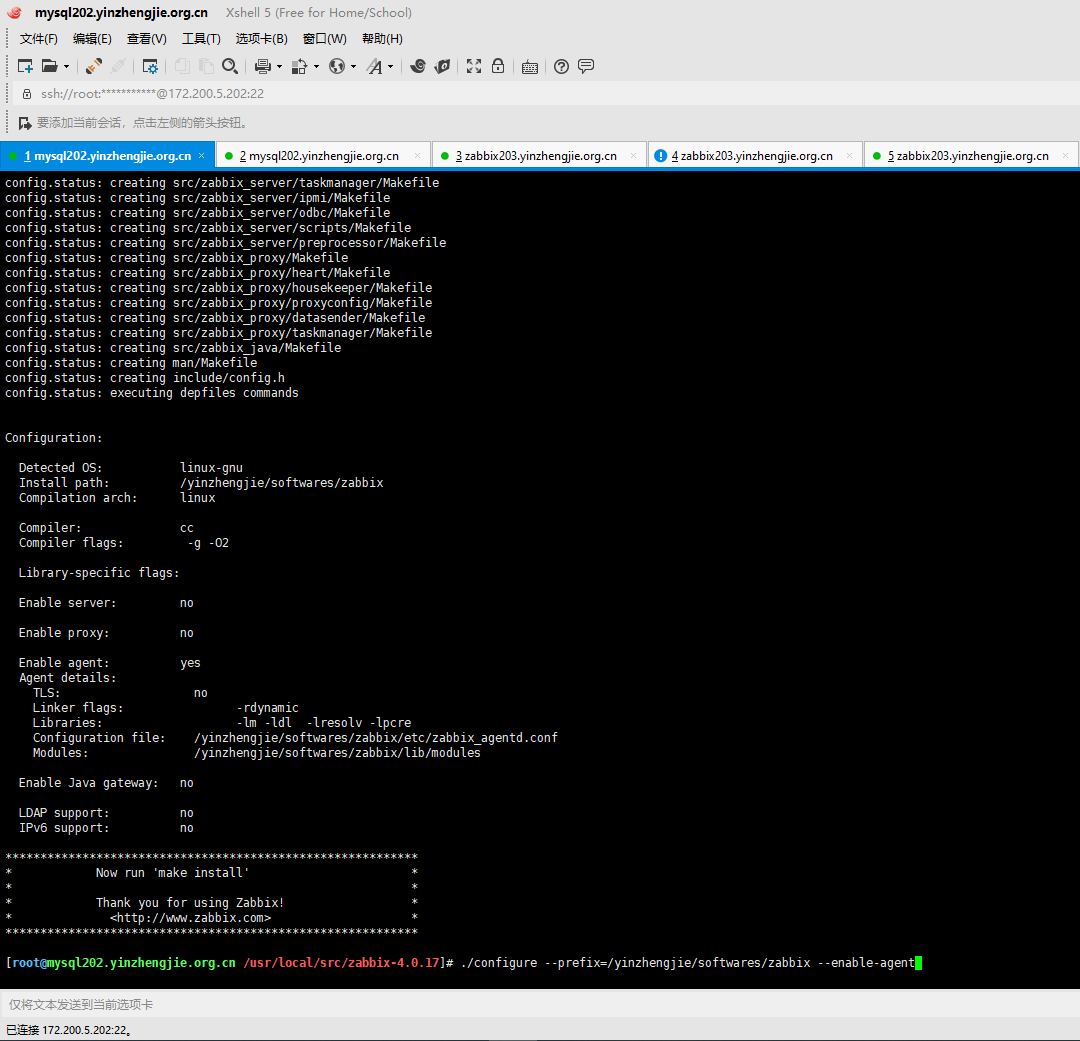
5>.编译并安装
[root@mysql202.yinzhengjie.org.cn /usr/local/src/zabbix-4.0.]# make -j && make install

6>.编写zabbix agent的启动脚本
  博主推荐阅读:

    https://www.cnblogs.com/yinzhengjie2020/p/12306215.html
三.手动启动zabbix agent程序
1>.修改zabbix agent的配置文件,指定zabbix server地址
[root@mysql202.yinzhengjie.org.cn ~]# cp /yinzhengjie/softwares/zabbix/etc/zabbix_agentd.conf /yinzhengjie/softwares/zabbix/etc/zabbix_agentd.conf-`date +%F` #修改配置文件之前别忘记先备份文件
[root@mysql202.yinzhengjie.org.cn ~]# grep ^Server= /yinzhengjie/softwares/zabbix/etc/zabbix_agentd.conf

Server=127.0.0.1

[root@mysql202.yinzhengjie.org.cn ~]#

[root@mysql202.yinzhengjie.org.cn ~]# sed -r -i 's#(Server=)127.0.0.1#\1172.200.5.203#' /yinzhengjie/softwares/zabbix/etc/zabbix_agentd.conf

[root@mysql202.yinzhengjie.org.cn ~]#

[root@mysql202.yinzhengjie.org.cn ~]# grep ^Server= /yinzhengjie/softwares/zabbix/etc/zabbix_agentd.conf

Server=172.200.5.203

[root@mysql202.yinzhengjie.org.cn ~]#

[root@mysql202.yinzhengjie.org.cn ~]#
[root@mysql202.yinzhengjie.org.cn ~]# sed -r -i 's#(Server=)127.0.0.1#\1172.200.5.203#' /yinzhengjie/softwares/zabbix/etc/zabbix_agentd.conf
[root@mysql202.yinzhengjie.org.cn ~]# grep ^Hostname= /yinzhengjie/softwares/zabbix/etc/zabbix_agentd.conf

Hostname=Zabbix server

[root@mysql202.yinzhengjie.org.cn ~]#

[root@mysql202.yinzhengjie.org.cn ~]#

[root@mysql202.yinzhengjie.org.cn ~]# sed -r -i 's#(Hostname=)Zabbix server#\1mysql202.yinzhengjie.org.cn#' /yinzhengjie/softwares/zabbix/etc/zabbix_agentd.conf

[root@mysql202.yinzhengjie.org.cn ~]#

[root@mysql202.yinzhengjie.org.cn ~]# grep ^Hostname= /yinzhengjie/softwares/zabbix/etc/zabbix_agentd.conf

Hostname=mysql202.yinzhengjie.org.cn

[root@mysql202.yinzhengjie.org.cn ~]#

[root@mysql202.yinzhengjie.org.cn ~]#
[root@mysql202.yinzhengjie.org.cn ~]# sed -r -i 's#(Hostname=)Zabbix server#\1mysql202.yinzhengjie.org.cn#' /yinzhengjie/softwares/zabbix/etc/zabbix_agentd.conf
2>.修改zabbix的守护进程为root用户(默认是zabbix用户)
[root@mysql202.yinzhengjie.org.cn ~]# grep User= /yinzhengjie/softwares/zabbix/etc/zabbix_agentd.conf

# User=zabbix

[root@mysql202.yinzhengjie.org.cn ~]#

[root@mysql202.yinzhengjie.org.cn ~]# sed -r -i 's@# (User=)zabbix@\1root@' /yinzhengjie/softwares/zabbix/etc/zabbix_agentd.conf

[root@mysql202.yinzhengjie.org.cn ~]#

[root@mysql202.yinzhengjie.org.cn ~]# grep User= /yinzhengjie/softwares/zabbix/etc/zabbix_agentd.conf

User=root

[root@mysql202.yinzhengjie.org.cn ~]#

[root@mysql202.yinzhengjie.org.cn ~]#
[root@mysql202.yinzhengjie.org.cn ~]# sed -r -i 's@# (User=)zabbix@\1root@' /yinzhengjie/softwares/zabbix/etc/zabbix_agentd.conf
[root@mysql202.yinzhengjie.org.cn ~]# grep AllowRoot= /yinzhengjie/softwares/zabbix/etc/zabbix_agentd.conf

# AllowRoot=

[root@mysql202.yinzhengjie.org.cn ~]#

[root@mysql202.yinzhengjie.org.cn ~]# sed -r -i 's@# (AllowRoot=)0@\11@' /yinzhengjie/softwares/zabbix/etc/zabbix_agentd.conf

[root@mysql202.yinzhengjie.org.cn ~]#

[root@mysql202.yinzhengjie.org.cn ~]# grep AllowRoot= /yinzhengjie/softwares/zabbix/etc/zabbix_agentd.conf

AllowRoot=

[root@mysql202.yinzhengjie.org.cn ~]#

[root@mysql202.yinzhengjie.org.cn ~]#
[root@mysql202.yinzhengjie.org.cn ~]# sed -r -i 's@# (AllowRoot=)0@\11@' /yinzhengjie/softwares/zabbix/etc/zabbix_agentd.conf
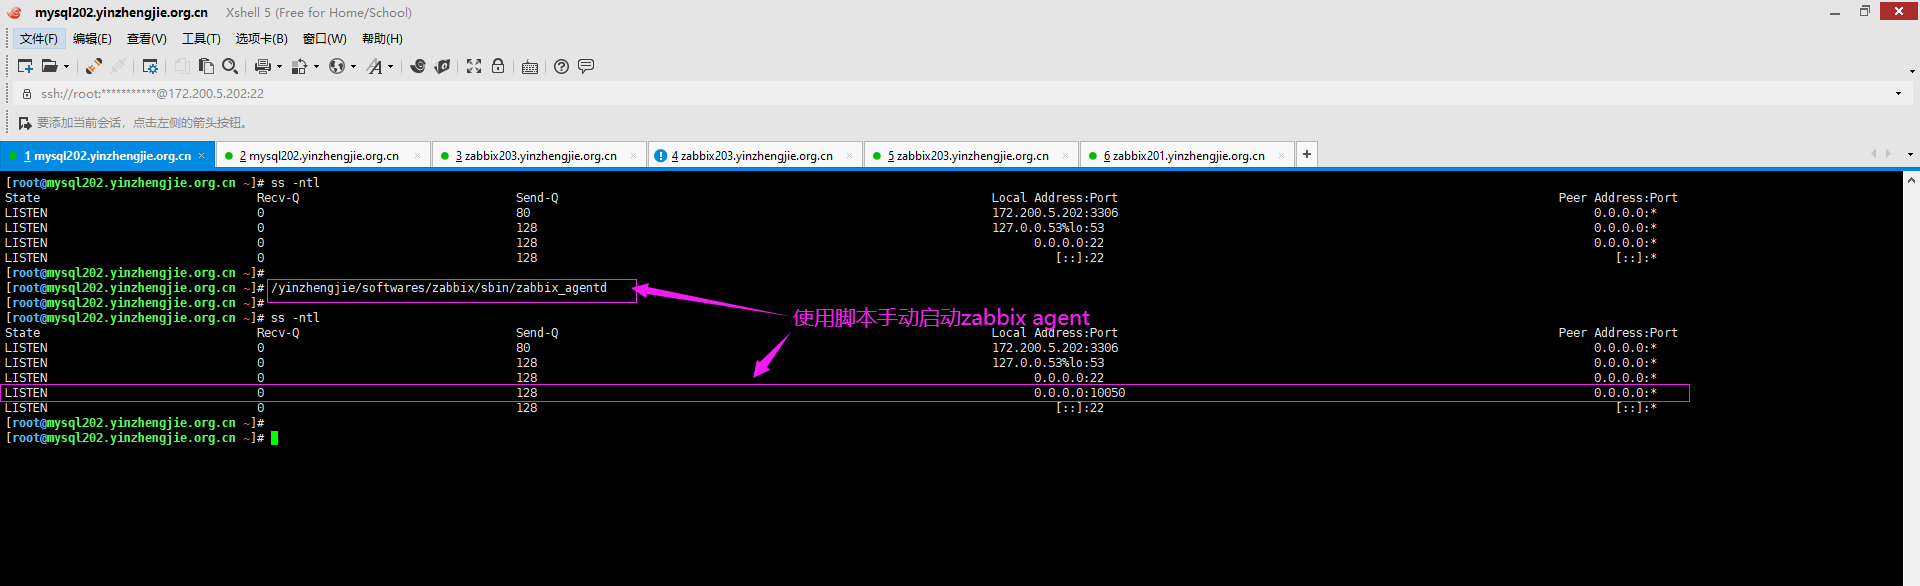
3>.启动zabbix agent服务
[root@mysql202.yinzhengjie.org.cn ~]# ss -ntl

State                               Recv-Q                               Send-Q                                                              Local Address:Port                                                               Peer Address:Port

LISTEN                                                                                                                                    172.200.5.202:                                                                    0.0.0.0:*

LISTEN                                                                                                                                   127.0.0.53%lo:                                                                      0.0.0.0:*

LISTEN                                                                                                                                         0.0.0.0:                                                                      0.0.0.0:*

LISTEN                                                                                                                                            [::]:                                                                         [::]:*

[root@mysql202.yinzhengjie.org.cn ~]#

[root@mysql202.yinzhengjie.org.cn ~]# /yinzhengjie/softwares/zabbix/sbin/zabbix_agentd

[root@mysql202.yinzhengjie.org.cn ~]#

[root@mysql202.yinzhengjie.org.cn ~]# ss -ntl

State                               Recv-Q                               Send-Q                                                              Local Address:Port                                                               Peer Address:Port

LISTEN                                                                                                                                    172.200.5.202:                                                                    0.0.0.0:*

LISTEN                                                                                                                                   127.0.0.53%lo:                                                                      0.0.0.0:*

LISTEN                                                                                                                                         0.0.0.0:                                                                      0.0.0.0:*

LISTEN                                                                                                                                         0.0.0.0:                                                                   0.0.0.0:*

LISTEN                                                                                                                                            [::]:                                                                         [::]:*

[root@mysql202.yinzhengjie.org.cn ~]#

[root@mysql202.yinzhengjie.org.cn ~]#
[root@mysql202.yinzhengjie.org.cn ~]# /yinzhengjie/softwares/zabbix/sbin/zabbix_agentd
Ubuntu操作系统部署zabbix agent服务的更多相关文章
- CentOS操作系统部署zabbix agent服务
CentOS操作系统部署zabbix agent服务 作者:尹正杰 版权声明:原创作品,谢绝转载!否则将追究法律责任. 一.查看zabbix的官方手册 1>.点击下载 2>.查看Ubunt ...
- Ubuntu操作系统编写zabbix的启动管理脚本
Ubuntu操作系统编写zabbix的启动管理脚本 作者:尹正杰 版权声明:原创作品,谢绝转载!否则将追究法律责任. 一.修改zabbix的pid存放路径 1>.创建存放zabbix的pid目录 ...
- 运维监控-基于yum的方式部署 Zabbix Agent 4.0 版本
运维监控-基于yum的方式部署 Zabbix Agent 4.0 版本 作者:尹正杰 版权声明:原创作品,谢绝转载!否则将追究法律责任. 上一篇博客我们分享了如何基于yum的方式部署zabbix 4. ...
- centos6.5安装部署zabbix监控服务端和客户端
部署zabbix服务端需要LNMP环境(nginx,mysql,php),其它数据库也可以,我这里使用mysql,关于LNMP环境部署,可以参考我的另一遍文章:http://www.cnblogs.c ...
- CentOS 7.2 Ubuntu 18部署Rsync + Lsyncd服务实现文件实时同步/备份
发送端配置: 一.配置密钥 1. 主/从服务器之间启用基于密钥的身份验证.登录发送端服务器并用 " ssh-keygen " 命令生成公共或私有的密钥. 2. 使用 " ...
- Linux下Ubuntu 操作系统 部署
1.1 先更新系统 环境 更新命令为: apt-get update 1.2 安装jdk 安装JDK命令为:sudo apt-get install o penjdk-7-jdk 1.3 安装tomc ...
- 通过ansible自动化部署zabbix应用
zabbix在实际的应用中,可能需要监控的主机非常多,而每个主机的操作系统类型.版本也都不尽相同,在这种环境下,通过手动安装zabbix的agent端已经不现实了,此时就需要借助自动化工具完成zabb ...
- zabbix agent配置详解(windows)
客户端操作 标注:监控zabbix_agentd客户端安装对象是win server 2008操作系统 64位. 1. 下载zabbix_agentd监控客户端软件安装包(windows操作系统客 ...
- Windows server 安装和配置zabbix agent
1.下载Windows 平台的zabbix agent 先到官网下载zabbix_agentd监控客户端软件安装包(windows操作系统客户端),客户端版本尽量与服务器版本一致,下载地址:http: ...
随机推荐
- Vue专题系列
一. 简介 1. 说明 Vue (读音 /vjuː/,类似于 view) 是一套用于构建用户界面的渐进式框架.与其它大型框架不同的是,Vue 被设计为可以自底向上逐层应用.Vue 的核心库只关注视图 ...
- 如鹏网仿QQ侧滑菜单:ResideMenu组件的使用笔记整理+Demo
ResideMenu菜单 课堂笔记: https://github.com/SpecialCyCi/AndroidResideMenu Github:如何使用开源组件1. 下载 下载方式: 1. 项目 ...
- StringBuilder为什么线程不安全(面试必问)
文章转载自:https://juejin.im/post/5d6228046fb9a06add4e37fe 作者:千山qianshan 1.引言 周五去面试又被面试的一个问题问哑巴了 面试官:Stri ...
- CF 1073 E. Segment Sum
https://codeforces.com/problemset/problem/1073/E 题意:[l,r]中,出现0—9数字的种类数不超过k的数的和 dp[i][j][0/1] 表示 dfs到 ...
- 腾讯玄武实验室向(CNVD)提交了一个重大漏洞“BucketShock”
导读 11 月 21 日,在小米 IoT 安全峰会上,腾讯安全玄武实验室负责人于旸(花名:TK 教主)在演讲中透露,腾讯玄武实验室最近向国家信息安全漏洞共享平台(CNVD)提交了一个重大漏洞“Buck ...
- Week of Code:GG
题意是给出一个数n,一个长度为n-1的字符串.求的是1到n符合要求的序列的数量,该序列需要满足当该位置为G时,这个位置的数大于后面位置的数.当该位置为L时,这个位置的数要小于后面位置的数.最后数量模m ...
- Intellij IDEA 快捷键 与 环境设置
快捷键 Ctrl+Shift+F10,运行 Ctrl+Alt+O,导入包,自动修正 Ctrl+Alt+L,格式化代码 Ctrl+Y,删除一整行 Alt + Insert,生成get/set方法 Ctr ...
- Python的常用库
读者您好.今天我将介绍20个属于我常用工具的Python库,我相信你看完之后也会觉得离不开它们.他们是: Requests.Kenneth Reitz写的最富盛名的http库.每个Python程序员都 ...
- get your sqlserver database back by using EMC NW NMM
Dear all Yes ~ We can backup our sqlserver by EMC NW NMM. That is true and NW is a very very powerfu ...
- 1016 部分A+B (15 分)
正整数 A 的“DA(为 1 位整数)部分”定义为由 A 中所有 DA 组成的新整数 PA.例如:给定 8,DA=6,则 A 的“6 部分”PA 是 66,因为 A 中有 ...