java框架之Spring(3)-JDBC模板使用&事务管理
JDBC模板使用
入门
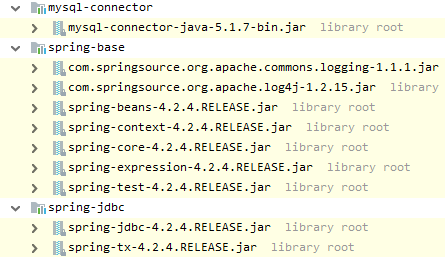
1、导包,如要导入 Spring 的基本开发包、数据库驱动包、Spring 提供的 JDBC 模板包,如下:
2、测试:
@Test
public void test(){
    // 创建连接池对象
    DriverManagerDataSource driverManagerDataSource = new DriverManagerDataSource();
    driverManagerDataSource.setDriverClassName("com.mysql.jdbc.Driver");
    driverManagerDataSource.setUrl("jdbc:mysql:///test");
    driverManagerDataSource.setUsername("root");
    driverManagerDataSource.setPassword("root");
    // 创建 JDBC 模板对象
    JdbcTemplate jdbcTemplate = new JdbcTemplate(driverManagerDataSource);
    // 通过模板对象操作数据库
    jdbcTemplate.update("insert into user values(null,?,?)", "bob", 123);
}
将模板交给Spring
<?xml version="1.0" encoding="UTF-8"?>
<beans xmlns="http://www.springframework.org/schema/beans"
       xmlns:xsi="http://www.w3.org/2001/XMLSchema-instance"
       xsi:schemaLocation="http://www.springframework.org/schema/beans http://www.springframework.org/schema/beans/spring-beans.xsd">
    <bean name="dataSource" class="org.springframework.jdbc.datasource.DriverManagerDataSource">
        <property name="driverClassName" value="com.mysql.jdbc.Driver"/>
        <property name="url" value="jdbc:mysql:///test"/>
        <property name="username" value="root"/>
        <property name="password" value="root"/>
    </bean>

    <bean name="jdbcTemplate" class="org.springframework.jdbc.core.JdbcTemplate">
        <property name="dataSource" ref="dataSource"/>
    </bean>
</beans>
applicationContext.xml
package com.zze.test;

import org.junit.Test;
import org.junit.runner.RunWith;
import org.springframework.beans.factory.annotation.Autowired;
import org.springframework.jdbc.core.JdbcTemplate;
import org.springframework.jdbc.datasource.DriverManagerDataSource;
import org.springframework.test.context.ContextConfiguration;
import org.springframework.test.context.junit4.SpringJUnit4ClassRunner;

@RunWith(SpringJUnit4ClassRunner.class)
@ContextConfiguration("classpath:applicationContext.xml")
public class Demo {
    @Autowired
    private JdbcTemplate jdbcTemplate;

    @Test
    public void test() {
        jdbcTemplate.update("update user set password=? where username=?", "345", "bob");
    }

}
test
使用第三方连接池
DBCP配置
额外导入 jar 包:

配置:
<?xml version="1.0" encoding="UTF-8"?>
<beans xmlns="http://www.springframework.org/schema/beans"
       xmlns:xsi="http://www.w3.org/2001/XMLSchema-instance"
       xsi:schemaLocation="http://www.springframework.org/schema/beans http://www.springframework.org/schema/beans/spring-beans.xsd">
    <!--DBCP 配置-->
    <bean name="dataSource" class="org.apache.commons.dbcp.BasicDataSource">
        <property name="driverClassName" value="com.mysql.jdbc.Driver"/>
        <property name="url" value="jdbc:mysql:///test"/>
        <property name="username" value="root"/>
        <property name="password" value="root"/>
    </bean>

    <bean name="jdbcTemplate" class="org.springframework.jdbc.core.JdbcTemplate">
        <property name="dataSource" ref="dataSource"/>
    </bean>
</beans>
applicationContext.xml
C3P0配置
额外导入 jar 包:

配置:
<?xml version="1.0" encoding="UTF-8"?>
<beans xmlns="http://www.springframework.org/schema/beans"
       xmlns:xsi="http://www.w3.org/2001/XMLSchema-instance"
       xsi:schemaLocation="http://www.springframework.org/schema/beans http://www.springframework.org/schema/beans/spring-beans.xsd">
    <!--C3P0连接池配置-->
    <bean name="dataSource" class="com.mchange.v2.c3p0.ComboPooledDataSource">
        <property name="driverClass" value="com.mysql.jdbc.Driver"/>
        <property name="jdbcUrl" value="jdbc:mysql:///test"/>
        <property name="user" value="root"/>
        <property name="password" value="root"/>
    </bean>

    <bean name="jdbcTemplate" class="org.springframework.jdbc.core.JdbcTemplate">
        <property name="dataSource" ref="dataSource"/>
    </bean>
</beans>
applicationContext.xml
抽取JDBC配置到属性文件
有如下属性文件:
jdbc.driverClass=com.mysql.jdbc.Driver
jdbc.url=jdbc:mysql:///test
jdbc.username=root
jdbc.password=root
jdbc.properties
方式一:
<bean class="org.springframework.beans.factory.config.PropertyPlaceholderConfigurer">
    <property name="location" value="classpath:jdbc.properties"/>
</bean>
方式二:
<context:property-placeholder location="classpath:jdbc.properties"/>
接下来就可以通过如下方式引用到属性文件中的属性,例:
<bean name="dataSource" class="com.mchange.v2.c3p0.ComboPooledDataSource">
    <property name="driverClass" value="${jdbc.driverClass}"/>
    <property name="jdbcUrl" value="${jdbc.url}"/>
    <property name="user" value="${jdbc.username}"/>
    <property name="password" value="${jdbc.password}"/>
</bean>
CRUD操作
package com.zze.test;

import com.zze.bean.User;
import org.junit.Test;
import org.junit.runner.RunWith;
import org.springframework.beans.factory.annotation.Autowired;
import org.springframework.jdbc.core.JdbcTemplate;
import org.springframework.jdbc.core.RowMapper;
import org.springframework.test.context.ContextConfiguration;
import org.springframework.test.context.junit4.SpringJUnit4ClassRunner;

import java.sql.ResultSet;
import java.sql.SQLException;
import java.util.List;

@RunWith(SpringJUnit4ClassRunner.class)
@ContextConfiguration("classpath:applicationContext.xml")
public class Demo {
    @Autowired
    private JdbcTemplate jdbcTemplate;

    /**
     * 保存
     */
    @Test
    public void test1() {
        jdbcTemplate.update("insert into user values (null,?,?)", "bob", "123");
    }

    /**
     * 更新
     */
    @Test
    public void test2() {
        jdbcTemplate.update("update user set password=? where username=?", "346", "bob");
    }

    /**
     * 删除
     */
    @Test
    public void test3() {
        jdbcTemplate.update("delete from user where username=?", "bob");
    }

    /**
     * 查询首行首列
     */
    @Test
    public void test4() {
        Integer integer = jdbcTemplate.queryForObject("select COUNT(1) from user", Integer.class);
        System.out.println(integer);
    }

    /**
     * 查询一条数据封装到单个对象
     */
    @Test
    public void test5() {
        User user = jdbcTemplate.queryForObject("select * from user where username=?", new RowMapper<User>() {
            @Override
            public User mapRow(ResultSet rs, int rowNum) throws SQLException {
                User user = new User();
                user.setId(rs.getInt("id"));
                user.setUsername(rs.getString("username"));
                user.setPassword(rs.getString("password"));
                return user;
            }
        }, "bob");
        System.out.println(user);
    }

    /**
     * 查询多条记录封装到集合
     */
    @Test
    public void test6() {
        List<User> userList = jdbcTemplate.query("select * from user", new RowMapper<User>() {
            @Override
            public User mapRow(ResultSet rs, int rowNum) throws SQLException {
                User user = new User();
                user.setId(rs.getInt("id"));
                user.setUsername(rs.getString("username"));
                user.setPassword(rs.getString("password"));
                return user;
            }
        });
        System.out.println(userList);
    }

}
事务管理
事务回顾
参见【数据库事务了解一下】。
Spring事务管理API
- PlatformTransactionManager:平台事务管理器
接口,是 Spring 用于管理事务真正的对象。
DataSourceTransactionManager:底层使用JDBC管理事务。
HibernateTransactionManager:底层使用Hibernate管理事务。
- TransactionDefinition:事务定义信息
用于定义事务的相关的信息,隔离级别、超时信息、传播行为、是否只读。
- TransactionStatus:事务的状态
用于记录在事务管理过程中,事务的状态的对象。
Spring进行事务管理的时候,首先平台事务管理器根据事务定义信息进行事务的管理,在事务管理过程中,产生各种状态,将这些状态的信息记录到事务状态的对象中。
事务的传播行为
Spring 中提供了七种事务的传播行为,可分为如下三类:
- 保证多个操作在同一个事务中:
PROPAGATION_REQUIRED :默认值,如果A中有事务,使用A中的事务,如果A没有,创建一个新的事务,将操作包含进来
PROPAGATION_SUPPORTS :支持事务,如果A中有事务,使用A中的事务。如果A没有事务,不使用事务。
PROPAGATION_MANDATORY :如果A中有事务,使用A中的事务。如果A没有事务,抛出异常。
- 保证多个操作不在同一个事务中:
PROPAGATION_REQUIRES_NEW :如果A中有事务,将A的事务挂起(暂停),创建新事务,只包含自身操作。如果A中没有事务,创建一个新事务,包含自身操作。
PROPAGATION_NOT_SUPPORTED :如果A中有事务,将A的事务挂起。不使用事务管理。
PROPAGATION_NEVER :如果A中有事务,报异常。
- 嵌套式事务:
PROPAGATION_NESTED :嵌套事务,如果A中有事务,按照A的事务执行,执行完成后,设置一个保存点,执行B中的操作,如果没有异常,执行通过,如果有异常,可以选择回滚到最初始位置,也可以回滚到保存点。
搭建Spring的事务管理的环境
准备
创建 account 表并初始化如下数据:

下面代码模拟一个转账场景:
package com.zze.dao;

public interface AccountDao {
    /**
     * 转出
     * @param username 转出账户的用户名
     * @param money 转出金额
     */
    void outMoney(String username,Double money);

    /**
     * 转入
     * @param username 转入账户的用户名
     * @param money 转入金额
     */
    void inMoney(String username, Double money);
}
com.zze.dao.AccountDao
package com.zze.dao.impl;

import com.zze.dao.AccountDao;
import org.springframework.jdbc.core.support.JdbcDaoSupport;

public class AccountDaoImpl extends JdbcDaoSupport implements AccountDao {
    @Override
    public void outMoney(String username, Double money) {
        this.getJdbcTemplate().update("update account set money=money-? where username=?", money, username);
    }

    @Override
    public void inMoney(String username, Double money) {
        this.getJdbcTemplate().update("update account set money=money+? where username=?", money, username);
    }
}
com.zze.dao.impl.AccountDaoImpl
package com.zze.service;

public interface AccountService {
    /**
     * 转账
     * @param usernameFrom 转账来源账户
     * @param usernameTo 转账目标账户
     * @param money 转账金额
     */
    void transfer(String usernameFrom,String usernameTo,Double money);
}
com.zze.service.AccountService
package com.zze.service.impl;

import com.zze.dao.AccountDao;
import com.zze.service.AccountService;

public class AccountServiceImpl implements AccountService {
    private AccountDao accountDao;

    public void setAccountDao(AccountDao accountDao) {
        this.accountDao = accountDao;
    }

    @Override
    public void transfer(String usernameFrom, String usernameTo, Double money) {
        accountDao.outMoney(usernameFrom, money);
        accountDao.inMoney(usernameTo,money);
    }
}
com.zze.service.impl.AccountServiceImpl
jdbc.driverClass=com.mysql.jdbc.Driver
jdbc.url=jdbc:mysql:///test
jdbc.username=root
jdbc.password=root
jdbc.properties
<beans xmlns="http://www.springframework.org/schema/beans"
       xmlns:context="http://www.springframework.org/schema/context"
       xmlns:xsi="http://www.w3.org/2001/XMLSchema-instance"
       xsi:schemaLocation="
        http://www.springframework.org/schema/beans http://www.springframework.org/schema/beans/spring-beans.xsd
        http://www.springframework.org/schema/context http://www.springframework.org/schema/context/spring-context.xsd">
    <context:property-placeholder location="classpath:jdbc.properties"/>

    <bean name="dataSource" class="com.mchange.v2.c3p0.ComboPooledDataSource">
        <property name="driverClass" value="${jdbc.driverClass}"/>
        <property name="jdbcUrl" value="${jdbc.url}"/>
        <property name="user" value="${jdbc.username}"/>
        <property name="password" value="${jdbc.password}"/>
    </bean>

    <!--
    <bean name="jdbcTemplate" class="org.springframework.jdbc.core.JdbcTemplate">
        <property name="dataSource" ref="dataSource"/>
    </bean>
    -->

    <bean name="accountDao" class="com.zze.dao.impl.AccountDaoImpl">
        <property name="dataSource" ref="dataSource"/>
        <!--<property name="jdbcTemplate" ref="jdbcTemplate"/>-->
    </bean>

    <bean name="accountService" class="com.zze.service.impl.AccountServiceImpl">
        <property name="accountDao" ref="accountDao"/>
    </bean>
</beans>
applicationContext.xml
package com.zze.test;

import com.zze.service.AccountService;
import org.junit.Test;
import org.junit.runner.RunWith;
import org.springframework.test.context.ContextConfiguration;
import org.springframework.test.context.junit4.SpringJUnit4ClassRunner;

import javax.annotation.Resource;

@RunWith(SpringJUnit4ClassRunner.class)
@ContextConfiguration("classpath:applicationContext.xml")
public class Demo {
    @Resource(name = "accountService")
    private AccountService accountService;
    @Test
    public void test(){
        // zhangsan 给 lisi 转账 100
        accountService.transfer("zhangsan","lisi",100d);
    }
}
执行结果如下:

test
编程式事务管理
1、修改配置:
<beans xmlns="http://www.springframework.org/schema/beans"
       xmlns:context="http://www.springframework.org/schema/context"
       xmlns:xsi="http://www.w3.org/2001/XMLSchema-instance"
       xsi:schemaLocation="
        http://www.springframework.org/schema/beans http://www.springframework.org/schema/beans/spring-beans.xsd
        http://www.springframework.org/schema/context http://www.springframework.org/schema/context/spring-context.xsd">
    <context:property-placeholder location="classpath:jdbc.properties"/>

    <!--配置 C3p0 连接池-->
    <bean name="dataSource" class="com.mchange.v2.c3p0.ComboPooledDataSource">
        <property name="driverClass" value="${jdbc.driverClass}"/>
        <property name="jdbcUrl" value="${jdbc.url}"/>
        <property name="user" value="${jdbc.username}"/>
        <property name="password" value="${jdbc.password}"/>
    </bean>

    <!--配置事务管理器-->
    <bean name="transactionManager" class="org.springframework.jdbc.datasource.DataSourceTransactionManager">
        <property name="dataSource" ref="dataSource"/>
    </bean>

    <!--配置事务的管理的模板类-->
    <bean name="transactionTemplate" class="org.springframework.transaction.support.TransactionTemplate">
        <property name="transactionManager" ref="transactionManager"/>
    </bean>

    <bean name="accountDao" class="com.zze.dao.impl.AccountDaoImpl">
        <property name="dataSource" ref="dataSource"/>
    </bean>

    <bean name="accountService" class="com.zze.service.impl.AccountServiceImpl">
        <property name="accountDao" ref="accountDao"/>
        <!--注入事务管理模板-->
        <property name="transactionTemplate" ref="transactionTemplate"/>
    </bean>
</beans>
applicationContext.xml
2、修改代码模拟异常并使用事务:
package com.zze.service.impl;

import com.zze.dao.AccountDao;
import com.zze.service.AccountService;
import org.springframework.transaction.TransactionStatus;
import org.springframework.transaction.support.TransactionCallbackWithoutResult;
import org.springframework.transaction.support.TransactionTemplate;

public class AccountServiceImpl implements AccountService {
    private AccountDao accountDao;
    private TransactionTemplate transactionTemplate;

    public void setAccountDao(AccountDao accountDao) {
        this.accountDao = accountDao;
    }

    public void setTransactionTemplate(TransactionTemplate transactionTemplate) {
        this.transactionTemplate = transactionTemplate;
    }

    @Override
    public void transfer(String usernameFrom, String usernameTo, Double money) {
        transactionTemplate.execute(new TransactionCallbackWithoutResult() {
            @Override
            protected void doInTransactionWithoutResult(TransactionStatus transactionStatus) {
                accountDao.outMoney(usernameFrom, money);
                // 模拟过程中异常
                int i = 1 / 0;
                accountDao.inMoney(usernameTo, money);
            }
        });
    }
}
com.zze.service.impl.AccountServiceImpl
3、测试:
package com.zze.test;

import com.zze.service.AccountService;
import org.junit.Test;
import org.junit.runner.RunWith;
import org.springframework.test.context.ContextConfiguration;
import org.springframework.test.context.junit4.SpringJUnit4ClassRunner;

import javax.annotation.Resource;

@RunWith(SpringJUnit4ClassRunner.class)
@ContextConfiguration("classpath:applicationContext.xml")
public class Demo {
    @Resource(name = "accountService")
    private AccountService accountService;
    @Test
    public void test(){
        // zhangsan 给 lisi 转账 100
        accountService.transfer("zhangsan","lisi",100d);

        // 此时表数据将不会发生变化
    }
}
test
声明式事务管理-XML
1、修改配置:
<beans xmlns="http://www.springframework.org/schema/beans"
       xmlns:context="http://www.springframework.org/schema/context"
       xmlns:xsi="http://www.w3.org/2001/XMLSchema-instance"
       xmlns:aop="http://www.springframework.org/schema/aop"
       xmlns:tx="http://www.springframework.org/schema/tx"
       xsi:schemaLocation="
        http://www.springframework.org/schema/beans http://www.springframework.org/schema/beans/spring-beans.xsd
        http://www.springframework.org/schema/context http://www.springframework.org/schema/context/spring-context.xsd
        http://www.springframework.org/schema/tx http://www.springframework.org/schema/tx/spring-tx.xsd
        http://www.springframework.org/schema/aop http://www.springframework.org/schema/aop/spring-aop.xsd">
    <context:property-placeholder location="classpath:jdbc.properties"/>

    <!--配置 C3p0 连接池-->
    <bean name="dataSource" class="com.mchange.v2.c3p0.ComboPooledDataSource">
        <property name="driverClass" value="${jdbc.driverClass}"/>
        <property name="jdbcUrl" value="${jdbc.url}"/>
        <property name="user" value="${jdbc.username}"/>
        <property name="password" value="${jdbc.password}"/>
    </bean>

    <!--配置事务管理器-->
    <bean name="transactionManager" class="org.springframework.jdbc.datasource.DataSourceTransactionManager">
        <property name="dataSource" ref="dataSource"/>
    </bean>

    <!--配置事务的通知/增强-->
    <tx:advice id="txAdvice" transaction-manager="transactionManager">
        <tx:attributes>
            <!--事务管理规则-->
            <tx:method name="save*" propagation="REQUIRED"/>
            <tx:method name="update*" propagation="REQUIRED"/>
            <tx:method name="delete*" propagation="REQUIRED"/>
            <tx:method name="find*" read-only="true"/>
            <!--
            name : 匹配方法名
            read-only : 为 true 时表示只做只读操作
            propagation : 事务的传播行为
            timeout : 事务过期时间,为 -1 时不会过期
            isolation : 事务的隔离级别
            -->
            <tx:method name="*" propagation="REQUIRED" isolation="DEFAULT" timeout="-1"/>
        </tx:attributes>
    </tx:advice>

    <!--AOP 配置-->
    <aop:config>
        <aop:pointcut id="pc_account" expression="execution(* com.zze.service.AccountService.*(..))"/>
        <aop:advisor advice-ref="txAdvice" pointcut-ref="pc_account"/>
    </aop:config>

    <bean name="accountDao" class="com.zze.dao.impl.AccountDaoImpl">
        <property name="dataSource" ref="dataSource"/>
    </bean>

    <bean name="accountService" class="com.zze.service.impl.AccountServiceImpl">
        <property name="accountDao" ref="accountDao"/>
    </bean>
</beans>
applicationContext.xml
2、修改代码模拟异常:
package com.zze.service.impl;

import com.zze.dao.AccountDao;
import com.zze.service.AccountService;

public class AccountServiceImpl implements AccountService {
    private AccountDao accountDao;

    public void setAccountDao(AccountDao accountDao) {
        this.accountDao = accountDao;
    }

    @Override
    public void transfer(String usernameFrom, String usernameTo, Double money) {
        accountDao.outMoney(usernameFrom, money);
        // 模拟过程中异常
        int i = 1 / 0;
        accountDao.inMoney(usernameTo, money);
    }
}
com.zze.service.impl.AccountServiceImpl
3、测试:
package com.zze.test;

import com.zze.service.AccountService;
import org.junit.Test;
import org.junit.runner.RunWith;
import org.springframework.test.context.ContextConfiguration;
import org.springframework.test.context.junit4.SpringJUnit4ClassRunner;

import javax.annotation.Resource;

@RunWith(SpringJUnit4ClassRunner.class)
@ContextConfiguration("classpath:applicationContext.xml")
public class Demo {
    @Resource(name = "accountService")
    private AccountService accountService;
    @Test
    public void test(){
        // zhangsan 给 lisi 转账 100
        accountService.transfer("zhangsan","lisi",100d);

        // 此时表数据将不会发生变化
    }
}
test
声明式事务管理-注解
1、修改配置:
<beans xmlns="http://www.springframework.org/schema/beans"
       xmlns:context="http://www.springframework.org/schema/context"
       xmlns:xsi="http://www.w3.org/2001/XMLSchema-instance"
       xmlns:tx="http://www.springframework.org/schema/tx"
       xsi:schemaLocation="http://www.springframework.org/schema/beans http://www.springframework.org/schema/beans/spring-beans.xsd
        http://www.springframework.org/schema/context http://www.springframework.org/schema/context/spring-context.xsd
        http://www.springframework.org/schema/tx http://www.springframework.org/schema/tx/spring-tx.xsd">
    <context:property-placeholder location="classpath:jdbc.properties"/>

    <!--配置 C3p0 连接池-->
    <bean name="dataSource" class="com.mchange.v2.c3p0.ComboPooledDataSource">
        <property name="driverClass" value="${jdbc.driverClass}"/>
        <property name="jdbcUrl" value="${jdbc.url}"/>
        <property name="user" value="${jdbc.username}"/>
        <property name="password" value="${jdbc.password}"/>
    </bean>

    <!--配置事务管理器-->
    <bean name="transactionManager" class="org.springframework.jdbc.datasource.DataSourceTransactionManager">
        <property name="dataSource" ref="dataSource"/>
    </bean>

    <!--开启注解事务-->
    <tx:annotation-driven transaction-manager="transactionManager"/>

    <bean name="accountDao" class="com.zze.dao.impl.AccountDaoImpl">
        <property name="dataSource" ref="dataSource"/>
    </bean>

    <bean name="accountService" class="com.zze.service.impl.AccountServiceImpl">
        <property name="accountDao" ref="accountDao"/>
    </bean>
</beans>
applicationContext.xml
2、修改代码模拟异常并添加事务注解:
package com.zze.service.impl;

import com.zze.dao.AccountDao;
import com.zze.service.AccountService;
import org.springframework.transaction.annotation.Isolation;
import org.springframework.transaction.annotation.Propagation;
import org.springframework.transaction.annotation.Transactional;

// 业务类上添加注解使用事务
@Transactional(isolation=Isolation.DEFAULT,propagation = Propagation.REQUIRED)
public class AccountServiceImpl implements AccountService {
    private AccountDao accountDao;

    public void setAccountDao(AccountDao accountDao) {
        this.accountDao = accountDao;
    }

    @Override
    public void transfer(String usernameFrom, String usernameTo, Double money) {
        accountDao.outMoney(usernameFrom, money);
        // 模拟过程中异常
        int i = 1 / 0;
        accountDao.inMoney(usernameTo, money);
    }
}
com.zze.service.impl.AccountServiceImpl
3、测试:
package com.zze.test;

import com.zze.service.AccountService;
import org.junit.Test;
import org.junit.runner.RunWith;
import org.springframework.test.context.ContextConfiguration;
import org.springframework.test.context.junit4.SpringJUnit4ClassRunner;

import javax.annotation.Resource;

@RunWith(SpringJUnit4ClassRunner.class)
@ContextConfiguration("classpath:applicationContext.xml")
public class Demo {
    @Resource(name = "accountService")
    private AccountService accountService;
    @Test
    public void test(){
        // zhangsan 给 lisi 转账 100
        accountService.transfer("zhangsan","lisi",100d);

        // 此时表数据将不会发生变化
    }
}
test
java框架之Spring(3)-JDBC模板使用&事务管理的更多相关文章
- 四、spring的JDBC模板和事务管理
Spring的JDBC模板 Spring是JavaEE开发的一站式框架,对各种持久化技术都提供了简单的模板 ORM持久化技术 模板类 JDBC org.springframework.jdbc.cor ...
- Java学习笔记43(Spring的jdbc模板)
在之前的学习中,我们执行sql语句,需要频繁的开流,关流比较麻烦,为了更加的简化代码,我们使用Spring 的jdbc模板jdbcTemplate来简化我们的代码量:需要导入的包有: 我们在之前的dr ...
- Java - 框架之 Spring
一. IOC 和 DI IOC : 控制反转,将对象的创建权反转给了 Spring.DI : 依赖注入,前提是必须要有 IOC 的环境,Spring 管理这个类的时候将类的依赖的属性注入(设置)进来 ...
- Spring的jdbc模板1
Spring是EE开发的一站式框架,有EE开发的每一层解决方案.Spring对持久层也提供了解决方案:ORM模块和jdbc模块,ORM模块在整合其他框架的时候使用 Spring提供了很多的模板用于简化 ...
- 创建JDBC模板简化代码、JDBC应用的事务管理以及连接池的作用
一.创建JDBC模板简化代码 一个简单的查询.要做这么一大堆事情,并且还要处理异常,我们不防来梳理一下: 1.获取connection 2.获取statement 3.获取resultset 4 ...
- 【Spring实战】—— 16 基于JDBC持久化的事务管理
前面讲解了基于JDBC驱动的Spring的持久化管理,本篇开始则着重介绍下与事务相关的操作. 通过本文你可以了解到: 1 Spring 事务管理的机制 2 基于JDBC持久化的事务管理 Spring的 ...
- Spring 简单而强大的事务管理功能
开始之前 关于本教程 本教程将深入讲解 Spring 简单而强大的事务管理功能,包括编程式事务和声明式事务.通过对本教程的学习,您将能够理解 Spring 事务管理的本质,并灵活运用之. 先决条件 本 ...
- 事务隔离级别与传播机制,spring+mybatis+atomikos实现分布式事务管理
1.事务的定义:事务是指多个操作单元组成的合集,多个单元操作是整体不可分割的,要么都操作不成功,要么都成功.其必须遵循四个原则(ACID). 原子性(Atomicity):即事务是不可分割的最小工作单 ...
- Spring事务隔离级别与传播机制详解,spring+mybatis+atomikos实现分布式事务管理
原创说明:本文为本人原创作品,绝非他处转载,转账请注明出处 1.事务的定义:事务是指多个操作单元组成的合集,多个单元操作是整体不可分割的,要么都操作不成功,要么都成功.其必须遵循四个原则(ACID). ...
随机推荐
- GooglePlay发布应用后,支持的 Android 设备 0 台设备
这个问题主要是权限问题: android.hardware.camera2.full #把这个权限去掉,注里能功里就不会有这一项了android.hardware.camera2.full 然后重新打 ...
- 微信公众号 chinaxdt 的 解压密码 mima
关于密码:解压密码获取方式第一步关注微信号“chinaxdt”第二步发送信息“mima”即可获取自动回复解压密码 这个 chinaxdt 的微信公众号已经失效,所以大家也不用去加了,密码我这告诉大家. ...
- [MySQL Code]Innodb 锁分配和锁冲突判断
根据阿里月报 : MySQL · 引擎特性 · InnoDB 事务锁系统简介 MySQL · 引擎特性 · Innodb 锁子系统浅析 行锁的入口:rec_lock_rec
- MobaXterm v10.9破解
去官网下载个人版 Exeinfo查壳发现无壳 载入OD,右键,字符串智能搜索. Ctrl+F搜索关键词About,找到到FormAbout处,即关于窗体的创建和显示的位置.双击查看汇编代码 程序在窗体 ...
- 释放锁标记只有在Synchronized代码结束或者调用wait()。
释放锁标记只有在Synchronized代码结束或者调用wait(). 注意锁标记是自己不会自动释放,必须有通知. 注意在程序中判定一个条件是否成立时要注意使用WHILE要比使用IF要严密. WHIL ...
- 在生成一个窗体的时候,点击窗体的右上角关闭按钮激发窗体事件的方法:窗体Frame为事件源,WindowsListener接口调用Windowsclosing()。
事件模式的实现步骤: 开发事件对象(事件发送者)——接口——接口实现类——设置监听对象 一定要理解透彻Gril.java程序. 重点:学会处理对一个事件源有多个事件的监听器(在发送消息时监听器收到 ...
- Houdini 过程化地形系统(二):基于UE4的FC5植被系统(1)
背景 通过之前的几篇分析实践,已经基本打通了UE4的Houdini植被管线部分,并对Far Cry5(简称FC5)的植被系统的需求做了整理,在接下来的几节中,会关注于如何使用Houdini基于UE4来 ...
- 聊聊IOCP,聊聊异步编程
*:first-child { margin-top: 0 !important; } .markdown-body>*:last-child { margin-bottom: 0 !impor ...
- 使用Apache下poi创建和读取excel文件
一:使用apache下poi创建excel文档 @Test /* * 使用Apache poi创建excel文件 */ public void testCreateExcel() { // 1:创建一 ...
- linux 使用不安全的sprintf函数,存储字符越界导致程序莫名崩溃问题
linux c++编程 问题背景: 在处理一个公共模块的代码中,其中有以下代码片段 //代码片段-组合一组字符串并存放到szSignKey数组中 ] = {}; sprintf(szSignKey, ...