e3mall商城的归纳总结9之activemq整合spring、redis的缓存
敬给读者
本节主要给大家说一下activemq整合spring,该如何进行配置,上一节我们说了activemq的搭建和测试(单独测试),想看的可以点击时空隧道前去查看。讲完了之后我们还说一说在项目中使用redis缓存的场景。
1、activemq整合spring开发
2、activemq在项目中的使用(添加商品同时索引库也添加)
2、商品详情页使用redis的缓存存数据
一、activemq整合spring开发
项目(e3mall-manager)

第一步:引用相关的jar包。
		<dependency>

			<groupId>org.springframework</groupId>

			<artifactId>spring-jms</artifactId>

		</dependency>

		<dependency>

			<groupId>org.springframework</groupId>

			<artifactId>spring-context-support</artifactId>

		</dependency>
第二步:配置Activemq整合spring。配置ConnectionFactory
applicationContext-activemq.xml
<?xml version="1.0" encoding="UTF-8"?>

<beans xmlns="http://www.springframework.org/schema/beans"

	xmlns:context="http://www.springframework.org/schema/context" xmlns:p="http://www.springframework.org/schema/p"

	xmlns:aop="http://www.springframework.org/schema/aop" xmlns:tx="http://www.springframework.org/schema/tx"

	xmlns:xsi="http://www.w3.org/2001/XMLSchema-instance"

	xsi:schemaLocation="http://www.springframework.org/schema/beans http://www.springframework.org/schema/beans/spring-beans-4.2.xsd

	http://www.springframework.org/schema/context http://www.springframework.org/schema/context/spring-context-4.2.xsd

	http://www.springframework.org/schema/aop http://www.springframework.org/schema/aop/spring-aop-4.2.xsd http://www.springframework.org/schema/tx http://www.springframework.org/schema/tx/spring-tx-4.2.xsd

	http://www.springframework.org/schema/util http://www.springframework.org/schema/util/spring-util-4.2.xsd">

	<!-- 真正可以产生Connection的ConnectionFactory,由对应的 JMS服务厂商提供 -->

	<bean id="targetConnectionFactory" class="org.apache.activemq.ActiveMQConnectionFactory">

		<property name="brokerURL" value="tcp://192.168.25.168:61616" />

	</bean>

	<!-- Spring用于管理真正的ConnectionFactory的ConnectionFactory -->

	<bean id="connectionFactory"

		class="org.springframework.jms.connection.SingleConnectionFactory">

		<!-- 目标ConnectionFactory对应真实的可以产生JMS Connection的ConnectionFactory -->

		<property name="targetConnectionFactory" ref="targetConnectionFactory" />

	</bean>

	<!-- 配置生产者 -->

	<!-- Spring提供的JMS工具类,它可以进行消息发送、接收等 -->

	<bean id="jmsTemplate" class="org.springframework.jms.core.JmsTemplate">

		<!-- 这个connectionFactory对应的是我们定义的Spring提供的那个ConnectionFactory对象 -->

		<property name="connectionFactory" ref="connectionFactory" />

	</bean>

	<!--这个是队列目的地,点对点的 -->

	<bean id="queueDestination" class="org.apache.activemq.command.ActiveMQQueue">

		<constructor-arg>

			<value>spring-queue</value>

		</constructor-arg>

	</bean>

	<!--这个是主题目的地,一对多的 -->

	<bean id="topicDestination" class="org.apache.activemq.command.ActiveMQTopic">

		<constructor-arg value="topic" />

	</bean>

</beans>
整合spring的测试
@Test

	public void testQueueProducer() throws Exception {

		// 第一步:初始化一个spring容器

		ApplicationContext applicationContext = new ClassPathXmlApplicationContext("classpath:spring/applicationContext-activemq.xml");

		// 第二步:从容器中获得JMSTemplate对象。

		JmsTemplate jmsTemplate = applicationContext.getBean(JmsTemplate.class);

		// 第三步:从容器中获得一个Destination对象

		Queue queue = (Queue) applicationContext.getBean("queueDestination");

		// 第四步:使用JMSTemplate对象发送消息,需要知道Destination

		jmsTemplate.send(queue, new MessageCreator() {

			@Override

			public Message createMessage(Session session) throws JMSException {

				TextMessage textMessage = session.createTextMessage("spring activemq test");

				return textMessage;

			}

		});

	}
接收消息Queue
e3-search-Service中接收消息。queque可以异步实行加载,也就是说当manager发送信号后,若search这边没开启,则等待search开启后自动发送到相应的位置。也就是说可以异步加载。
第一步:把Activemq相关的jar包添加到工程中
	<dependency>

			<groupId>org.springframework</groupId>

			<artifactId>spring-jms</artifactId>

		</dependency>

		<dependency>

			<groupId>org.springframework</groupId>

			<artifactId>spring-context-support</artifactId>

		</dependency>
第二步:创建一个MessageListener的实现类。
public class MyMessageListener implements MessageListener {

	@Override

	public void onMessage(Message message) {

		try {

			TextMessage textMessage = (TextMessage) message;

			//取消息内容

			String text = textMessage.getText();

			System.out.println(text);

		} catch (JMSException e) {

			e.printStackTrace();

		}

	}

}
第三步:配置spring和Activemq整合
<?xml version="1.0" encoding="UTF-8"?>

<beans xmlns="http://www.springframework.org/schema/beans"

	xmlns:context="http://www.springframework.org/schema/context" xmlns:p="http://www.springframework.org/schema/p"

	xmlns:aop="http://www.springframework.org/schema/aop" xmlns:tx="http://www.springframework.org/schema/tx"

	xmlns:xsi="http://www.w3.org/2001/XMLSchema-instance"

	xsi:schemaLocation="http://www.springframework.org/schema/beans http://www.springframework.org/schema/beans/spring-beans-4.2.xsd

	http://www.springframework.org/schema/context http://www.springframework.org/schema/context/spring-context-4.2.xsd

	http://www.springframework.org/schema/aop http://www.springframework.org/schema/aop/spring-aop-4.2.xsd http://www.springframework.org/schema/tx http://www.springframework.org/schema/tx/spring-tx-4.2.xsd

	http://www.springframework.org/schema/util http://www.springframework.org/schema/util/spring-util-4.2.xsd">

	<!-- 真正可以产生Connection的ConnectionFactory,由对应的 JMS服务厂商提供 -->

	<bean id="targetConnectionFactory" class="org.apache.activemq.ActiveMQConnectionFactory">

		<property name="brokerURL" value="tcp://192.168.25.168:61616" />

	</bean>

	<!-- Spring用于管理真正的ConnectionFactory的ConnectionFactory -->

	<bean id="connectionFactory"

		class="org.springframework.jms.connection.SingleConnectionFactory">

		<!-- 目标ConnectionFactory对应真实的可以产生JMS Connection的ConnectionFactory -->

		<property name="targetConnectionFactory" ref="targetConnectionFactory" />

	</bean>

	<!--这个是队列目的地,点对点的 -->

	<bean id="queueDestination" class="org.apache.activemq.command.ActiveMQQueue">

		<constructor-arg>

			<value>spring-queue</value>

		</constructor-arg>

	</bean>

	<!--这个是主题目的地,一对多的 -->

	<bean id="topicDestination" class="org.apache.activemq.command.ActiveMQTopic">

		<constructor-arg value="topic" />

	</bean>

	<!-- 接收消息 -->

	<!-- 配置监听器 -->

	<bean id="myMessageListener" class="cn.e3mall.search.listener.MyMessageListener" />

	<!-- 消息监听容器 -->

	<bean class="org.springframework.jms.listener.DefaultMessageListenerContainer">

		<property name="connectionFactory" ref="connectionFactory" />

		<property name="destination" ref="queueDestination" />

		<property name="messageListener" ref="myMessageListener" />

	</bean>

</beans>

第四步:测试代码。
	@Test

	public void testQueueConsumer() throws Exception {

		//初始化spring容器

		ApplicationContext applicationContext = new ClassPathXmlApplicationContext("classpath:spring/applicationContext-activemq.xml");

		//等待

		System.in.read();

	}
二、activemq在项目中的使用(添加商品同时索引库也添加)
a、在e3ll-manager-service工程中发送消息。
当商品添加完成后发送一个TextMessage,包含一个商品id。


上图中由于我们再配置文件中配置了两个Destination,一个是queue,一个是Topic,所以我们采用@resource注解,首先根据Byname 方式 topicDestination查询配置文件中的id进行自动装配。
	//添加商品

	@Override

	public E3Result InsertItem(TbItem item, String desc) {

		final long id = IDUtils.genItemId();

		//补齐数据

		item.setId(id);

		//1-正常,2-下架,3-删除

		item.setStatus((byte) 1);

		item.setCreated(new Date());

		item.setUpdated(new Date());

		TbItemMapper.insert(item);

		TbItemDesc itemDesc = new TbItemDesc();

		itemDesc.setItemId(id);

		itemDesc.setItemDesc(desc);

		itemDesc.setCreated(new Date());

		itemDesc.setUpdated(new Date());

		itemDescMapper.insert(itemDesc);

		//向activemq中发送topic消息,广播一下

		try {

			jmsTemplate.send(topicDestination,new MessageCreator() {

				@Override

				public Message createMessage(Session session) throws JMSException {

					// 发送数据

				TextMessage textMessgage = session.createTextMessage(id+"");

				return textMessgage;

				}

			});

		} catch (JmsException e) {

			e.printStackTrace();

		}

		return E3Result.ok();

	}
代码逻辑:
向数据库中插入商品和商品详情,插入完成后通过jmsTemplate.send()方法发送id。我们要保证发送数据不能影响代码的正常运行,因此需要try{}catch()一下。
Consumer
3.2.1.功能分析
1、接收消息。需要创建MessageListener接口的实现类。
2、取消息,取商品id。
3、根据商品id查询数据库。
4、创建一SolrInputDocument对象。
5、使用SolrServer对象写入索引库。
6、返回成功,返回e3Result。
b、在solr-service中接受消息
1、接收消息。需要创建MessageListener接口的实现类。
2、取消息,取商品id。
3、根据商品id查询数据库。
4、创建一SolrInputDocument对象。
5、使用SolrServer对象写入索引库。
返回成功,返回e3Result。
我们先看看Dao层,因为solr索引库中的业务域是我们自己定义的,因此我们需要查询的数据要包含两个表(商品表和商品类型表),所以用逆向工程的代码是不行的,需要我们自己写sql语句。
Dao层:
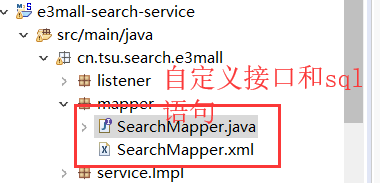
SearchMapper.xml文件内容
<?xml version="1.0" encoding="UTF-8" ?>

<!DOCTYPE mapper PUBLIC "-//mybatis.org//DTD Mapper 3.0//EN" "http://mybatis.org/dtd/mybatis-3-mapper.dtd" >

<mapper namespace="cn.tsu.search.e3mall.mapper.SearchMapper" >

  <select id="getItemList" resultType="cn.tsu.e3mall.pojo.SearchResult">

	  	SELECT

			a.id,

			a.title,

			a.sell_point,

			a.price,

			a.image,

			b.NAME category_id

		FROM

			tb_item a

		LEFT JOIN tb_item_cat b ON a.cid = b.id WHERE a.`status`=1

	</select>

	<select id="getItemById" parameterType="Long" resultType="cn.tsu.e3mall.pojo.SearchResult">

	  	SELECT

			a.id,

			a.title,

			a.sell_point,

			a.price,

			a.image,

			b.NAME category_id

		FROM

			tb_item a

		LEFT JOIN tb_item_cat b ON a.cid = b.id WHERE a.`status`=1 AND a.id=#{itemId}

	</select>

</mapper>
使用的是LEFT JOIN让两个表相关联(以左表为主).
Service层代码,service层代码主要包含监听topic发送来的信息,还有向索引库中添加商品的代码逻辑
参数:商品ID
业务逻辑:
1、根据商品id查询商品信息。
2、创建一SolrInputDocument对象。
3、使用SolrServer对象写入索引库。
4、返回成功,返回e3Result。
返回值:e3Result
添加商品的代码逻辑:(因为manager向数据库中已插入该条信息,因此我们可以向数据库中通过商品id查询该条商品信息,然后再把商品信息存放到solr索引库中。)
public e3Result addDocument(long itemId) throws Exception {

		// 1、根据商品id查询商品信息。

		SearchItem searchItem = searchItemMapper.getItemById(itemId);

		// 2、创建一SolrInputDocument对象。

		SolrInputDocument document = new SolrInputDocument();

		// 3、使用SolrServer对象写入索引库。

		document.addField("id", searchItem.getId());

		document.addField("item_title", searchItem.getTitle());

		document.addField("item_sell_point", searchItem.getSell_point());

		document.addField("item_price", searchItem.getPrice());

		document.addField("item_image", searchItem.getImage());

		document.addField("item_category_name", searchItem.getCategory_name());

		// 5、向索引库中添加文档。

		solrServer.add(document);

		solrServer.commit();

		// 4、返回成功,返回e3Result。

		return e3Result.ok();

	}

package cn.tsu.search.e3mall.listener;

import javax.jms.Message;

import javax.jms.MessageListener;

import javax.jms.TextMessage;

import org.springframework.beans.factory.annotation.Autowired;

import cn.tsu.search.e3mall.service.Impl.SearchServiceImpl;

public class MyMessageListenter implements MessageListener{

	@Autowired

	private SearchServiceImpl searchServiceImpl;

	@Override

	public void onMessage(Message message) {

		// TODO Auto-generated method stub

		TextMessage textMessage = (TextMessage) message;

		try {

			Thread.sleep(1000);

			String text = textMessage.getText();

			System.out.println("收到.....searchservice"+text);

			Long id = new Long(text);

			searchServiceImpl.mqAddDoc(id);

		} catch (Exception e) {

			// TODO Auto-generated catch block

			e.printStackTrace();

		}

	}

}
MyMessageListenter 写完之后需要在配置文件中配置一下

代码:
<?xml version="1.0" encoding="UTF-8"?>

<beans xmlns="http://www.springframework.org/schema/beans"

	xmlns:context="http://www.springframework.org/schema/context" xmlns:p="http://www.springframework.org/schema/p"

	xmlns:aop="http://www.springframework.org/schema/aop" xmlns:tx="http://www.springframework.org/schema/tx"

	xmlns:dubbo="http://code.alibabatech.com/schema/dubbo" xmlns:xsi="http://www.w3.org/2001/XMLSchema-instance"

	xsi:schemaLocation="http://www.springframework.org/schema/beans http://www.springframework.org/schema/beans/spring-beans-4.2.xsd

	http://www.springframework.org/schema/context http://www.springframework.org/schema/context/spring-context-4.2.xsd

	http://www.springframework.org/schema/aop http://www.springframework.org/schema/aop/spring-aop-4.2.xsd http://www.springframework.org/schema/tx http://www.springframework.org/schema/tx/spring-tx-4.2.xsd

	http://code.alibabatech.com/schema/dubbo http://code.alibabatech.com/schema/dubbo/dubbo.xsd

	http://www.springframework.org/schema/util http://www.springframework.org/schema/util/spring-util-4.2.xsd">

	<!-- 真正可以产生Connection的ConnectionFactory,由对应的 JMS服务厂商提供 -->

	<bean id="targetConnectionFactory" class="org.apache.activemq.ActiveMQConnectionFactory">

		<property name="brokerURL" value="tcp://192.168.25.110:61616" />

	</bean>

	<!-- Spring用于管理真正的ConnectionFactory的ConnectionFactory -->

	<bean id="connectionFactory"

		class="org.springframework.jms.connection.SingleConnectionFactory">

		<!-- 目标ConnectionFactory对应真实的可以产生JMS Connection的ConnectionFactory -->

		<property name="targetConnectionFactory" ref="targetConnectionFactory" />

	</bean>

	<!--这个是队列目的地,点对点的 -->

	<bean id="queueDestination" class="org.apache.activemq.command.ActiveMQQueue">

		<constructor-arg>

			<value>spring-queue</value>

		</constructor-arg>

	</bean>

	<!--这个是主题目的地,一对多的 -->

	<bean id="topicDestination" class="org.apache.activemq.command.ActiveMQTopic">

		<constructor-arg value="itemaddtopic" />

	</bean>

	<!-- 接收消息 -->

	<!-- 配置监听器 -->

	<bean id="myMessageListener" class="cn.tsu.search.e3mall.listener.MyMessageListenter" />

	<!-- 消息监听容器 -->

	<bean class="org.springframework.jms.listener.DefaultMessageListenerContainer">

		<property name="connectionFactory" ref="connectionFactory" />

		<property name="destination" ref="topicDestination" />

		<property name="messageListener" ref="myMessageListener" />

	</bean>

</beans>
业务逻辑:

三、redis缓存在项目中的使用
业务逻辑:
由于本商城的商品有很多,把那么多的商品存放在redis中,可能会导致redis的内存不足,所以我们采用TTL过期时间的逻辑对商品详情进行冷热处理,那什么是冷热处理呢?
也就是当用户第一次访问我们的商品详情时,redis缓存中没有该商品,则前往数据库中搜索该商品,搜索到该商品后,我们把该商品存放到redis缓存中,设置TTL时间,比如5田之后过期。这样的话只有热卖商品存放到redis缓存中,而数据库的压力也减轻了很多。同时也兼顾了redis的内存问题。保存的格式,string-value方式,因为涉及到TTl过期时间,所以不能使用hashMap存储方式
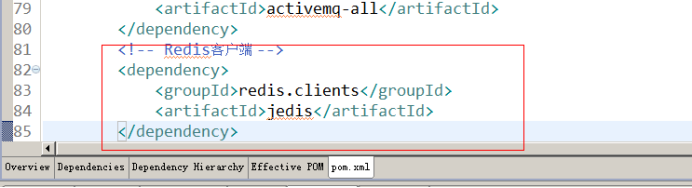
添加jar包
Dao层:
逆向工程
service层:
也就是简单的通过id进行查询数据库,查询,查询到返回数据
当用户第一次访问我们的商品详情时,redis缓存中没有该商品,则前往数据库中搜索该商品,搜索到该商品后,我们把该商品存放到redis缓存中,设置TTL时间,比如5田之后过期。这样的话只有热卖商品存放到redis缓存中,
代码:
取商品缓存:
@Override

	public TbItem getItemById(long itemId) {

		try {

			//查询缓存

			String json = jedisClient.get(ITEM_INFO_PRE + ":" + itemId + ":BASE");

			if (StringUtils.isNotBlank(json)) {

				//把json转换为java对象

				TbItem item = JsonUtils.jsonToPojo(json, TbItem.class);

				return item;

			}

		} catch (Exception e) {

			e.printStackTrace();

		}

		//根据商品id查询商品信息

		//TbItem tbItem = itemMapper.selectByPrimaryKey(itemId);

		TbItemExample example = new TbItemExample();

		//设置查询条件

		Criteria criteria = example.createCriteria();

		criteria.andIdEqualTo(itemId);

		List<TbItem> list = itemMapper.selectByExample(example);

		if (list != null && list.size() > 0) {

			TbItem item = list.get(0);

			try {

				//把数据保存到缓存

				jedisClient.set(ITEM_INFO_PRE + ":" + itemId + ":BASE", JsonUtils.objectToJson(item));

				//设置缓存的有效期

				jedisClient.expire(ITEM_INFO_PRE + ":" + itemId + ":BASE", ITEM_INFO_EXPIRE);

			} catch (Exception e) {

				e.printStackTrace();

			}

			return item;

		}

		return null;

	}
取商品详情缓存:
@Override

	public TbItemDesc getItemDescById(long itemId) {

		try {

			String json = jedisClient.get(ITEM_INFO_PRE + ":" + itemId + ":DESC");

			//判断缓存是否命中

			if (StringUtils.isNotBlank(json) ) {

				//转换为java对象

				TbItemDesc itemDesc = JsonUtils.jsonToPojo(json, TbItemDesc.class);

				return itemDesc;

			}

		} catch (Exception e) {

			e.printStackTrace();

		}

		TbItemDesc itemDesc = itemDescMapper.selectByPrimaryKey(itemId);

		try {

			jedisClient.set(ITEM_INFO_PRE + ":" + itemId + ":DESC", JsonUtils.objectToJson(itemDesc));

			//设置过期时间

			jedisClient.expire(ITEM_INFO_PRE + ":" + itemId + ":DESC", ITEM_INFO_EXPIRE);

		} catch (Exception e) {

			e.printStackTrace();

		}

		return itemDesc;

	}
controller层:
package cn.tsu.item.e3mall.controller;

import org.springframework.beans.factory.annotation.Autowired;

import org.springframework.stereotype.Controller;

import org.springframework.ui.Model;

import org.springframework.web.bind.annotation.PathVariable;

import org.springframework.web.bind.annotation.RequestMapping;

import cn.tsu.e3mall.pojo.TbItem;

import cn.tsu.e3mall.pojo.TbItemDesc;

import cn.tsu.e3mall.service.ItemService;

import cn.tsu.item.e3mall.pojo.Item;

/**

 * 页面详情页

 * @author xiaofeng

 *

 */

@Controller

public class ItemController {

	@Autowired

	private ItemService itemService;

	@RequestMapping("/item/{itemId}")

	public String ShowItemInfo(@PathVariable Long itemId,Model model) {

		//获取商品信息

		TbItem tbItem = itemService.getItemByid(itemId);

		//获取商品详情信息

		TbItemDesc descDesc = itemService.descEdit(itemId);

		//因为tbItem中图片是一个数据,创建一个对象,继承tbItem,然后getimages方法进行分开提取

		Item item = new Item(tbItem);

		model.addAttribute("item", item);

		model.addAttribute("itemDesc", descDesc);

		return "item";

	}

}
继承的item 代码:
package cn.tsu.item.e3mall.pojo;

import com.alibaba.dubbo.common.utils.StringUtils;

import cn.tsu.e3mall.pojo.TbItem;

public class Item extends TbItem {

	public String[] getImages() {

		String image = this.getImage();

		if(!StringUtils.isBlank(image)) {

			String[] split = image.split(",");

			return split;

		}

		return null;

	}

	public Item(TbItem tbItem) {

		 this.setId(tbItem.getId());

	     this.setTitle(tbItem.getTitle());

	     this.setSellPoint(tbItem.getSellPoint());

	     this.setPrice(tbItem.getPrice());

	     this.setNum(tbItem.getNum());

	     this.setBarcode(tbItem.getBarcode());

	     this.setImage(tbItem.getImage());

	     this.setCid(tbItem.getCid());

	     this.setStatus(tbItem.getStatus());

	     this.setCreated(tbItem.getCreated());

	     this.setUpdated(tbItem.getUpdated());

	}

}
本文讲解的很详细,希望可以给您带来不同之处,如果您有问题,欢迎下方评论,博主看到后会第一时间回复大家.
e3mall商城的归纳总结9之activemq整合spring、redis的缓存的更多相关文章
- JAVAEE——宜立方商城09:Activemq整合spring的应用场景、添加商品同步索引库、商品详情页面动态展示与使用缓存
1. 学习计划 1.Activemq整合spring的应用场景 2.添加商品同步索引库 3.商品详情页面动态展示 4.展示详情页面使用缓存 2. Activemq整合spring 2.1. 使用方法 ...
- 淘淘商城项目_同步索引库问题分析 + ActiveMQ介绍/安装/使用 + ActiveMQ整合spring + 使用ActiveMQ实现添加商品后同步索引库_匠心笔记
文章目录 1.同步索引库问题分析 2.ActiveM的介绍 2.1.什么是ActiveMQ 2.2.ActiveMQ的消息形式 3.ActiveMQ的安装 3.1.安装环境 3.2.安装步骤 4.Ac ...
- ActiveMQ整合spring、同步索引库
1. Activemq整合spring 1.1. 使用方法 第一步:引用相关的jar包. <dependency> <groupId>org.springframework ...
- e3mall商城的归纳总结1之项目的架构
首先来谈谈e3mall商城,e3mall商城是黑马推出一个学习的项目,前身是淘淘商城.两个用的技术差不多.,但由于后期加了一些新技术,更名为e3mall商城.本商城为分布式商城,主要用到的技术使mav ...
- e3mall商城的归纳总结10之freemarker的使用和sso单点登录系统的简介
敬给读者的话 本节主要讲解freemarker的使用以及sso单点登录系统,两种技术都是比较先进的技术,freemarker是一个模板,主要生成一个静态静态,能更快的响应给用户,提高用户体验. 而ss ...
- ActiveMQ学习笔记(6)----ActiveMQ整合Spring开发
1. 添加依赖 spring 提供了对JMS的支持,需要添加Spring支持jms的包和Spring的核心包,如下: <dependency> <groupId>org.apa ...
- e3mall商城的归纳总结8之solr集群、activemq的搭建和使用
由于本节内容比较分散,因此专门为这两个技术进行开展了帖子. solr集群的搭建 solr集群solrJ的测试 activemq的搭建 activemq的使用 引入activemq.jar包 我们先来说 ...
- e3mall商城的归纳总结6之redis
一.说在前面的话 前面几节我们主要对该项目的后端进行了增删改查,但是所有的数据都是存放在数据库中,这样的话数据库的压力显而易见是很大的,因此本节学习nosql的缓存,也就是redis的使用,在使用之前 ...
- e3mall商城的归纳总结4之图片服务器以及文本编辑器
一.图片服务器 --1.认识图片服务器 大家可能都知道在分布式架构中使用图片上传可能会导致文件存放在某一个项目,而我们的项目基本上都采用集群的方式 ,因此这样会导致图片的问题比较难以存放,在这里我们有 ...
随机推荐
- 【FZYZOJ】下片 题解(最短路+超级源点)
题目描述 为了提高服务器的耐受能力,很多流量大的网站都会架设多台服务器,而互联网的路由能找到线路最短的一台服务器. 现在UOI想要下片,他有好多台电脑,又有好多服务器可以提供下载.UOI将给你一个网络 ...
- PHP爬取网页的主要方法,你掌握了吗
这篇文章讲的是PHP爬取网页的主要方法,主要流程就是获取整个网页,然后正则匹配(关键的). PHP抓取页面的主要方法,有几种方法是网上前辈的经验,现在还没有用到的,先存下来以后试试. file()函数 ...
- JavaScript小游戏实例:统一着色
设计如下的简单小游戏. 在面板(画布)中放置10行10列共100个小方块,每个小方块随机在5种颜色中选一种颜色进行着色,在面板的下方,放置对应的5种颜色色块,如图1所示. 图1 “统一着色”游戏界面 ...
- 面试这么撩准拿offer,HashMap深度学习,扰动函数、负载因子、扩容拆分,原理和实践验证,让懂了就是真的懂!
作者:小傅哥 博客:https://bugstack.cn 沉淀.分享.成长,让自己和他人都能有所收获! 一.前言 得益于Doug Lea老爷子的操刀,让HashMap成为使用和面试最频繁的API,没 ...
- 为什么我们需要Q#?
原文地址:https://blogs.msdn.microsoft.com/visualstudio/2018/11/15/why-do-we-need-q/ 本文章为机器翻译. 你可能熟悉微软量子的 ...
- vue scss 样式穿透
使用2个style的方式不够优雅,可以使用下面方式做样式穿透 .normal-field /deep/ .el-form-item { margin-bottom: 0px; } .normal-fi ...
- JavaScript 把数组扁平化的方法
使用 ES2019中的新特性 Array.prototype.flat() const arr = [1,2,3,4,[10,20,30]] const res = arr.flat() consol ...
- 编写高质量代码的50条黄金守则-Day 02(首选readonly而不是const)
编写高质量代码的50条黄金守则-Day 02(首选readonly而不是const),本文由比特飞原创发布,转载务必在文章开头附带链接:https://www.byteflying.com/archi ...
- 痞子衡嵌入式:利用i.MXRT1060,1010上新增的FlexSPI地址重映射(Remap)功能可安全OTA
大家好,我是痞子衡,是正经搞技术的痞子.今天痞子衡给大家介绍的是i.MXRT部分型号上新增的FlexSPI Remap功能. OTA升级设计几乎是每个量产客户都绕不开的话题,产品发布后免不了要做固件( ...
- Linux C++实现一服务器与多客户端之间的通信
通过网络查找资料得到的都是一些零碎不成体系的知识点,无法融会贯通.而且需要筛选有用的信息,这需要花费大量的时间.所以把写代码过程中用到的相关知识的博客链接附在用到的位置,方便回顾. 1.程序流程 服务 ...