Python _PyQt5对话框
Python 调用PyQt5 制作对话框,退出时候有二次确认(注:默认是直接退出)

 1 # -*- ytf-8 -*-

 2 """

 3 用PyQt建一个对话框,退出时提示有二次确认

 4 """

 5

 6 import sys

 7 from PyQt5.QtWidgets import QApplication,QMessageBox,QWidget

 8

 9 class myWin(QWidget):

10     def __init__(self):

11         #执行父类的__init__构造方法

12         super().__init__()

13         #将窗口的设置委托给initUI方法

14         self.initUI()

15     def initUI(self):

16         #设置窗口

17         self.setWindowTitle("消息框")

18         self.setGeometry(200,200,500,500)   #先位置再大小

19         self.show()

20     #重写关闭事件方法(closeEvent)

21     def closeEvent(self,event):

22         #获取消息框实例的值

23         msg = QMessageBox.question(self,"退出警告","你确定退出吗?",QMessageBox.Yes|QMessageBox.No,QMessageBox.No)  #这里是固定格式,yes/no不能动

24         #判断消息的返回值

25         if msg ==QMessageBox.Yes:

26             event.accept()

27         else:

28             event.ignore()

29 if __name__=="__main__":

30     app=QApplication(sys.argv)

31     my=myWin()

32     sys.exit(app.exec_())
PyQt5_对话框_退出时确认
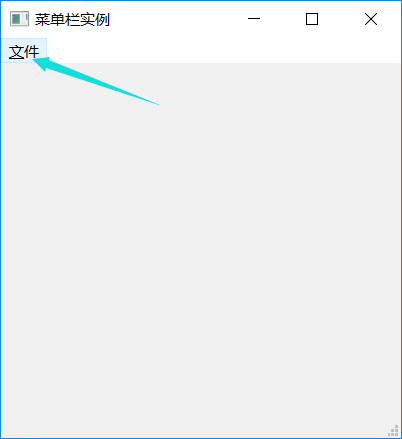
Python_menuBar
 1 import sys

 2 from PyQt5.QtWidgets import QApplication,QMainWindow,QAction,QMessageBox

 3 from PyQt5.QtGui import QIcon

 4

 5 class myWin(QMainWindow):

 6     def __init__(self):

 7         super().__init__()

 8         self.initUI()

 9

10     def initUI(self):

11         #创建动作对象并设置

12         action_close=QAction(QIcon('icon.png'),'&退出',self)

13         action_close.setShortcut('A')

14         action_close.setStatusTip('这是退出功能')

15         action_close.triggered.connect(self.close)

16

17         action_open=QAction(QIcon('icon.png'),'&打开',self)

18         action_open.setShortcut('Ctrl+O')

19         action_open.setStatusTip('这是打开功能')

20         action_open.triggered.connect(self.open1)

21

22         #创建菜单

23         menuBar=self.menuBar()

24         menufile=menuBar.addMenu('&文件')

25         menufile.addAction(action_open)

26         menufile.addAction(action_close)

27

28         #设置状态栏

29         self.statusBar().showMessage('这个是状态栏....')

30

31         #设置窗口属性

32         self.setGeometry(100,300,400,400)

33         self.setWindowTitle('菜单栏实例')

34         self.setWindowIcon(QIcon('icon.png'))

35

36         self.show()

37     #重写关闭事件方法(closeEvent)

38     def closeEvent(self,event):

39         #获取消息框实例的值

40         msg=QMessageBox.question(self,'退出警告','你确认退出吗??',QMessageBox.Yes | QMessageBox.No,QMessageBox.No)

41         #判定消息框的返回值

42         if msg==QMessageBox.Yes:

43             event.accept()

44         else:

45             event.ignore()

46     def open1(self):

47         print('马季是个相声家')

48

49 if __name__=='__main__':

50     app=QApplication(sys.argv)

51     my=myWin()

52     sys.exit(app.exec_())
Python_menuBar
1 # -*- coding:utf-8 -*-
2
3 """
4 图形界面
5 拖动 只在图形界面
6
7
8 对于接收拖动组件:
9 1、开启 setAcceptDrops 允许接收拖动
10 2、重写 dragEnterEvent 对拖入数据进行过滤
11 3、重写 dropEvent 放入拖拽状态
12
13 对于拖出组件
14 设置setDragEnabled 为 True 允许拖动操作
15
16
17 目标:将单行文本框里的文字拖到按钮中,在按钮中显示
18 """
19
20 from PyQt5.QtWidgets import QApplication,QWidget,QLineEdit,QPushButton
21 import sys
22
23 #创建一个可以拖入的按键类型
24 class btn_drag(QPushButton):
25 #注意构造方法与按钮之间的参数的需求关系
26 def __init__(self,title,parent): #形参
27 super().__init__(title,parent)
28 self.setAcceptDrops(True) #允许拖入
29
30 def dragEnterEvent(self,e): #重写 拖拽进入方法
31 if e.mimeData().hasFormat("text/plain"): #过滤信息,只能是文本下的纯文本格式
32 e.accept()
33 else:
34 e.ignore()
35
36 def dropEvent(self,e): #重写放入事件
37 self.setText(e.mimeData().text()) #将拖入的文本信息放入到当前实例的text中
38
39 #新建基本框,有单行文本框和按钮
40 class myWin(QWidget):
41 def __init__(self):
42 super().__init__()
43 self.initUI()
44
45 def initUI(self):
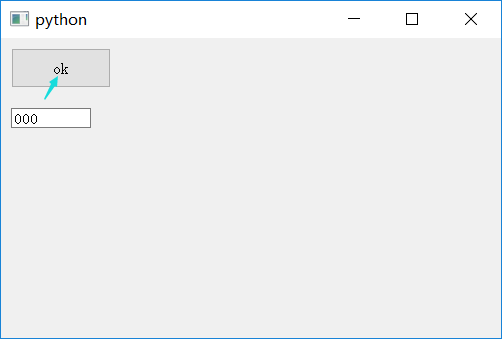
46 btn=btn_drag("ok",self) #实例化框中按钮
47 edit=QLineEdit('000',self)
48 edit.setDragEnabled(True) #设置允许拖拽
49 btn.setGeometry(10,10,100,40)
50 edit.setGeometry(10,70,80,20)
51
52 self.setGeometry(150,150,500,300)
53 edit.setWindowTitle("拖拽实例1")
54 self.show()
55
56 if __name__ == "__main__":
57 app = QApplication(sys.argv)
58 my = myWin()
59 sys.exit(app.exec_())
PyQt5 拖动单行文本框的文字到一个按钮里
1 """
2 选择框
3 """
4
5 import sys
6 from PyQt5.QtWidgets import QApplication,QWidget,QComboBox #combox选择框
7
8 class myWin(QWidget):
9 def __init__(self):
10 super().__init__()
11 self.initUI()
12 def initUI(self):
13 self.com=QComboBox(self) #实例化选择框
14 self.com.setGeometry(40,40,100,20)
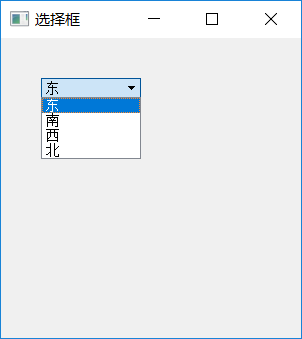
15 self.com.addItem("东")
16 self.com.addItem("南")
17 self.com.addItem("西")
18 self.com.addItem("北")
19
20 self.setGeometry(100,100,300,300)
21 self.setWindowTitle("选择框")
22 self.show()
23 def shows(self,date):
24 print(date)
25 self.lb1.setText(str(date))
26
27 if __name__=="__main__":
28 app = QApplication(sys.argv)
29 my = myWin()
30 sys.exit(app.exec_())
31
选择框
Python _PyQt5对话框的更多相关文章
- Python _PyQt5 【总】
http://www.cnblogs.com/archisama/p/5442071.html QtCore QtGui QtWidgets QtMultimedia QtBluetooth QtNe ...
- python :模态对话框
<!DOCTYPE HTML PUBLIC "-//W3C//DTD HTML 4.01 Transitional//EN" "http://www.w3.org/ ...
- [Python] Remote debugging by Pycharm
From: http://blog.csdn.net/u013088062/article/details/50170551 虚拟环境配置 配置远程解释器 设想这样一种情况,你在一个平台上操作你的工程 ...
- [Python] Interpreter setting in Pycharm
From: http://blog.csdn.net/u013088062/article/details/50135135 From: http://blog.csdn.net/u013088062 ...
- [Python] Basic operations in Pycharm
From: http://learnpythonthehardway.org/book Comment with line comment: Ctrl + slash Run: Shift + F10 ...
- Python在windows下的安装与配置
安装python 文件准备: A. python安装文件:我用的是python-3.4.3.amd64.msi: 安装很简单,直接双击点下一步即可: 配置环境变量,在windows系统变量中找到pat ...
- Odoo 12 开发手册指南(八)—— 业务逻辑 – 业务流程的支持
在前面的文章中,我们学习了模型层.如何创建应用数据结构以及如何使用 ORM API 来存储查看数据.本文中我们将利用前面所学的模型和记录集知识实现应用中常用的业务逻辑模式. 本文的主要内容有: 以文件 ...
- 在cmd下可以import cv2,而Pycharm报错:找不到cv2
平台:win10 x64+Pycharm+Anaconda3+opencv 安装教程:参考博客——http://blog.sina.com.cn/s/blog_cca23c300102xiy4.htm ...
- [Pycharm] Interpreter setting in Pycharm
From: http://blog.csdn.net/u013088062/article/details/50135135 From: http://blog.csdn.net/u013088062 ...
随机推荐
- 手写Redux-Saga源码
上一篇文章我们分析了Redux-Thunk的源码,可以看到他的代码非常简单,只是让dispatch可以处理函数类型的action,其作者也承认对于复杂场景,Redux-Thunk并不适用,还推荐了Re ...
- Python之for循环和列表
for循环: 有限循环 基本语法: for 变量 in 可迭代对象: 循环体 也可使用break,continue,for else list列表初识: 列表可放任意数据类型:[int,str,boo ...
- Mybatis项目搭建
MyBatis是一个优秀的持久层框架.原生的jdbc操作存在大量的重复性代码(如注册驱动,创建连接,创建statement,结果集检测等).框架的作用就是把这些繁琐的代码封装. MyBatis通过XM ...
- Java中的5大队列,你知道几个?
本文已收录至 https://github.com/vipstone/algorithm <算法图解>系列. 通过前面文章的学习<一文详解「队列」,手撸队列的3种方法!>我们知 ...
- docker部署nginx服务器
1,下载nginx镜像 docker pull nginx 2,启动 docker run --name runoob-nginx-test -p 8081:80 -d nginx 3,创建本地目录 ...
- 彻底理解RSA加密算法
RSA是非常典型的非对称加密算法 它的算法是这样的 加密是我们把明文M转化成密文C 需要用到加密运算 而解密时我们要用解密运算将密文C转化成M 从表达式中 可以看出 e和d使我们需要确定的参数 而N是 ...
- Oracl Linux KVM虚拟机备份
Oracle Linux KVM 作为Oracle Linux的一部分,基于KVM的Oracle Linux 服务器虚拟化解决方案在功能上得到了增强.用户可以利用Oracle Linux旧版本,将操 ...
- 使用Socket通信(二)
这个socket有梗,主要是服务器端有梗,可能大家会碰到同样的问题,网上查了好久,这里分享一下解决办法.首先在第一个module建一个类SimpleServer,这个类就是服务端,建好之后在代码左边有 ...
- Redis分布式锁及分区
以下内容是翻译的官网文档RedLock和分区部分,可以简单了解分布式锁在redis如何实现及其方式 redis分区的方法 redis实现的分布式锁RedLock算法,分布式锁,即在多个master上获 ...
- C# 9.0 新特性预览 - init-only 属性
C# 9.0 新特性预览 - init-only 属性 前言 随着 .NET 5 发布日期的日益临近,其对应的 C# 新版本已确定为 C# 9.0,其中新增加的特性(或语法糖)也已基本锁定,本系列文章 ...