SpringCloud(7)服务链路追踪Spring Cloud Sleuth
1.简介
Spring Cloud Sleuth 主要功能就是在分布式系统中提供追踪解决方案,并且兼容支持了 zipkin,你只需要在pom文件中引入相应的依赖即可。本文主要讲述服务追踪组件zipkin,Spring Cloud Sleuth集成了zipkin组件。
2.术语
- Span:基本工作单元,例如,在一个新建的span中发送一个RPC等同于发送一个回应请求给RPC,span通过一个64位ID唯一标识,trace以另一个64位ID表示,span还有其他数据信息,比如摘要、时间戳事件、关键值注释(tags)、span的ID、以及进度ID(通常是IP地址)
span在不断的启动和停止,同时记录了时间信息,当你创建了一个span,你必须在未来的某个时刻停止它。 - Trace:一系列spans组成的一个树状结构,例如,如果你正在跑一个分布式大数据工程,你可能需要创建一个trace。
- Annotation:用来及时记录一个事件的存在,一些核心annotations用来定义一个请求的开始和结束 .
- cs - Client Sent -客户端发起一个请求,这个annotion描述了这个span的开始.
- sr - Server Received -服务端获得请求并准备开始处理它,如果将其sr减去cs时间戳便可得到网络延迟.
- ss - Server Sent -注解表明请求处理的完成(当请求返回客户端),如果ss减去sr时间戳便可得到服务端需要的处理请求时间.
- cr - Client Received -表明span的结束,客户端成功接收到服务端的回复,如果cr减去cs时间戳便可得到整个请求所消耗的时间.
3.项目架构
本文案例主要由四个工程组成:
- eureka-server:作为服务注册中心。
- zipkin-server:作为链路追踪服务中心,负责存储链路数据。
- service-hi:对外暴露hi接口,同时作为产生链路数据,负责产生链路数据 。
- service-zuul:路由网关,负责请求转发,同时作为链路追踪客户端,产生链路数据,并上传至 zipkin-server 。
在8761端口开启eureka-server注册服务中心,参考前面的文章即可,这里不再演示创建。
4.构建zipkin-server
新建一个spring-boot工程取名为 zipkin-server,其 pom.xml 完整依赖.
<?xml version="1.0" encoding="UTF-8"?>
<project xmlns="http://maven.apache.org/POM/4.0.0" xmlns:xsi="http://www.w3.org/2001/XMLSchema-instance"
         xsi:schemaLocation="http://maven.apache.org/POM/4.0.0 http://maven.apache.org/xsd/maven-4.0.0.xsd">
    <modelVersion>4.0.0</modelVersion>
    <parent>
        <groupId>org.springframework.boot</groupId>
        <artifactId>spring-boot-starter-parent</artifactId>
        <version>1.5.3.RELEASE</version>
        <relativePath/> <!-- lookup parent from repository -->
    </parent>

    <groupId>com.example</groupId>
    <artifactId>zipkin-server</artifactId>
    <version>0.0.1-SNAPSHOT</version>

    <name>zipkin-server</name>
    <description>Demo project for Spring Boot</description>

    <properties>
        <java.version>1.8</java.version>
        <spring-cloud.version>Dalston.RELEASE</spring-cloud.version>
    </properties>

    <dependencies>
        <dependency>
            <groupId>org.springframework.cloud</groupId>
            <artifactId>spring-cloud-starter-eureka</artifactId>
        </dependency>
        <dependency>
            <groupId>io.zipkin.java</groupId>
            <artifactId>zipkin-server</artifactId>
        </dependency>
        <dependency>
            <groupId>io.zipkin.java</groupId>
            <artifactId>zipkin-autoconfigure-ui</artifactId>
        </dependency>

        <dependency>
            <groupId>org.springframework.boot</groupId>
            <artifactId>spring-boot-starter-test</artifactId>
            <scope>test</scope>
        </dependency>
    </dependencies>

    <dependencyManagement>
        <dependencies>
            <dependency>
                <groupId>org.springframework.cloud</groupId>
                <artifactId>spring-cloud-dependencies</artifactId>
                <version>${spring-cloud.version}</version>
                <type>pom</type>
                <scope>import</scope>
            </dependency>
        </dependencies>
    </dependencyManagement>

    <build>
        <plugins>
            <plugin>
                <groupId>org.springframework.boot</groupId>
                <artifactId>spring-boot-maven-plugin</artifactId>
            </plugin>
        </plugins>
    </build>

</project>
在其程序入口类, 加上注解@EnableZipkinServer,开启ZipkinServer的功能.
@EnableZipkinServer
@EnableEurekaClient
@SpringBootApplication
public class ZipkinServerApplication {

    public static void main(String[] args) {
        SpringApplication.run(ZipkinServerApplication.class, args);
    }

}
在配置文件application.yml指定服务端口为9411,并向Eureka注册中心注册.
eureka:
  client:
    service-url:
      defaultZone: http://localhost:8761/eureka/
server:
  port: 9411
spring:
  application:
    name: zipkin-server
5.构建service-hi
新建一个SpringBoot工程,取名 service-hi,在其pom引入起步依赖 spring-cloud-starter-zipkin,完整依赖如下.
<?xml version="1.0" encoding="UTF-8"?>
<project xmlns="http://maven.apache.org/POM/4.0.0" xmlns:xsi="http://www.w3.org/2001/XMLSchema-instance"
         xsi:schemaLocation="http://maven.apache.org/POM/4.0.0 http://maven.apache.org/xsd/maven-4.0.0.xsd">
    <modelVersion>4.0.0</modelVersion>
    <parent>
        <groupId>org.springframework.boot</groupId>
        <artifactId>spring-boot-starter-parent</artifactId>
        <version>1.5.3.RELEASE</version>
        <relativePath/> <!-- lookup parent from repository -->
    </parent>
    <groupId>com.example</groupId>
    <artifactId>service-hi</artifactId>
    <version>0.0.1-SNAPSHOT</version>
    <name>eureka-client</name>
    <description>Demo project for Spring Boot</description>

    <properties>
        <java.version>1.8</java.version>
        <spring-cloud.version>Dalston.SR1</spring-cloud.version>
    </properties>

    <dependencies>
        <dependency>
            <groupId>org.springframework.cloud</groupId>
            <artifactId>spring-cloud-starter-eureka</artifactId>
        </dependency>
        <dependency>
            <groupId>org.springframework.cloud</groupId>
            <artifactId>spring-cloud-starter-zipkin</artifactId>
        </dependency>
        <dependency>
            <groupId>org.springframework.boot</groupId>
            <artifactId>spring-boot-starter-web</artifactId>
        </dependency>

        <dependency>
            <groupId>org.springframework.boot</groupId>
            <artifactId>spring-boot-starter-test</artifactId>
            <scope>test</scope>
        </dependency>
    </dependencies>

    <dependencyManagement>
        <dependencies>
            <dependency>
                <groupId>org.springframework.cloud</groupId>
                <artifactId>spring-cloud-dependencies</artifactId>
                <version>${spring-cloud.version}</version>
                <type>pom</type>
                <scope>import</scope>
            </dependency>
        </dependencies>
    </dependencyManagement>

    <build>
        <plugins>
            <plugin>
                <groupId>org.springframework.boot</groupId>
                <artifactId>spring-boot-maven-plugin</artifactId>
            </plugin>
        </plugins>
    </build>

</project>
在其配置文件application.yml通过配置“spring.zipkin.base-url”指定zipkin server的地址.
eureka:
  client:
    serviceUrl:
      defaultZone: http://localhost:8761/eureka/
server:
  port: 8763
spring:
  application:
    name: service-hi
  zipkin:
#    base-url: http://localhost:9411/
# 若在同一个注册中心的话可以启用自动发现,省略base-url
    locator:
      discovery:
        enabled: true #自动发现
  sleuth:
    sampler:
      percentage: 1.0
到这里已经整合ZipKin客户端完毕,最后对外暴露一个API接口方便测试.
@SpringBootApplication
@EnableEurekaClient
@RestController
public class ServiceHiApplication {

    public static void main(String[] args) {
        SpringApplication.run(ServiceHiApplication.class, args);
    }

    @Value("${server.port}")
    String port;
    @RequestMapping("/hi")
    public String home(@RequestParam String name) {
        return "hi "+name+",i am from port:" +port;
    }

}
6.构建service-zuul
新建一个Spring Boot工程,取名为 service-zuul,引入依赖 spring-cloud-starter-zipkin,完整 pom.xml 依赖如下.
<?xml version="1.0" encoding="UTF-8"?>
<project xmlns="http://maven.apache.org/POM/4.0.0" xmlns:xsi="http://www.w3.org/2001/XMLSchema-instance"
         xsi:schemaLocation="http://maven.apache.org/POM/4.0.0 http://maven.apache.org/xsd/maven-4.0.0.xsd">
    <modelVersion>4.0.0</modelVersion>

    <parent>
        <groupId>org.springframework.boot</groupId>
        <artifactId>spring-boot-starter-parent</artifactId>
        <version>1.5.3.RELEASE</version>
        <relativePath/> <!-- lookup parent from repository -->
    </parent>

    <groupId>com.example</groupId>
    <artifactId>service-zuul</artifactId>
    <version>0.0.1-SNAPSHOT</version>

    <name>service-zuul</name>
    <description>Demo project for Spring Boot</description>

    <properties>
        <java.version>1.8</java.version>
        <spring-cloud.version>Dalston.SR1</spring-cloud.version>
    </properties>

    <dependencies>
        <dependency>
            <groupId>org.springframework.cloud</groupId>
            <artifactId>spring-cloud-starter-eureka</artifactId>
        </dependency>
        <dependency>
            <groupId>org.springframework.cloud</groupId>
            <artifactId>spring-cloud-starter-zuul</artifactId>
        </dependency>
        <dependency>
            <groupId>org.springframework.boot</groupId>
            <artifactId>spring-boot-starter-web</artifactId>
        </dependency>

        <dependency>
            <groupId>org.springframework.cloud</groupId>
            <artifactId>spring-cloud-starter-zipkin</artifactId>
        </dependency>

        <dependency>
            <groupId>org.springframework.boot</groupId>
            <artifactId>spring-boot-starter-test</artifactId>
            <scope>test</scope>
        </dependency>
    </dependencies>

    <dependencyManagement>
        <dependencies>
            <dependency>
                <groupId>org.springframework.cloud</groupId>
                <artifactId>spring-cloud-dependencies</artifactId>
                <version>${spring-cloud.version}</version>
                <type>pom</type>
                <scope>import</scope>
            </dependency>
        </dependencies>
    </dependencyManagement>

    <build>
        <plugins>
            <plugin>
                <groupId>org.springframework.boot</groupId>
                <artifactId>spring-boot-maven-plugin</artifactId>
            </plugin>
        </plugins>
    </build>

</project>
配置工程 application.yml 文件,主要配置ZipKin Server的地址.
server:
  port: 8769
spring:
  application:
    name: service-zuul
  client:
    service-url:
      defaultZone: http://localhost:8761/eureka/
  sleuth:
    sampler:
      percentage: 1.0
  zipkin:
#    base-url: http://localhost:9411/
# 若在同一个注册中心的话可以启用自动发现,省略base-url
    locator:
      discovery:
        enabled: true #自动发现
zuul:
  routes:
    api-hi:
      path: /api-hi/**
      serviceId: service-hi
到这里,你也许已经发现,引入ZipKin服务只需要导包、配置两步即可。
在工程的启动类注解开启Zuul.
@EnableZuulProxy //开启路由网关
@EnableEurekaClient
@SpringBootApplication
public class ServiceZuulApplication {

    public static void main(String[] args) {
        SpringApplication.run(ServiceZuulApplication.class, args);
    }
}
7.启动工程,演示追踪
完整项目搭建完毕,总结一下,第一搭建 zipkin server 作为链路服务中心,第二步就是给各个工程引入 zipkin 依赖,配置zipkin server地址即可。
下面依次启动 eureka-server、service-zipkin、service-hi 和 service-zuul。打开浏览器,访问 http://localhost:8769/api-hi/hi?name=mark,显示
hi mark,i am from port:8763
然后访问 http://localhost:9411,即访问 ZipKin 的展示界面.
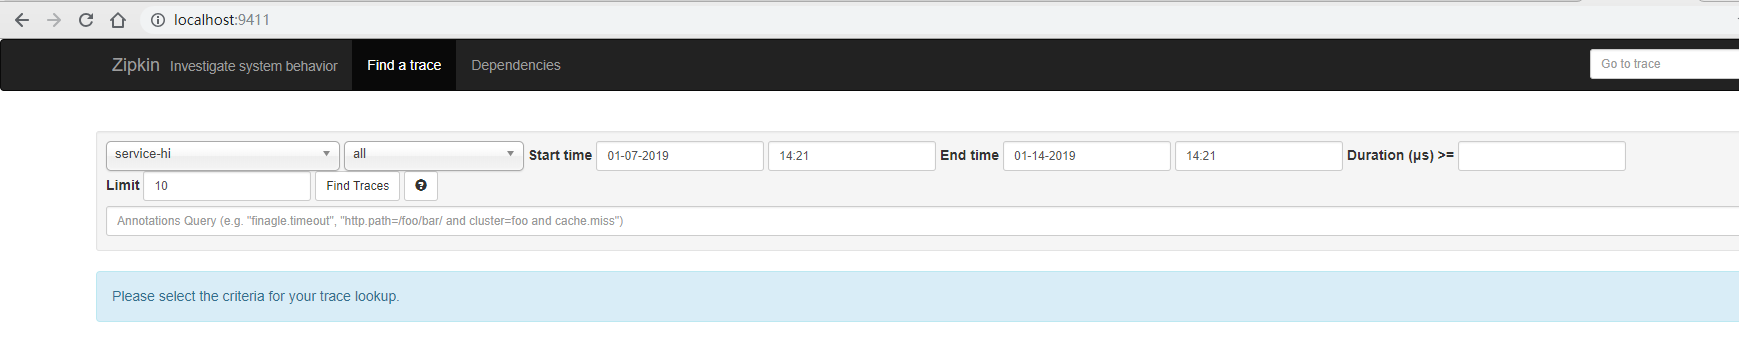
这个界面用于展示 ZipKin Server收集的链路数据,可以根据服务名、开始时间、结束时间、请求消耗的时间等条件来查找。单击“Find Tracks”按钮,可以查看请求的调用时间、消耗时间,以及请求的链路情况。
单击顶部的“Dependencies”按钮,可以查看服务的依赖关系。

8.在链路数据中添加自定义数据
现在需要实现这样一个功能:在链路数据中加上请求的操作人。本案例在gateway-service服务中实现。在gateway-service 工程里新建一个ZuulFilter 过滤器,它的类型为post 类型, order为900 ,开启拦截。在过滤器的拦截逻辑方法里, 通过Tracer 的add Tag 方法力n 上门定义的数据,在本案例中加上了链路的操作人。另外也可以在这个过滤器中获取当前链路的traceld 信息, traceld 作为链路数据的唯一标识,可以存储在log 日志中,方便后续查找,本案例只是将traceld 信息简单地打印在控制台上。代码如下:
@Component
public class LoggerFileter extends ZuulFilter {
    @Autowired
    Tracer tracer;

    @Override
    public String filterType() {
        return FilterConstants.POST_TYPE;
    }

    @Override
    public int filterOrder() {
        return 900;
    }

    @Override
    public boolean shouldFilter() {
        return true;
    }

    @Override
    public Object run() {
        tracer.addTag("operator","forezp");
        System.out.println(tracer.getCurrentSpan().traceIdString());
        return null;
    }
}
9.使用 RabbitMQ 传输链路数据
首先改造 zipkin-server 工程, 在其 pom 文件中将 zipkin-server 的依赖去掉,加上
spring-cloud-sleuth-zipkin-stream 和 spring-cloud-starter-stream-rabbit 的依赖,代码如下:
<dependency>
       <groupId>org.springframework.cloud</groupId>
       <artifactId>spring-cloud-sleuth-zipkin-stream</artifactId>
</dependency>
<dependency>
       <groupId>org.springframework.cloud</groupId>
       <artifactId>spring-cloud-starter-stream-rabbit</artifactId>
</dependency>
在工程的配置文件 application.yml 加上RabbitMQ 的配置,包括host 、端口、用户名、密码,代码如下:
spring:
  rabbitmq:
    host: localhost
    port: 5672
    username: guest
    password: guest
在程序的启动类 ZipkinServerApplication 中加上 @EnableZipkinStreamServer 注解,开启 ZipkinStreamServer,代码如下:
@EnableEurekaClient
@SpringBootApplication
@EnableZipkinStreamServer
public class ZipkinServerApplication {

    public static void main(String[] args) {
        SpringApplication.run(ZipkinServerApplication.class, args);
    }

}
现在来改造Zipkin Client(包括 service-zuul 工程和 service-hi 工程),在它们的pom文件中将 spring-cloud-starter-zipkin 依赖改为 spring-cloud-sleuth-zipkin-strearn 和spring-cloud-starter-stream-rabbit,代码如下:
<dependency>
       <groupId>org.springframework.cloud</groupId>
       <artifactId>spring-cloud-sleuth-zipkin-stream</artifactId>
</dependency>
<dependency>
       <groupId>org.springframework.cloud</groupId>
       <artifactId>spring-cloud-starter-stream-rabbit</artifactId>
</dependency>
同时在配置文件 applicayion.yml 加上RabbitMQ 的配置,同zipkin-server 工程。这样, 就将链路的上传数据从 Http 改为用消息代组件RabbitMQ 。
10.在MySQL数据库中存储链路数据
在上面的例子中, Zipkin Server 将数据存储在内存中, 一旦程序重启,之前的链路数据全部丢失,那么怎么将链路数据存储起来呢? Zipkin 支持将链路数据存储在MySQL 、Elasticsearch 和 Cassandra 数据库中。本节讲解使用MySQL存储。
Zipkin Client 有两种方式将链路数据传输到Zipkin Server中, 一种是使用Http ,另一种是使用RabbitMQ 。Zipkin Server 通过这两种方式来收集链路数据,并存储在MySQL中。
10.1使用Http 传输链路数据,并存储在MySQL 数据库中
本节是在没有使用RabbitMQ传输数据的基础上进行改造的,只需要改造zipkin-serv er 工程。在zipkin-server 工程的porn 文件加上Zipkin Server的依赖zipkin-server 、Zipkin 的MySQL存储依赖zipkin-storage-mysql (这两个依赖的版本都为1.19.0 )、Zipkin Server 的UI界面依赖zipkin-autoconfigure-ui 、MySQL 的连接器依赖mysql-connector-java 和JDBC的起步依赖spring-boot-starter-jdbc 。代码如下:
        <dependency>
            <groupId>io.zipkin.java</groupId>
            <artifactId>zipkin-server</artifactId>
            <version>1.19.0</version>
        </dependency>
        <dependency>
            <groupId>io.zipkin.java</groupId>
            <artifactId>zipkin-storage-mysql</artifactId>
            <version>1.19.0</version>
        </dependency>
        <dependency>
            <groupId>io.zipkin.java</groupId>
            <artifactId>zipkin-autoconfigure-ui</artifactId>
        </dependency>
        <dependency>
            <groupId>mysql</groupId>
            <artifactId>mysql-connector-java</artifactId>
        </dependency>
        <dependency>
            <groupId>org.springframework.boot</groupId>
            <artifactId>spring-boot-starter-jdbc</artifactId>
        </dependency>
在 zipkin-server 工程的配置文件 application.yml 中加上数据源的配置,包括数据库的Url 、用户名、密码和连接驱动, 并且需要配置zipkin.storage.type 为mysql , 代码如下:
spring:
  datasource:
    driver-class-name: com.mysql.jdbc.Driver
    url: jdbc:mysql://localhost:3306/spring-cloud-zipkin?useUnicode=true&characterEncoding=utf8&useSSL=false
    username: root
    password: 123456
zipkin:
  storage:
    type: mysql
另外需要在MySQL 数据库中初始化数据库脚本,数据库脚本地址为 https://github.com/openzipkin/zipkin/b lob/master/zipkinstorage/mysql/src/main/resources/mysqI.sqI(已经404)复制下面的即可:
CREATE TABLE IF NOT EXISTS zipkin_spans (
  `trace_id_high` BIGINT NOT NULL DEFAULT 0 COMMENT 'If non zero, this means the trace uses 128 bit traceIds instead of 64 bit',
  `trace_id` BIGINT NOT NULL,
  `id` BIGINT NOT NULL,
  `name` VARCHAR(255) NOT NULL,
  `parent_id` BIGINT,
  `debug` BIT(1),
  `start_ts` BIGINT COMMENT 'Span.timestamp(): epoch micros used for endTs query and to implement TTL',
  `duration` BIGINT COMMENT 'Span.duration(): micros used for minDuration and maxDuration query'
) ENGINE=InnoDB ROW_FORMAT=COMPRESSED CHARACTER SET=utf8 COLLATE utf8_general_ci;

ALTER TABLE zipkin_spans ADD UNIQUE KEY(`trace_id_high`, `trace_id`, `id`) COMMENT 'ignore insert on duplicate';
ALTER TABLE zipkin_spans ADD INDEX(`trace_id_high`, `trace_id`, `id`) COMMENT 'for joining with zipkin_annotations';
ALTER TABLE zipkin_spans ADD INDEX(`trace_id_high`, `trace_id`) COMMENT 'for getTracesByIds';
ALTER TABLE zipkin_spans ADD INDEX(`name`) COMMENT 'for getTraces and getSpanNames';
ALTER TABLE zipkin_spans ADD INDEX(`start_ts`) COMMENT 'for getTraces ordering and range';

CREATE TABLE IF NOT EXISTS zipkin_annotations (
  `trace_id_high` BIGINT NOT NULL DEFAULT 0 COMMENT 'If non zero, this means the trace uses 128 bit traceIds instead of 64 bit',
  `trace_id` BIGINT NOT NULL COMMENT 'coincides with zipkin_spans.trace_id',
  `span_id` BIGINT NOT NULL COMMENT 'coincides with zipkin_spans.id',
  `a_key` VARCHAR(255) NOT NULL COMMENT 'BinaryAnnotation.key or Annotation.value if type == -1',
  `a_value` BLOB COMMENT 'BinaryAnnotation.value(), which must be smaller than 64KB',
  `a_type` INT NOT NULL COMMENT 'BinaryAnnotation.type() or -1 if Annotation',
  `a_timestamp` BIGINT COMMENT 'Used to implement TTL; Annotation.timestamp or zipkin_spans.timestamp',
  `endpoint_ipv4` INT COMMENT 'Null when Binary/Annotation.endpoint is null',
  `endpoint_ipv6` BINARY(16) COMMENT 'Null when Binary/Annotation.endpoint is null, or no IPv6 address',
  `endpoint_port` SMALLINT COMMENT 'Null when Binary/Annotation.endpoint is null',
  `endpoint_service_name` VARCHAR(255) COMMENT 'Null when Binary/Annotation.endpoint is null'
) ENGINE=InnoDB ROW_FORMAT=COMPRESSED CHARACTER SET=utf8 COLLATE utf8_general_ci;

ALTER TABLE zipkin_annotations ADD UNIQUE KEY(`trace_id_high`, `trace_id`, `span_id`, `a_key`, `a_timestamp`) COMMENT 'Ignore insert on duplicate';
ALTER TABLE zipkin_annotations ADD INDEX(`trace_id_high`, `trace_id`, `span_id`) COMMENT 'for joining with zipkin_spans';
ALTER TABLE zipkin_annotations ADD INDEX(`trace_id_high`, `trace_id`) COMMENT 'for getTraces/ByIds';
ALTER TABLE zipkin_annotations ADD INDEX(`endpoint_service_name`) COMMENT 'for getTraces and getServiceNames';
ALTER TABLE zipkin_annotations ADD INDEX(`a_type`) COMMENT 'for getTraces';
ALTER TABLE zipkin_annotations ADD INDEX(`a_key`) COMMENT 'for getTraces';
ALTER TABLE zipkin_annotations ADD INDEX(`trace_id`, `span_id`, `a_key`) COMMENT 'for dependencies job';

CREATE TABLE IF NOT EXISTS zipkin_dependencies (
  `day` DATE NOT NULL,
  `parent` VARCHAR(255) NOT NULL,
  `child` VARCHAR(255) NOT NULL,
  `call_count` BIGINT,
  `error_count` BIGINT
) ENGINE=InnoDB ROW_FORMAT=COMPRESSED CHARACTER SET=utf8 COLLATE utf8_general_ci;

ALTER TABLE zipkin_dependencies ADD UNIQUE KEY(`day`, `parent`, `child`);
最后需要在程序的启动类ZipkinServerApplication 中注入MySQLStorage 的Bean ,代码如下:
@Bean
public MySQLStorage mySQLStorage(DataSource datasource) {
    return MySQLStorage.builder().datasource(datasource).executor(Runnable::run).build();
}
只需要上述步骤,即可将使用Http传输的链路数据存储在 MySQL 数据库中。
10.2使用RabbitMQ传输链路数据,并存储在MySQL数据库中
本节的案例是在使用RabbitMQ传输数据基础上进行改造的,只需要改造 zipkin-server 的工程。在 zipkin-server 工程的pom 文件中加上 MySQL 的连接器依赖 mysql-connector-java, JDBC 的起步依赖spring-boot-starter-jdbc ,代码如下:
        <dependency>
            <groupId>mysql</groupId>
            <artifactId>mysql-connector-java</artifactId>
        </dependency>
        <dependency>
            <groupId>org.springframework.boot</groupId>
            <artifactId>spring-boot-starter-jdbc</artifactId>
        </dependency>
在zipkin-server 工程的配置文件application.yml 中加上数据源的配置,包括数据库的Uri 、用户名、密码、连接驱动,另外需要配置 zipkin.storage.type 为mysql ,代码如下:
spring:
  datasource:
    url: jdbc:mysql://localhost:3306/spring-cloud-zipkin?useUnicode=true&characterEncoding=utf8&useSSL=false
    username: root
    password: 123456
    driver-class-name: com.mysql.jdbc.Driver
zipkin:
  storage:
    type: mysql
另外需要在MySQL数据库中初始化数据库脚本, 具体同上一节。
11.在ElasticSearch中存储链路数据
在并发高的情况下,使用MySQL存储链路数据显然不合理,这时可以选择使用ElasticSearch存储。读者需要自行安装ElasticSearch 和Kibana ( 下一节中使用) ,下载地址为 https://www.elastic.co/products/elasticsearch 。安装完成后启动, 其中ElasticSearch 的默认端口号为9200,Kibana的默认端口号为5601 。
本节是在第9节的基础上进行改造。首先在porn文件中加上zipkin的依赖和zipkin-autoconfigure-storage-elasticsearch-http的依赖,代码如下:
<dependency>
        <groupId>io.zipkin.java</groupId>
        <artifactId>zipkin</artifactId>
        <version>1.28.1</version>
</dependency>
<dependency>
        <groupId>io.zipkin.java</groupId>
        <artifactId>zipkin-autoconfigure-storage-elasticsearch-http</artifactId>
        <version>1.28.1</version>
</dependency>
在程序的配置文件 application. yml 中加上 Zipkin 的配置,配置了 zipkin 的存储类型( type ) 为 elasticsearch ,使用的存储组件( StorageComponent ) 为 elasticsearch , 然后需要配置 elasticsearch ,包括hosts ( 可以配置多个,用“” 隔开) 和index 等。具体配置代码如下:
zipkin:
  storage:
    type: elasticsearch
    StorageComponent: elasticsearch
    elasticsearch:
      cluster: elasticsearch
      max-requests: 30
      index: zipkin
      index-shards: 3
      index-replicas: 1
      hosts: localhost:9200
只需要这些配置, Zipkin Server 的链路数据就存储在 ElasticSearch 中了。
12.用Kibana展示链路数据
上一节讲述了如何将链路数据存储在ElasticSearch 中, ElasticSearch 可以和Kibana 结合,将链路数据展示在Kibana 上。安装完成Kibana 后启动, Kibana 默认会向本地端口为 9200 的 ElasticSearch 读取数据。Kibana 默认的端口为5601 ,访问 Kibana 的主页 http://localhost:5601, 单击 “Management” 按钮,然后单击“Add New”, 添加一个index 。我们将在上节 ElasticSearch 中写入链路数据的 index 配置为“ zipkin ”,那么在界面填写为 ”zipkin-*“ , 单击“ C reate ”按钮,创建完成 index 后,单击 “Discover ”,就可以在界面上展示链路数据了。
参考方志朋《深入理解Spring Cloud与微服务构建》
SpringCloud(7)服务链路追踪Spring Cloud Sleuth的更多相关文章
- springCloud学习-服务链路追踪(Spring Cloud Sleuth)
1.简介 Spring Cloud Sleuth 是 Spring Cloud 的一个组件,它的主要功能是在分布式系统中提供服务链路追踪的解决方案. 常见的链路追踪组件有 Google 的 Dappe ...
- 史上最简单的SpringCloud教程 | 第九篇: 服务链路追踪(Spring Cloud Sleuth)(Finchley版本)
转载请标明出处: 原文首发于:>https://www.fangzhipeng.com/springcloud/2018/08/30/sc-f9-sleuth/ 本文出自方志朋的博客 这篇文章主 ...
- 史上最简单的SpringCloud教程 | 第九篇: 服务链路追踪(Spring Cloud Sleuth)
这篇文章主要讲述服务追踪组件zipkin,Spring Cloud Sleuth集成了zipkin组件. 注意情况: 该案例使用的spring-boot版本1.5.x,没使用2.0.x, 另外本文图3 ...
- 【SpringCloud】 第九篇: 服务链路追踪(Spring Cloud Sleuth)
前言: 必需学会SpringBoot基础知识 简介: spring cloud 为开发人员提供了快速构建分布式系统的一些工具,包括配置管理.服务发现.断路器.路由.微代理.事件总线.全局锁.决策竞选. ...
- SpringCloud教程 | 第九篇: 服务链路追踪(Spring Cloud Sleuth)
版权声明:本文为博主原创文章,欢迎转载,转载请注明作者.原文超链接 ,博主地址:http://blog.csdn.net/forezp. http://blog.csdn.net/forezp/art ...
- SpringCloud 教程 (二) 服务链路追踪(Spring Cloud Sleuth)
一.简介 Add sleuth to the classpath of a Spring Boot application (see below for Maven and Gradle exampl ...
- 服务链路追踪(Spring Cloud Sleuth)
sleuth:英 [slu:θ] 美 [sluθ] n.足迹,警犬,侦探vi.做侦探 微服务架构是一个分布式架构,它按业务划分服务单元,一个分布式系统往往有很多个服务单元.由于服务单元数量众多,业务的 ...
- 第八篇: 服务链路追踪(Spring Cloud Sleuth)
一.简介 一个分布式系统由若干分布式服务构成,每一个请求会经过多个业务系统并留下足迹,但是这些分散的数据对于问题排查,或是流程优化都很有限. 要能做到追踪每个请求的完整链路调用,收集链路调用上每个 ...
- spring boot 2.0.3+spring cloud (Finchley)7、服务链路追踪Spring Cloud Sleuth
参考:Spring Cloud(十二):分布式链路跟踪 Sleuth 与 Zipkin[Finchley 版] Spring Cloud Sleuth 是Spring Cloud的一个组件,主要功能是 ...
随机推荐
- 4.镜像管理【Docker每天5分钟】
Docker给PaaS世界带来的“降维打击”,其实是提供了一种非常便利的打包机制.该机制打包了应用运行所需要的整个操作系统,从而保证了本地环境和云端环境的高度一致,避免了用户通过“试错”来匹配不同运行 ...
- Spring AOP中的JDK和CGLib动态代理哪个效率更高?
一.背景 今天有小伙伴面试的时候被问到:Spring AOP中JDK 和 CGLib动态代理哪个效率更高? 二.基本概念 首先,我们知道Spring AOP的底层实现有两种方式:一种是JDK动态代理, ...
- JaveWeb学习之Servlet(二):ServletConfig和ServletContext
原文同步发表至个人博客[夜月归途] 原文链接:http://www.guitu18.com/se/java/2018-07-26/20.html 作者:夜月归途 出处:http://www.guitu ...
- 聊聊数据库~3.SQL基础篇
上篇回顾:聊聊数据库~SQL环境篇 扩展:为用户添加新数据库的权限 PS:先使用root创建数据库,然后再授权grant all privileges on 数据库.* to 用户名@"%& ...
- linux-2.6.18源码分析笔记---进程
一.进程重要字段描述 在目录include\linux\sched.h下定义了进程描述符task_struct,关注如下字段: 进程状态 volatile long state:表示进程状态,在该文件 ...
- C#组件系列——又一款日志组件:Elmah的学习和分享
前言:好久没动笔了,都有点生疏,12月都要接近尾声,可是这月连一篇的产出都没有,不能坏了“规矩”,今天还是来写一篇.最近个把月确实很忙,不过每天早上还是会抽空来园子里逛逛.一如既往,园子里每年这个时候 ...
- VS2017移动开发(C#、VB.NET)——Numeric控件的使用方式
Visual Studio 2017移动开发 控件介绍和使用方式:Numeric控件 Smobiler开发平台,.NET移动开发 一. 样式一 我们要实现上图中的效果,需要如下的操作 ...
- 第43章 添加更多API端点 - Identity Server 4 中文文档(v1.0.0)
您可以向托管IdentityServer4的应用程序添加更多API端点. 您通常希望通过它们所托管的IdentityServer实例来保护这些API.这不是问题.只需将令牌验证处理程序添加到主机(请参 ...
- Bootstrap方法之--排版、代码
<!DOCTYPE html> <html lang="zh-CN"> <head> <meta charset="UTF-8& ...
- SD详解-销售过程
http://www.sapzh.com/html/Financial/SD/3113.html 7 销售过程 7.1销售执行 目的 作用与目的描述 步骤 操作过程/步骤描述 备 ...